Learn how to install Open VTS GPS tracking software on a Linux server. This step-by-step guide covers Ubuntu server setup, SSH access, Open VTS installation, service configuration, SSL setup, and first-time login.
Last updated November 6, 2026
Open VTS is self-hosted GPS tracking software that allows you to manage vehicles, GPS devices, users, and fleet operations on your own server.
This guide explains how to set up a Linux server, install Open VTS using the official Linux installation script, and complete your first login.
You will learn how to:
You will need:
For a small initial deployment, a practical starting configuration is:
| Component | Suggested configuration |
|---|---|
| Operating system | Compatible 64-bit Linux (Ubuntu Server LTS used in this example) |
| Processor | 2 vCPU |
| Memory | 4 GB RAM(up to 500 vehicle), 8 GB RAM(up to 2000 vehicles) |
| Storage | 100 GB SSD |
| Network | Public IP with internet access |
These are starting recommendations, not guaranteed capacity limits. Larger fleets may require additional CPU, RAM, and storage.
Important: Confirm that your chosen Ubuntu version is supported by the current Open VTS Linux installer before production deployment.
Open your browser and visit:
https://aws.amazon.com
Select Create an AWS Account if you do not already have one.
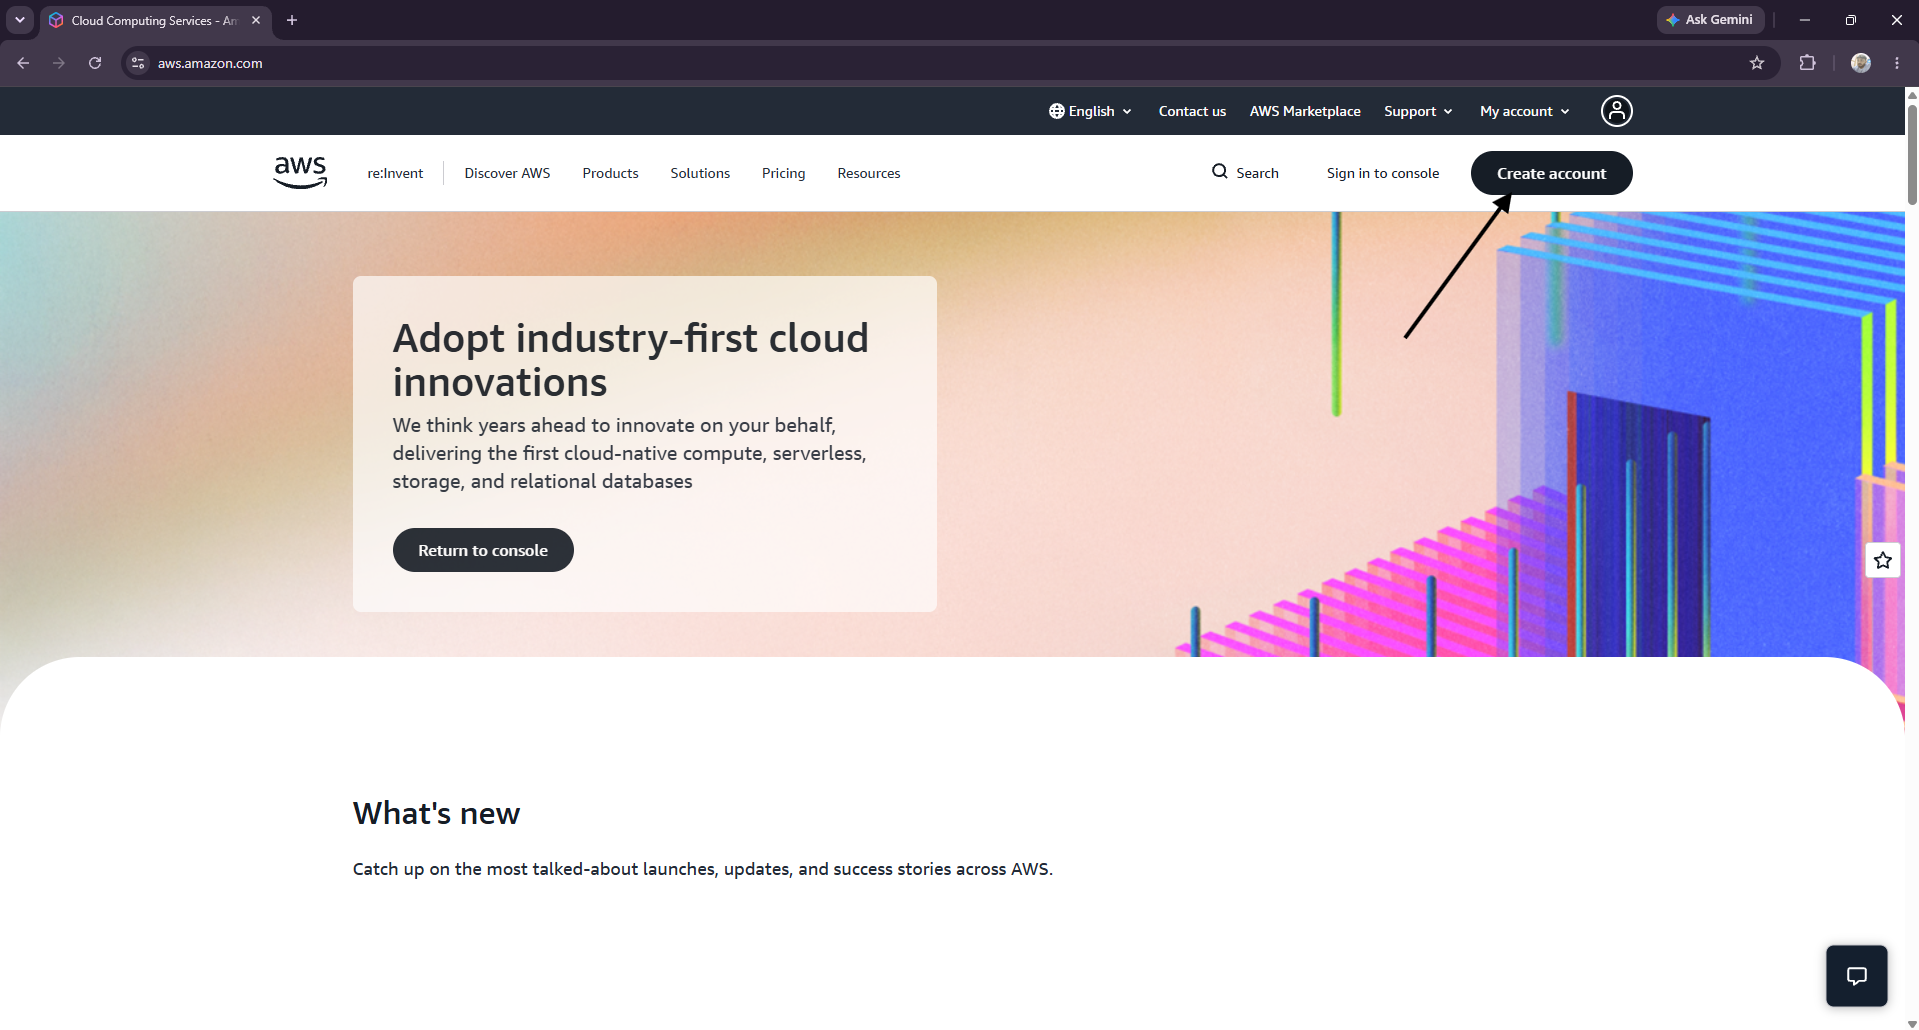
Complete the registration, billing, and account-verification steps.
Once your AWS account is ready, sign in to the AWS Management Console.
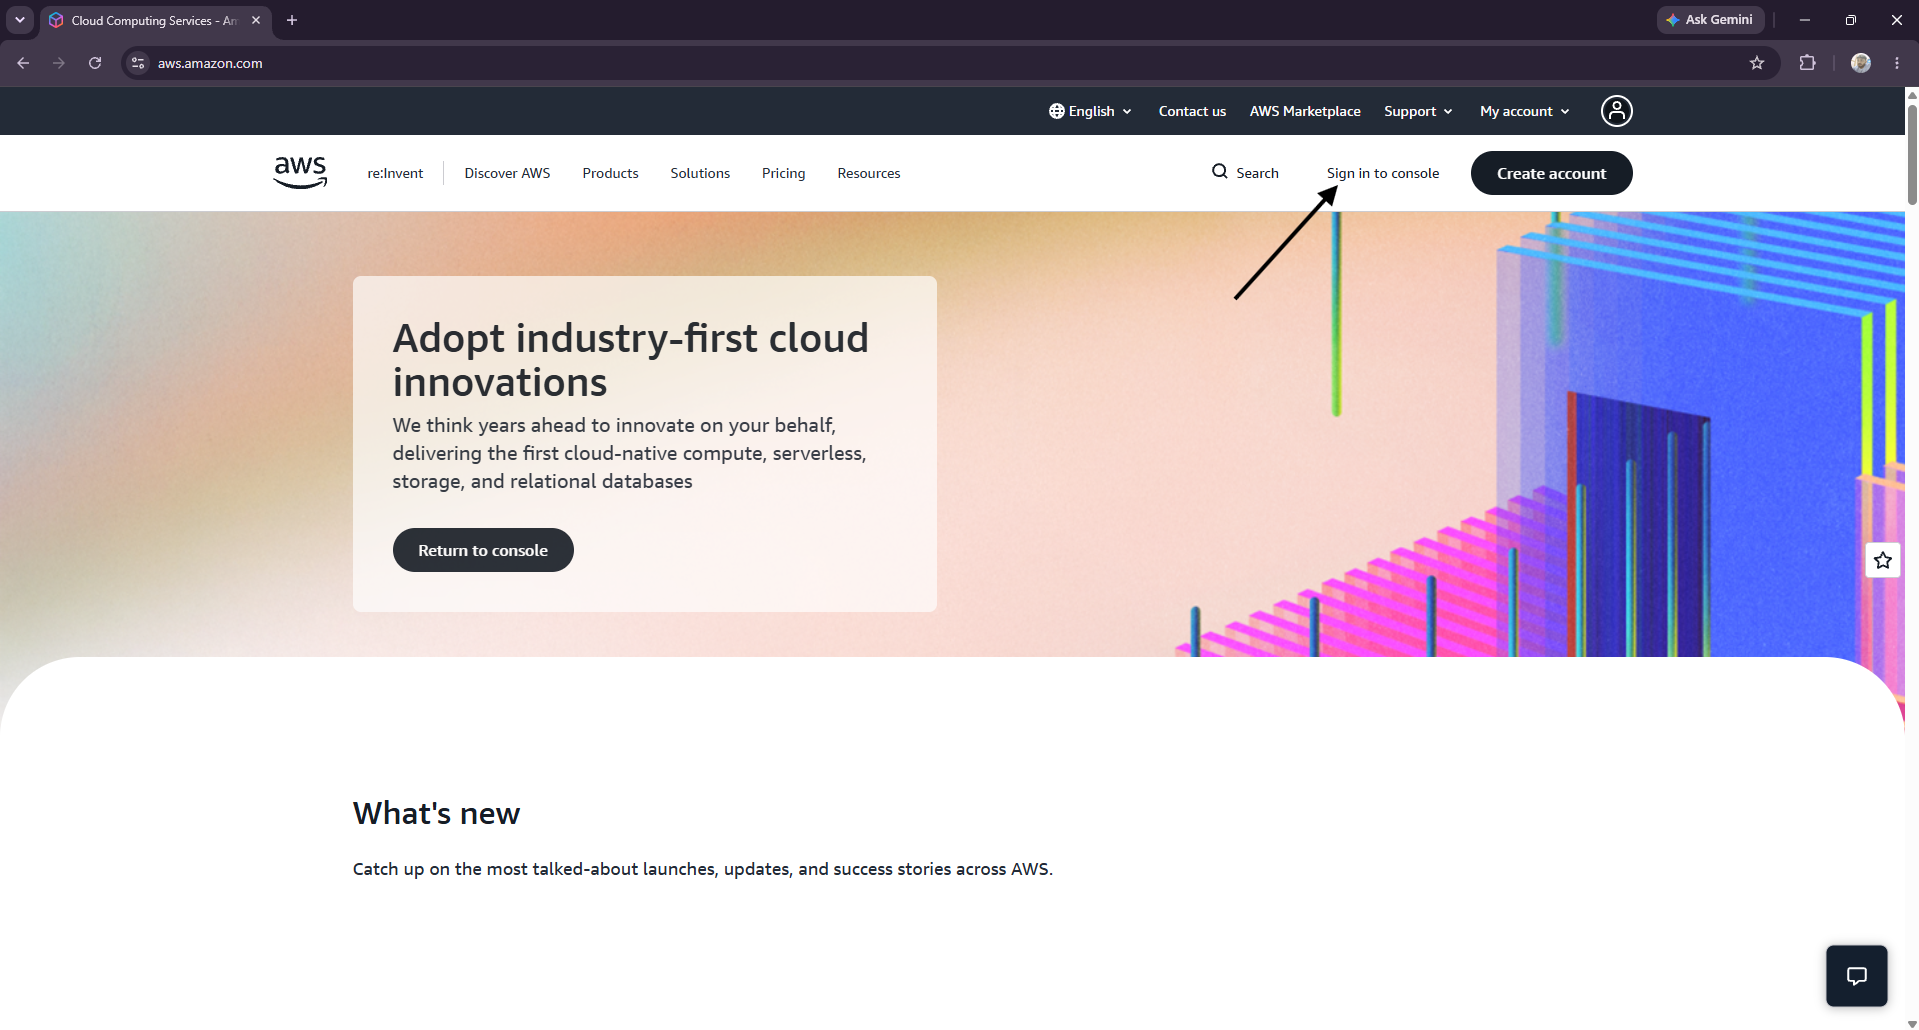
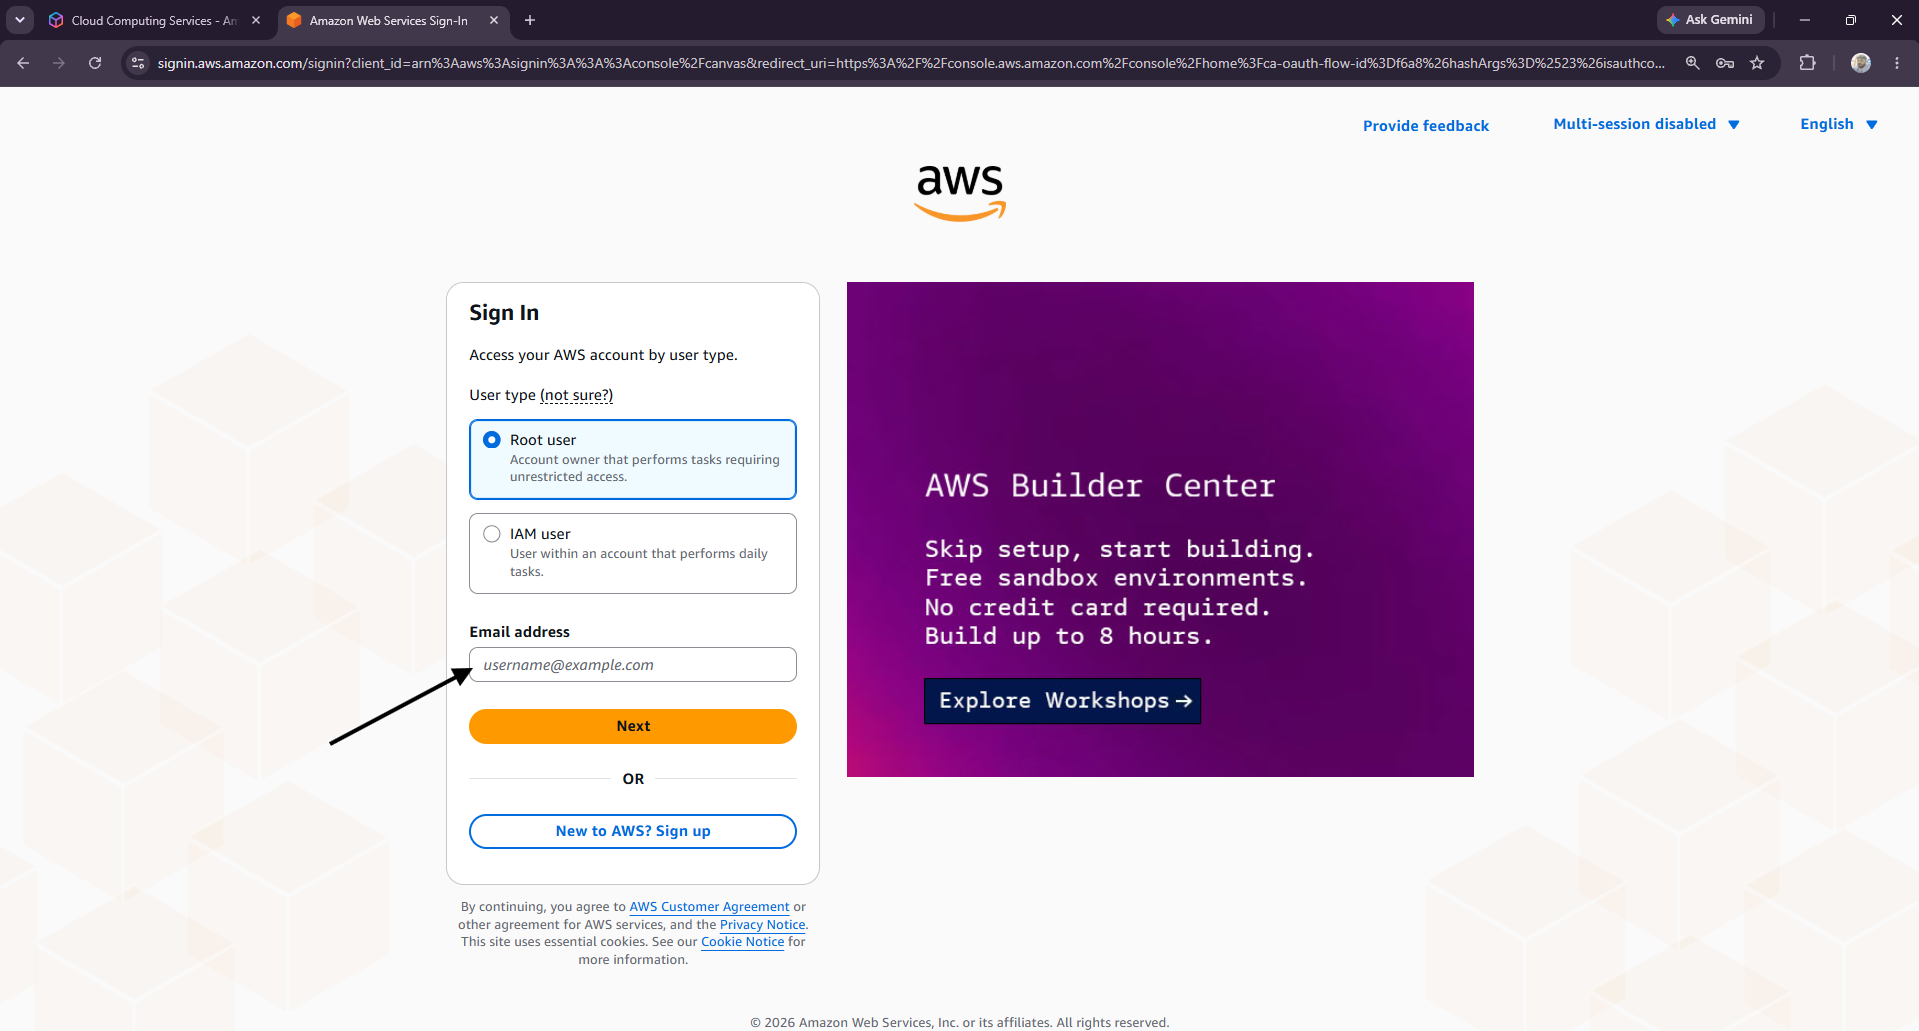
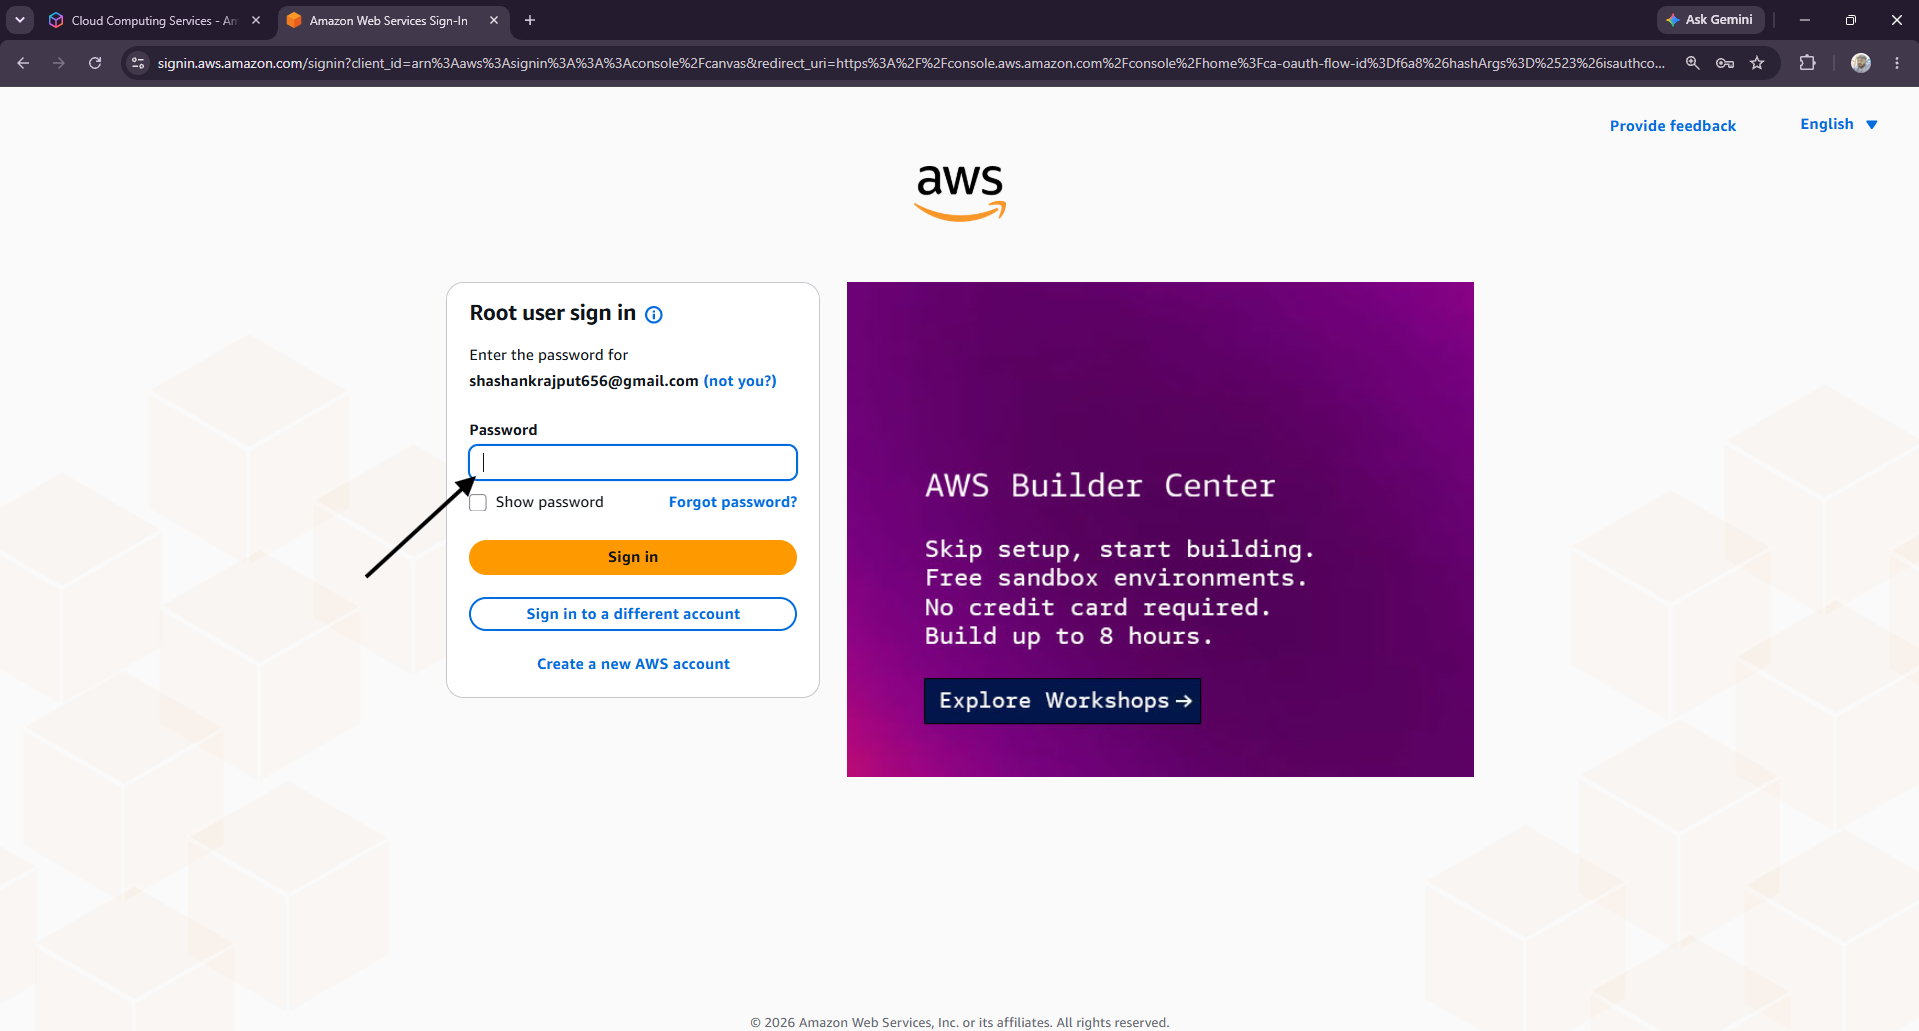
After login the AWS Management Console:
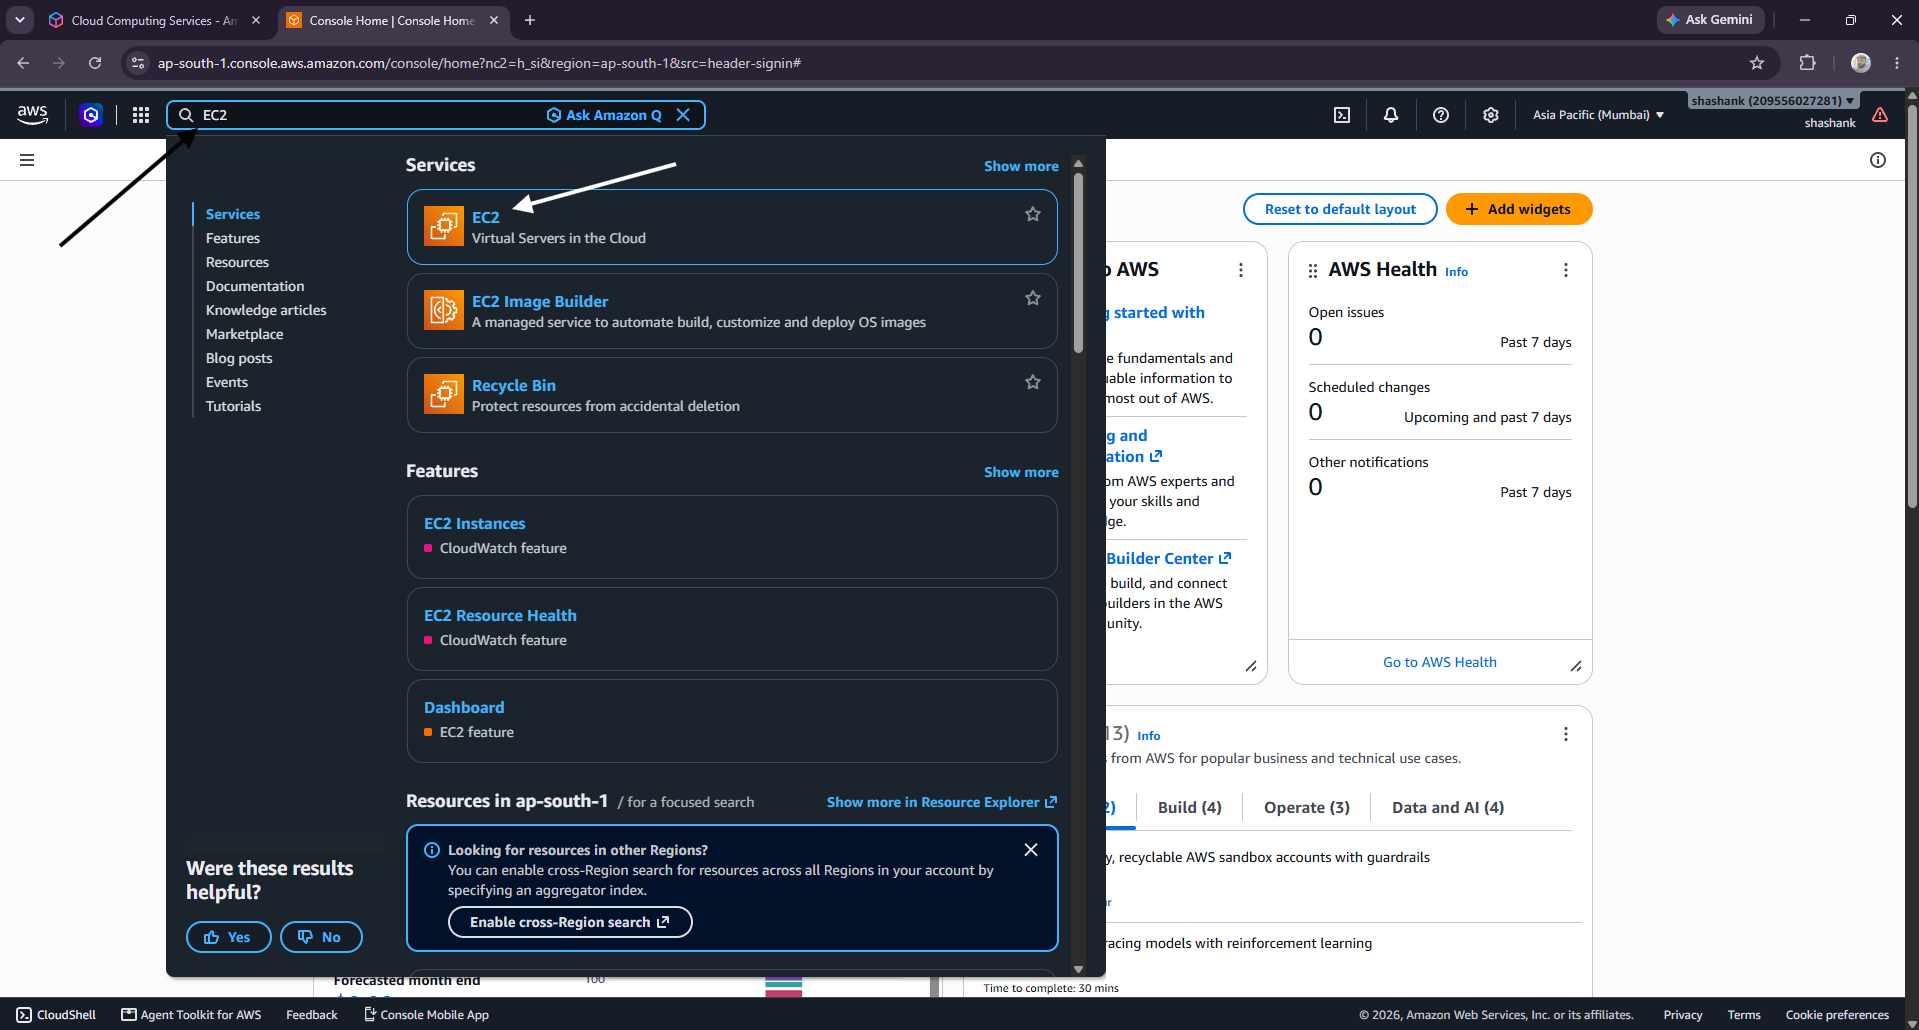
2. Open the EC2 Dashboard.
3. Select the AWS region where you want to host your server.
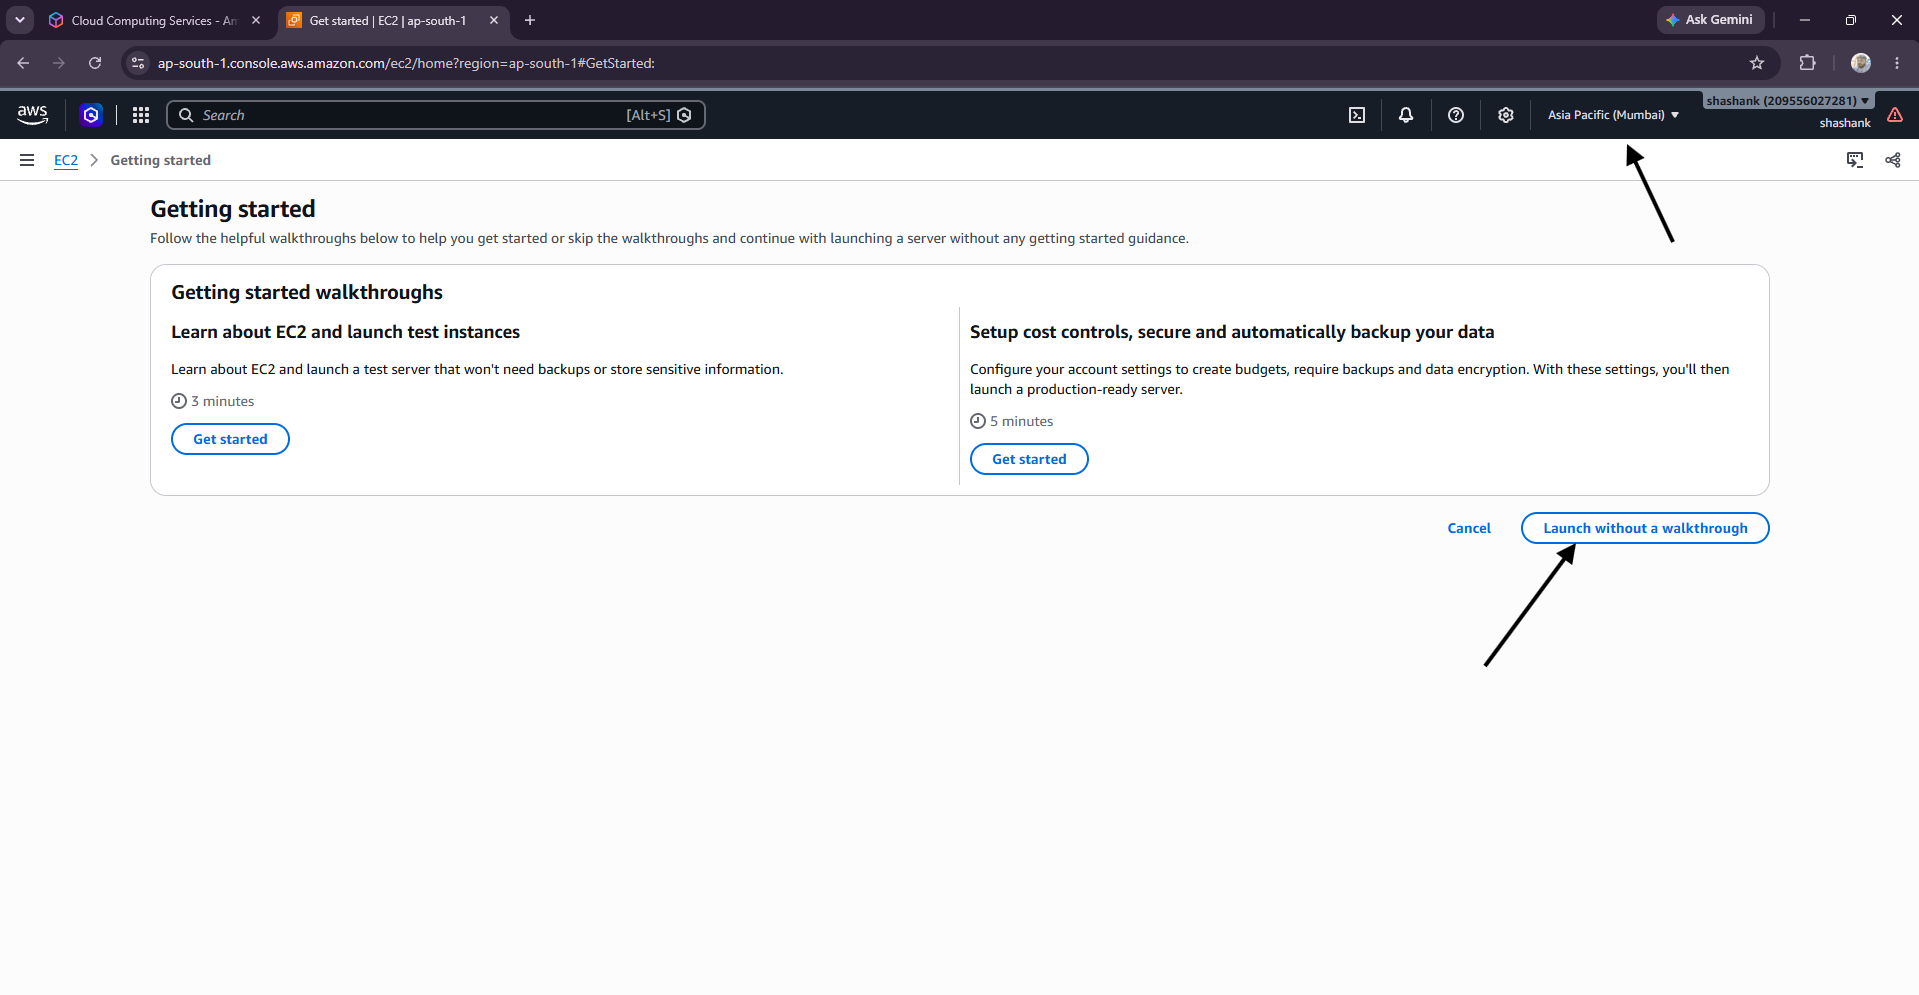
4. Click Launch Instance.
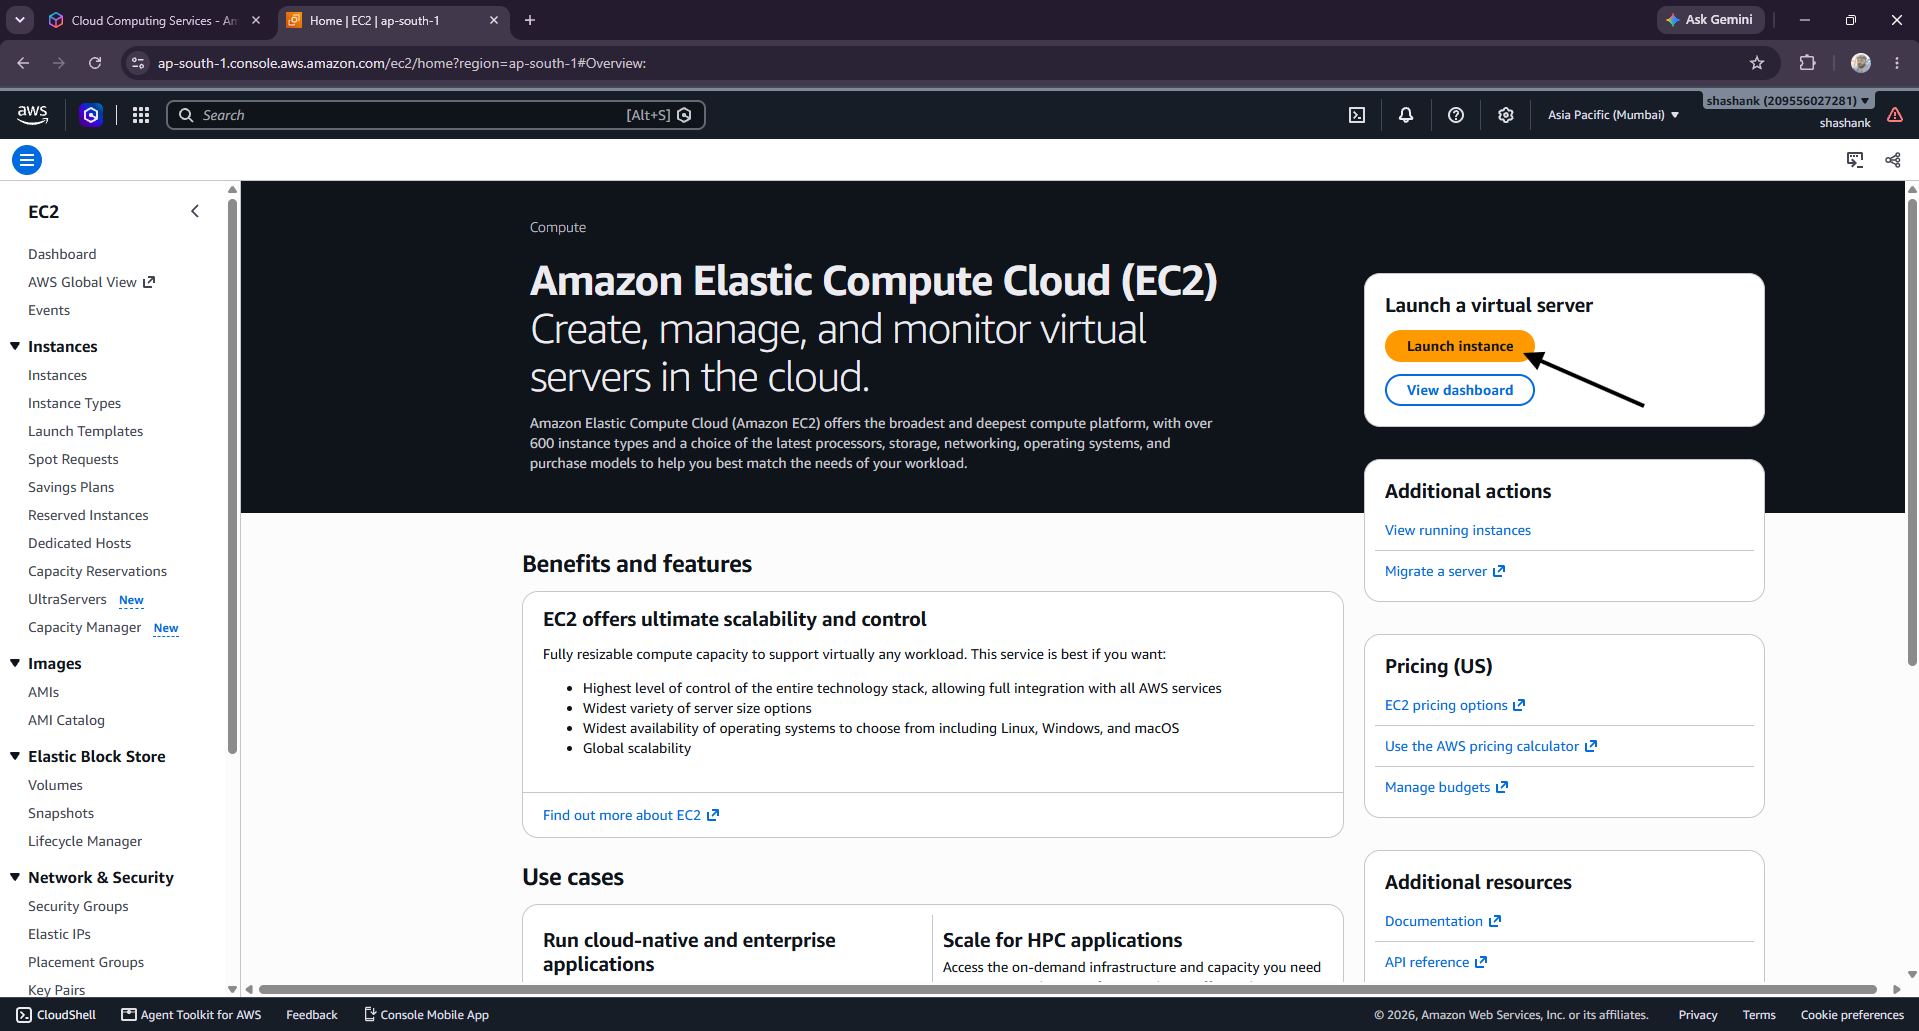
EC2 allows you to create and manage virtual servers on Amazon Web Services.
On the Launch Instance page, configure the following settings.
Server Name
Enter a name such as: Open-VTS-Linux-Server
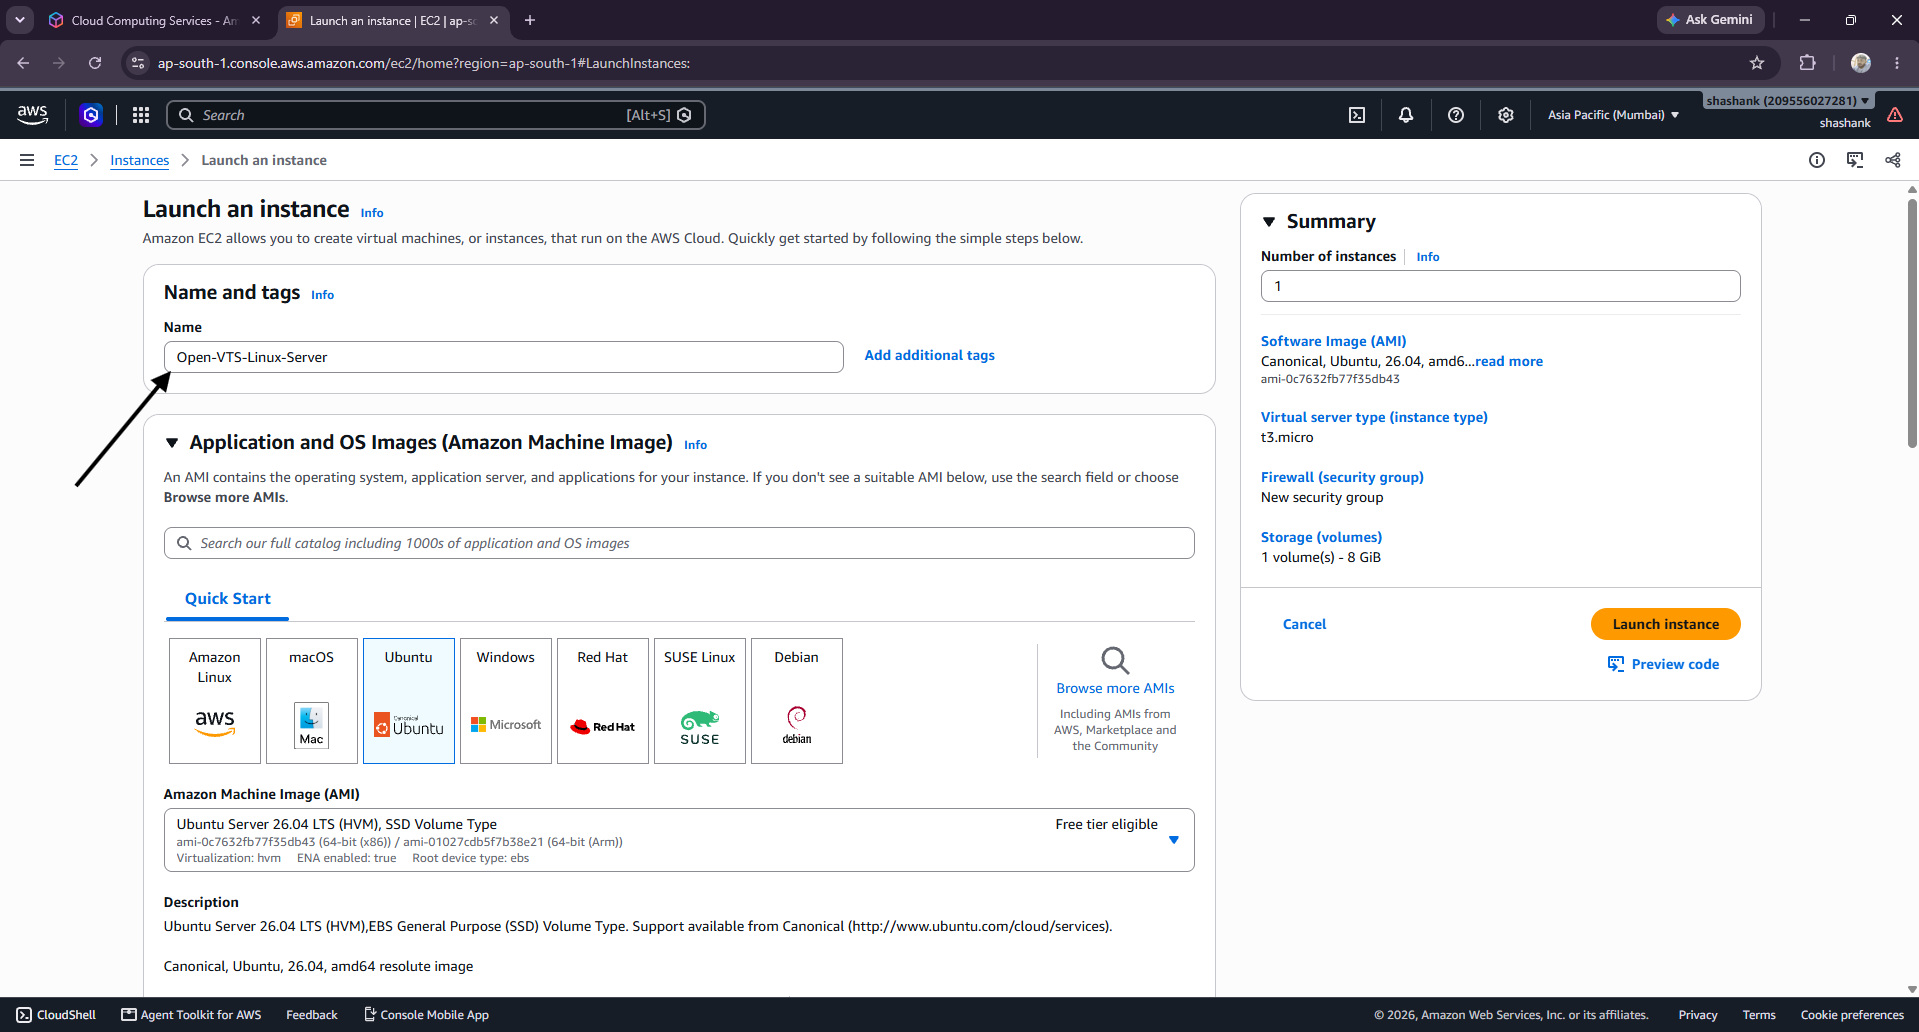
Operating System
Under Application and OS Images, select Ubuntu Server and choose an installer-compatible LTS version with 64-bit x86 architecture.
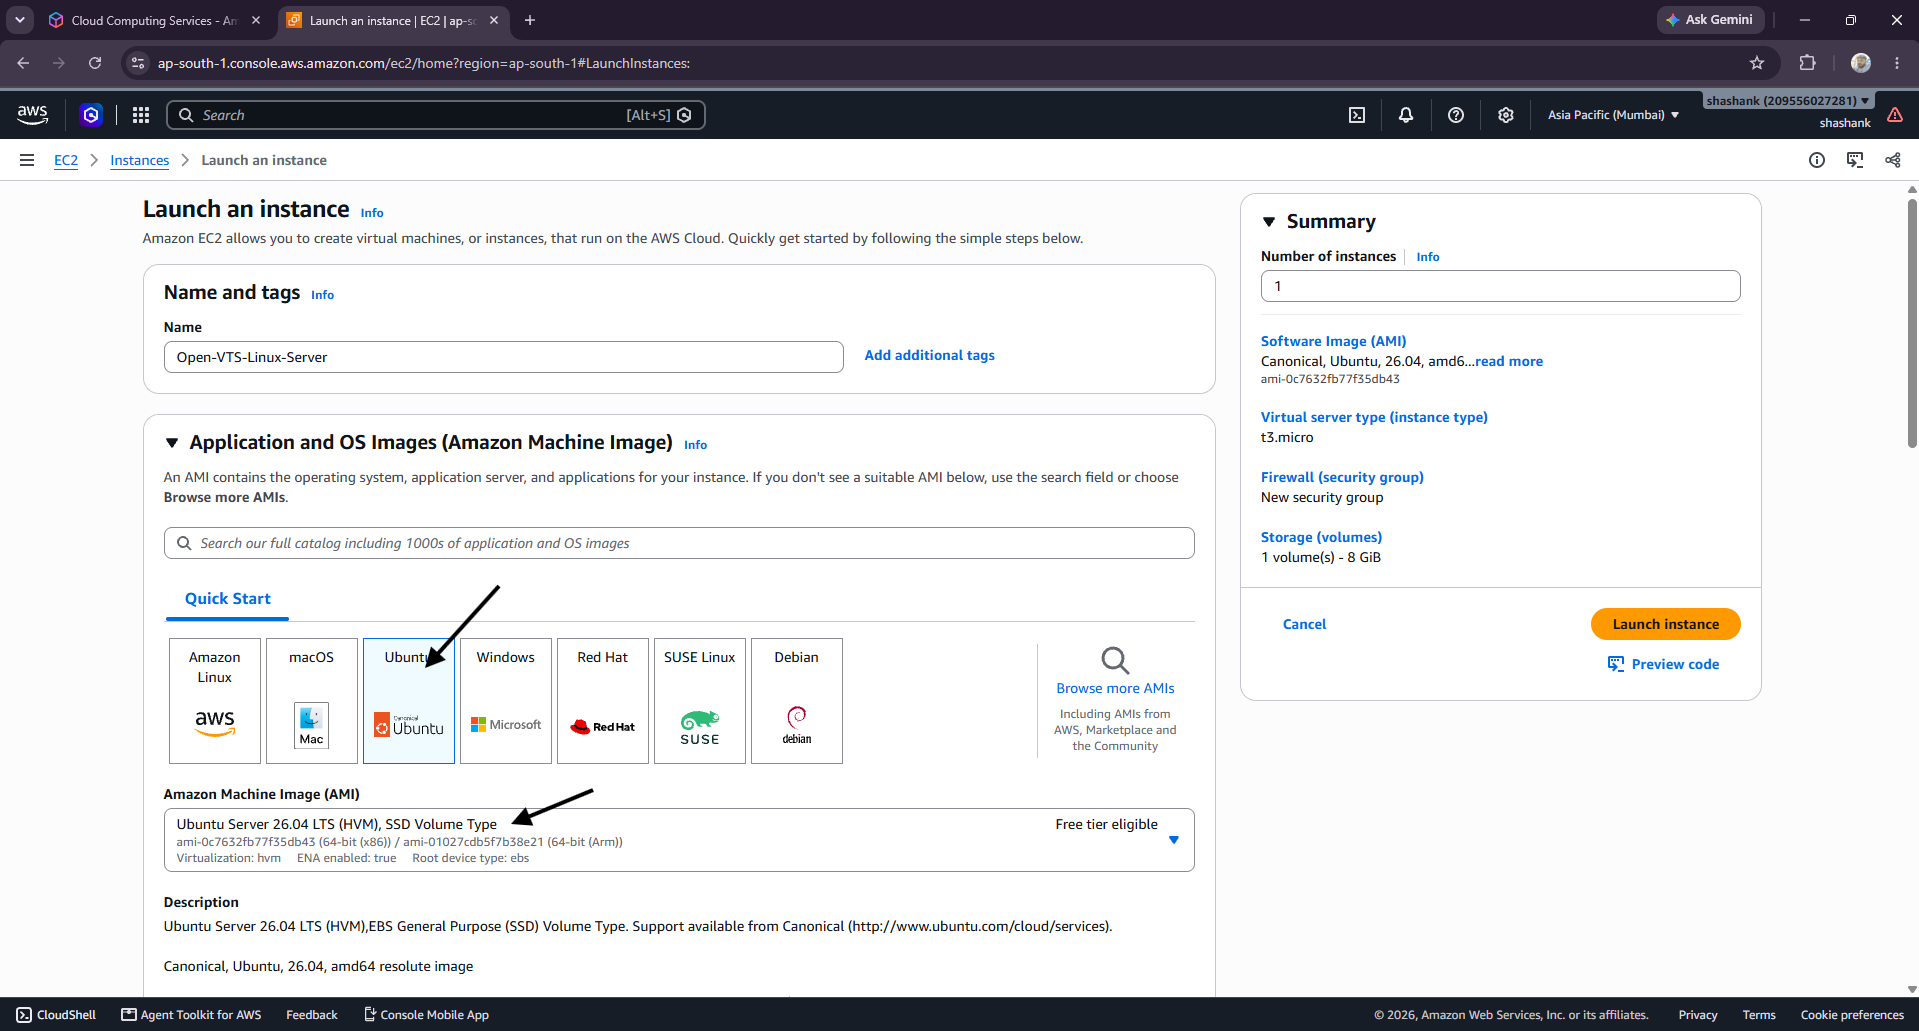
Choose Instance Type
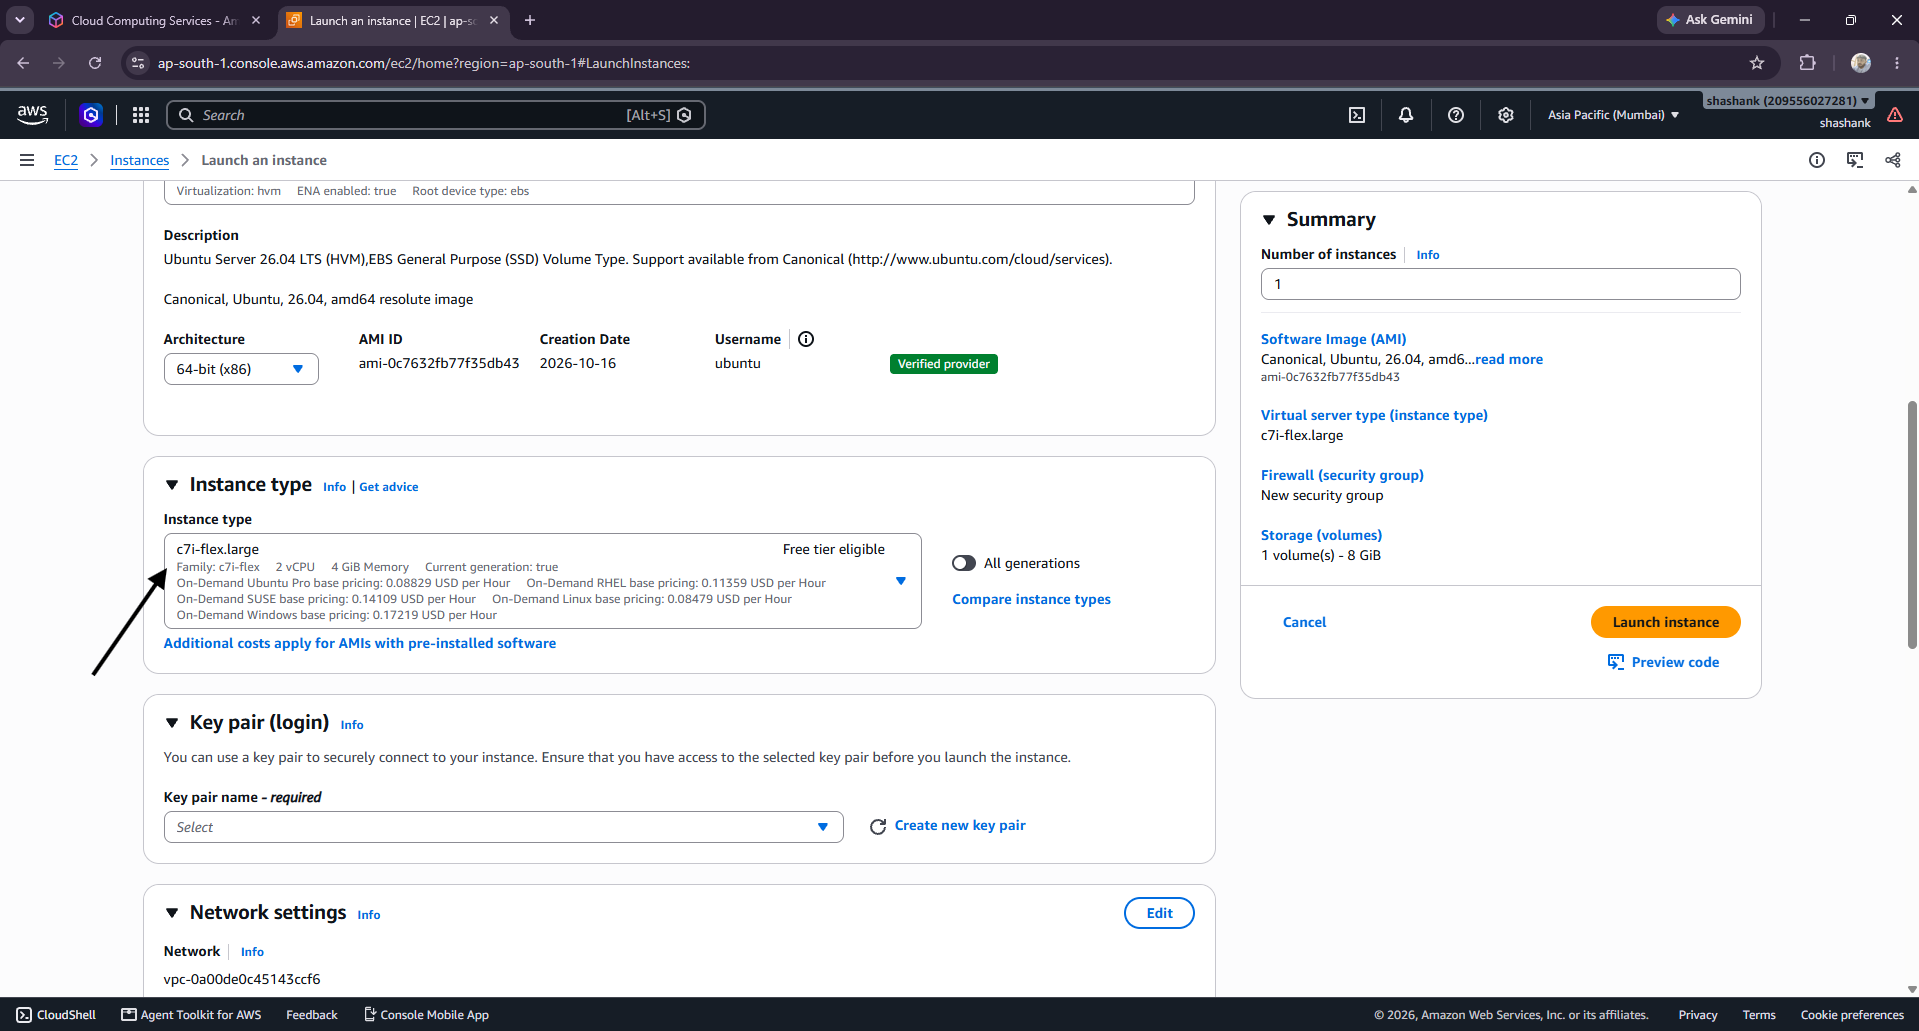
Select an instance appropriate for your workload, such as an instance offering 2 vCPU and 4 GB RAM for a small evaluation deployment.
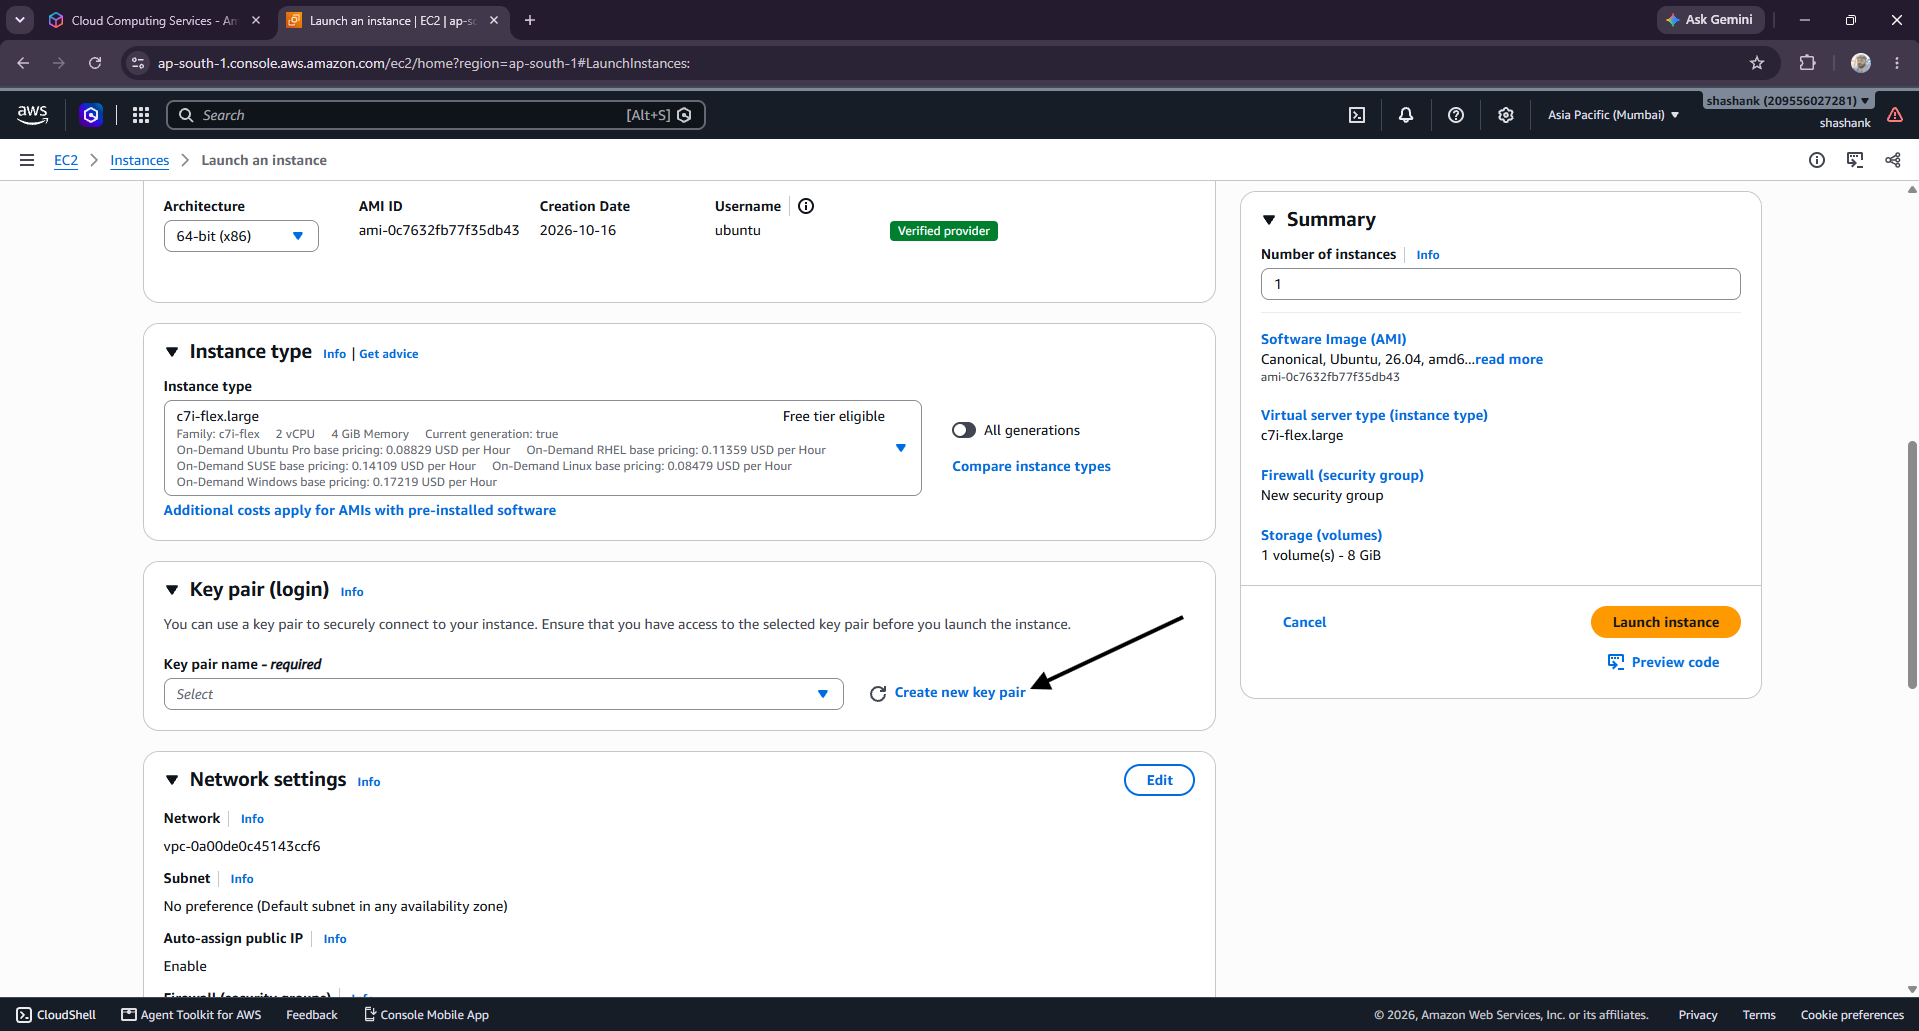
An SSH key allows you to connect securely to your Linux server.
Under Key Pair (Login):
Click Create New Key Pair.
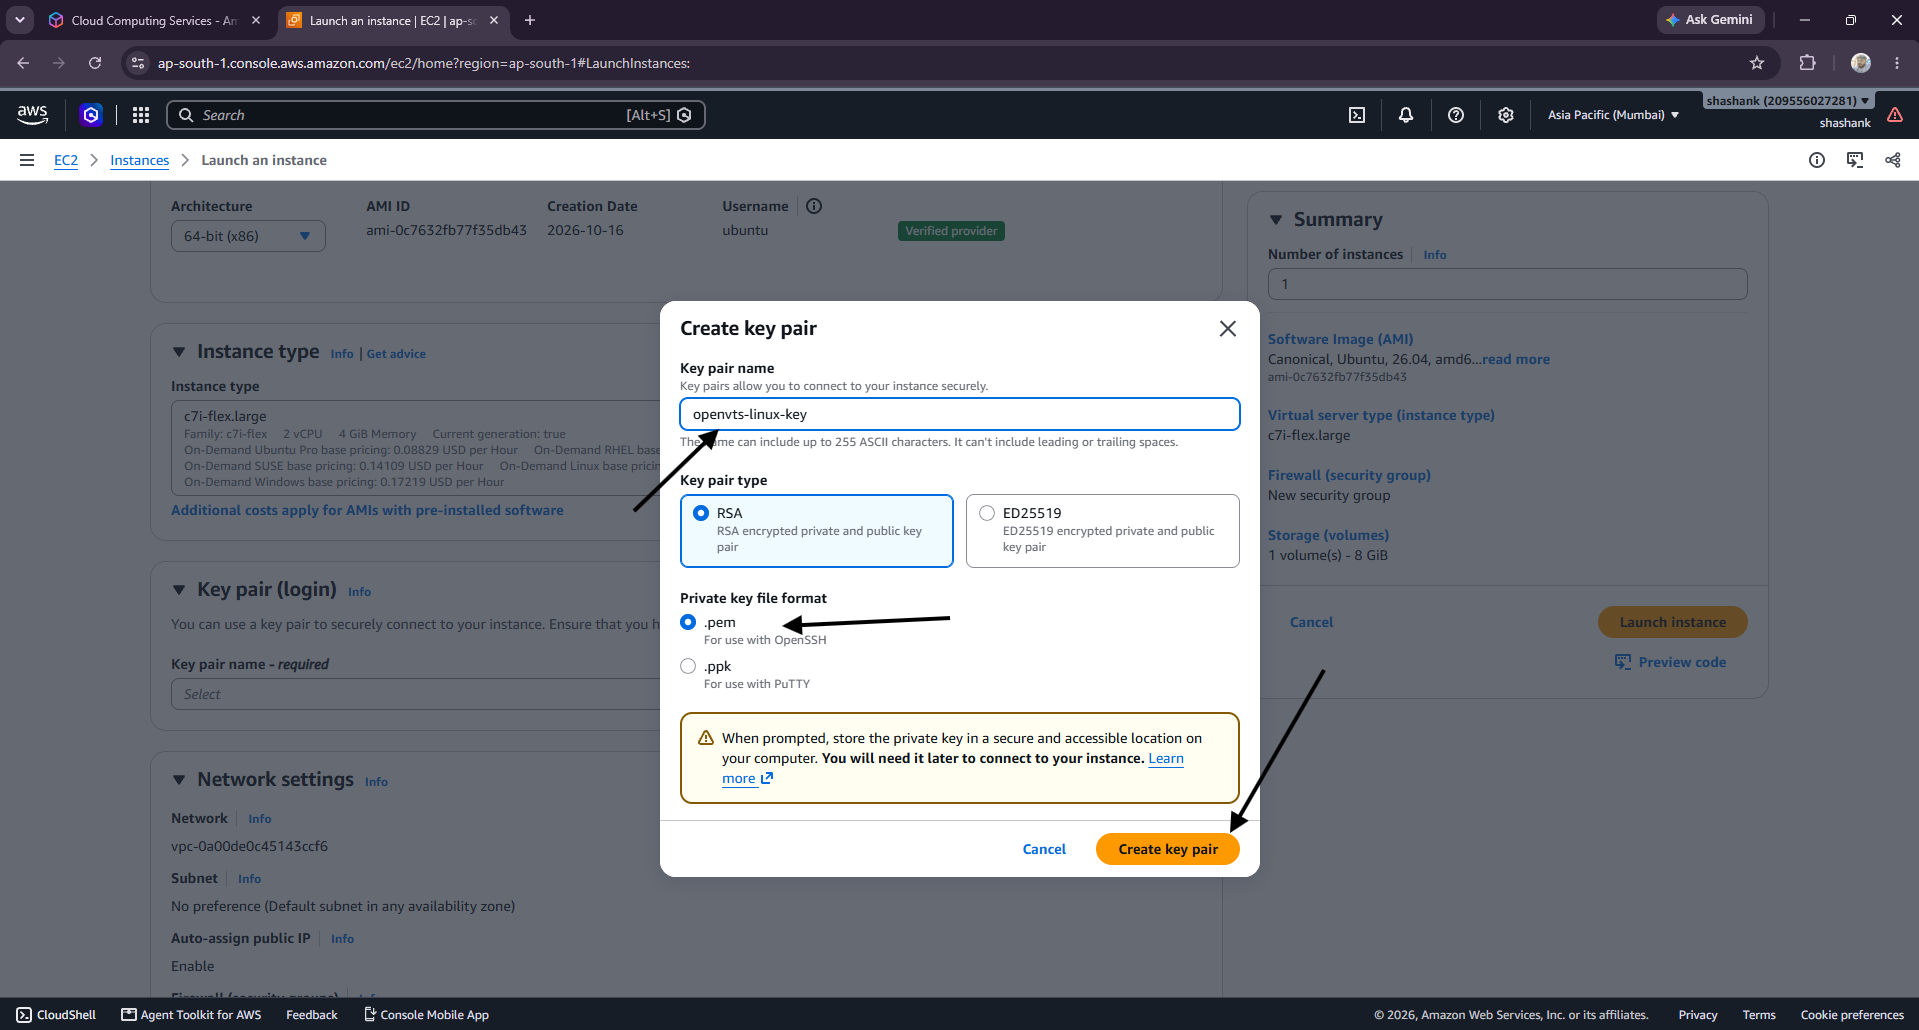
Enter a name such as openvts-linux-key.
Choose RSA and .pem if you intend to connect using OpenSSH.
Download the private key.
Keep the private key in a secure location.
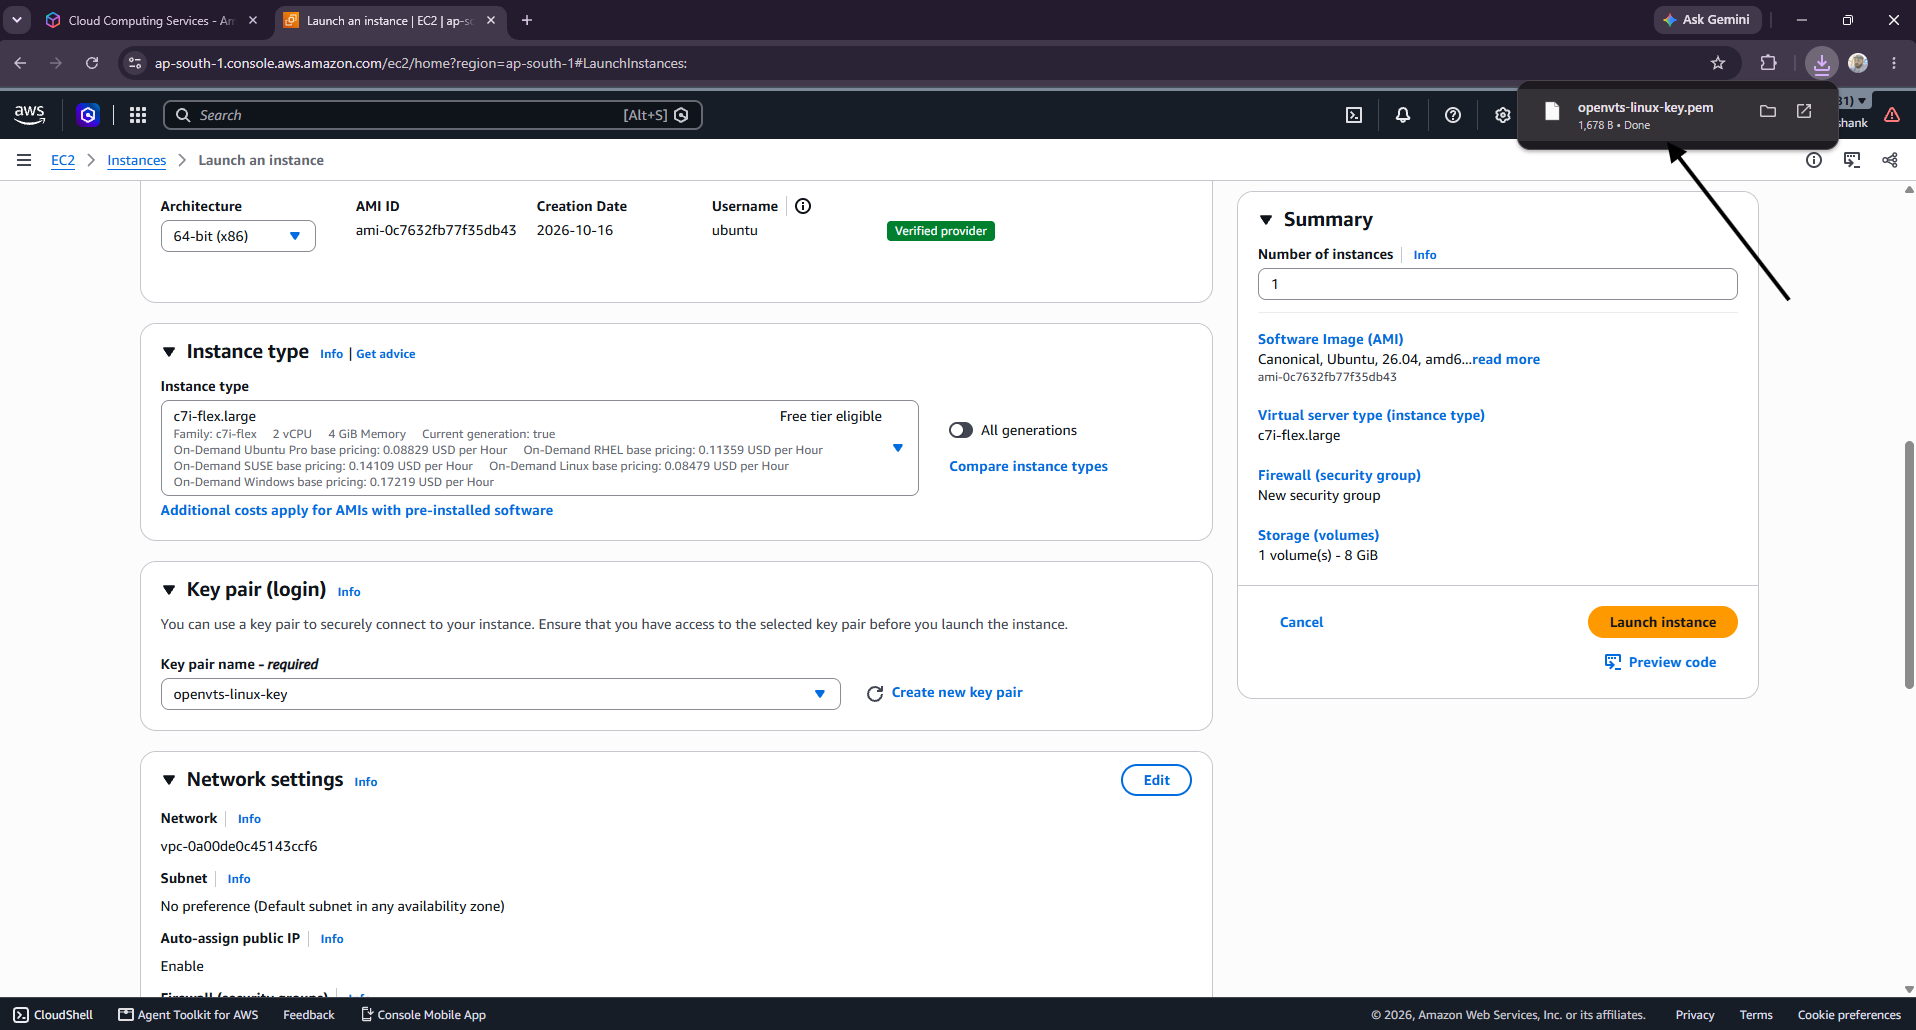
The key will be required to access your server.
Storage
Configure approximately 100 GB of SSD-backed storage for an initial deployment.
Increase this according to your expected GPS data retention and vehicle workload.
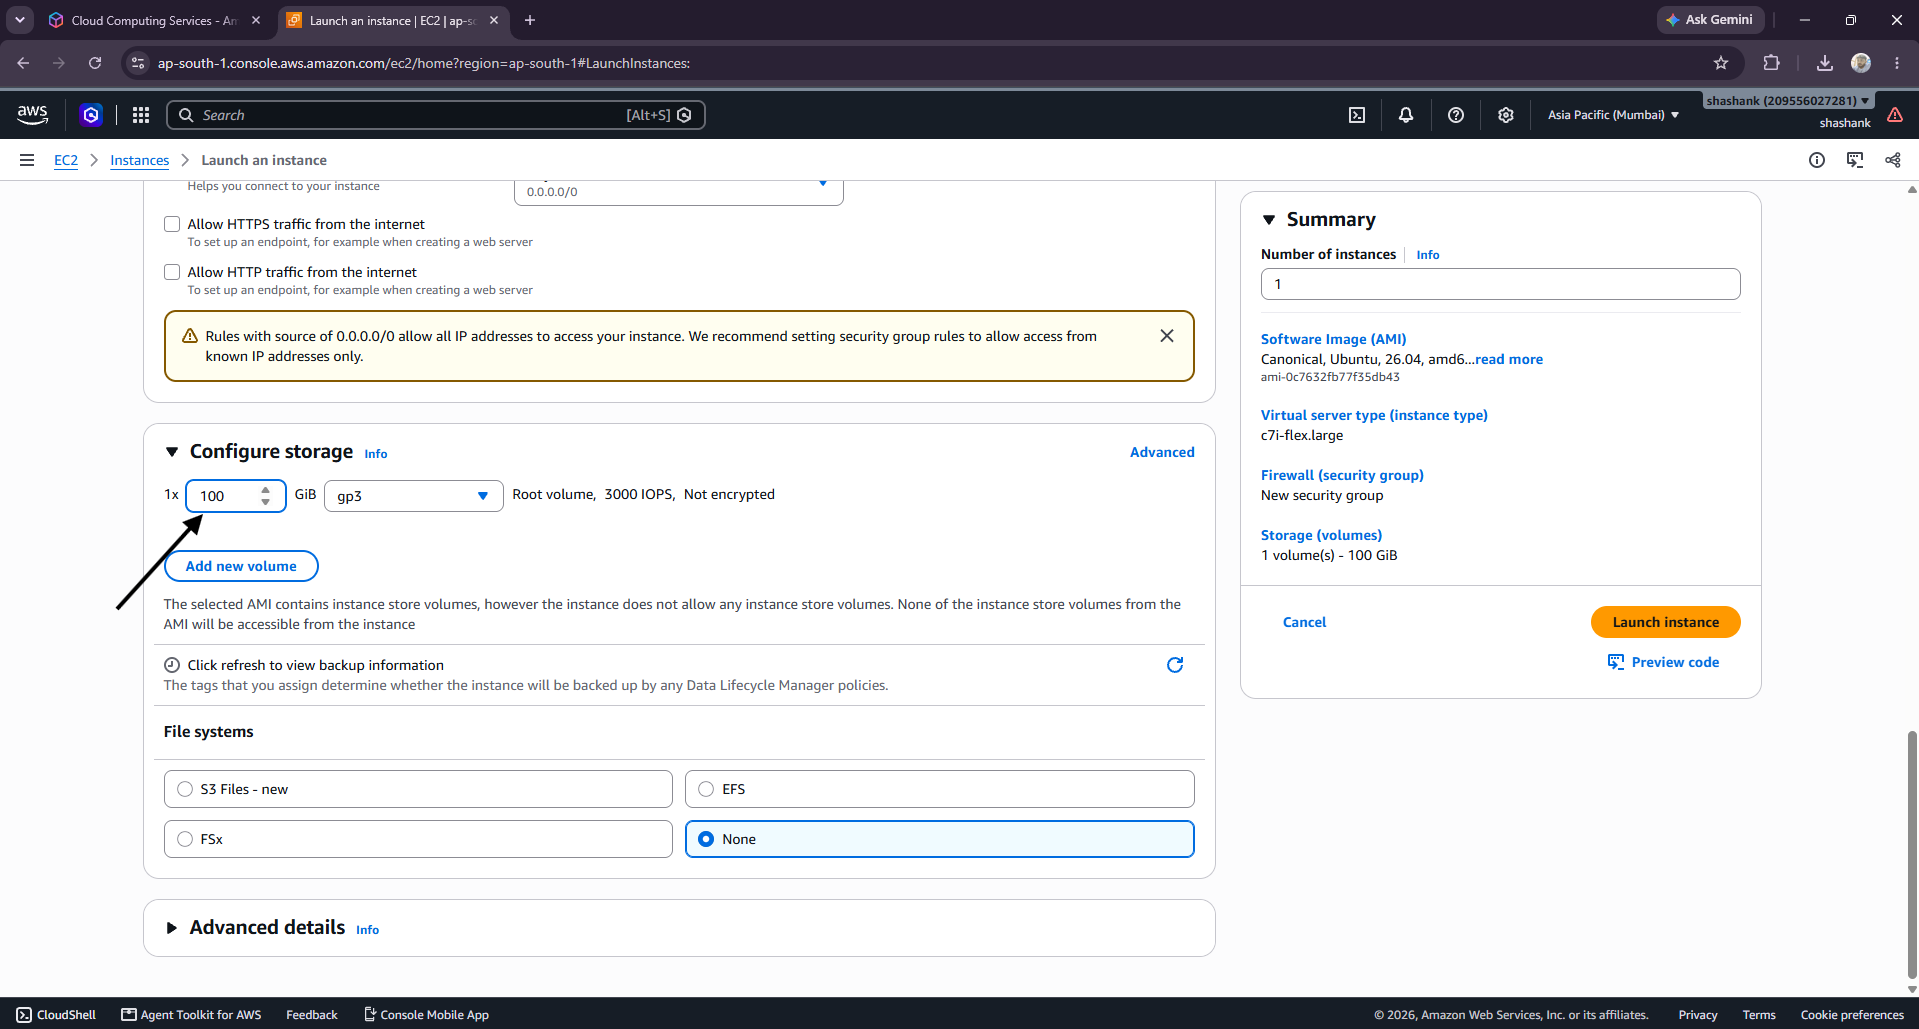
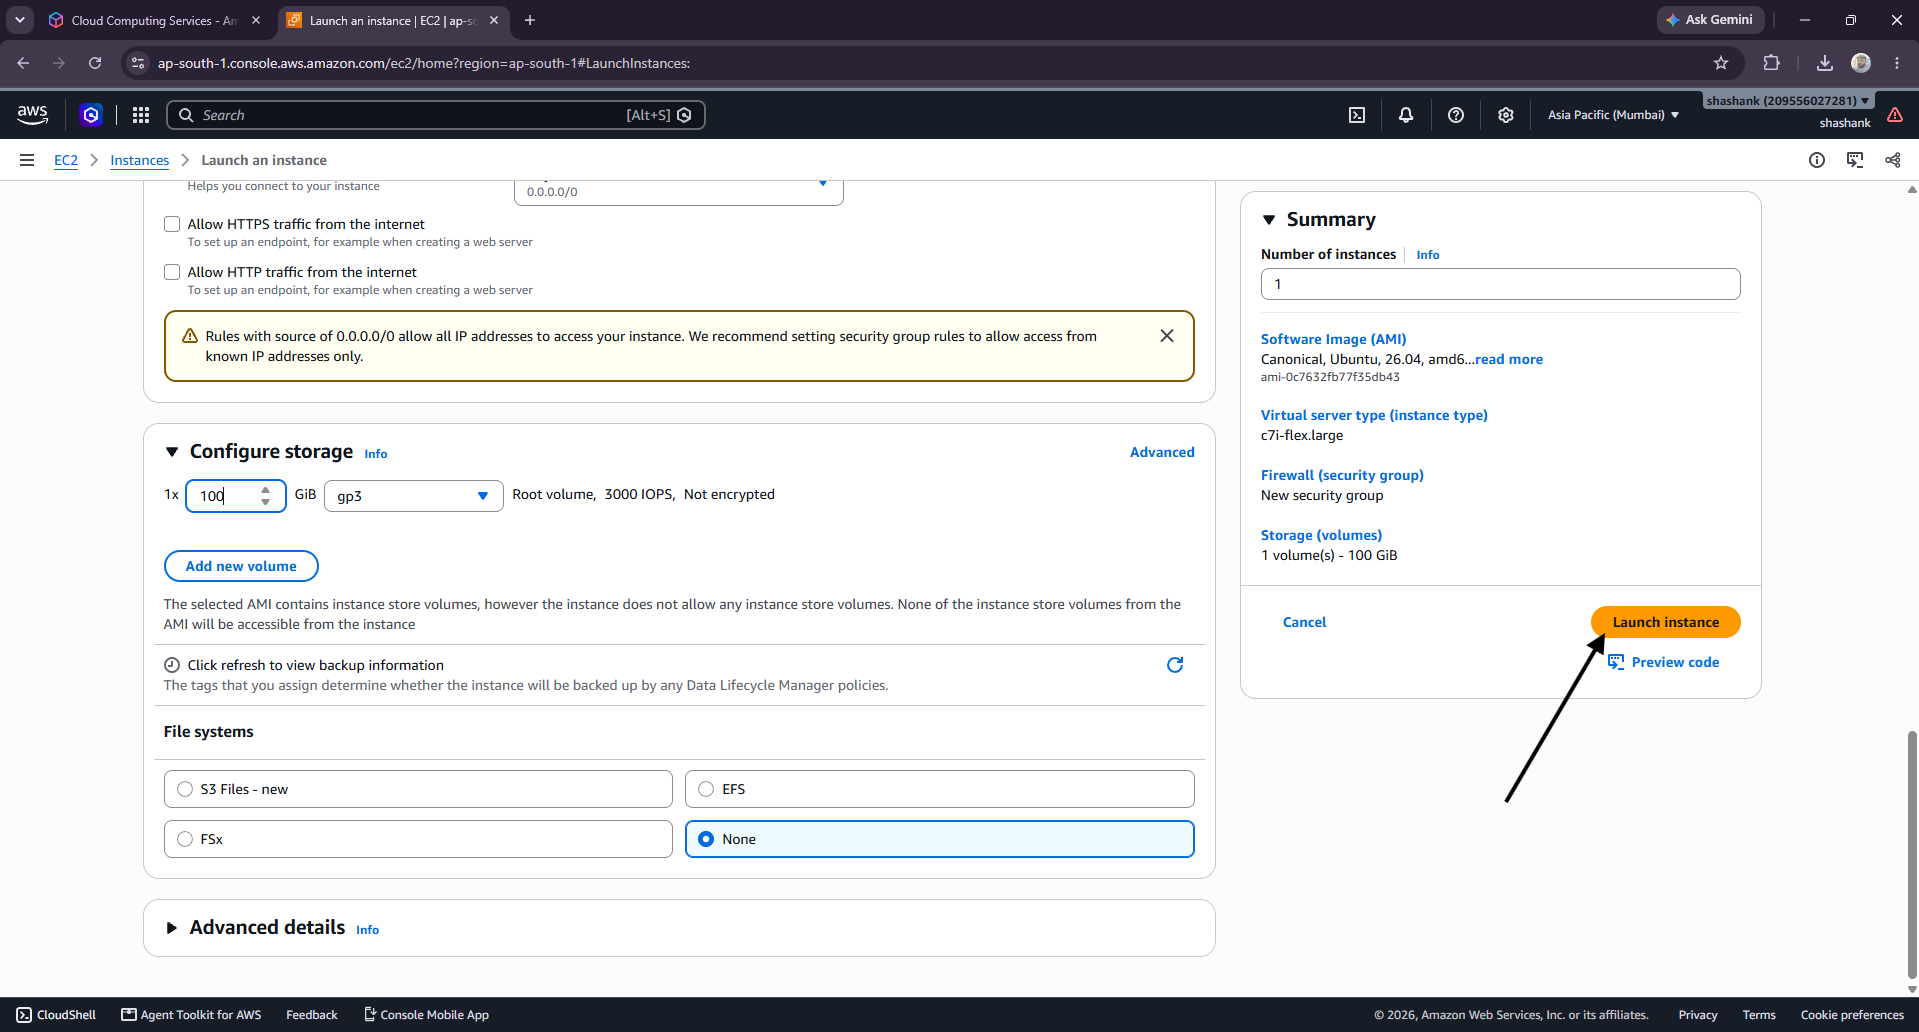
Finally click on Launch Instances
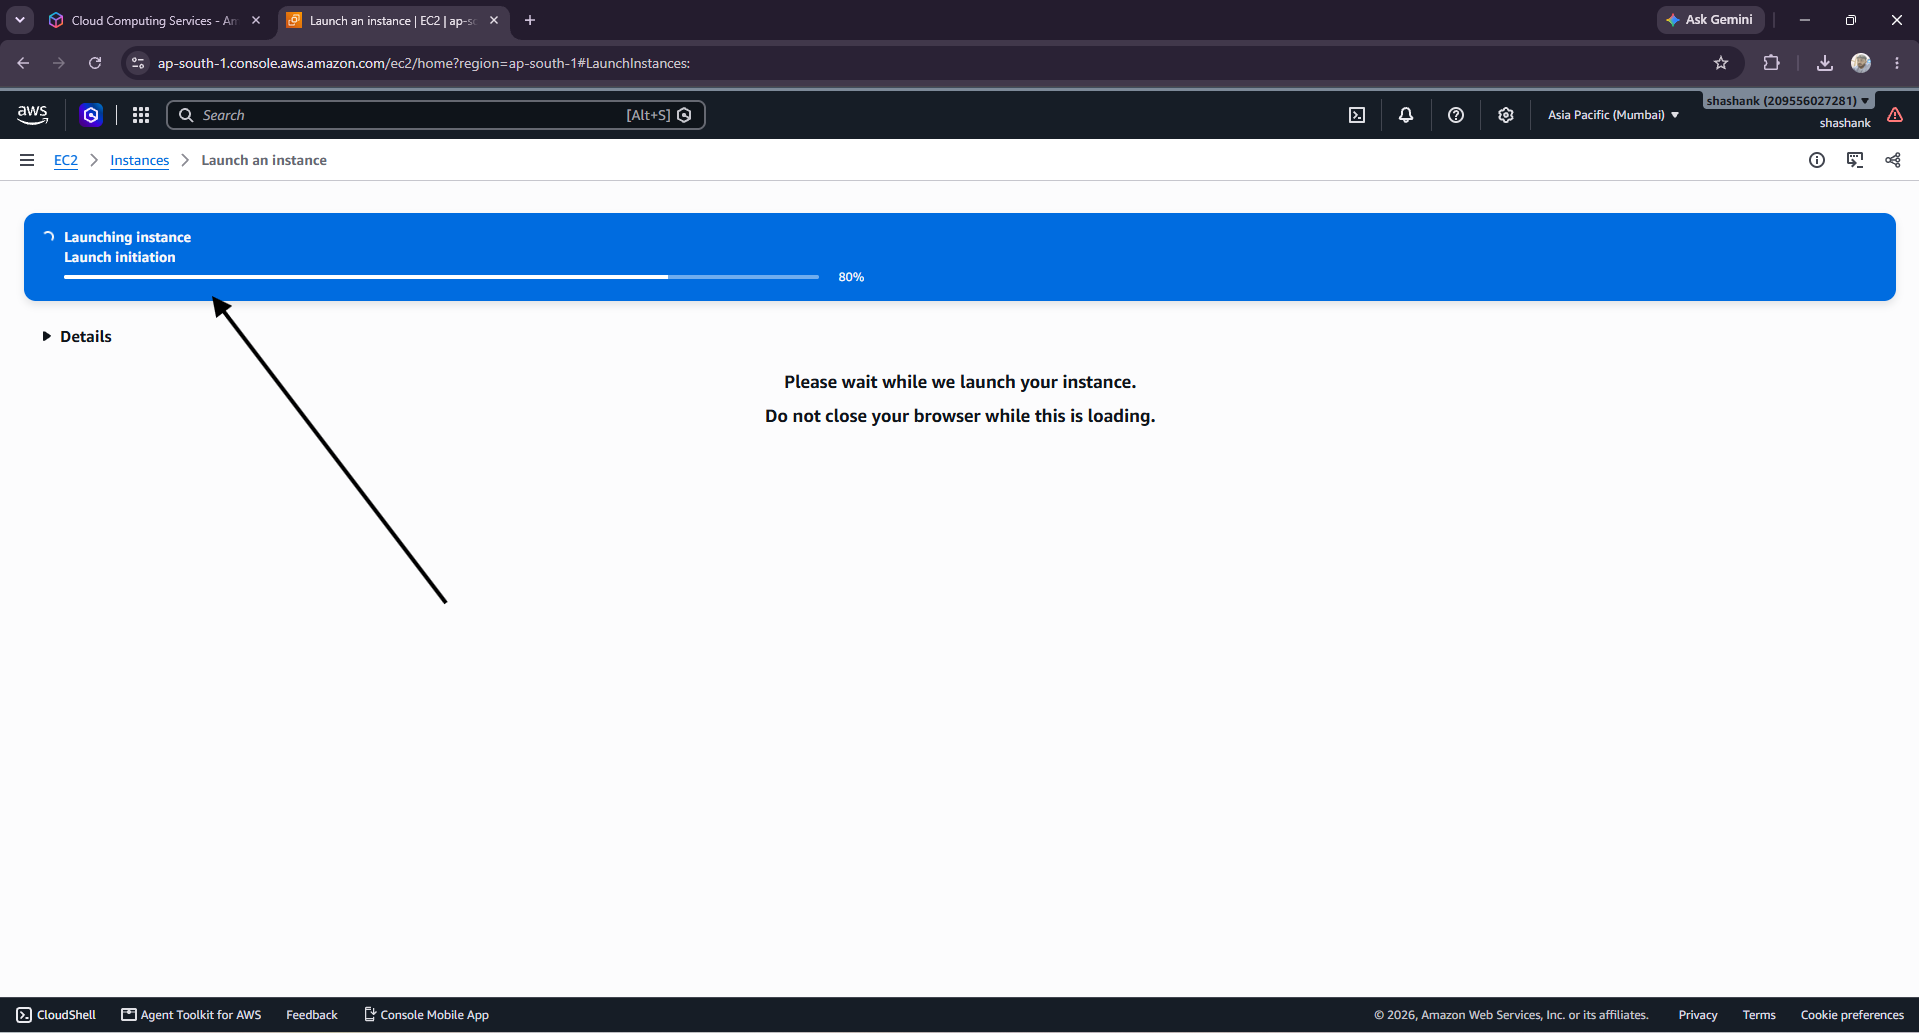
Wait for the server creation
Under Network Settings, configure the security group.
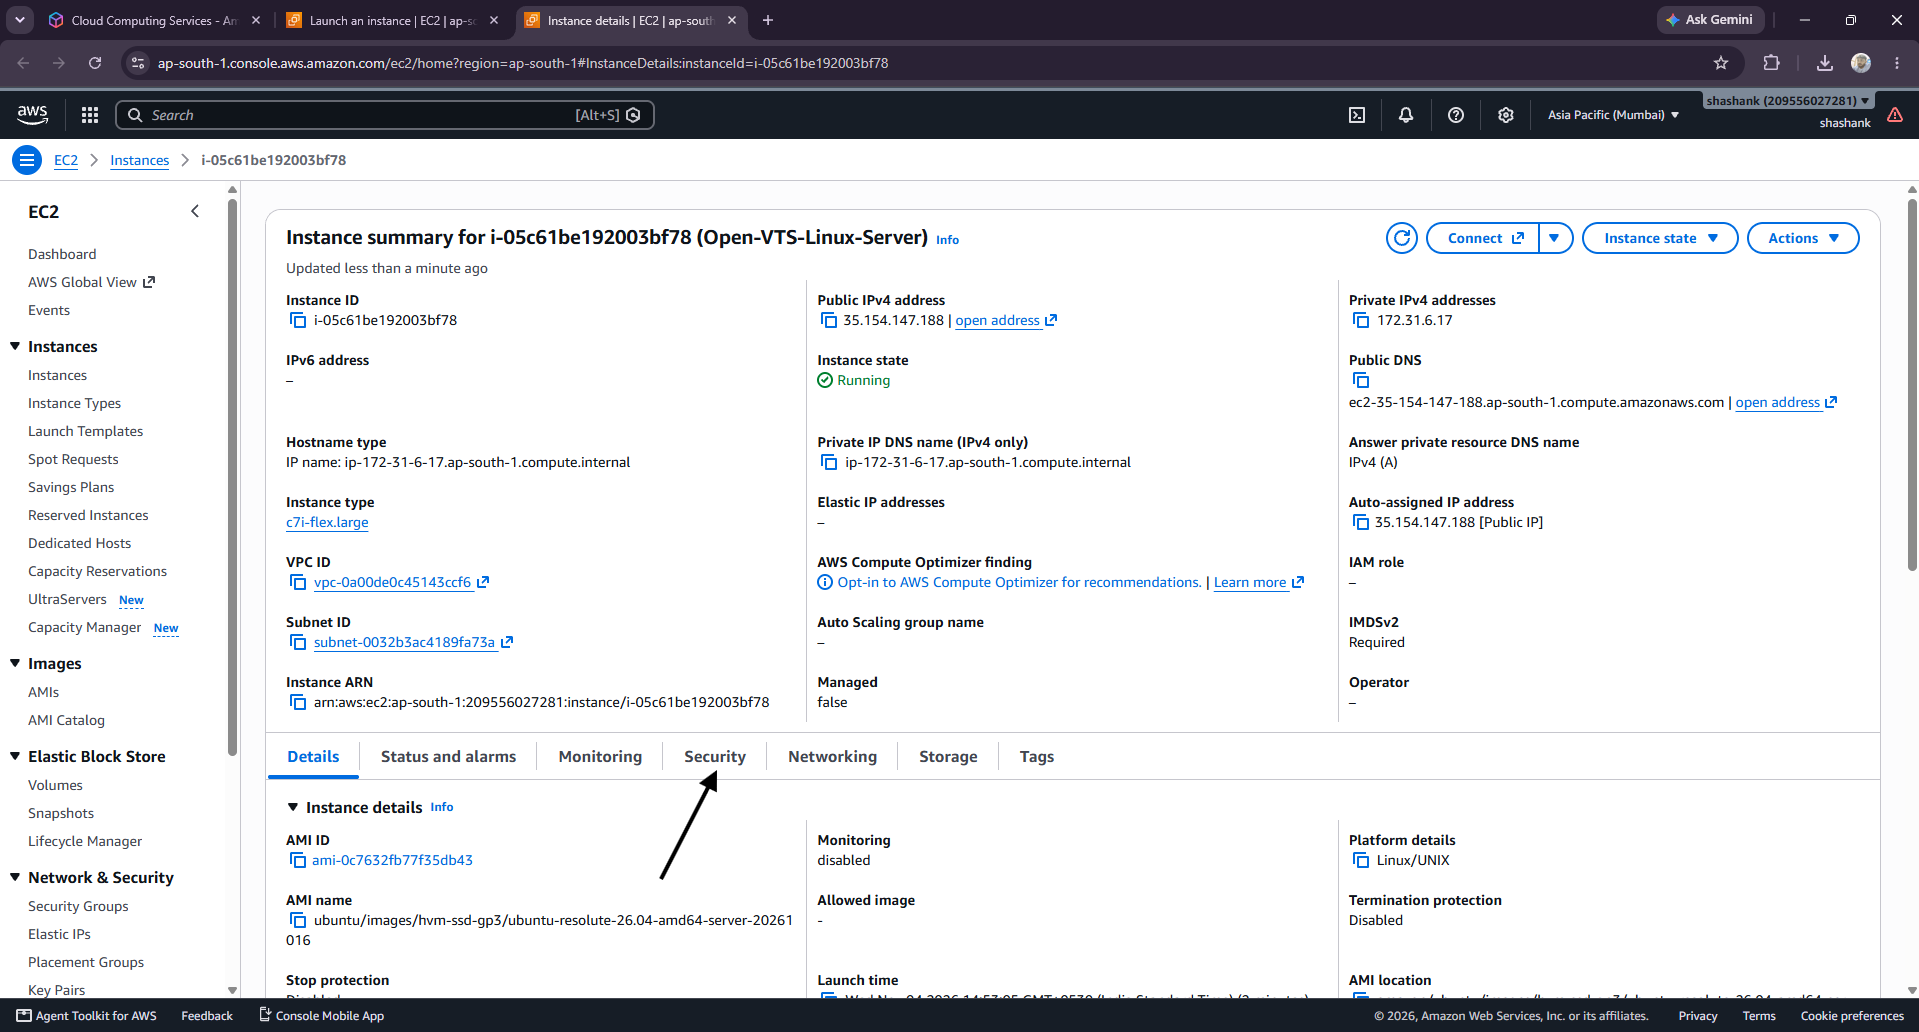
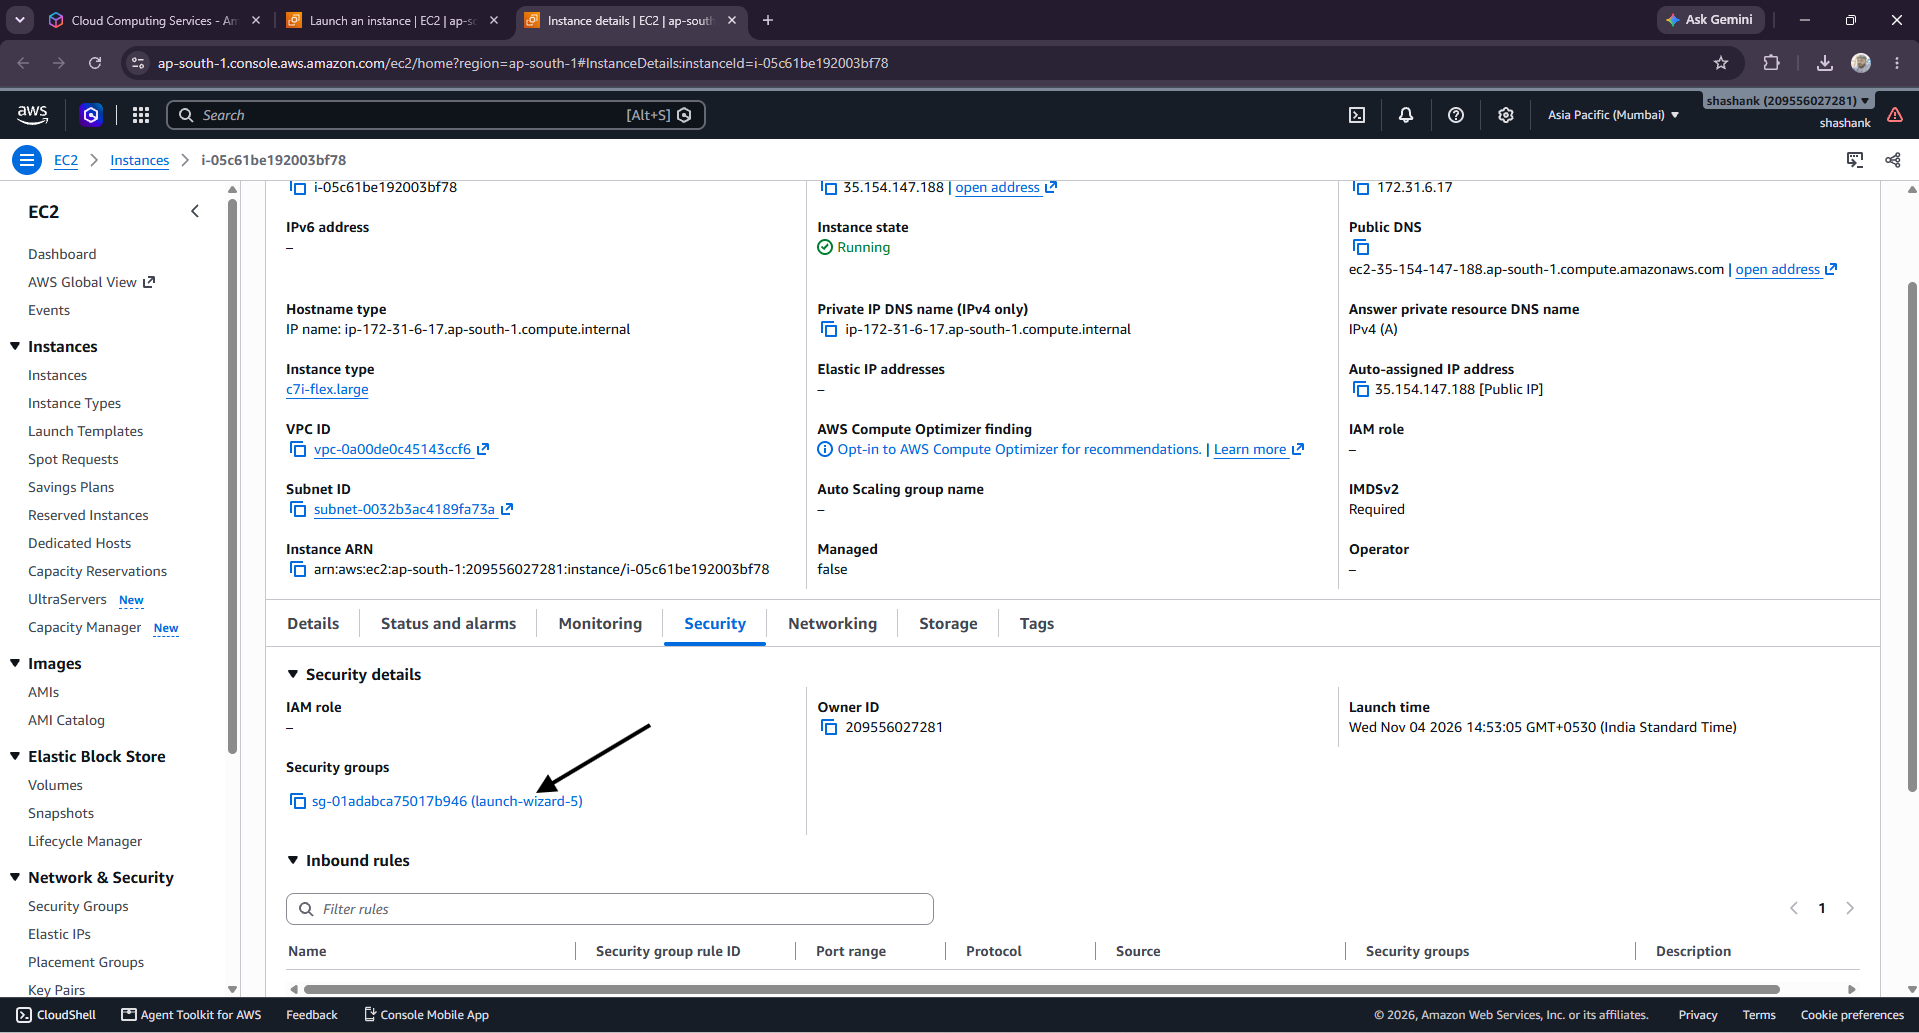
Click on security groups
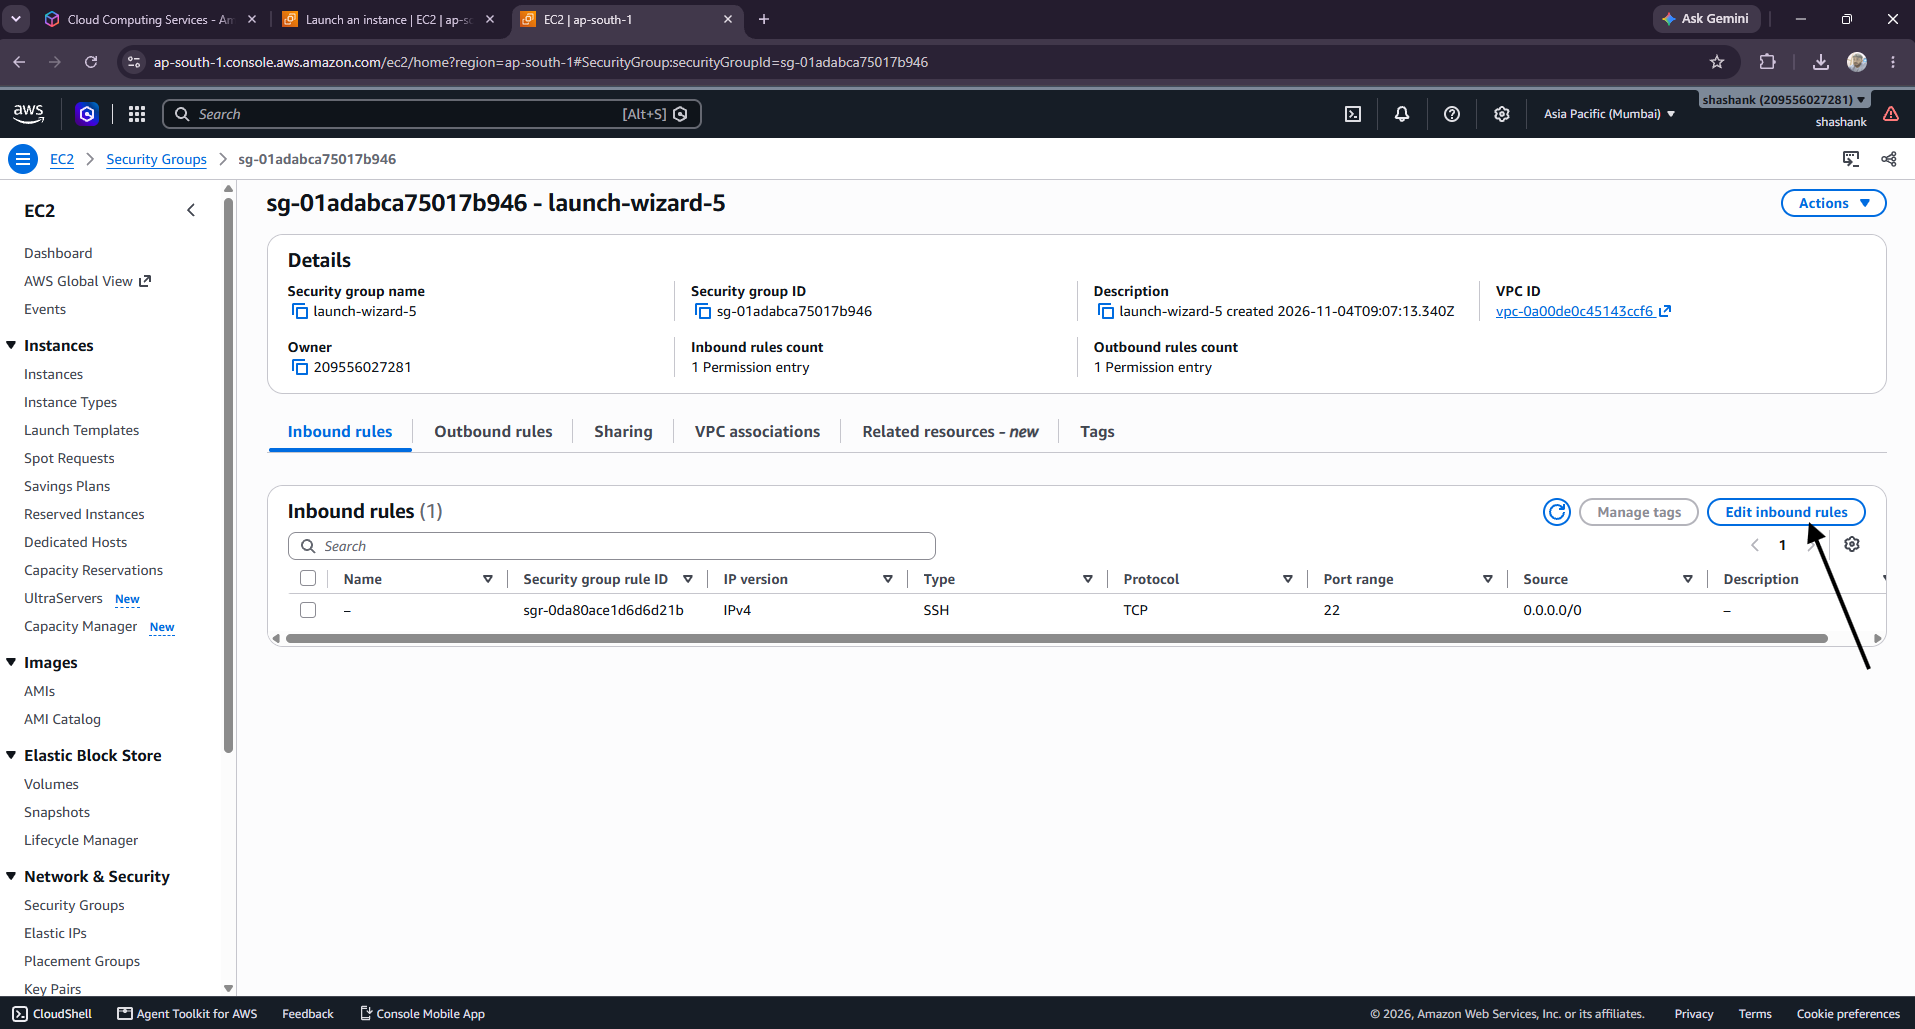
Click on edit inbound rule
Click on add rules
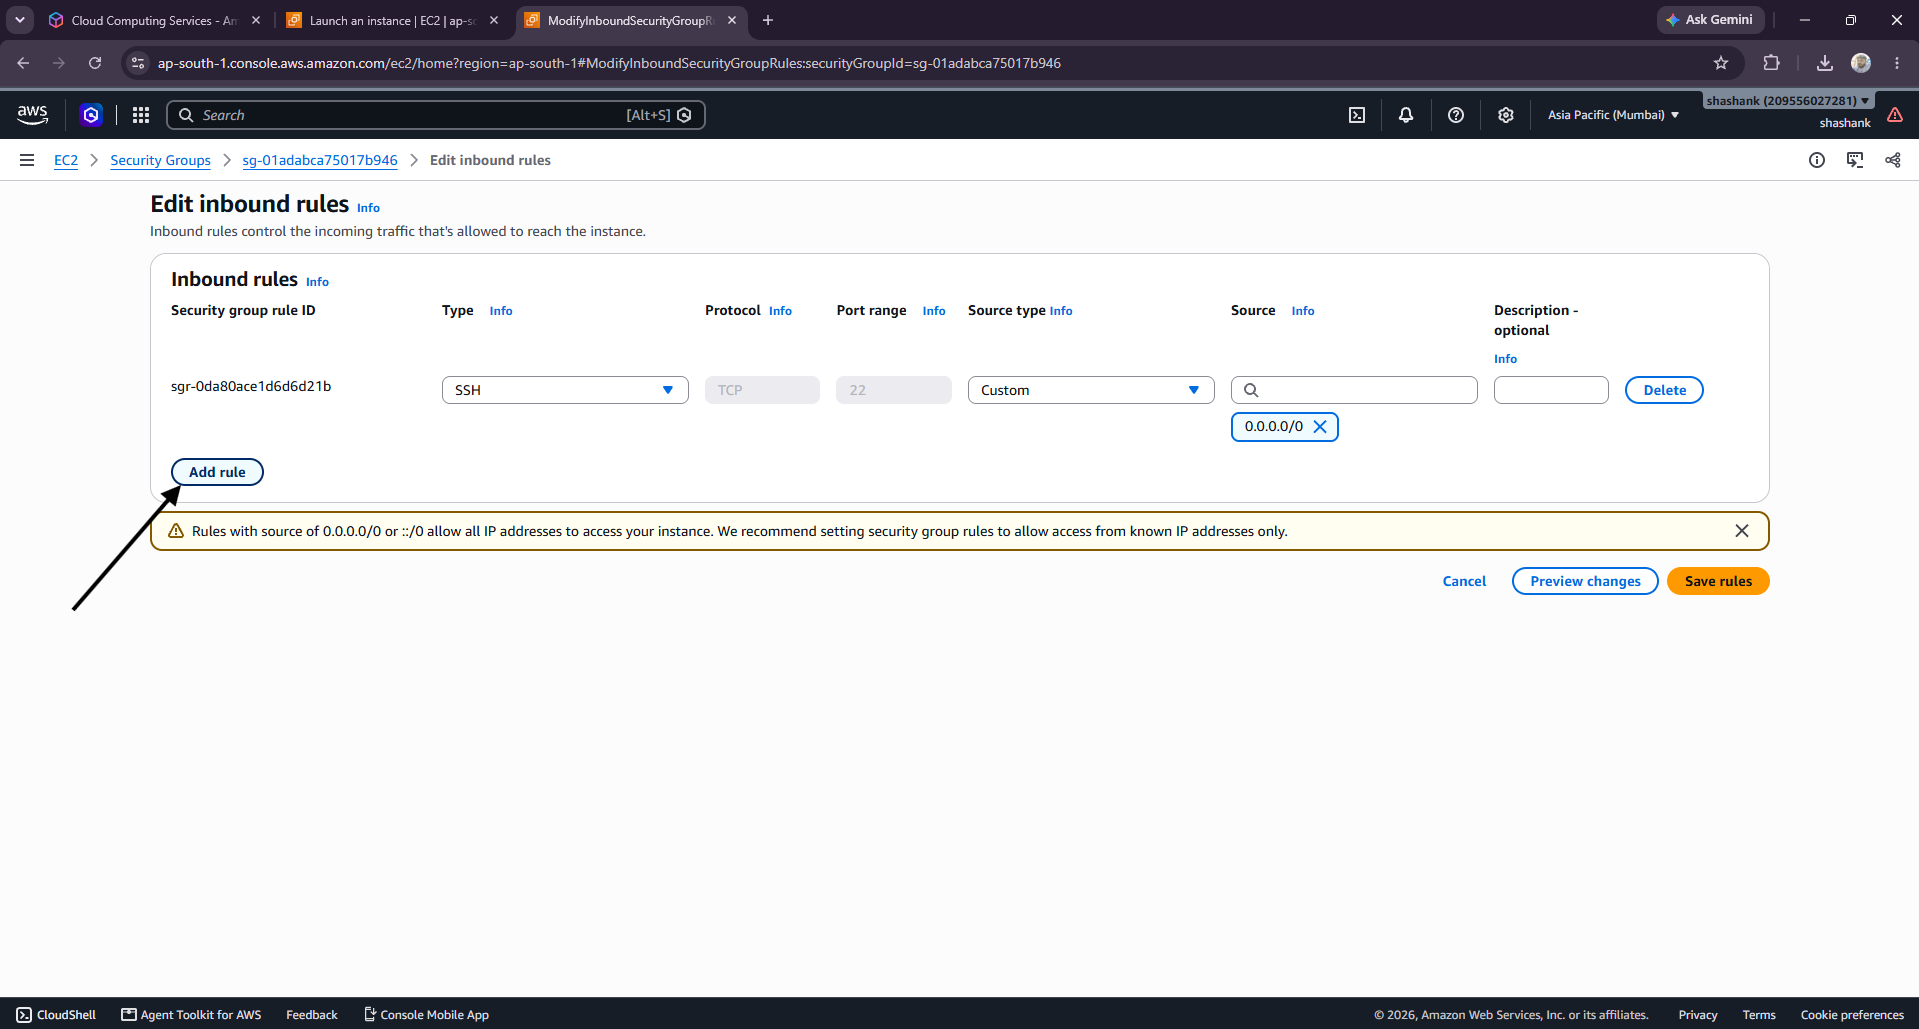
Allow the following inbound traffic as needed:
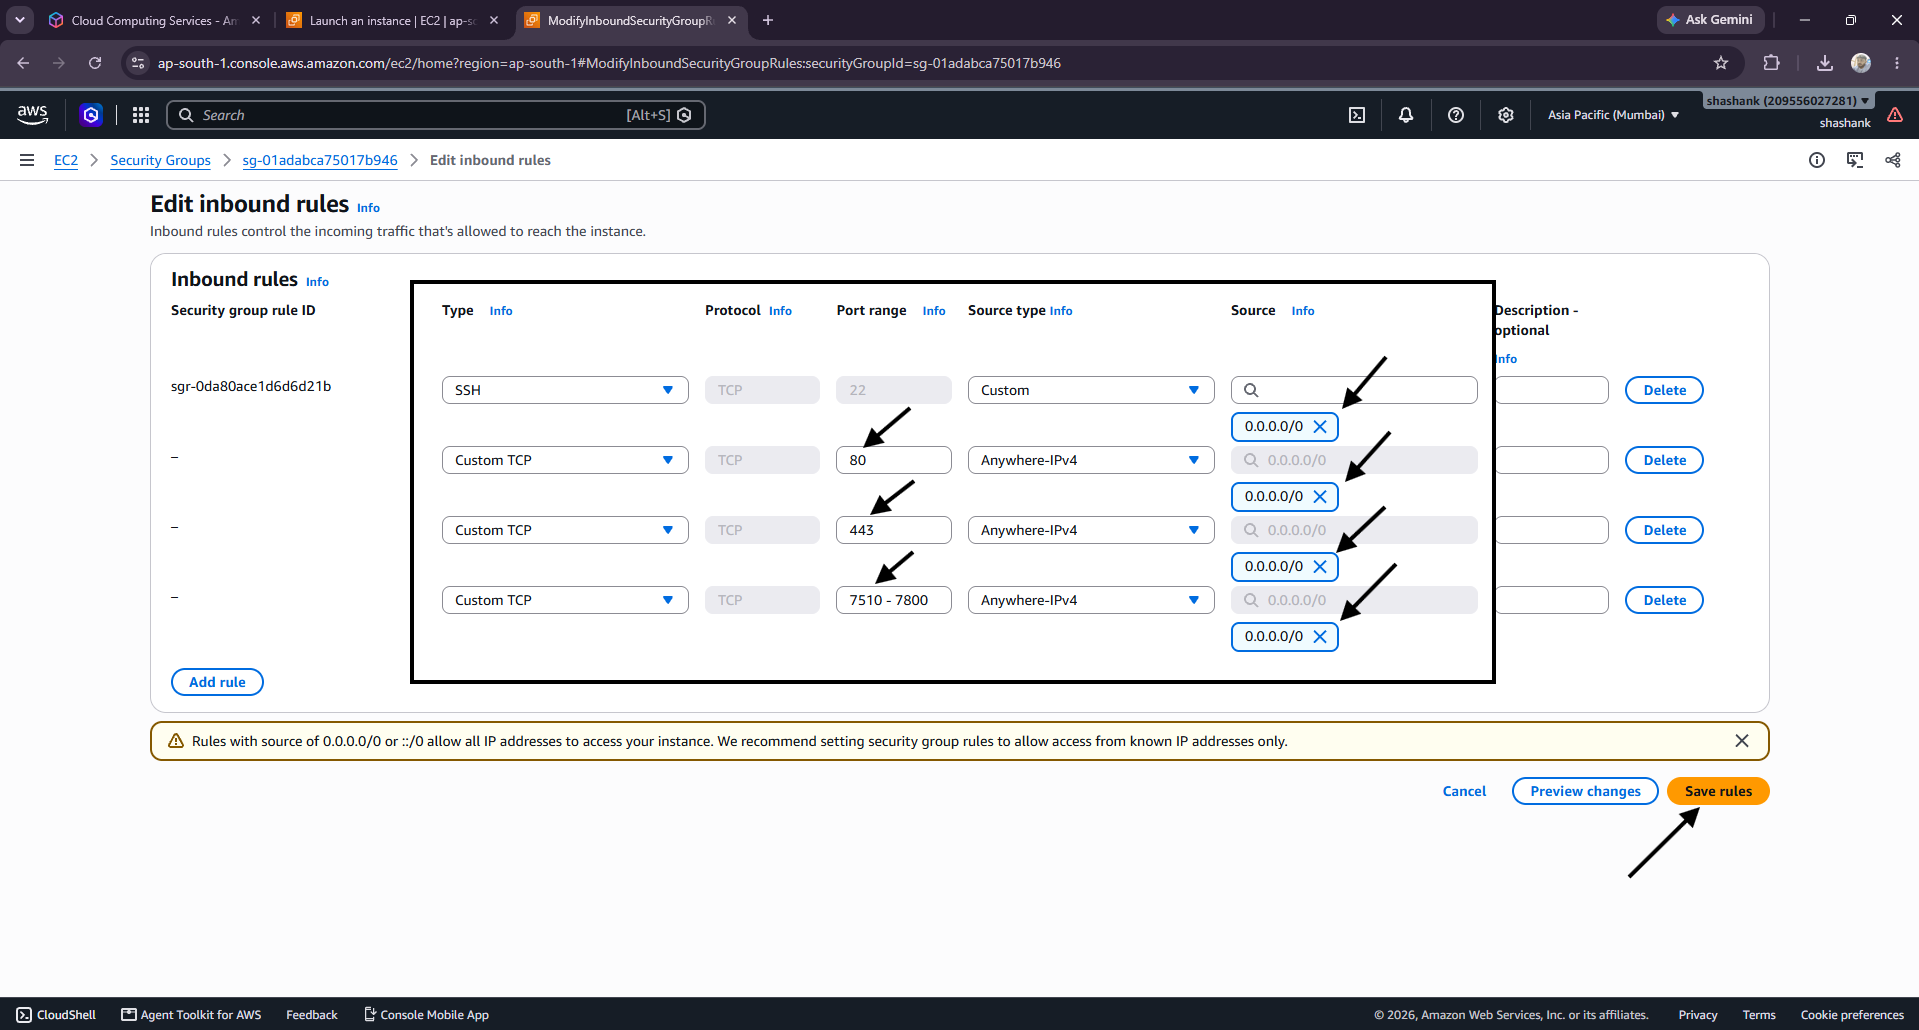
| Port | Purpose | Access |
|---|---|---|
| TCP 22 | SSH access | Your trusted IP address only |
| TCP 80 | Web application / HTTP | Public |
| TCP 443 | Secure HTTPS access | Public |
| 7510-7800 | GPS device communication | As required by your device protocol |
Open VTS uses additional TCP/UDP ports for supported GPS protocols. Only enable the ports your actual tracking devices require.
For example, the official deployment information identifies port 5055 and additional protocol ports in the 7510–7780 range. These should not all be opened automatically unless your deployment requires them.
Once all settings have been configured:
1. Open Instances in your EC2 dashboard.
2. Confirm that the instance is running and its status checks pass.
Select your instance and copy its Public IPv4 Address.
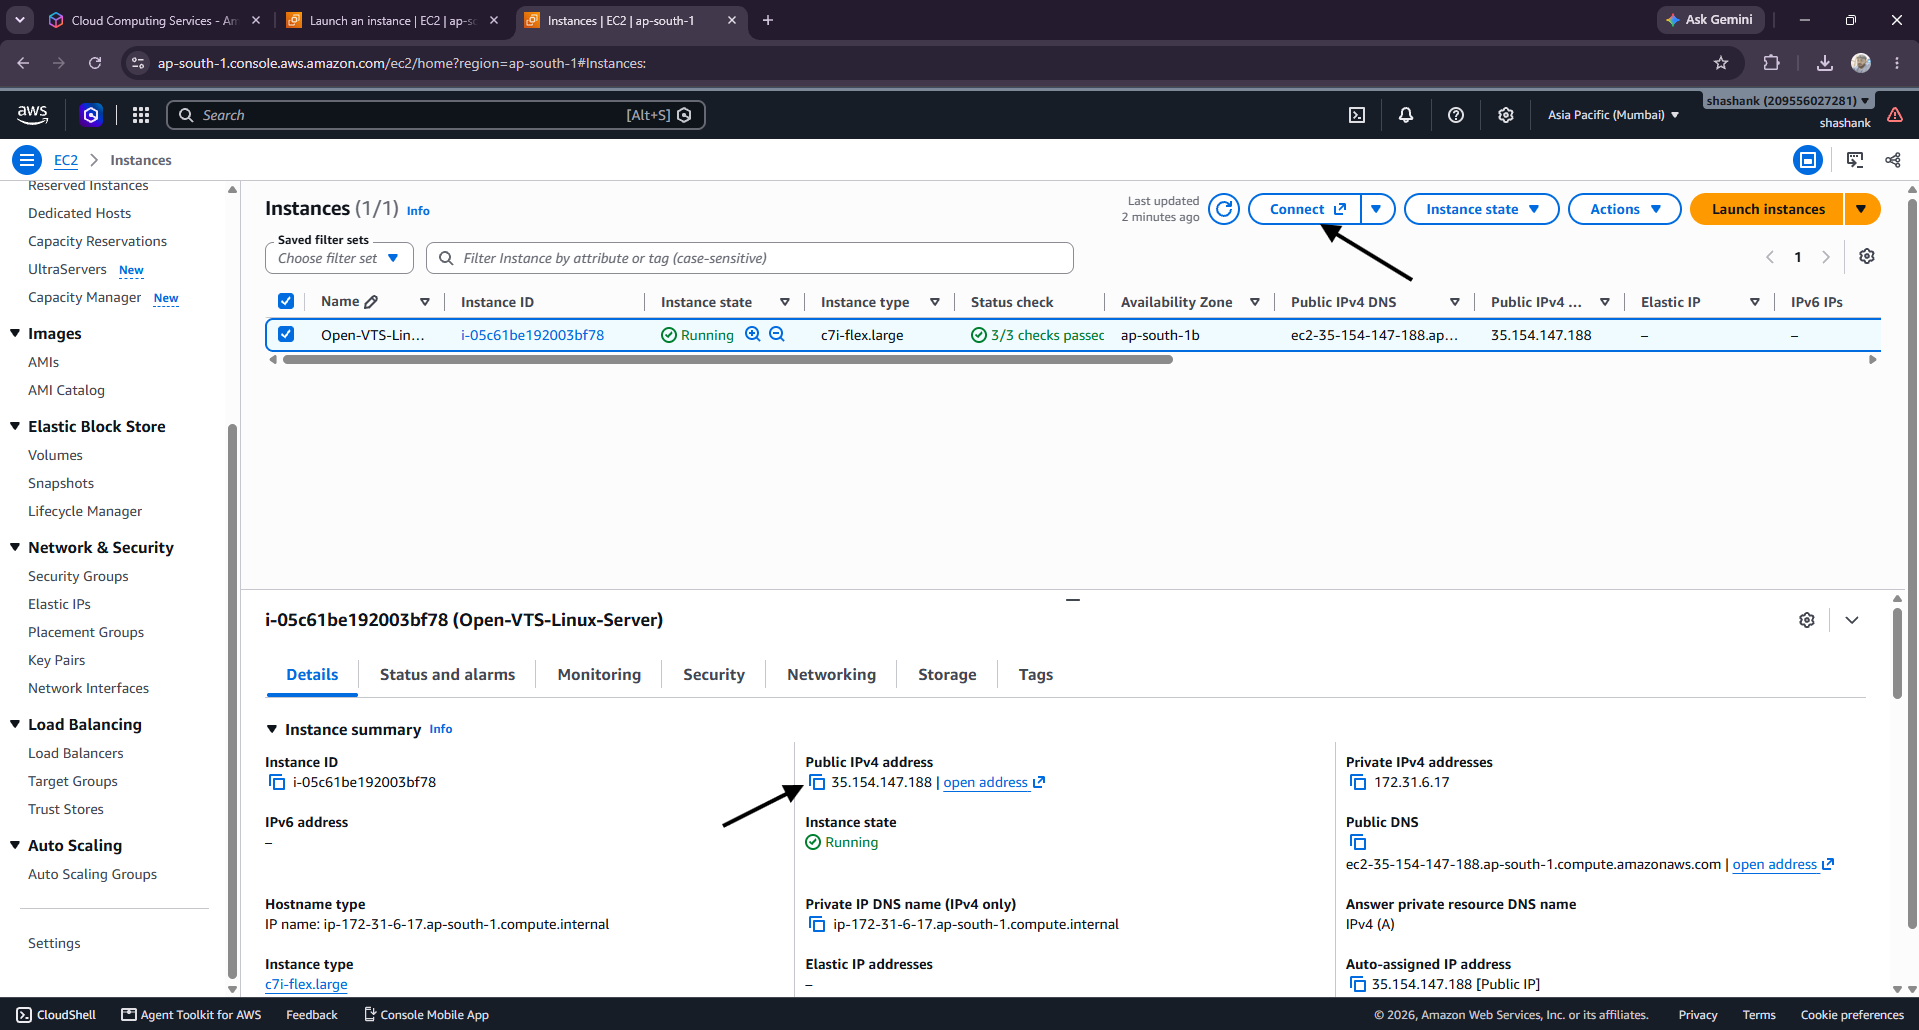
Once you copy the Public IP, on your Windows computer, open PowerShell .
Run the following command, replacing the example IP and key filename with your own:
ssh -i "PASTE PATH OF .pem PRIVATE KEY" ubuntu@YOUR_SERVER_IP
Example:
ssh -i "D:\KEYPAIR\openvts-linux-key.pem" ubuntu@35.154.147.188
If you see the error for like your keys are public like:

OR For Linux OS follow:-
Run this command: chmod 400 "Enter full path of your PEM file"
Then again try to connect
ssh -i "D:\KEYPAIR\openvts-linux-key.pem" ubuntu@35.154.147.188
For windows OS follow:-
Then first make the .pem key private, run these commands one by one as it is without editing:
command 1: $key = (Read-Host "Enter full path of your PEM file").Trim('"')
You will ask for full path of your PEM file.
Now Enter full path of your PEM file (Do not enter the name of the file only)
Then run these commands one by one
command 2: icacls $key /inheritance:r
command 3: icacls $key /remove "*S-1-5-11" "*S-1-1-0" "*S-1-5-32-545"
command 4: $userAccount = [System.Security.Principal.WindowsIdentity]::GetCurrent().Name
command 5: icacls $key /grant:r "${userAccount}:(R)"
Verify permission
command 6: icacls $key
Now connect your server.
ssh -i "path your .pem key" ubuntu@YOUR_SERVER_IP
Example:
ssh -i "D:\KEYPAIR\openvts-linux-key.pem" ubuntu@35.154.147.155
The default username for many AWS Ubuntu images is ubuntu.
When prompted to confirm the server fingerprint, verify it and accept the connection.
You should now see the Linux terminal.
Before installing Open VTS, update the operating system packages.
Run: sudo apt update
Then: sudo apt upgrade -y
Once the commands finish, the server is ready for the next stage.
Open VTS provides an official Linux installation script.
Visit the official download page:
https://openvts.io/download
Navigate to the Linux download section. Copy the command or to install directly, run:
curl -fsSL https://openvts.io/downloads/openvts-install-linux.sh | sudo bash
Once installation is complete, verify the Open VTS services.
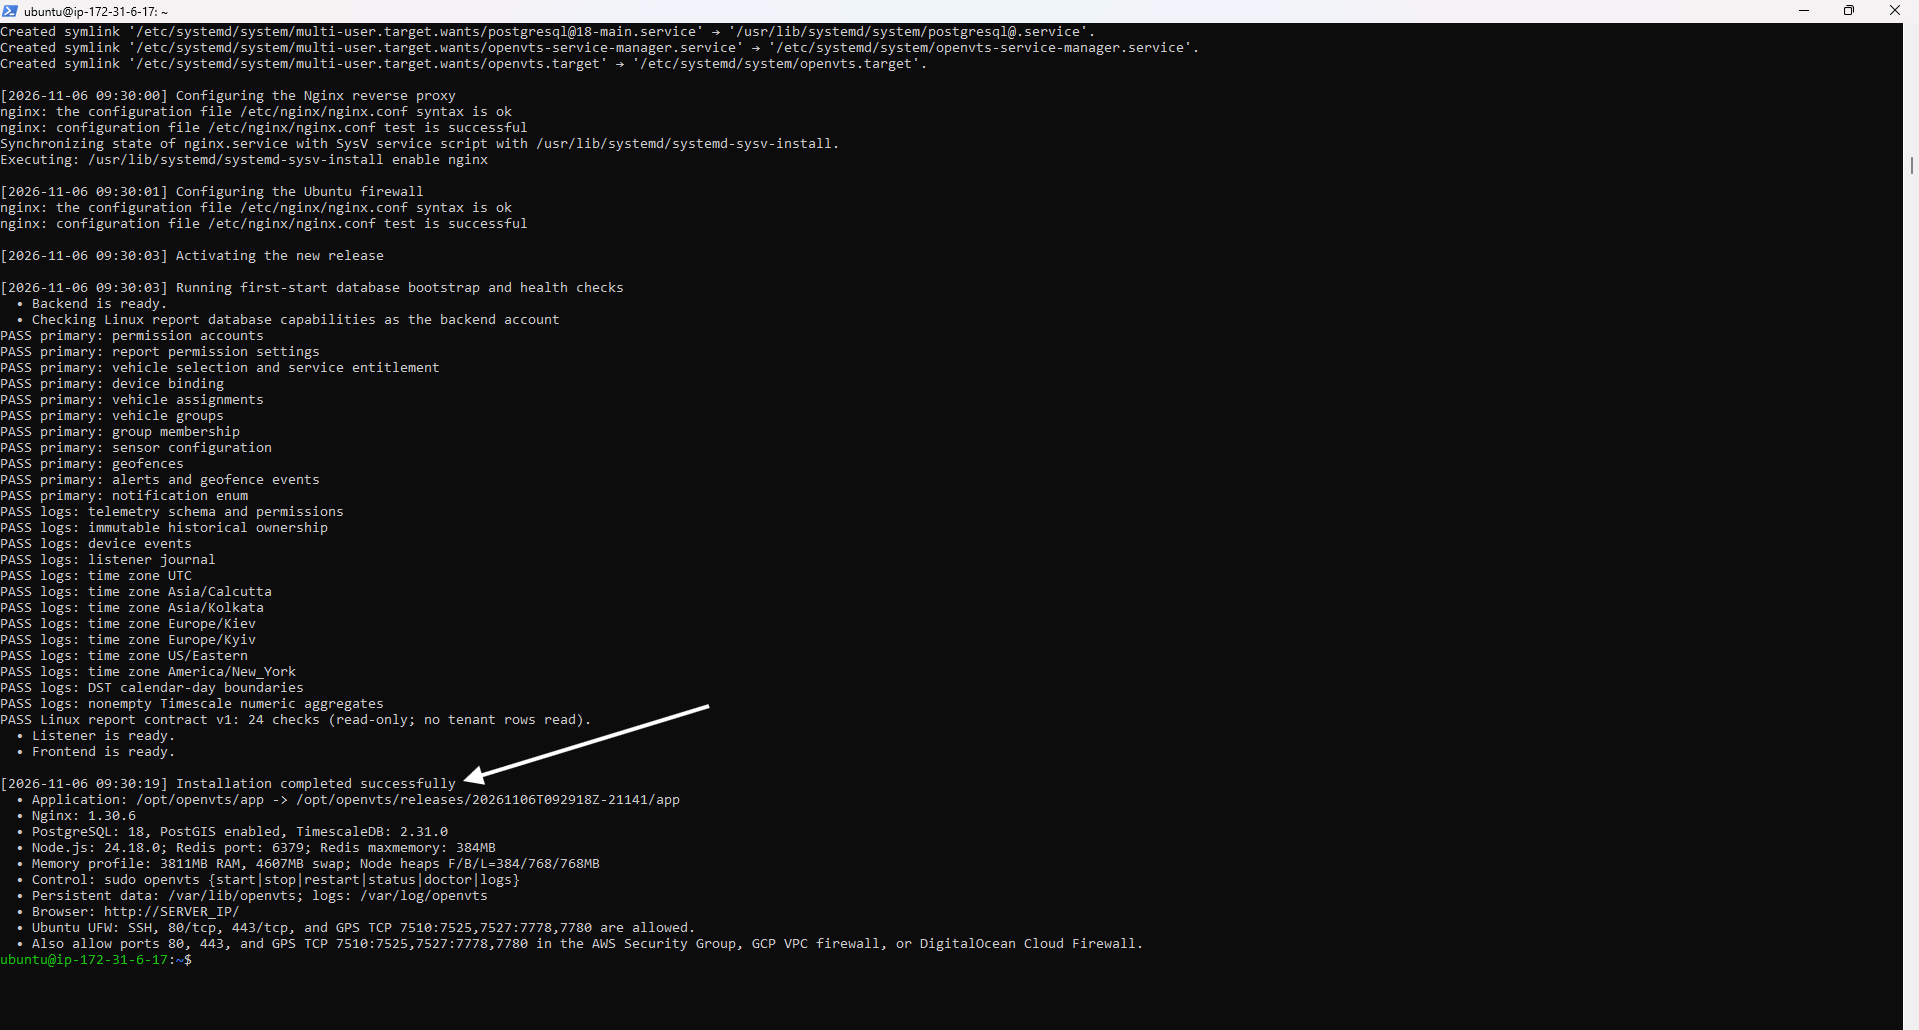
Run: sudo openvts status
This command is used to check the application service status.
Next, run: sudo openvts doctor
The doctor command is provided to diagnose the Open VTS installation and its service environment.
Review the output and resolve any reported errors before continuing.
After confirming that the required services are running, open a web browser on your local computer.
Enter your server's public IP address:
http://YOUR_SERVER_IP
For example:
http://203.0.113.10
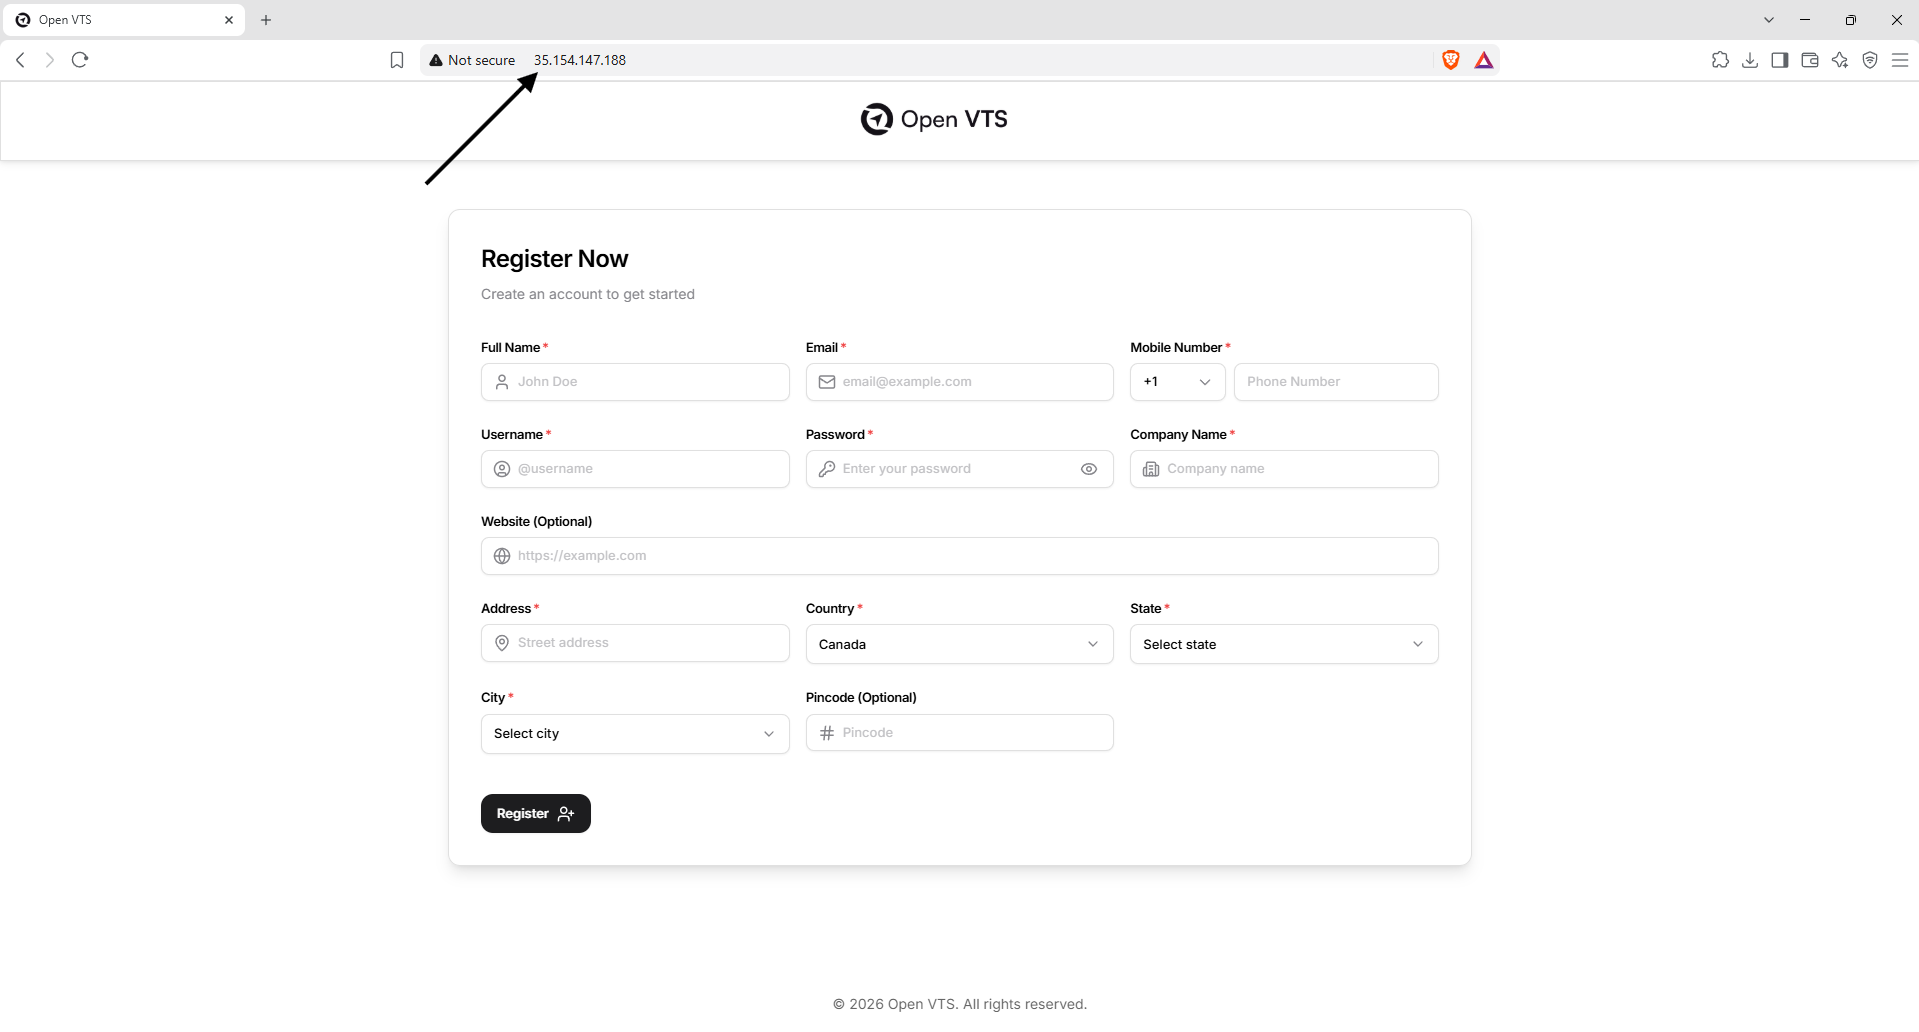
The Open VTS application will load in your browser with the initial registration page.
If the page does not open, check the service status and confirm that port 80 is accessible through the server firewall and cloud security group.
On the first-registration page, enter the requested account information.
Provide the required details, which may include:
Use a strong, unique password and an email address controlled by your organization.
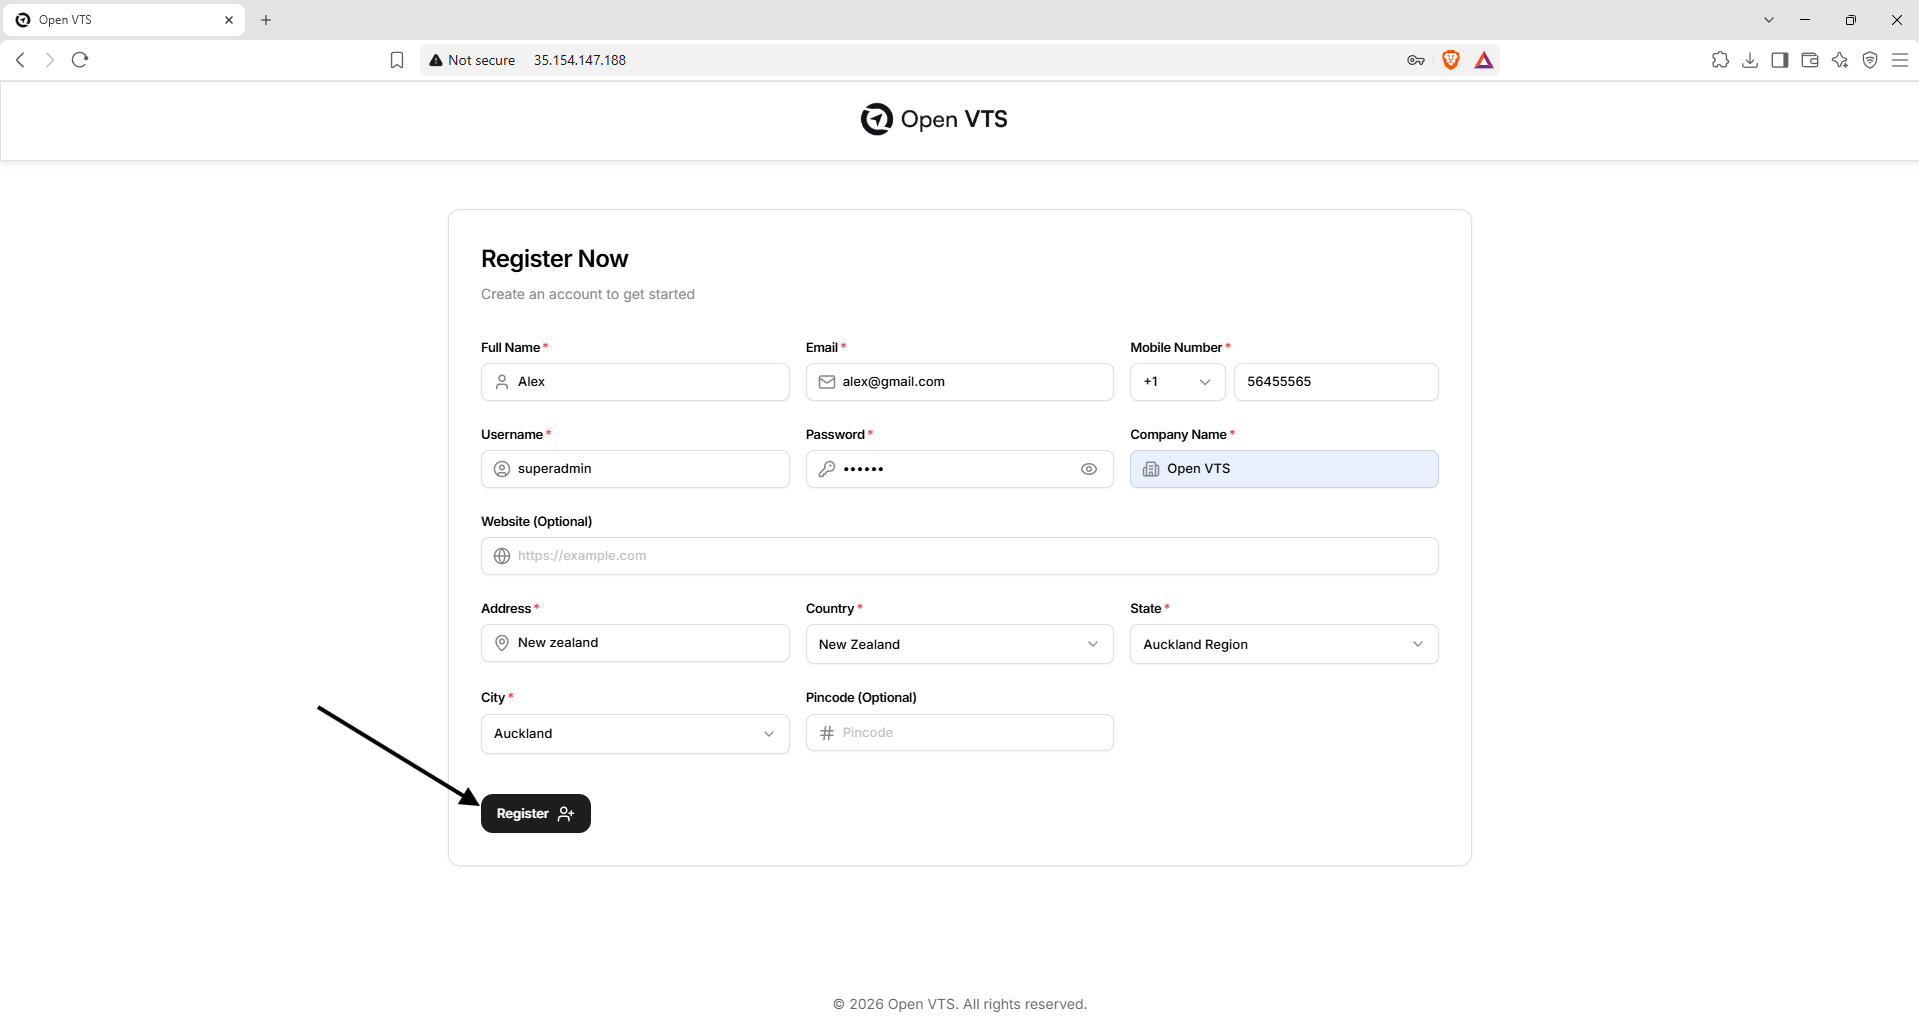
Complete the registration form and select Register.
The first Superadmin account will be created for your Open VTS installation.
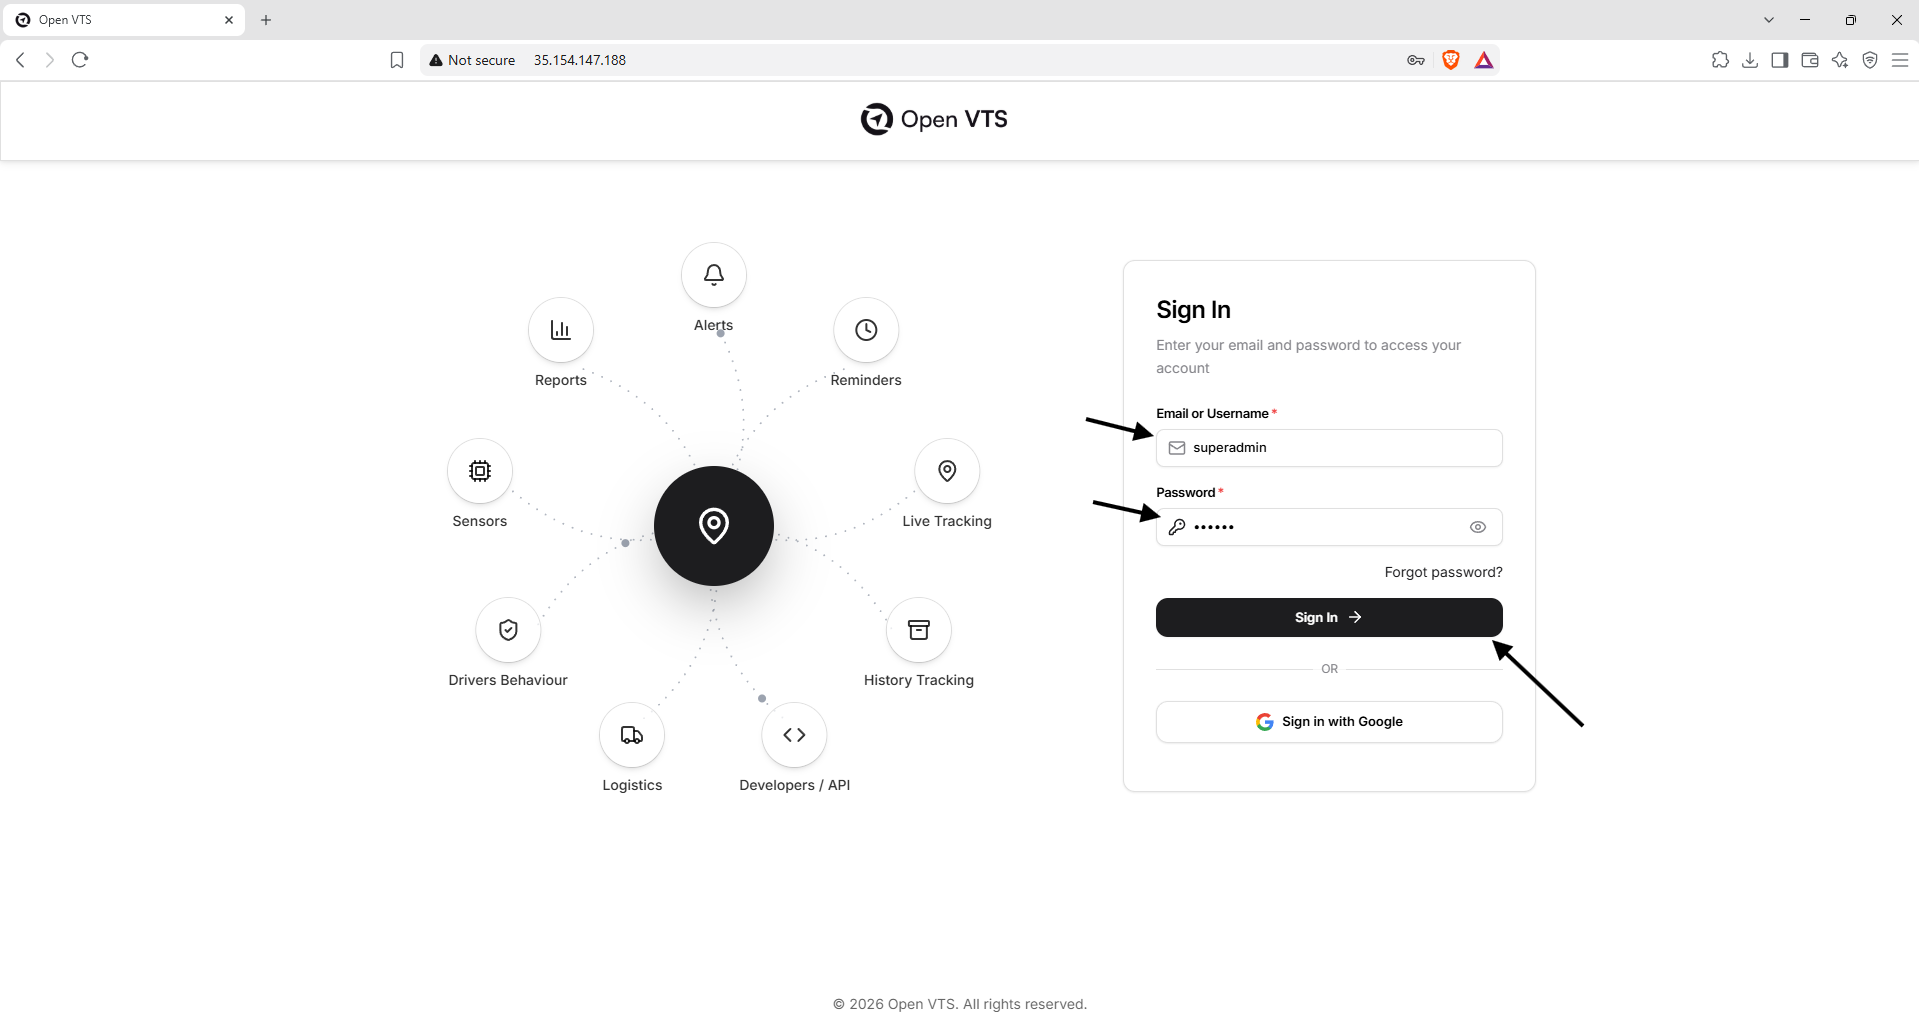
Once registration is successful, open the login page.
Enter the username and password created during registration.
Click Sign In.
After successful authentication, the Open VTS Superadmin dashboard should appear.
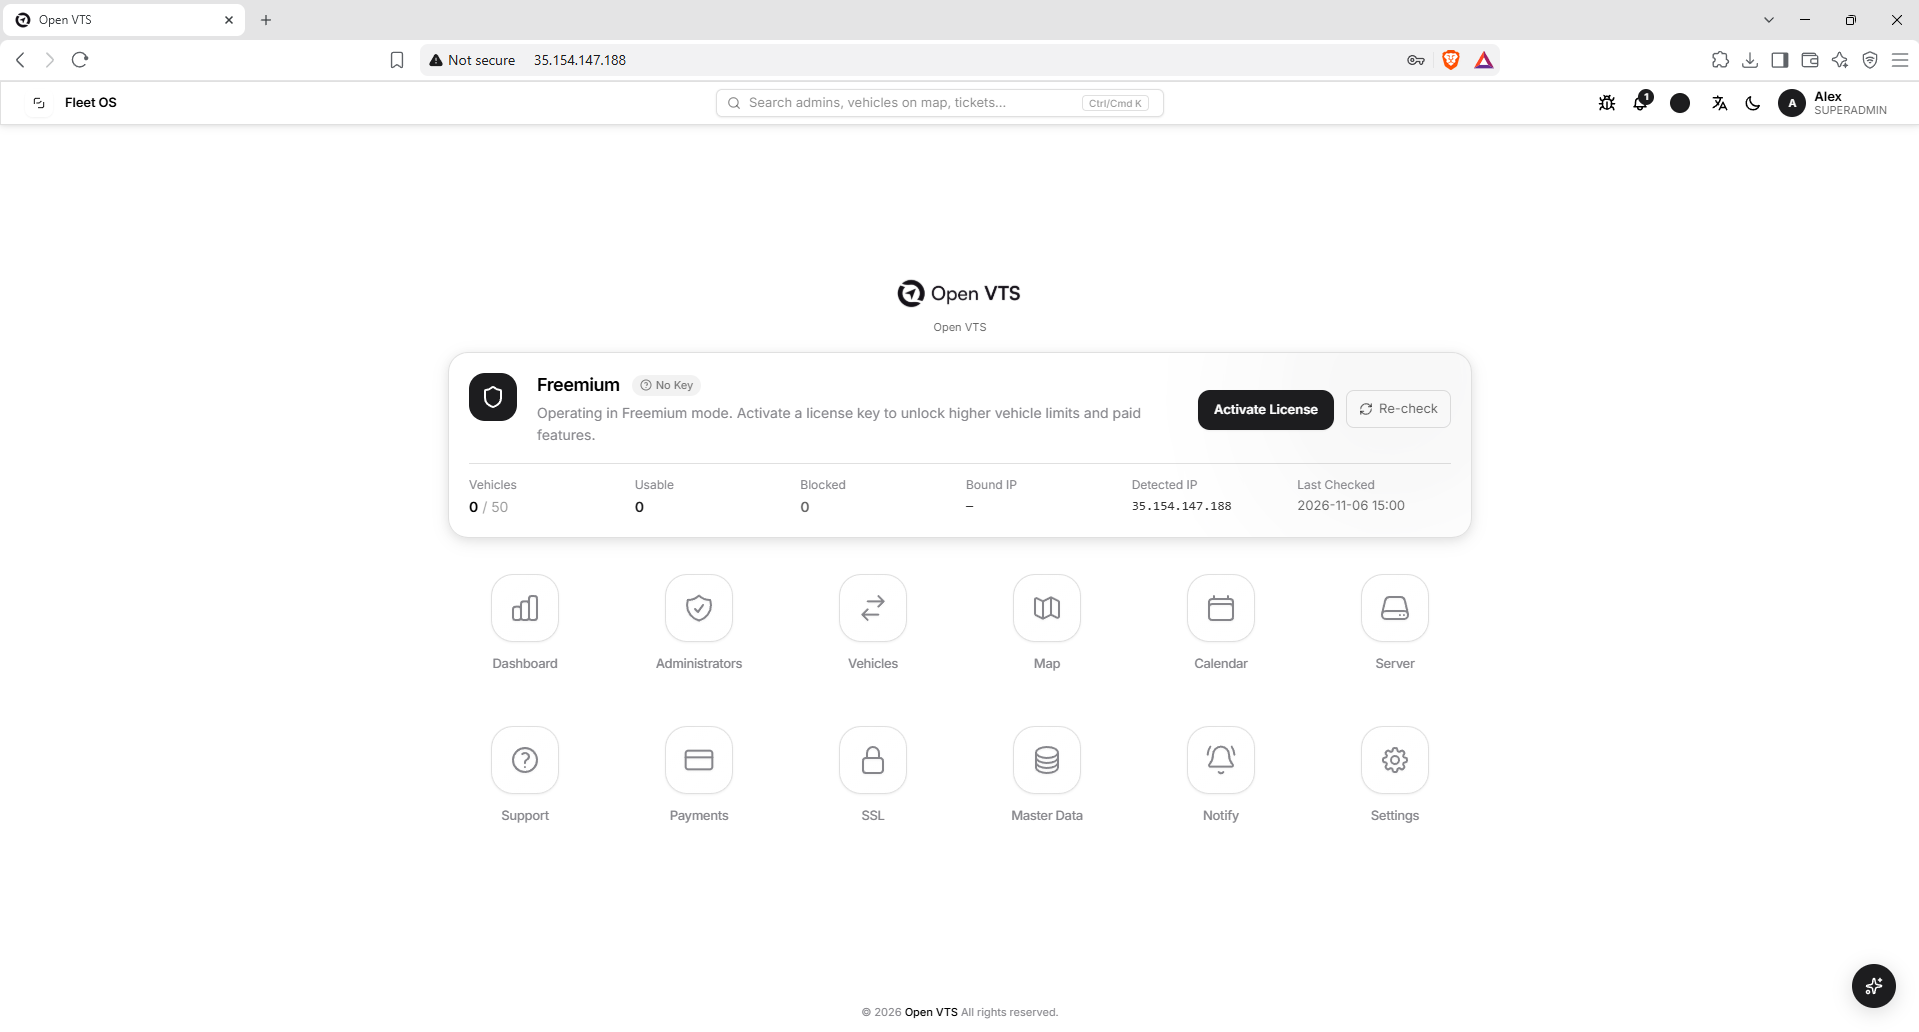
You can now begin configuring your GPS tracking platform.
Before using Open VTS in production, confirm the following:
Once these checks pass, the initial installation is complete.
After signing in as Superadmin, you can begin setting up your fleet-management environment.
The usual onboarding order is:
