
Configure Google OAuth 2.0
Configure Google Sign-In in Open VTS so existing users can access their accounts securely using their Google account.
Last updated August 19, 2026
Configure Google OAuth 2.0
Google OAuth 2.0 enables Sign in with Google on the Open VTS login page. Once configured, users can access their existing Open VTS account through their Google account instead of entering a username and password.
Google login does not automatically create a new Open VTS account. The Google account email must match the email of an existing active Open VTS user.
Before You Begin
You need:
- Superadmin access to Open VTS
- A Google account
- Access to Google Cloud Console
- An active Open VTS domain using HTTPS
- An existing Open VTS account whose email matches the Google account used for testing
For example, when Open VTS is available at:
https://app.openvts.io
use that exact website origin when configuring Google OAuth.
Open the Google OAuth Configuration
From the Open VTS homepage, go to:
Settings → API Config → Google OAuth 2.0
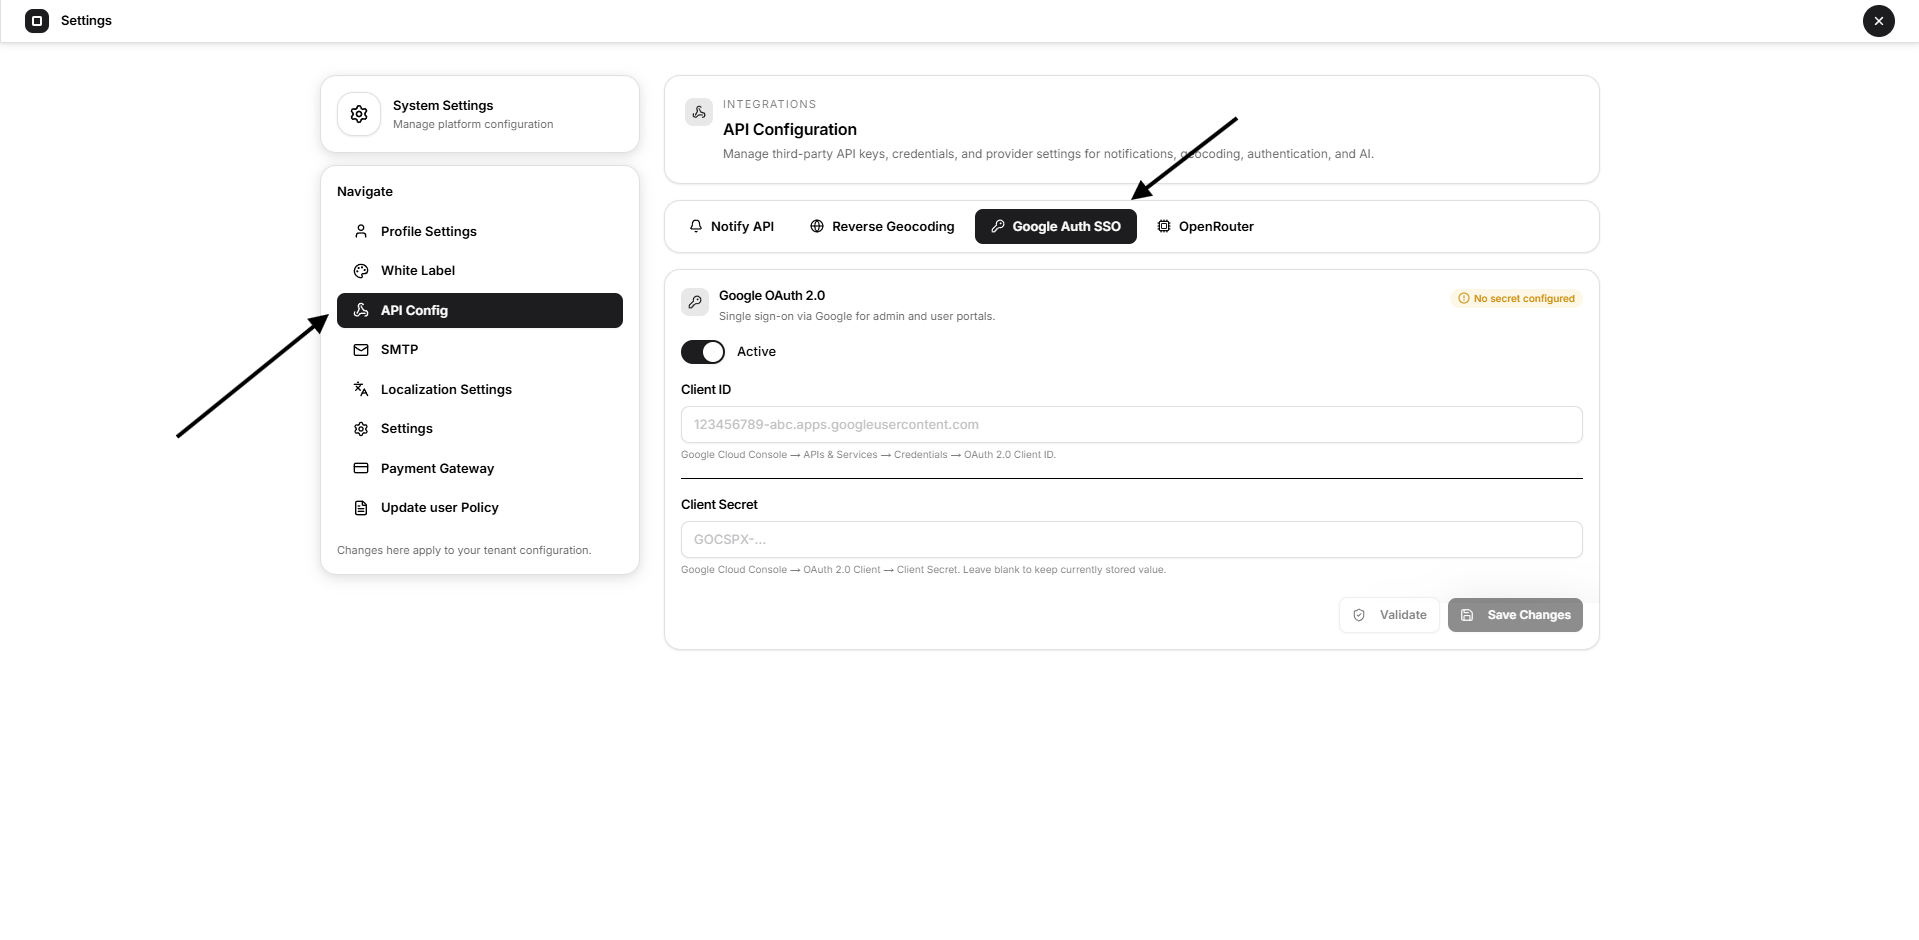
The configuration contains:
- Active toggle
- Client ID
- Client Secret
- Validate option
- Save Changes button
Step 1: Open Google Cloud Console
Open Google Cloud Console in a new browser tab.
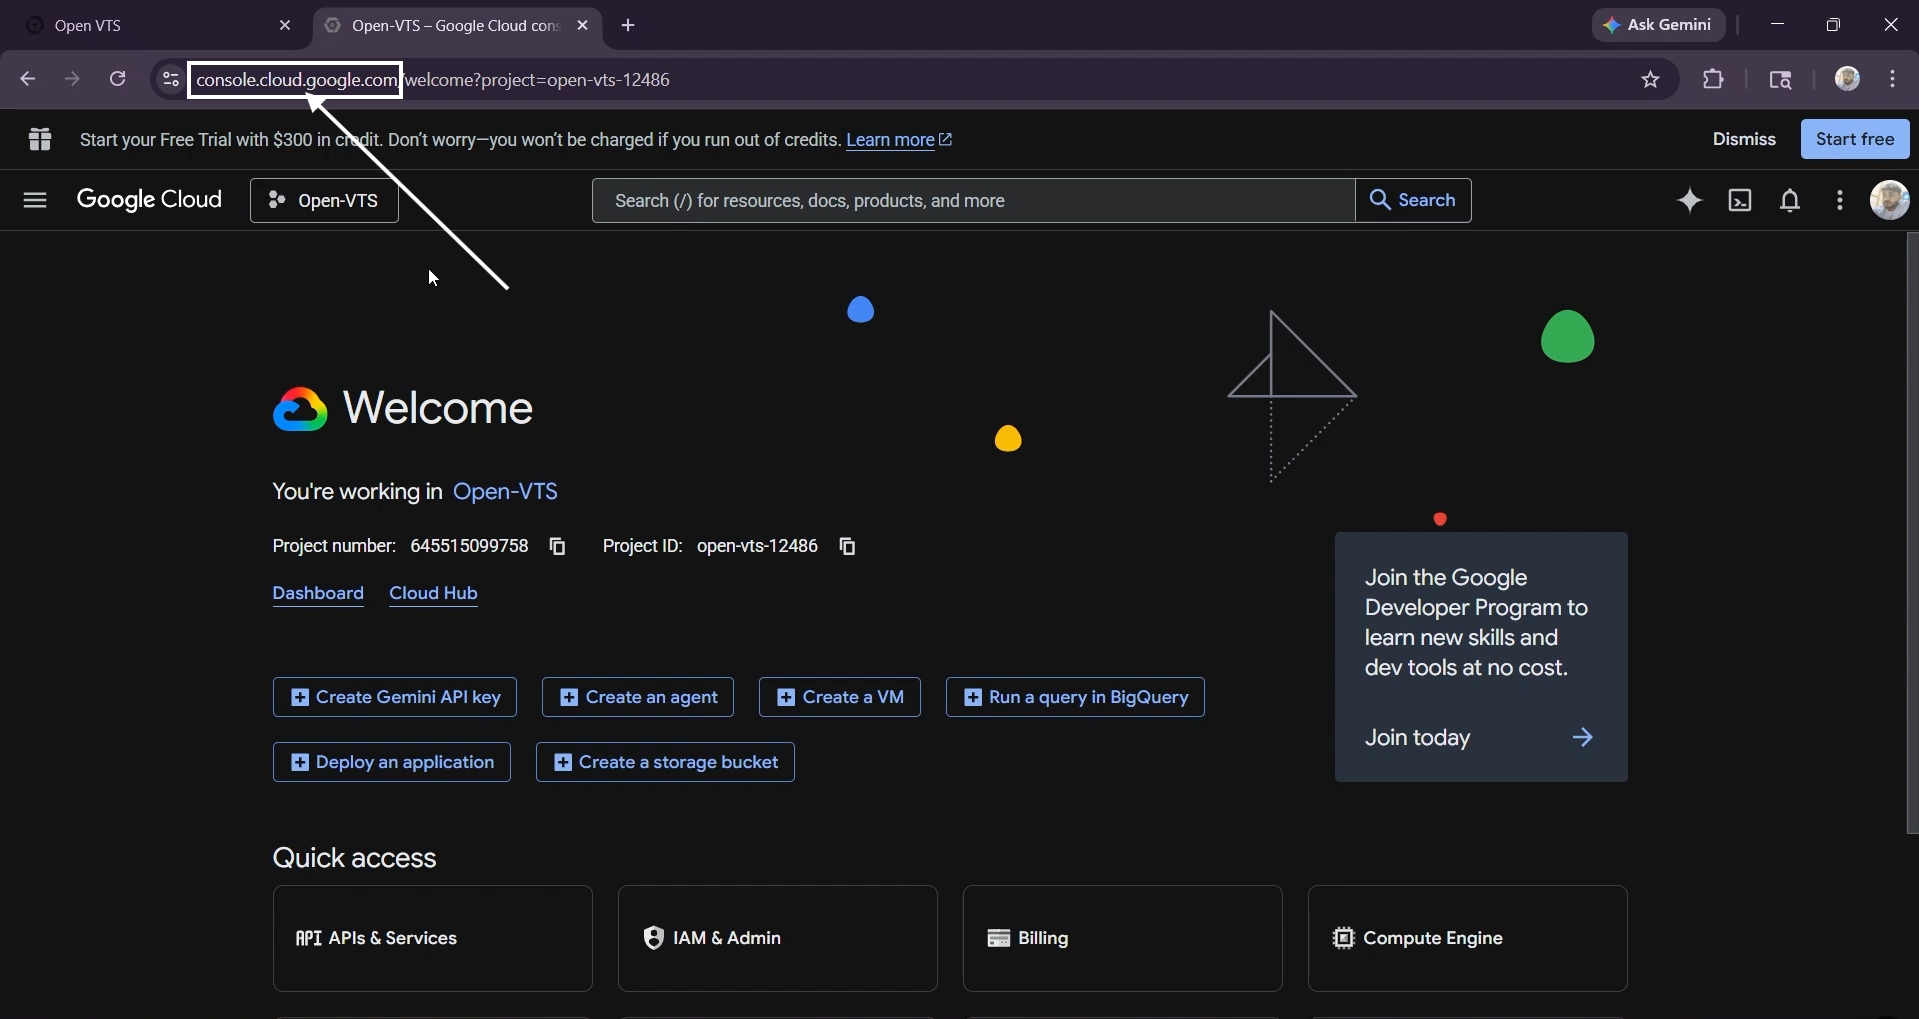
Select the project that you want to use for Open VTS. You may use an existing Firebase or Google Cloud project, or create a separate project for Open VTS authentication.
Make sure the correct project is selected before continuing.
Step 2: Open Google Auth Platform
From the Google Cloud project:
Select View All Products.
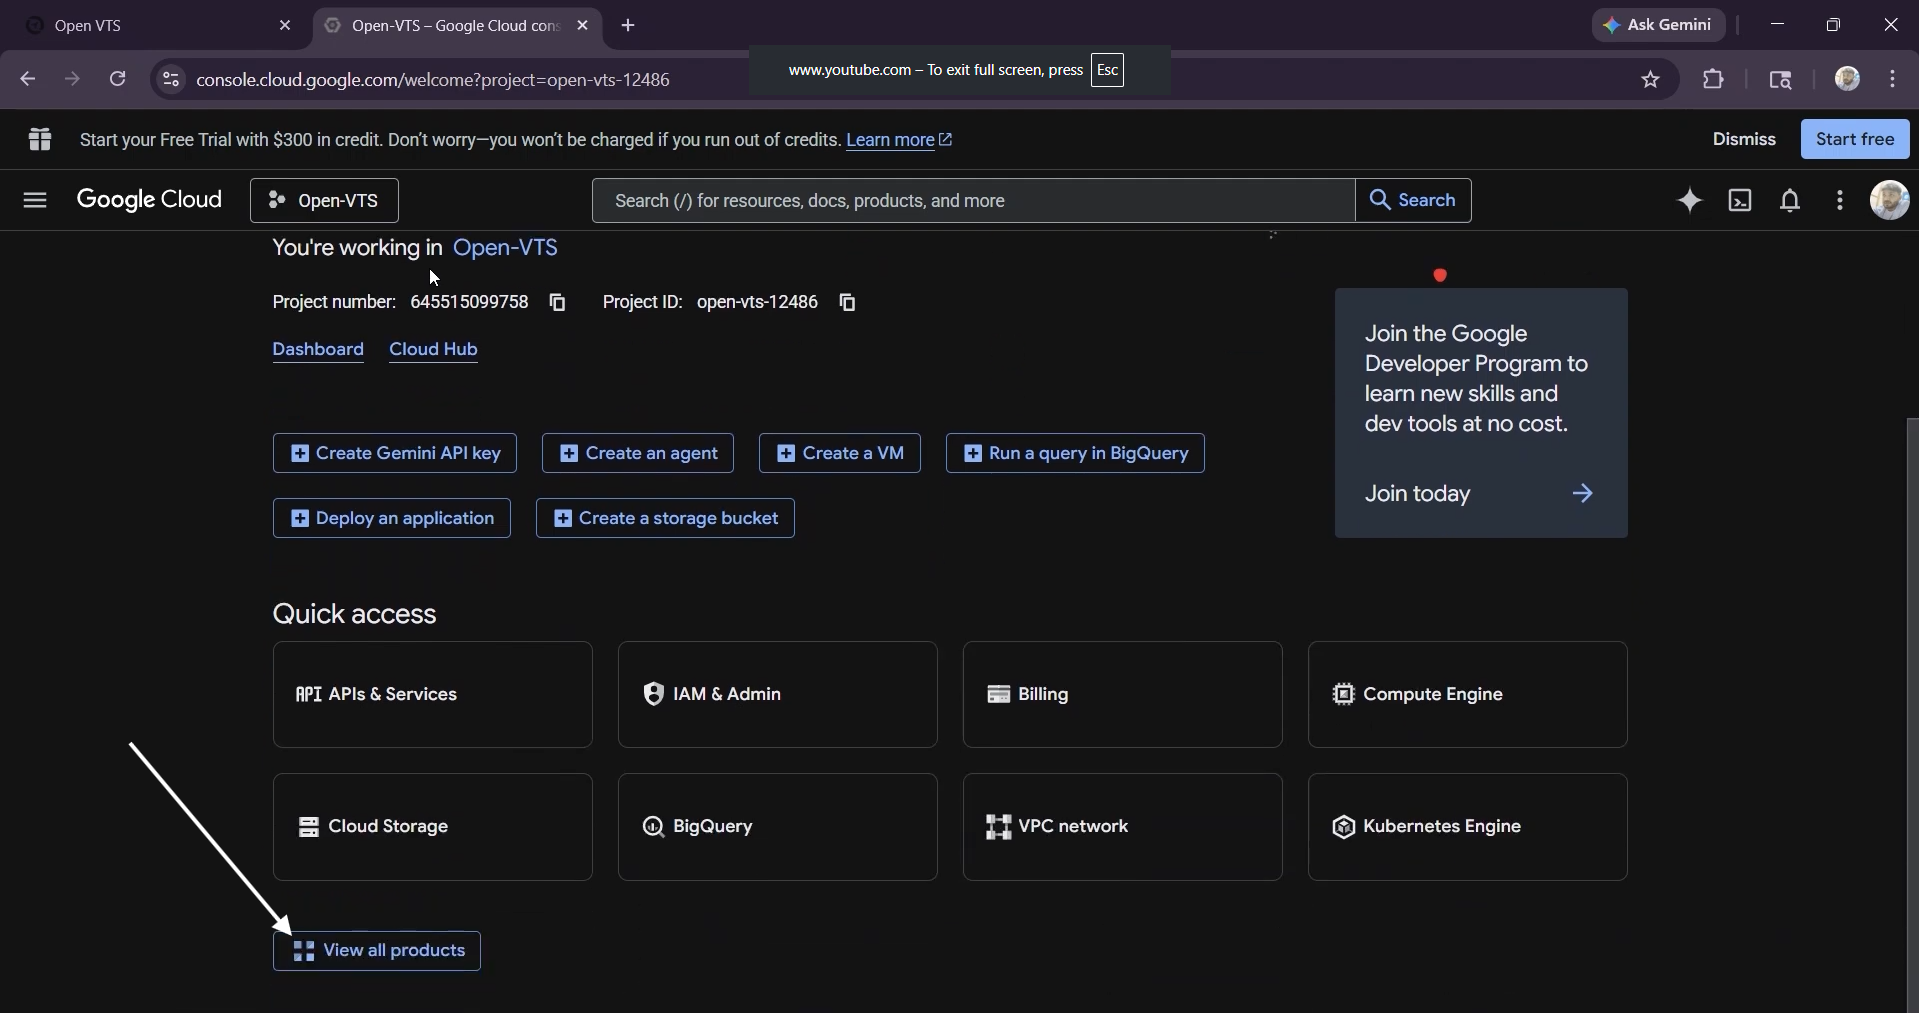
Open Google Auth Platform.
Select Get Started.
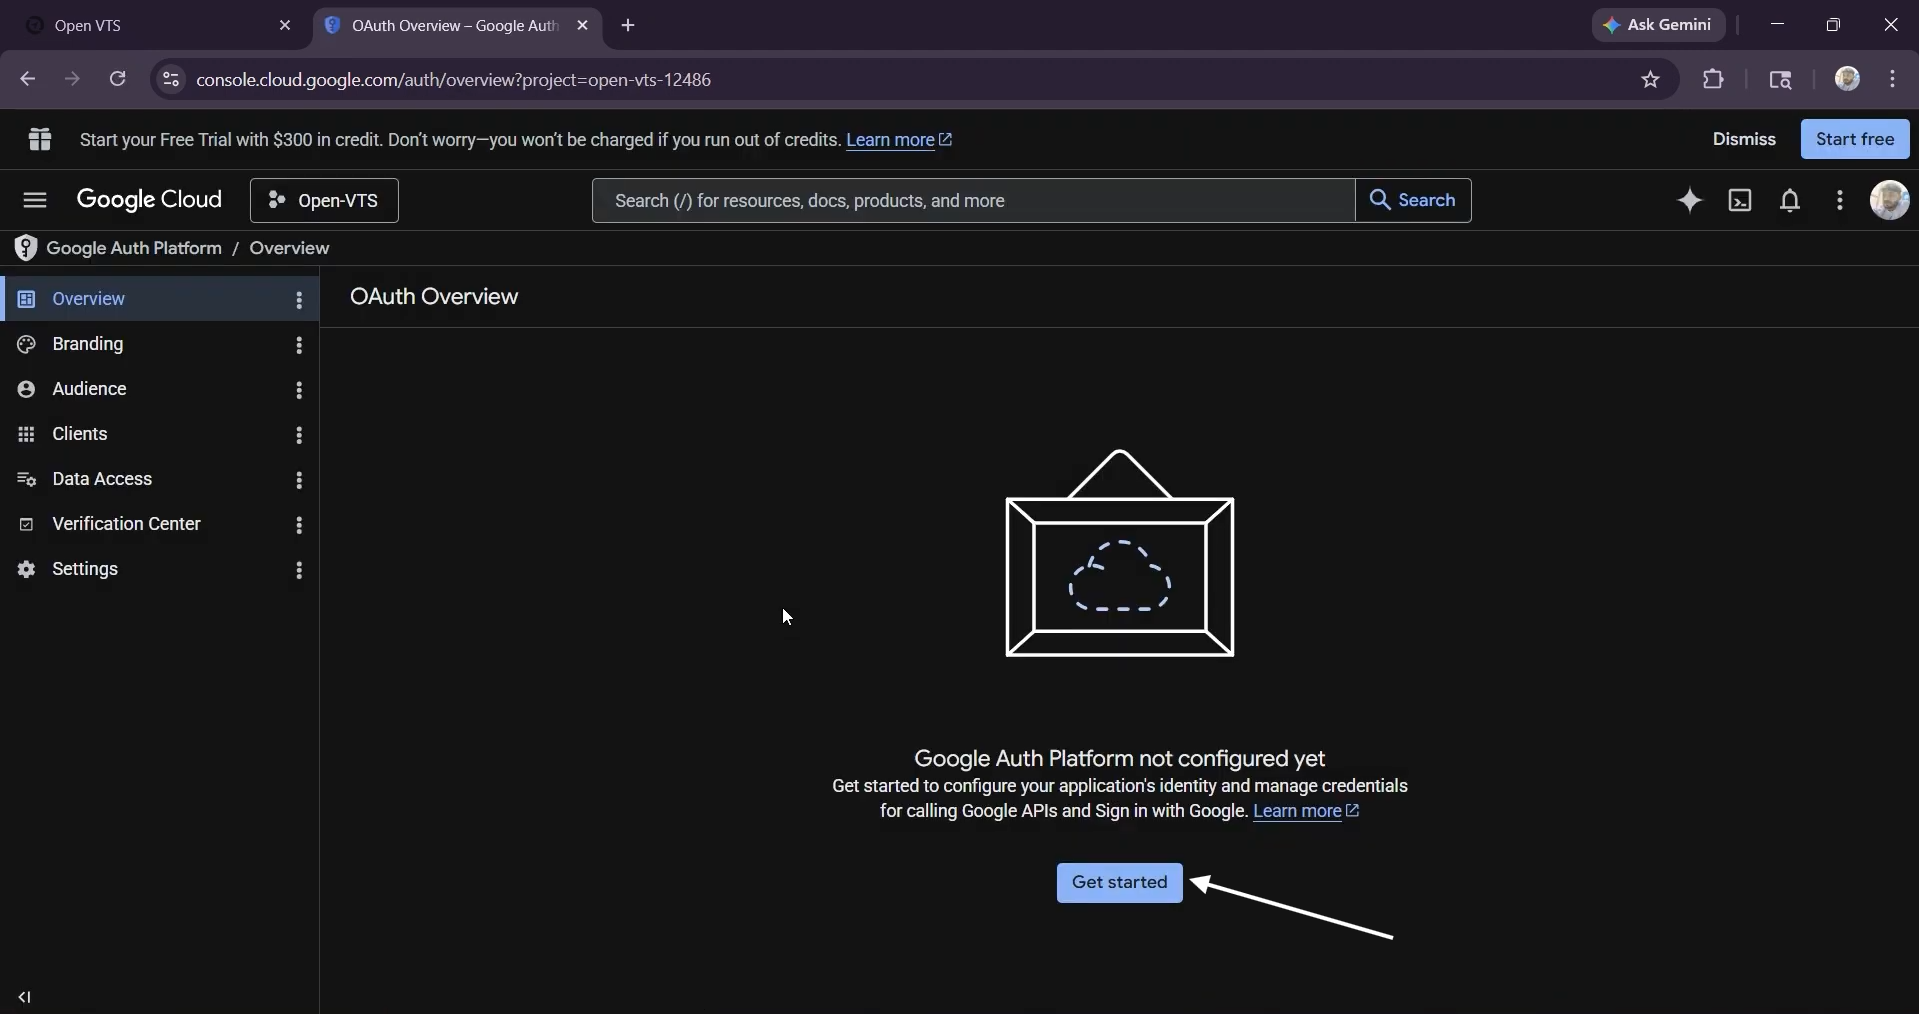
Google Auth Platform is used to configure the application identity, audience, permissions, and OAuth credentials.
Step 3: Configure App Information
In the App Information section:
Enter the application name, such as Open VTS or your white-label brand name.
Select the user support email.
Select Next.
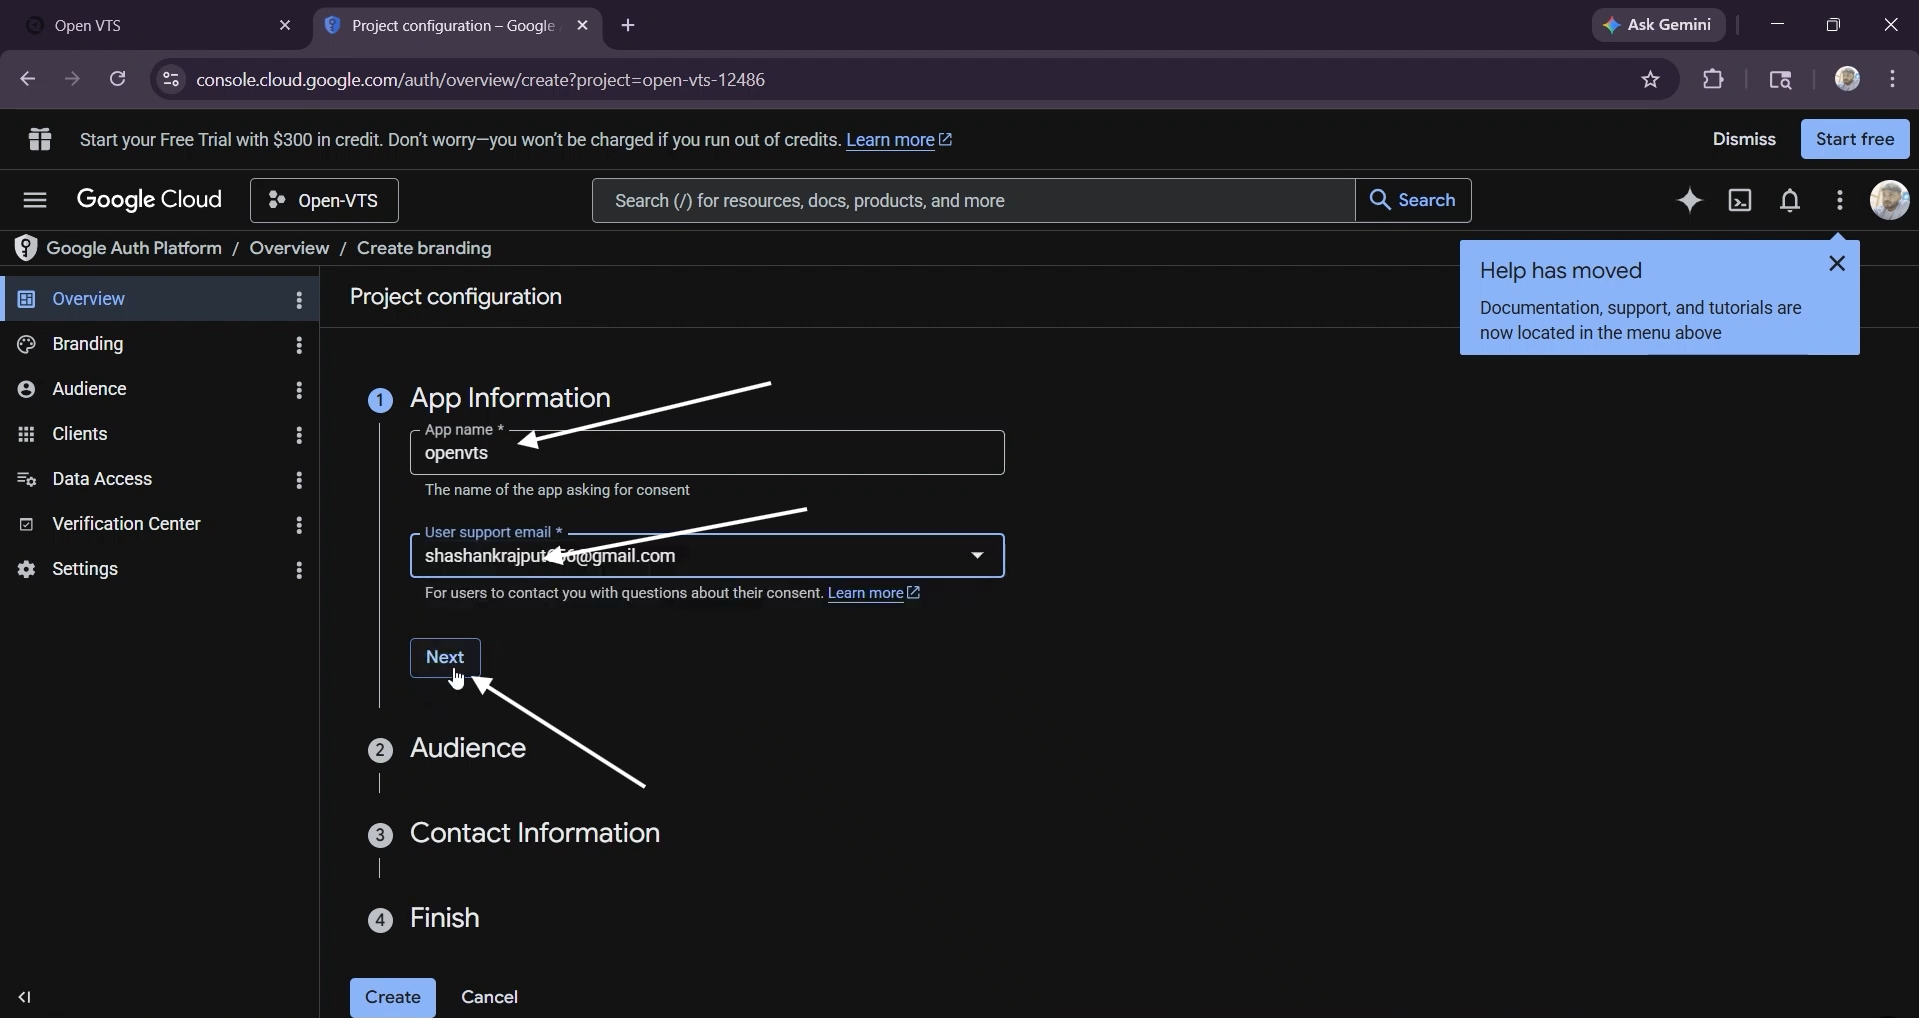
The application name and support details may be shown to users during Google authentication.
Step 4: Select the Audience
Choose External when users outside your Google Workspace organization need to sign in.
Select Next to continue.
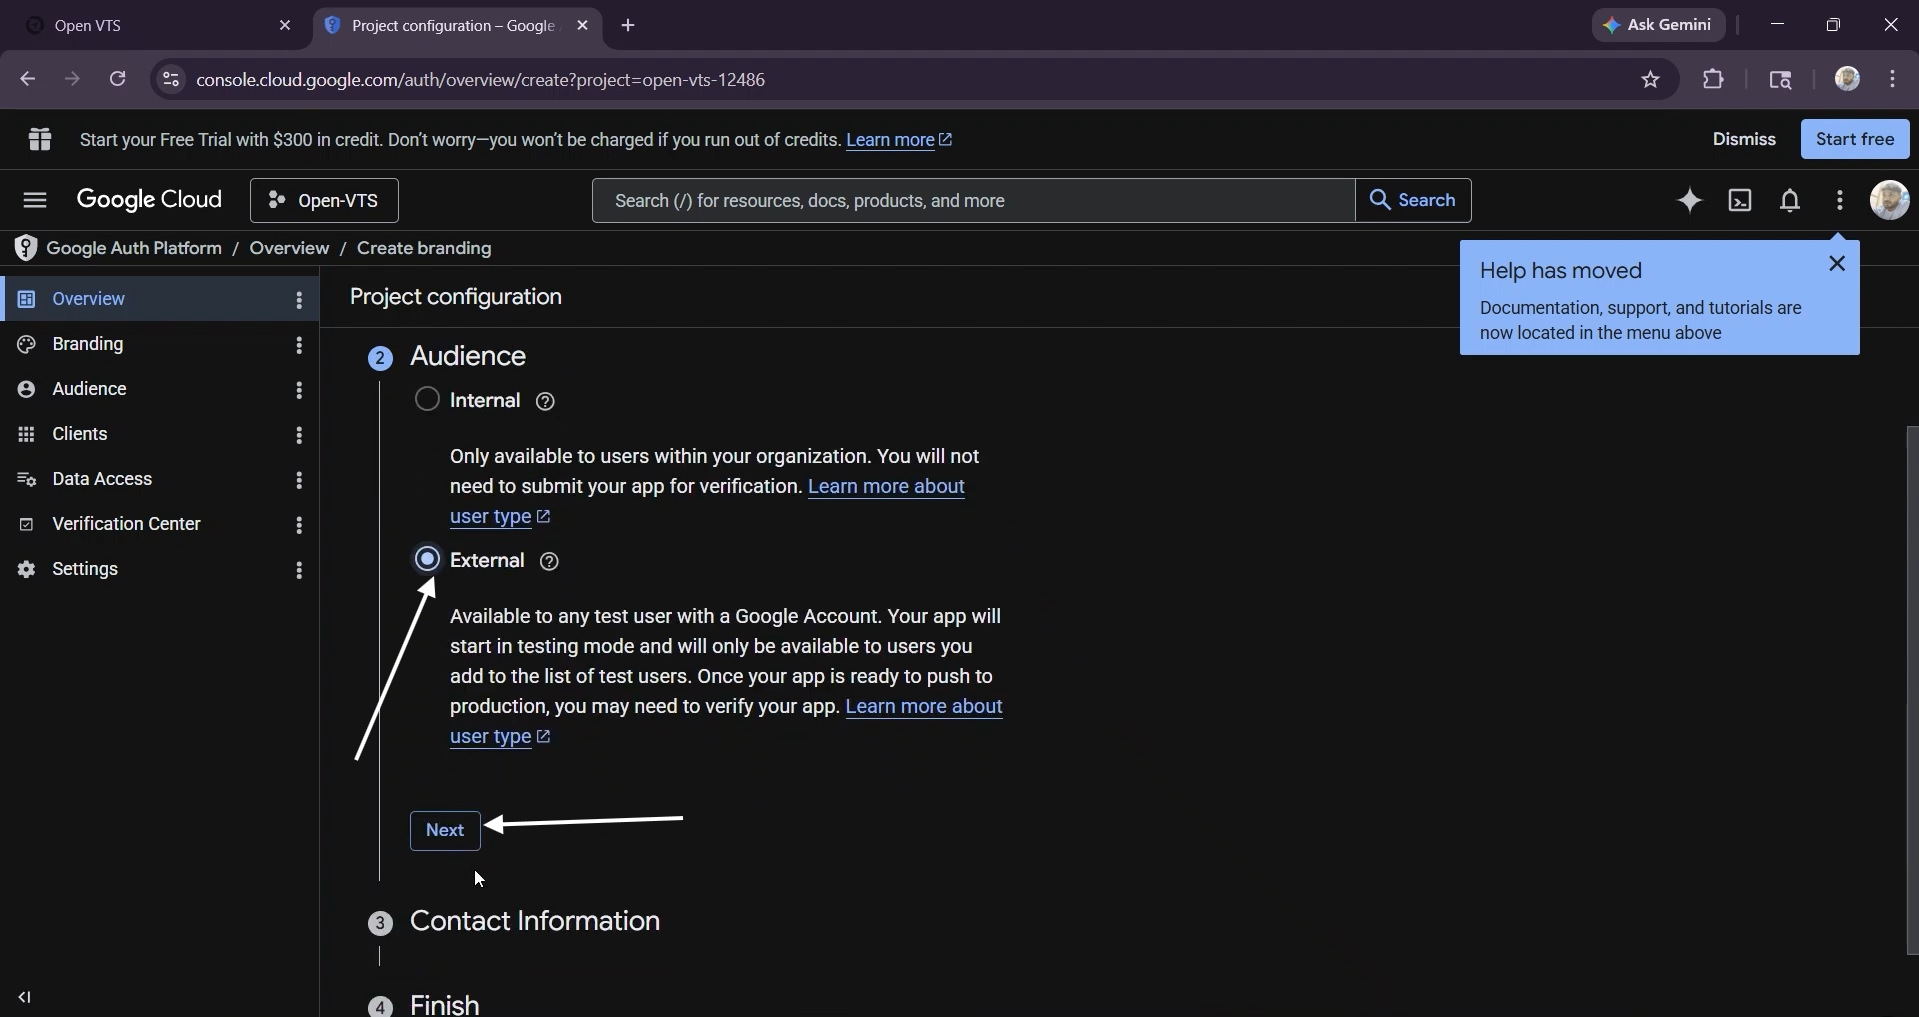
While the application remains in testing mode, only Google accounts added as test users can access it. Google currently allows up to 100 test users for an OAuth application in testing mode.
Step 5: Enter Contact Information
Enter the email address that Google can use to contact you about:
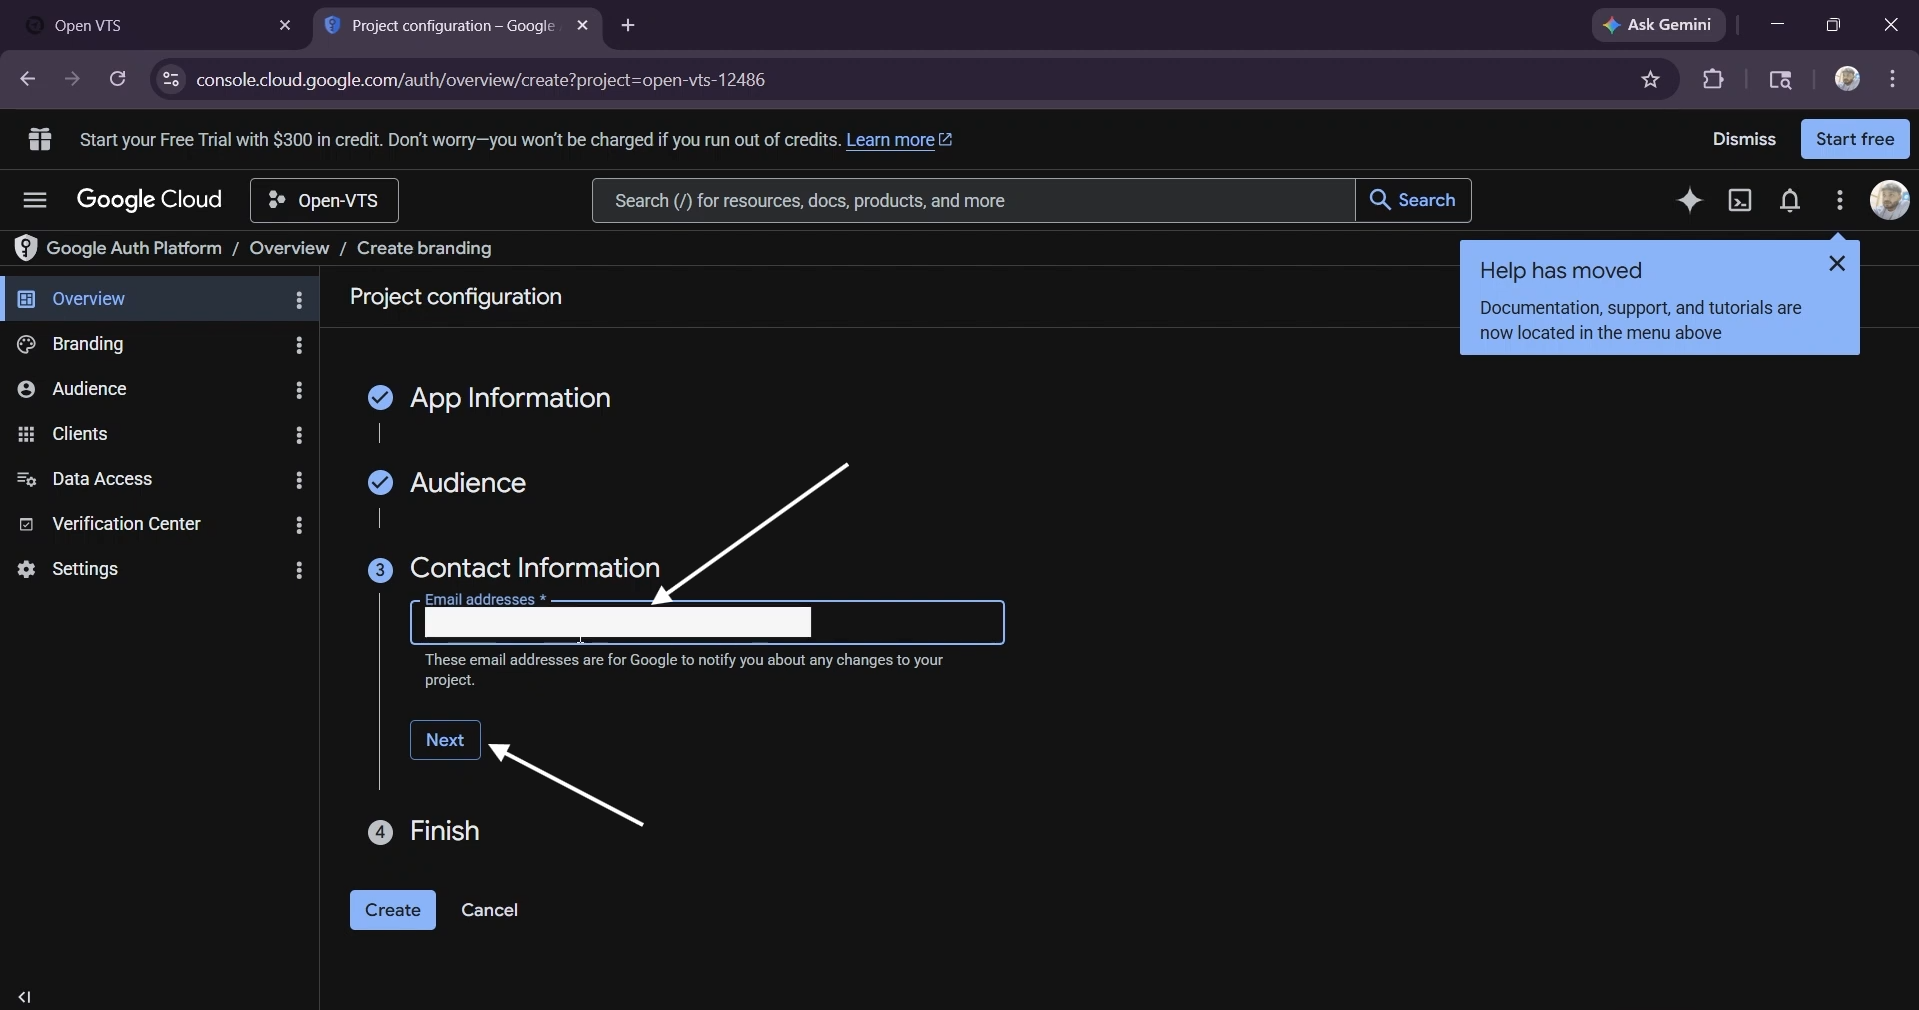
- OAuth configuration
- Application verification
- Policy or security issues
Select Next.
On the final step:
Review the Google API Services User Data Policy.
Accept the required checkbox.
Select Continue.
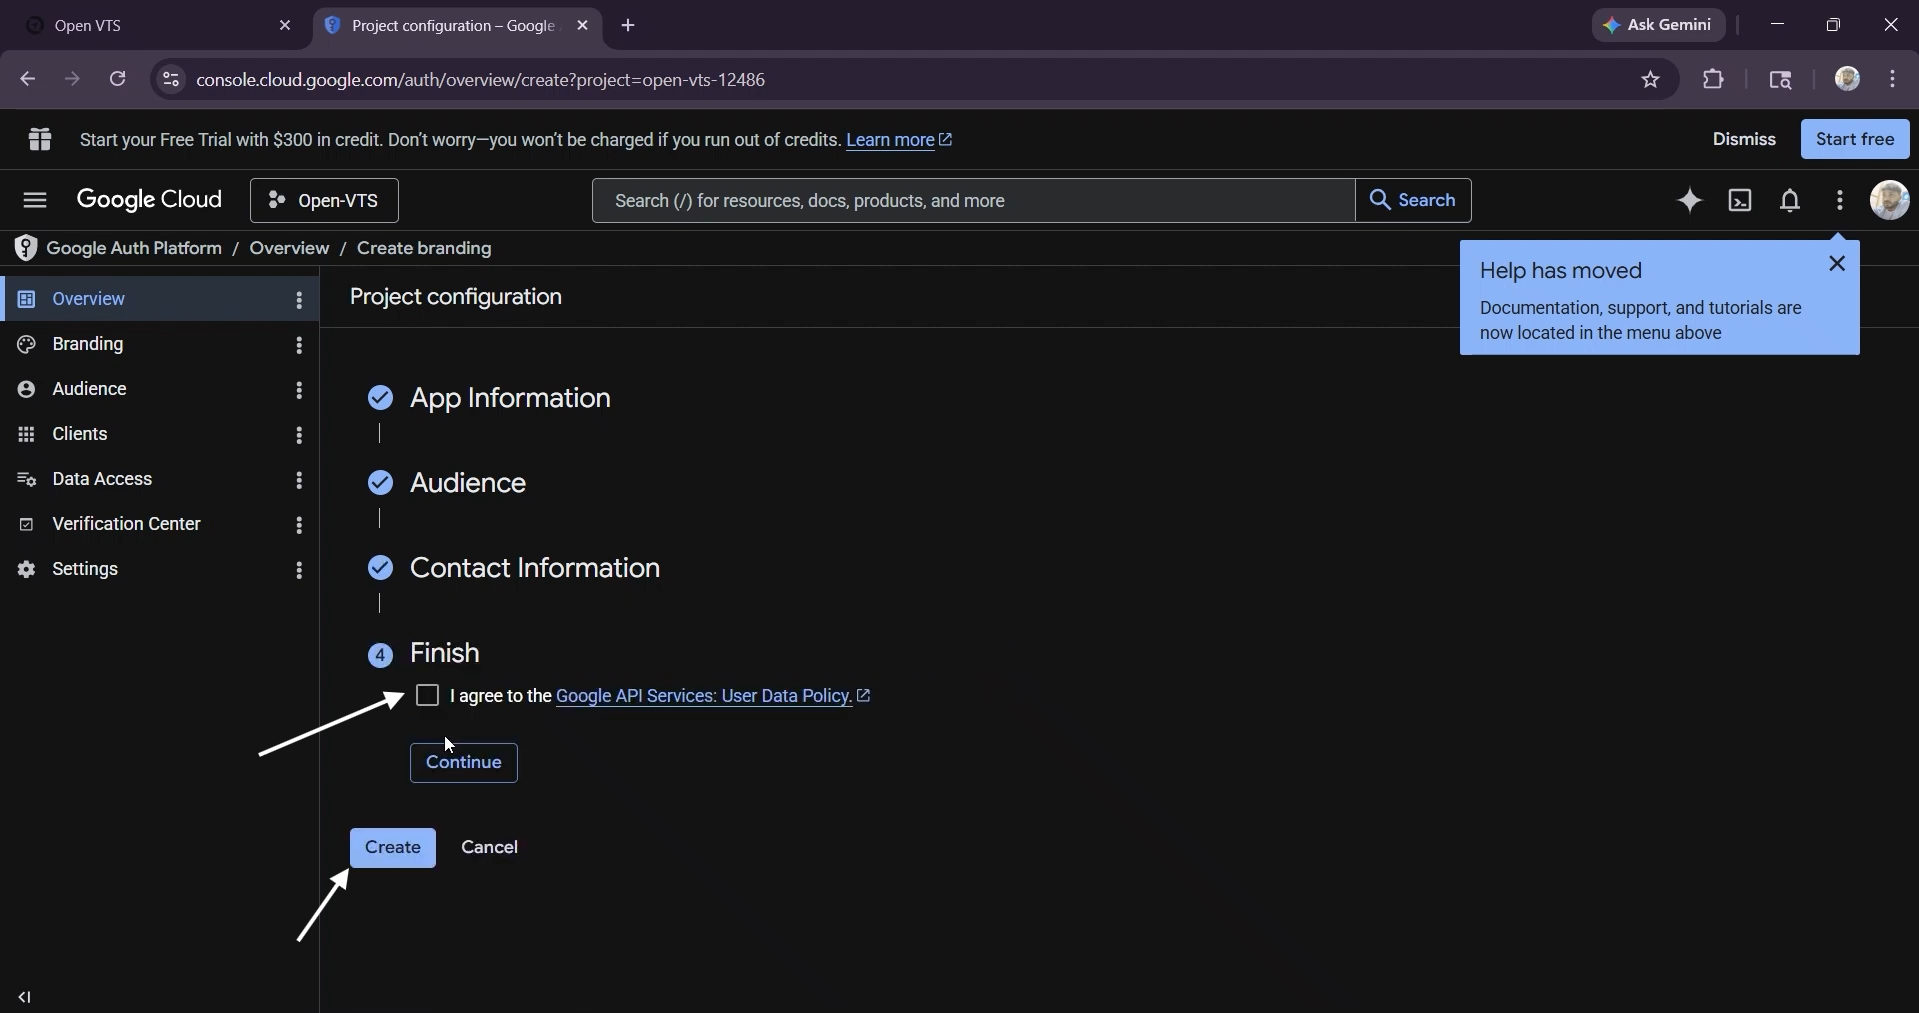
Select Create.
Step 6: Add Test Users
Open:
Google Auth Platform → Audience
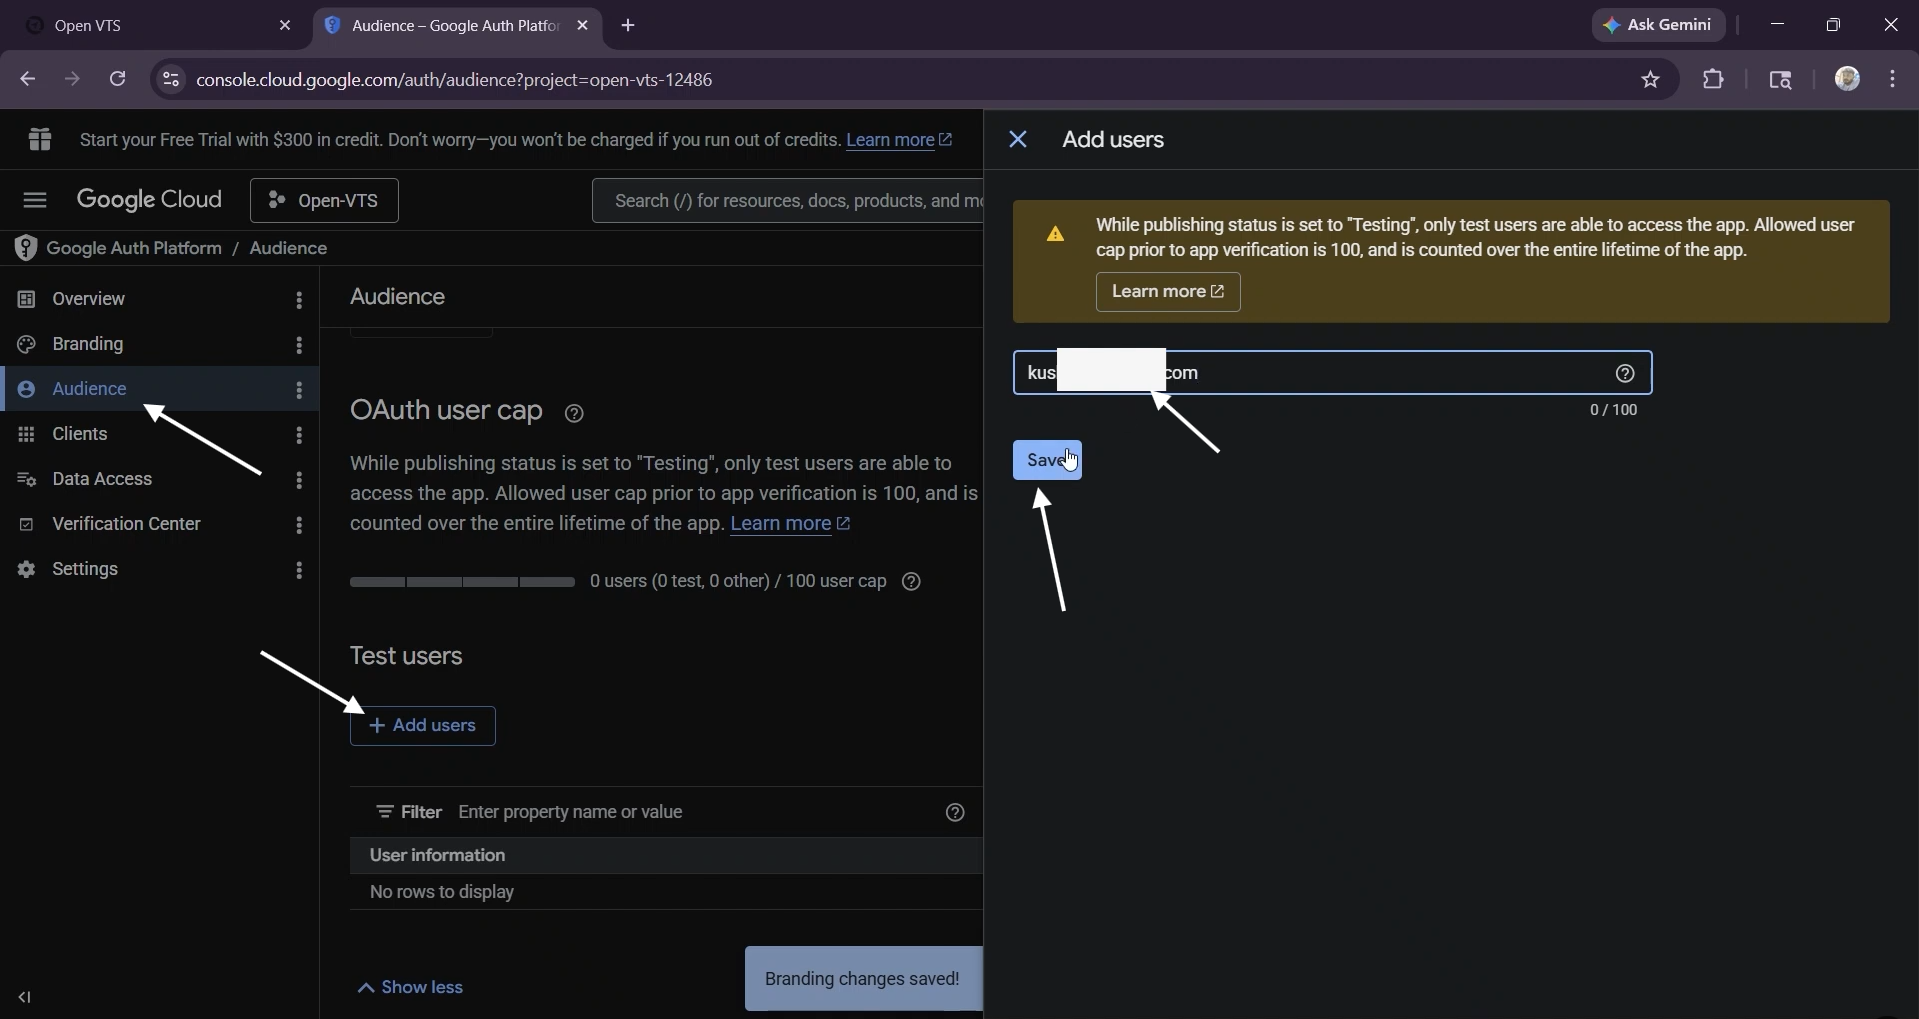
Under Test Users:
Select Add Users.
Enter the Google account email that you will use for testing.
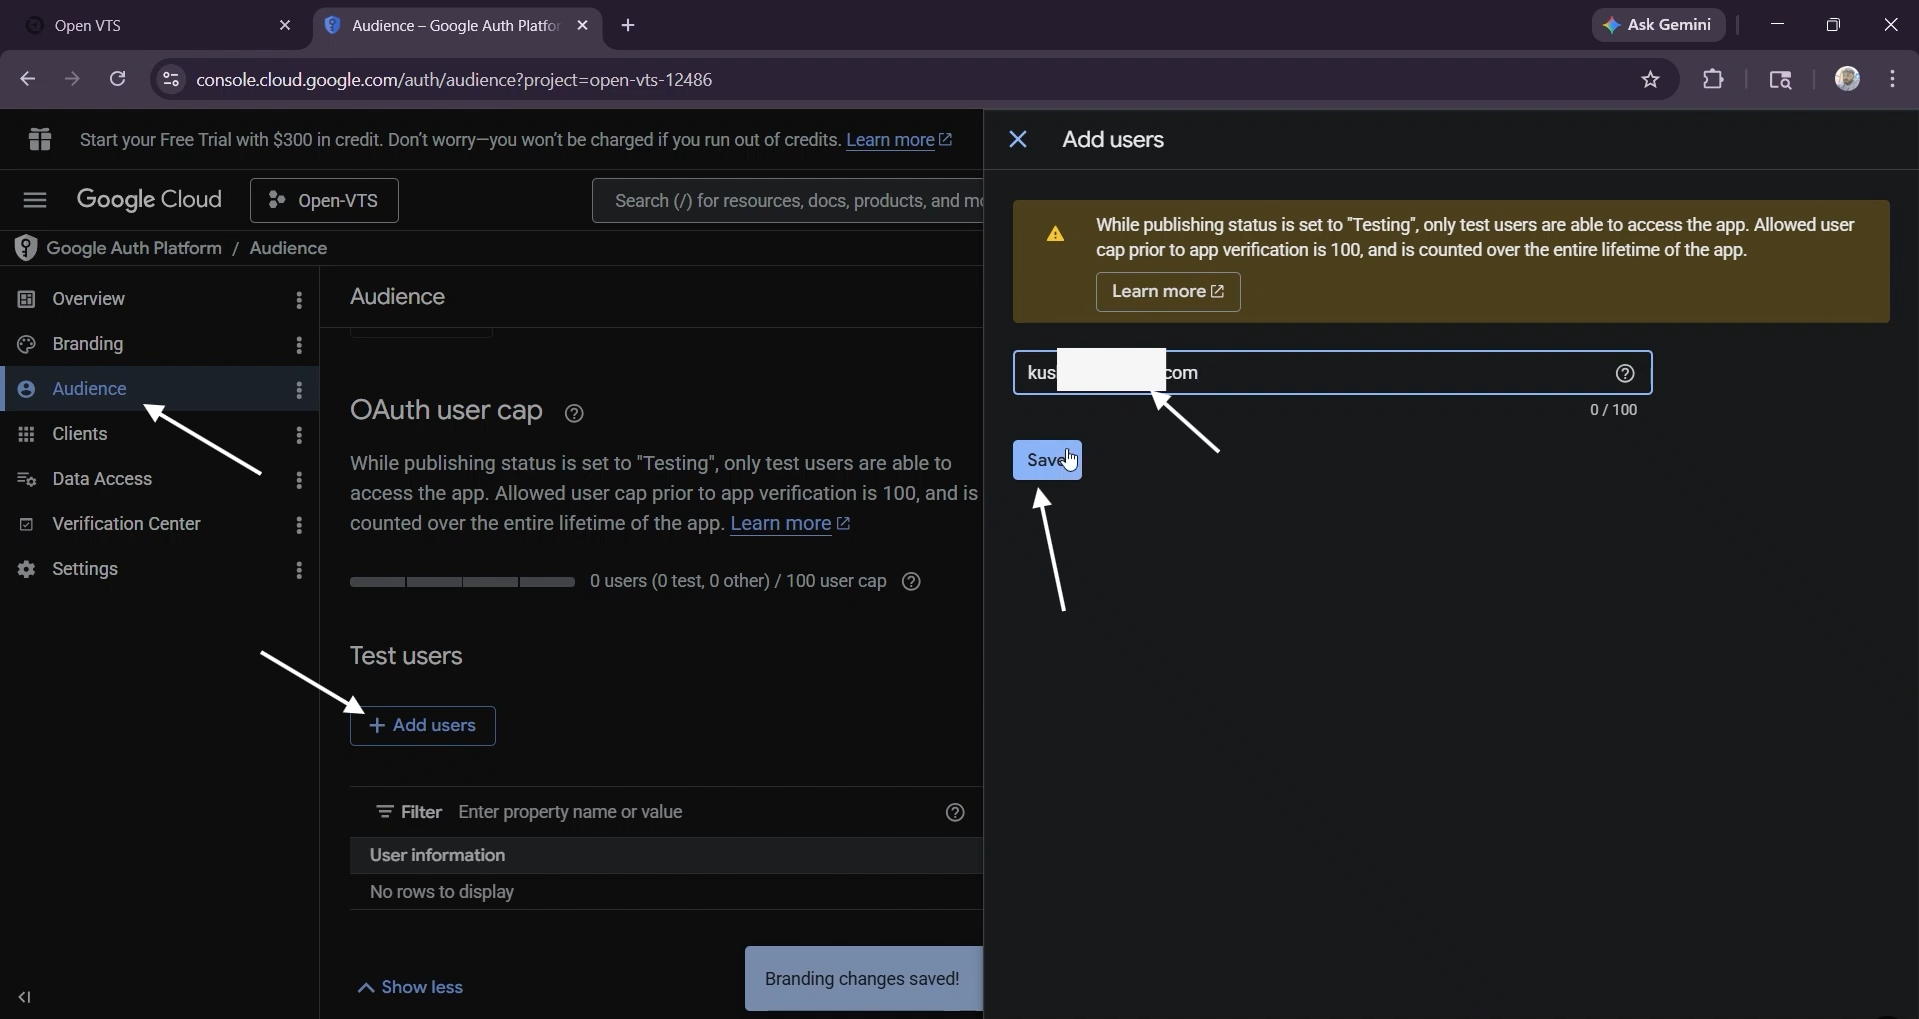
Select Save.
The same email address should already exist on an active Open VTS account.
Example
Google account: user@example.com Open VTS account email: user@example.com
Both email addresses must match.
Step 7: Configure Data Access
Open:
Google Auth Platform → Data Access
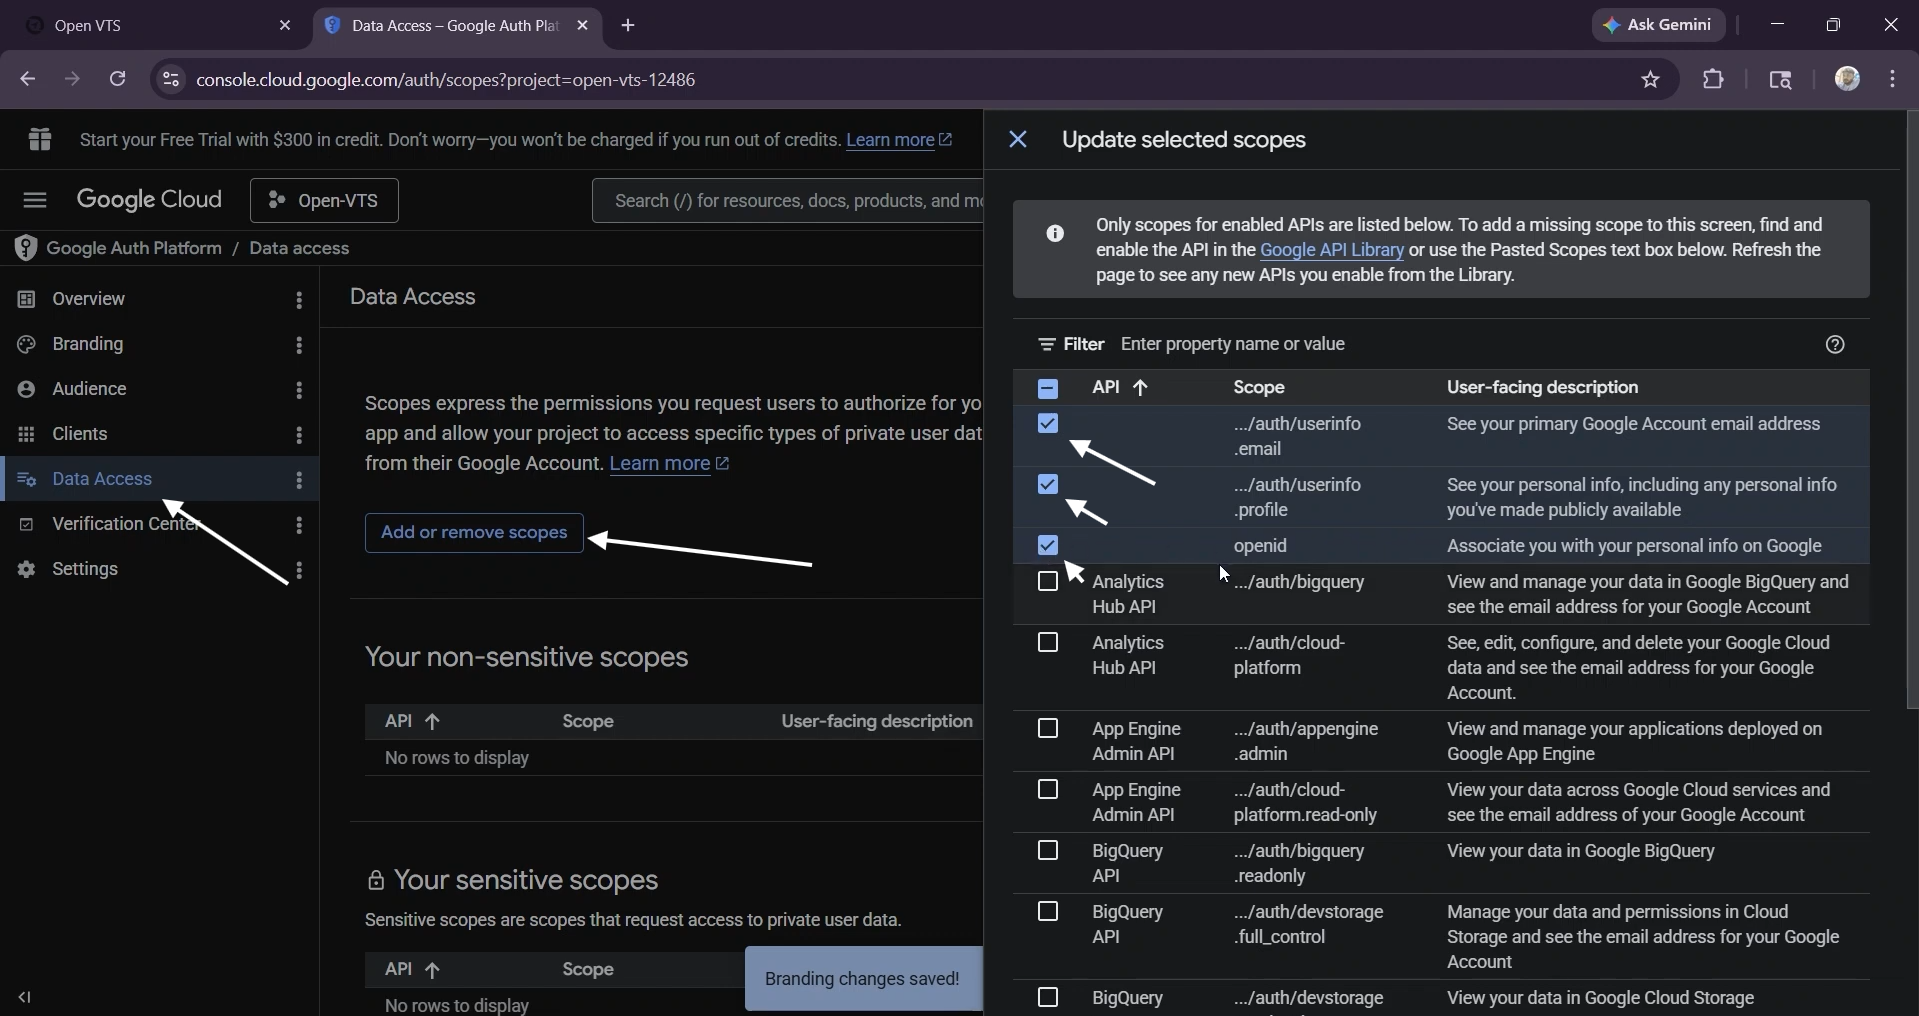
Select Add or Remove Scopes and add the basic identity scopes:
openid https://www.googleapis.com/auth/userinfo.email https://www.googleapis.com/auth/userinfo.profile
These permissions allow Open VTS to identify the Google account and retrieve its email and basic profile information. Google recommends declaring the scopes required by the application on the consent screen.
After selecting the scopes:
Select Update.
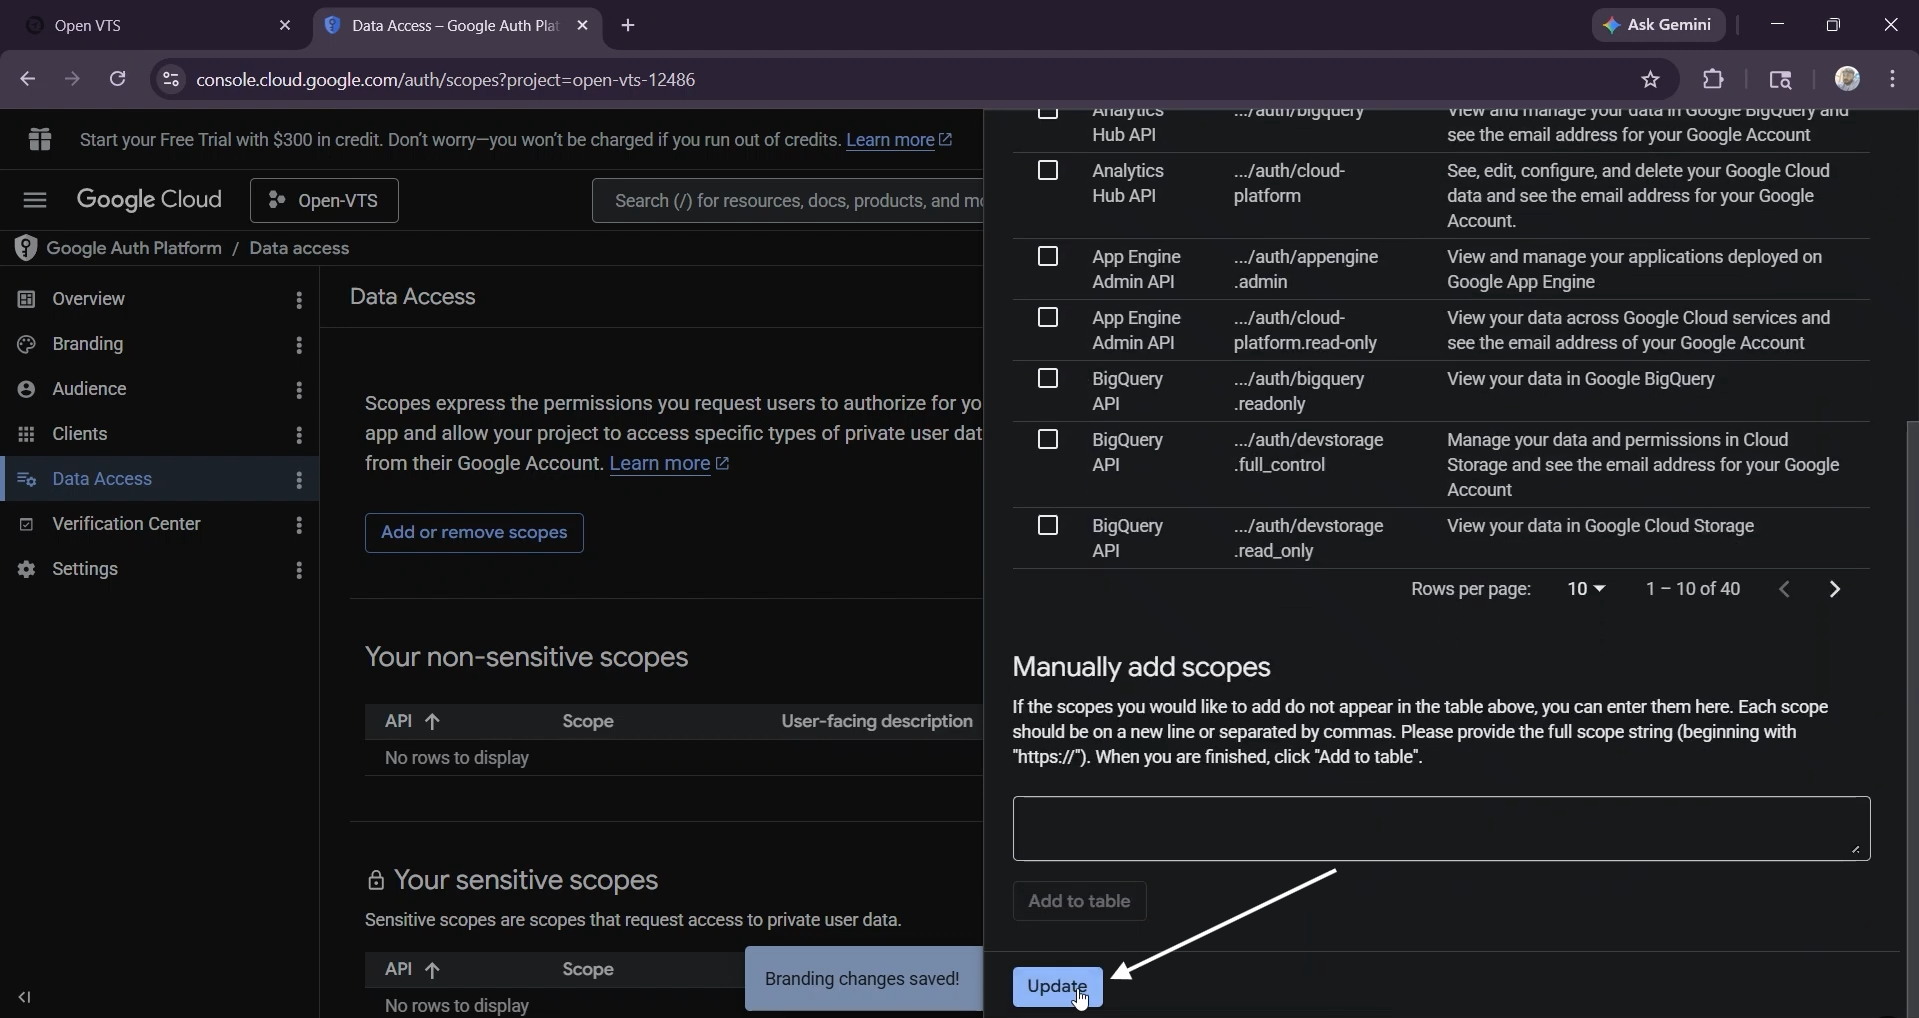
Confirm that the selected scopes are saved.
Step 8: Create the OAuth Client
Open:
Google Auth Platform → Clients
Then:
Select Create Client.
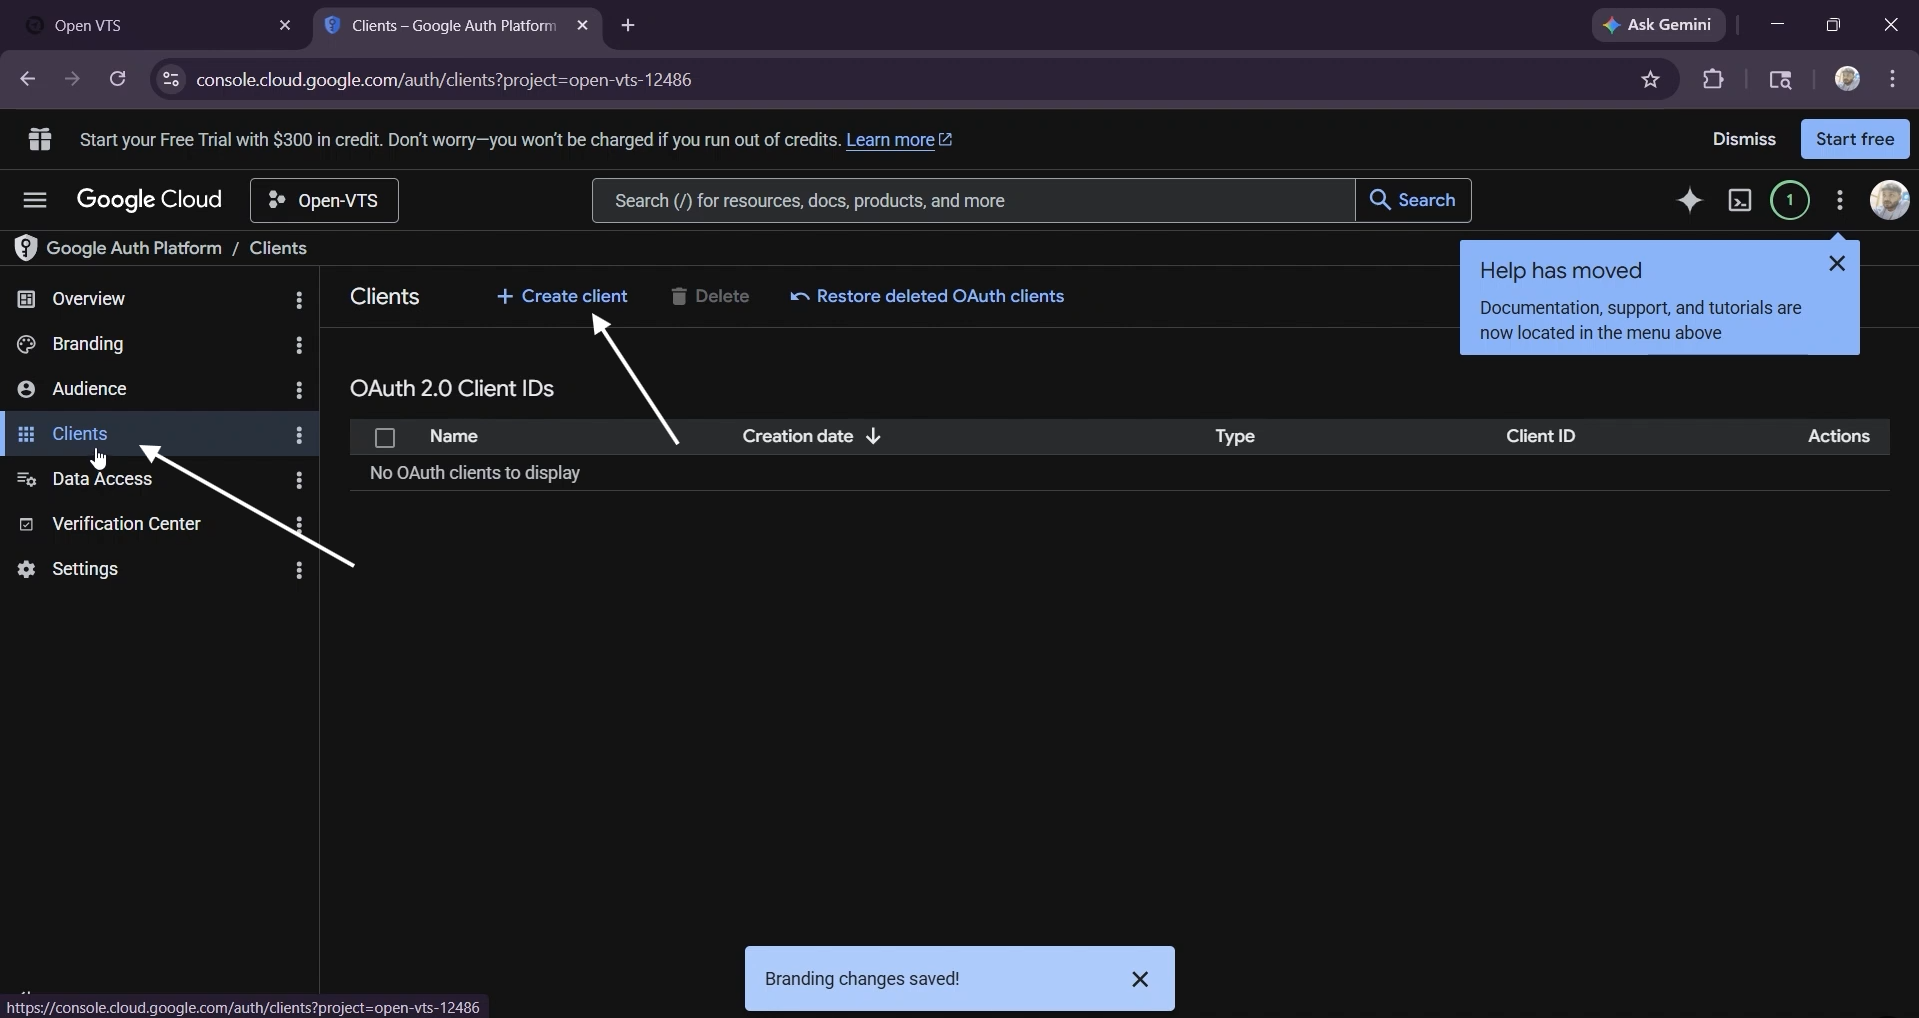
Choose Web Application as the application type.
Enter a recognizable name, such as Open VTS Web Login.
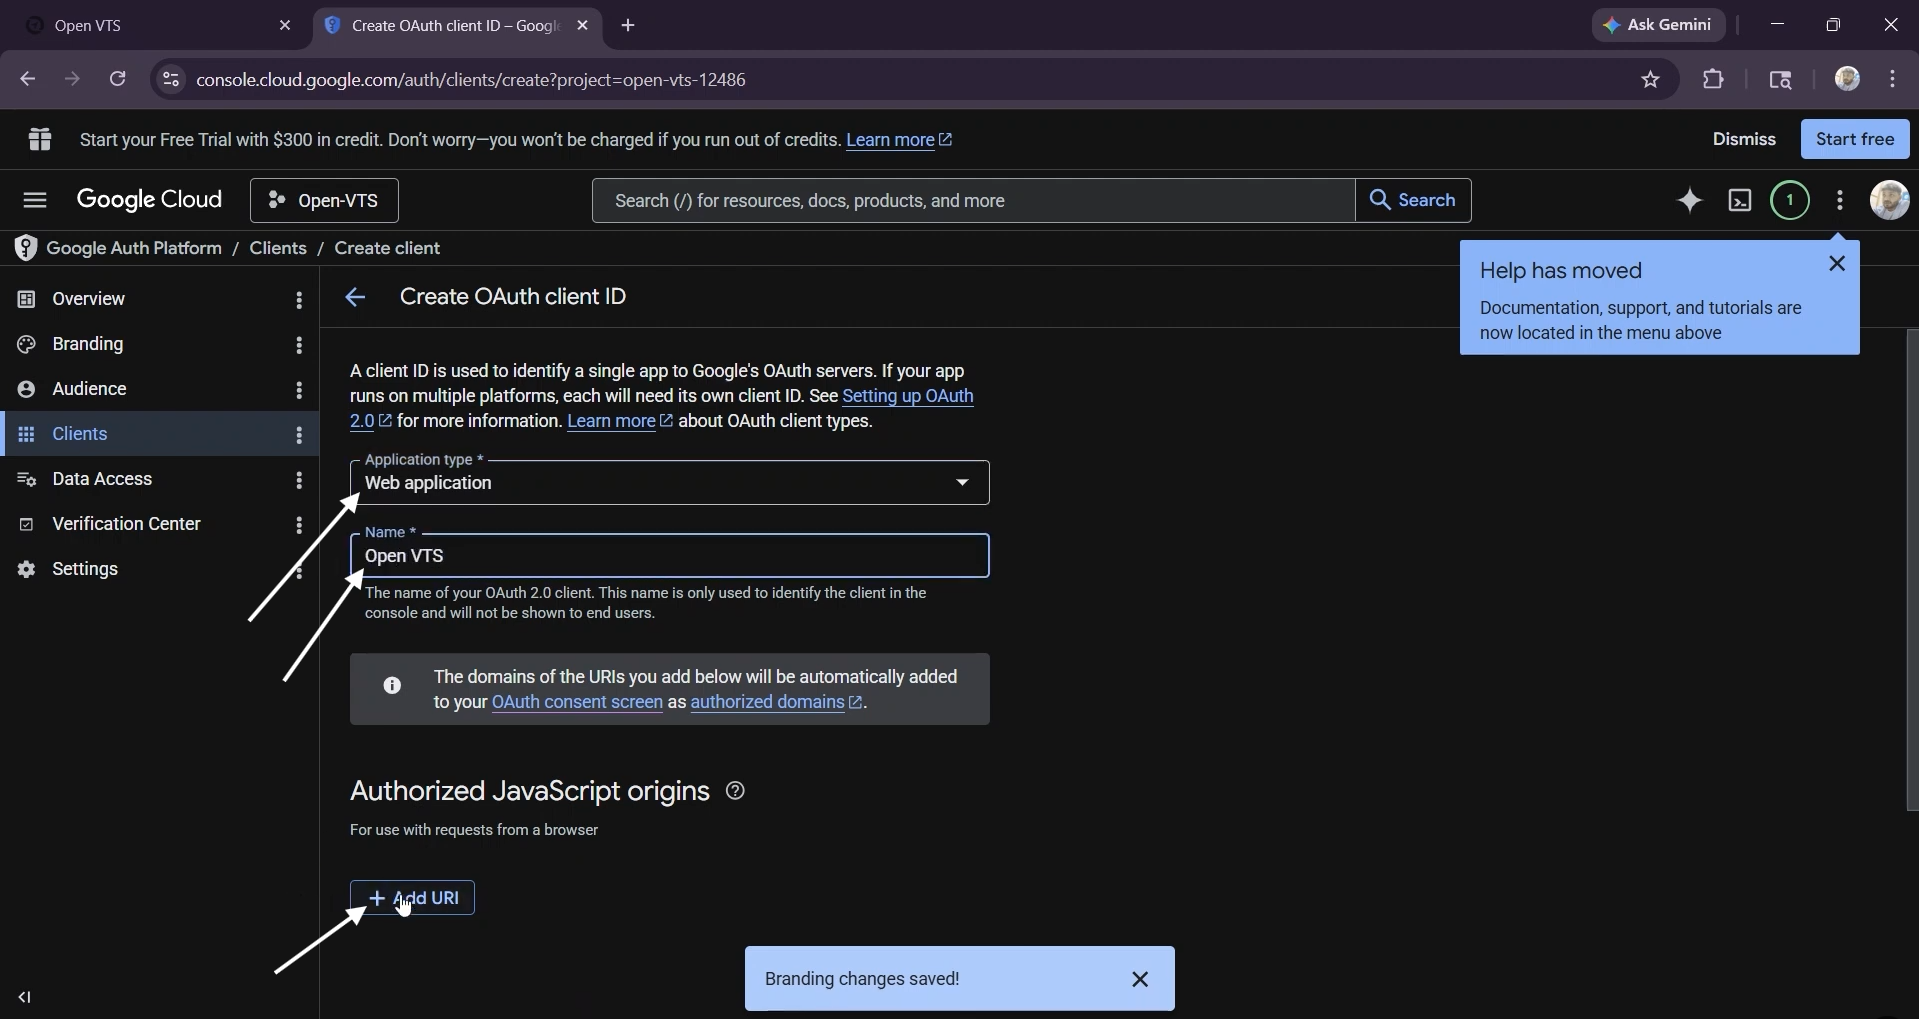
Google generates a Client ID and Client Secret for the OAuth web client.
Step 9: Add the Authorized JavaScript Origin
Under Authorized JavaScript Origins, select Add URI.
Enter the origin where Open VTS is running.
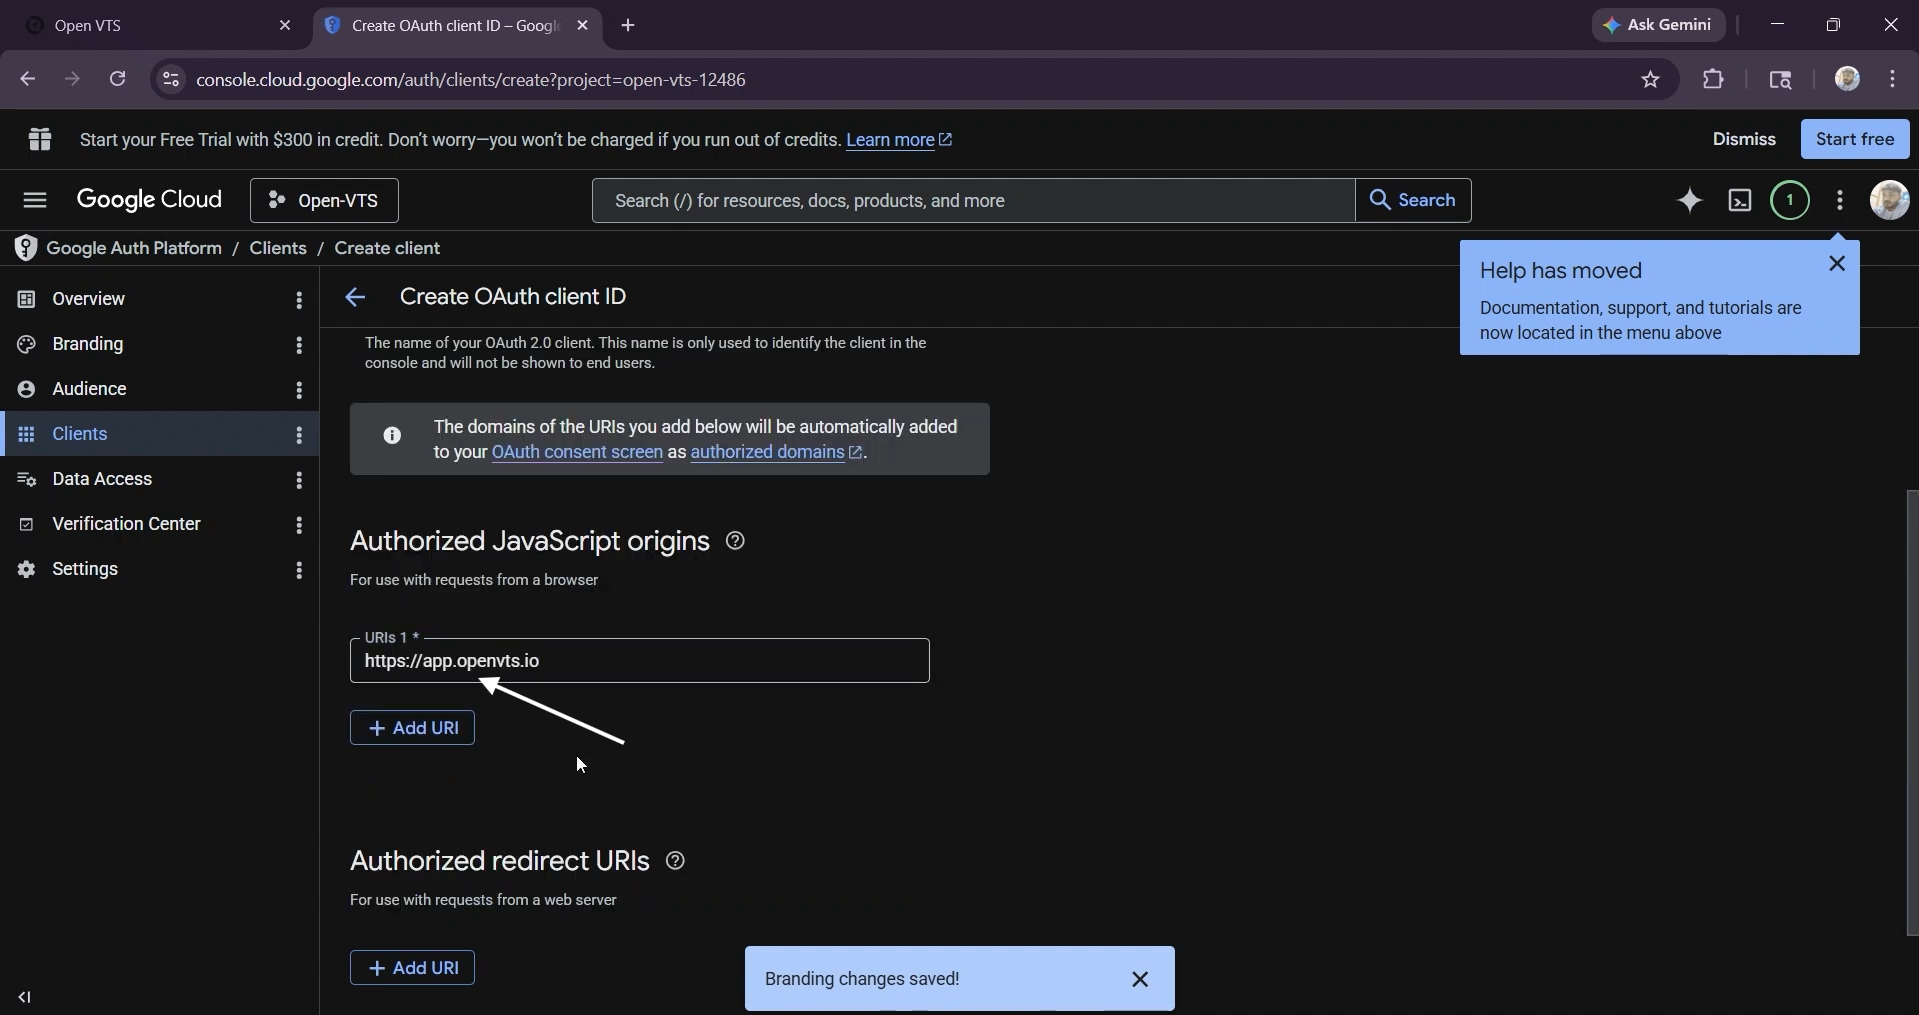
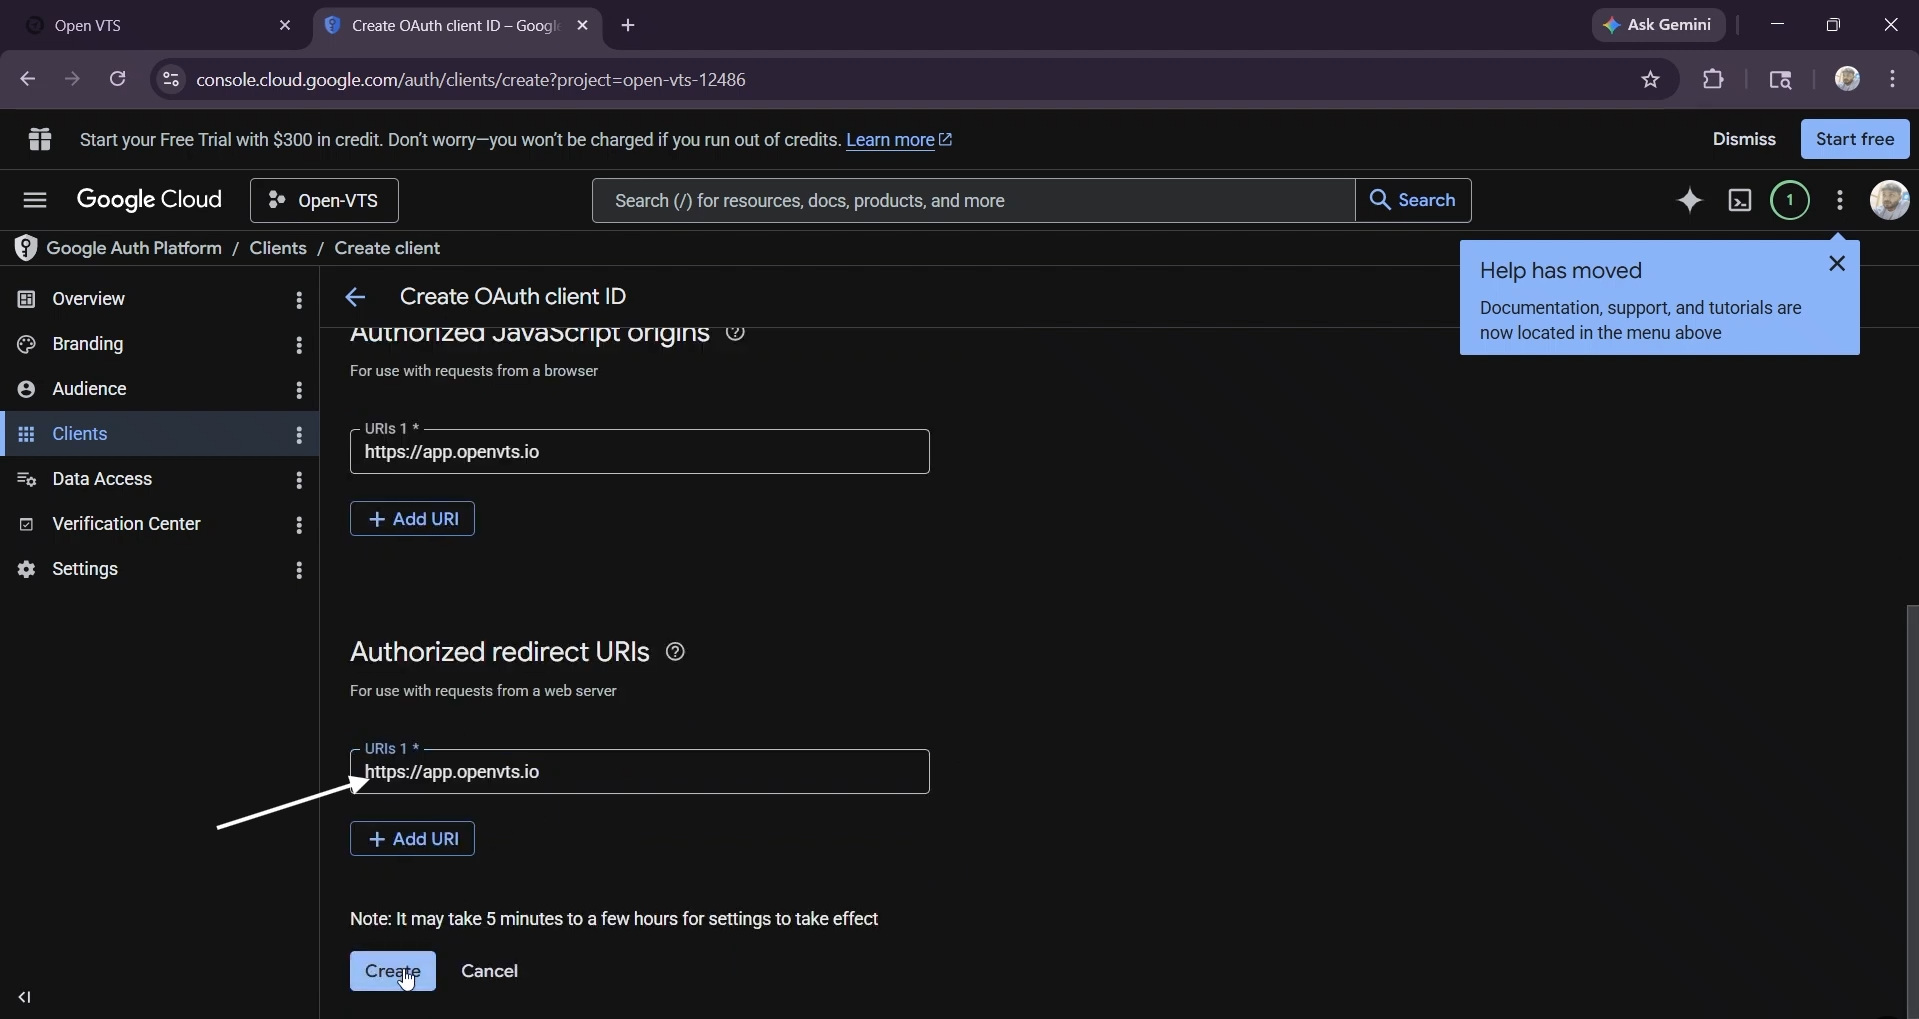
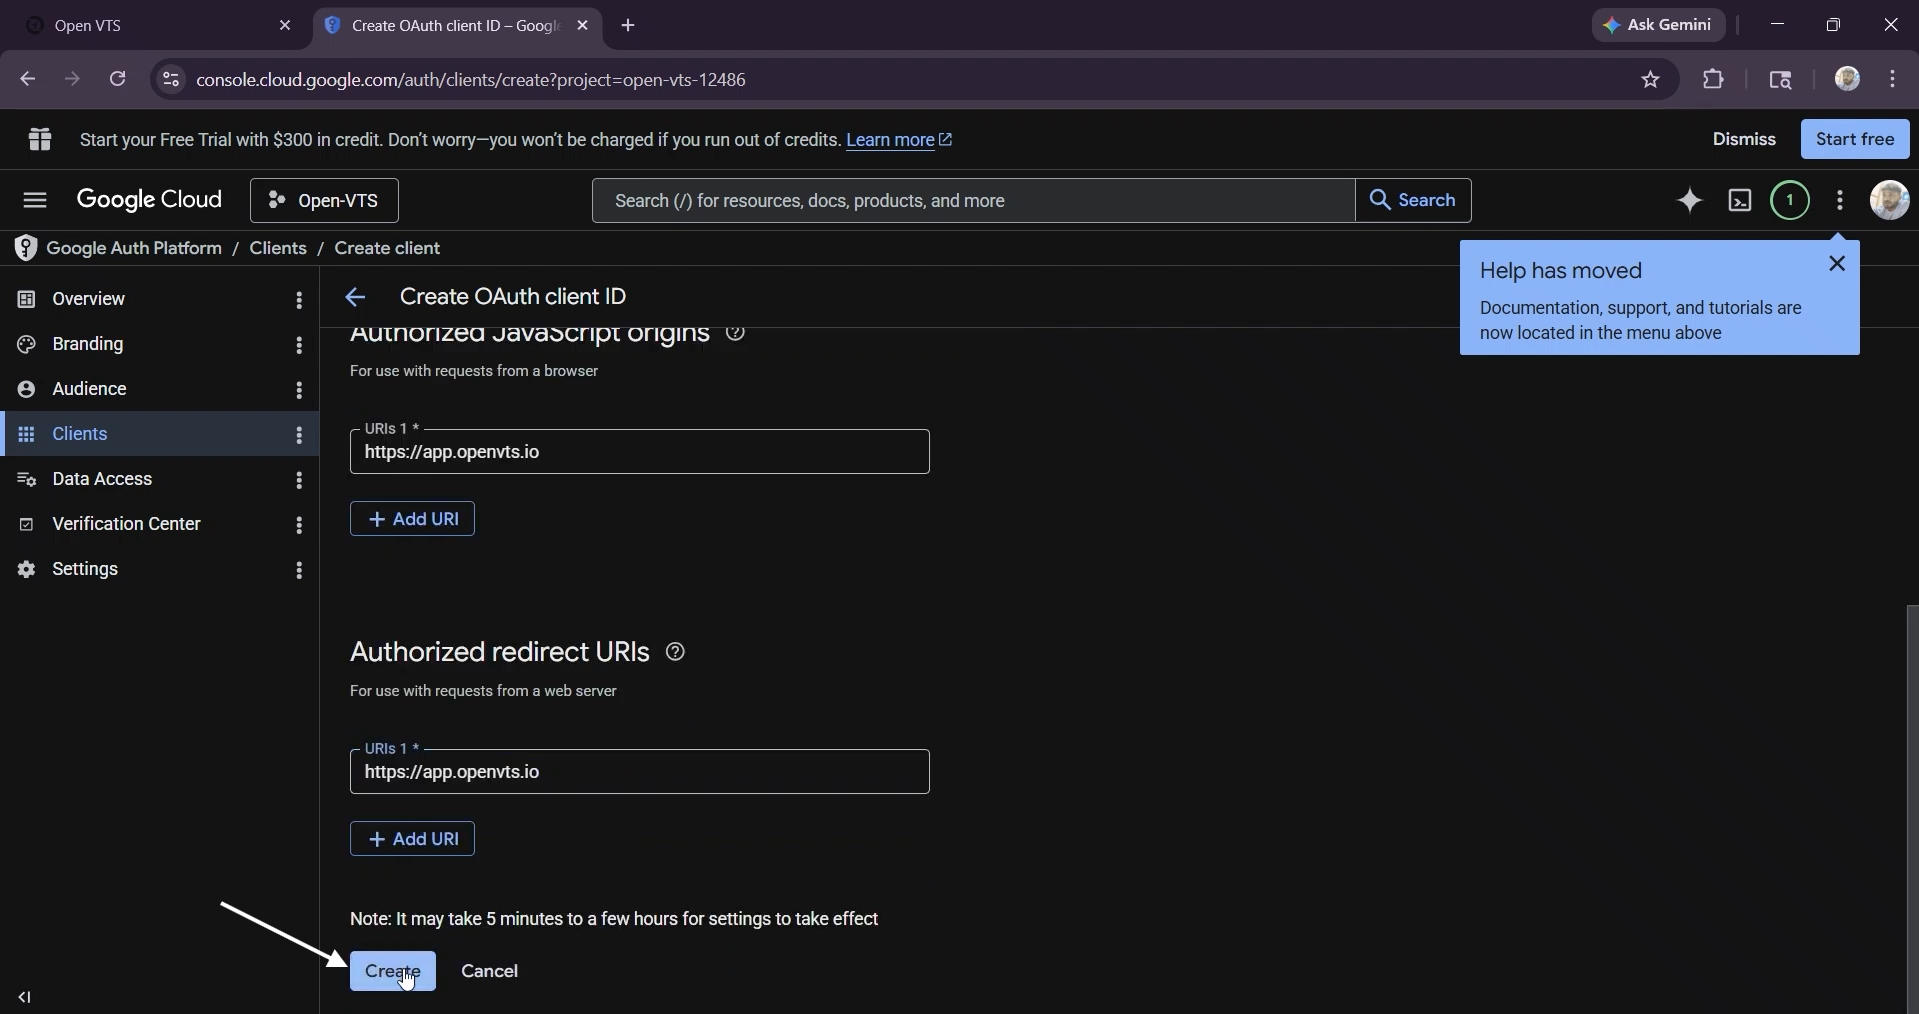
For example:
https://app.openvts.io
Enter only the origin:
- Include https://
- Include the domain or subdomain
- Do not add a page path
- Do not add a trailing slash
Correct
https://app.openvts.io
Incorrect
https://app.openvts.io/login https://app.openvts.io/ app.openvts.io
The current Open VTS implementation uses the Google Identity Services popup flow. For popup authentication, Google requires the application domain under Authorized JavaScript Origins. Authorized redirect URIs are required for redirect-based flows instead.
Do You Need an Authorized Redirect URI?
The current Open VTS login uses a Google popup and exchanges the authorization code through the Open VTS backend. Therefore, a manually configured callback URL is not required for the normal current setup.
Leave Authorized Redirect URIs empty unless:
- Your Open VTS interface displays a specific redirect URL, or
- Your deployment has been modified to use Google’s redirect authentication flow.
When a redirect URL is required, copy the exact URL displayed by Open VTS. Do not create or guess the callback URL.
Older tutorials may show a URL such as /auth/google/callback. Use it only when your current Open VTS configuration explicitly provides that URL.
Step 10: Create the Client Credentials
After entering the authorized origin, select Create.
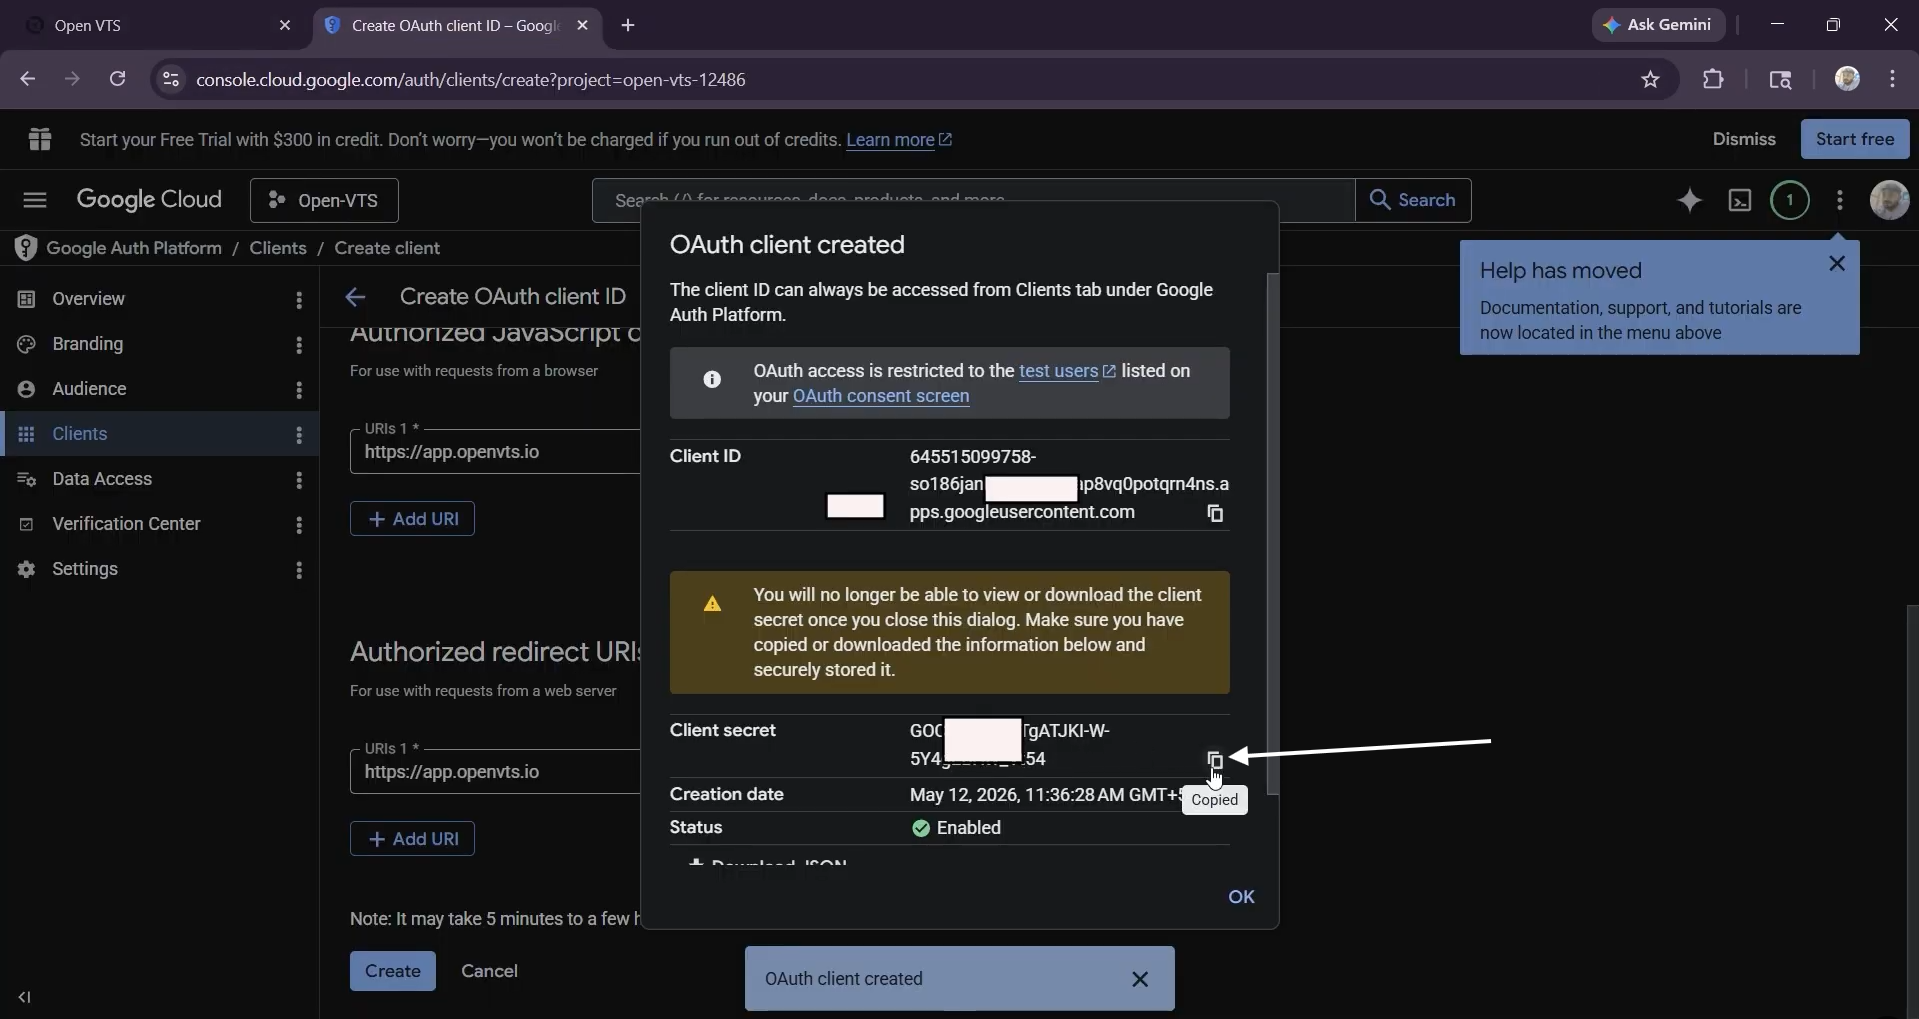
Google will display:
- Client ID
- Client Secret
Keep this window open while you copy the credentials into Open VTS.
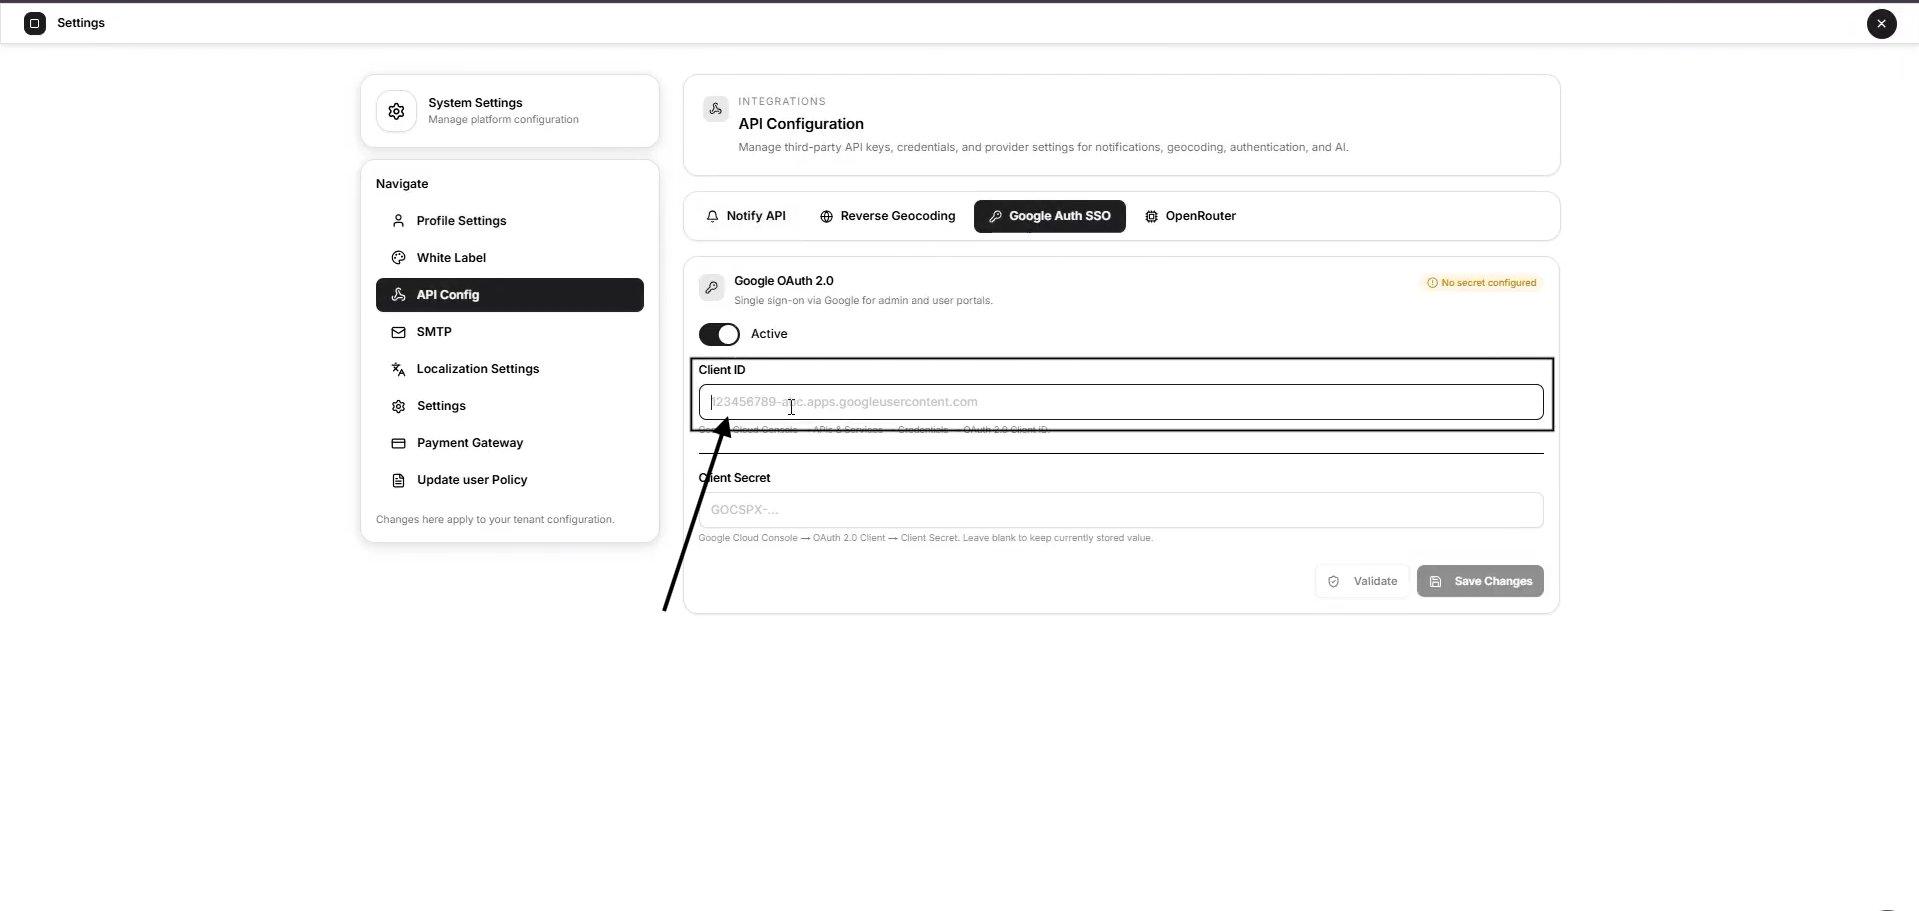
Step 11: Enter the Credentials in Open VTS
Return to:
Open VTS → Settings → API Config → Google OAuth 2.0
Enter the following details:
Client ID
Copy the Google OAuth Client ID and paste it into Client ID.
It normally follows this format:
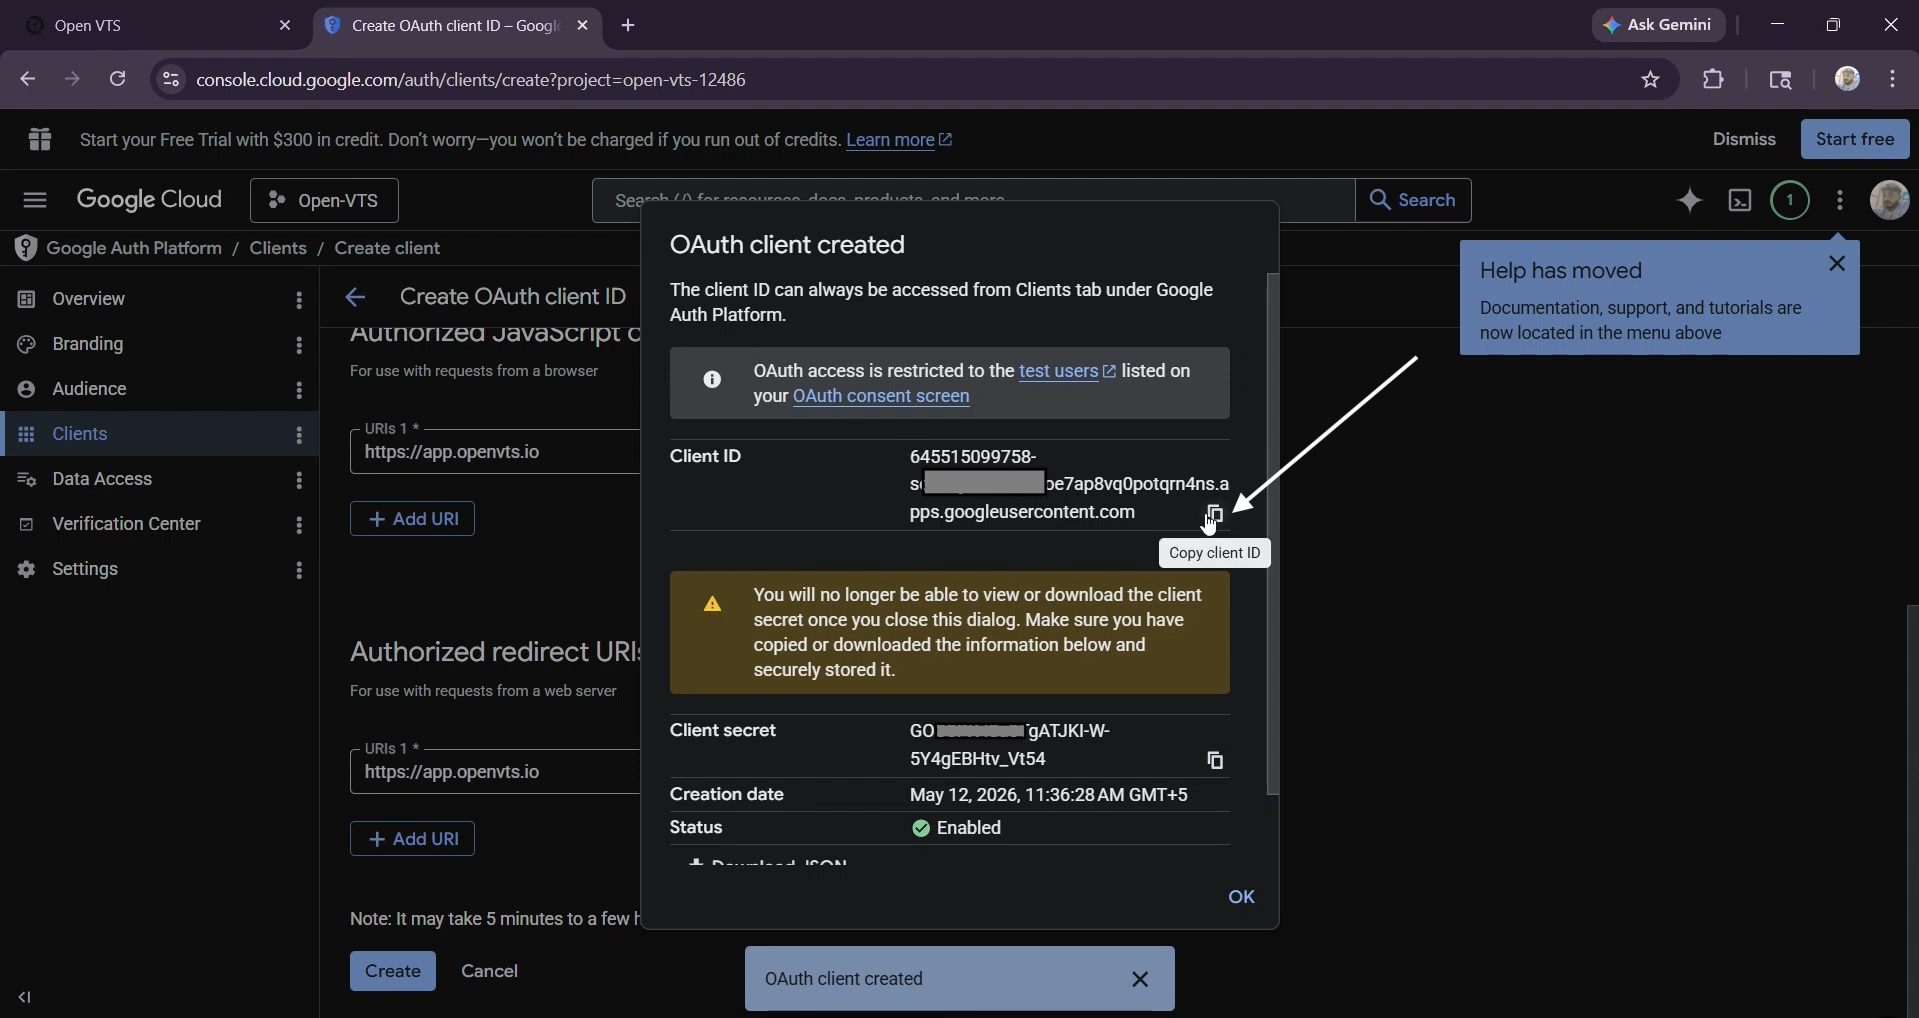
123456789012-example.apps.googleusercontent.com
Client Secret
Copy the Google OAuth Client Secret and paste it into Client Secret.
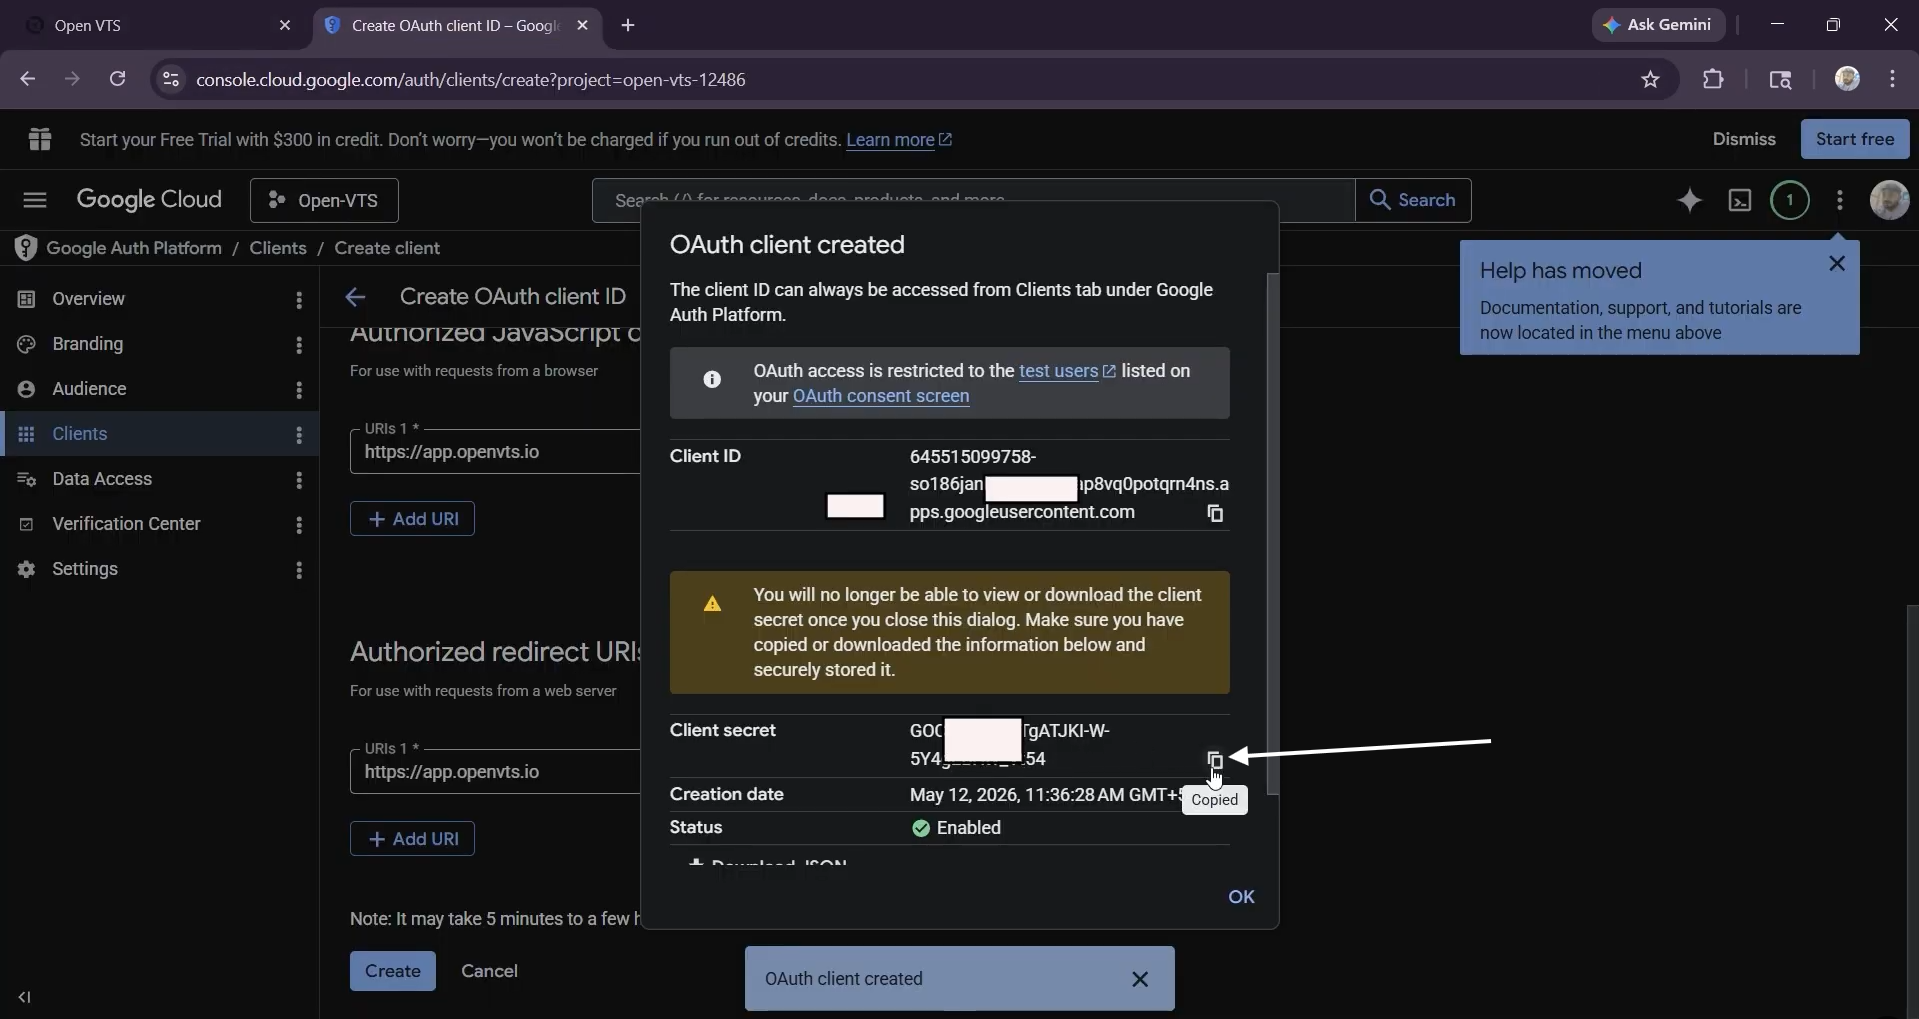
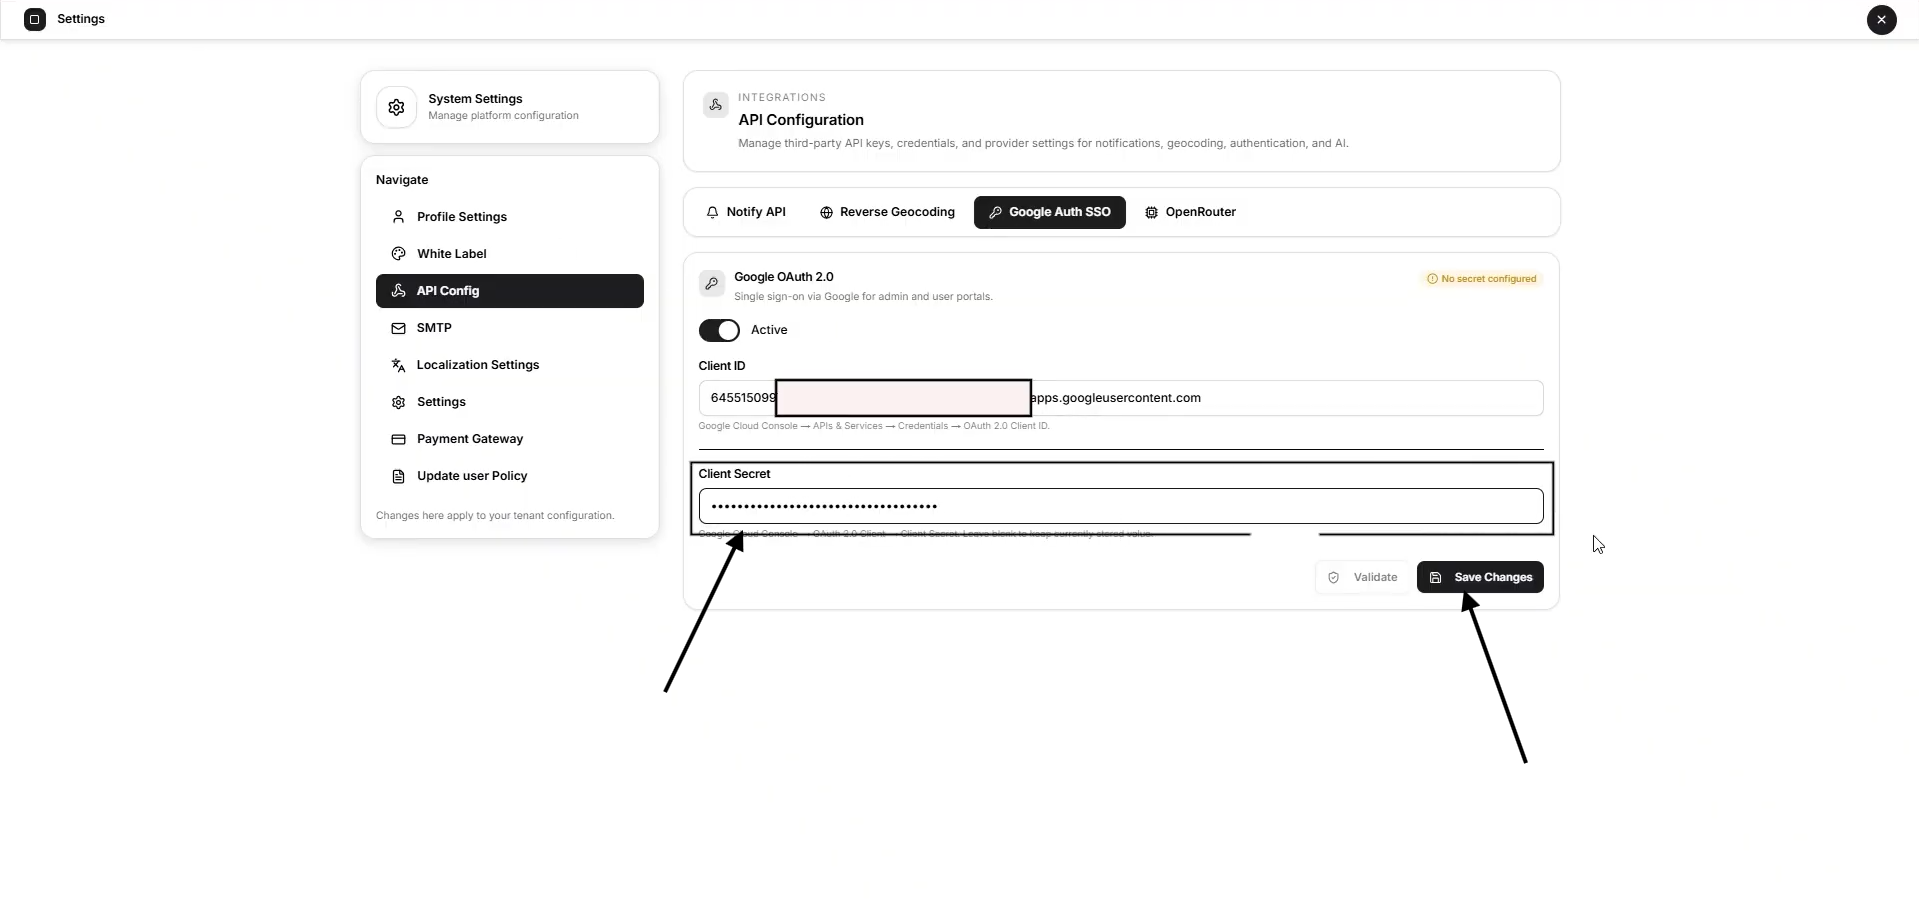
The Client Secret is sensitive. Do not publish it, share it in screenshots, or store it in public files.
Active
Enable the Active toggle to make Google Sign-In available.
Select Save Changes.
Step 12: Validate the Configuration
After saving, select Validate when the option is available.
Open VTS checks whether:
- The Client ID is present
- The Client ID has a valid format
- A Client Secret is stored
- The Google OAuth credentials can be reached and checked
Correct any displayed errors before testing the login.
Step 13: Test Sign in with Google
- Sign out of Open VTS.
- Open the Open VTS login page.
- Select Sign in with Google.
- Choose the Google account added as a test user.
- Complete the Google authentication prompt.
Open VTS checks the Google account email against its existing active accounts.
When a matching account is found, Open VTS signs the user in and opens the correct workspace according to the assigned account role.
Screenshot reference: Add screenshots showing:
- Sign in with Google option
- Google account selection window
- Successful Open VTS login
Moving from Testing to Production
While the Google OAuth application is in testing mode, only added test users can sign in.
To allow other Google accounts:
- Complete the required branding information.
- Add your application domain and policy information where requested.
- Change the application publishing status from testing to production.
- Complete Google verification if it is required for your selected scopes or application configuration.
Use HTTPS for production domains. Google requires secure JavaScript origins and redirect URIs for production web applications, except for limited local-development cases.
Troubleshooting
Google Sign-In is not visible
Confirm that:
- Google OAuth is active in Open VTS
- The Client ID is saved
- The Client Secret is saved
- Open VTS has been refreshed after saving
Access blocked or user not allowed
The OAuth application may still be in testing mode.
Add the Google account under:
Google Auth Platform → Audience → Test Users
Origin mismatch or popup error
Confirm that the exact Open VTS origin is entered under Authorized JavaScript Origins.
For example:
https://app.openvts.io
Do not use the server IP when users access Open VTS through a domain.
No Open VTS account found
Google Sign-In only authenticates existing Open VTS accounts.
Create or update the Open VTS account so that its email matches the Google account email.
The Client Secret field is empty after saving
For security, Open VTS may not display the stored secret again. An empty field does not necessarily mean that the saved secret was removed.
Enter a new Client Secret only when you want to replace the existing one.
Configuration Checklist
Before completing the setup, confirm that:
- Google Auth Platform is configured
- External or appropriate audience is selected
- The test user has been added
- OpenID, email, and profile scopes are selected
- A Web Application OAuth client is created
- The Open VTS domain is added as an authorized JavaScript origin
- Client ID and Client Secret are saved in Open VTS
- Google OAuth is active
- Validation completes successfully
- The Google account email matches an active Open VTS account
- Sign in with Google works from the login page