
Master Data
Configure the reusable vehicle, device, command, document, SIM, system-variable, email, and app-notification records used throughout Open VTS.
Last updated August 19, 2026
Master Data
Master Data is the central configuration area for reusable records used throughout Open VTS.
Instead of entering the same information repeatedly, the Superadmin can create standardized options once and make them available across relevant platform forms and workflows.
Master Data currently includes:
- Vehicle Types
- Command Types
- Device Types
- Custom Commands
- Custom System Variables
- Document Types
- SIM Providers
- Email Templates
- Notification Templates
Because changes made here can affect other areas of the platform, Master Data should only be managed by an authorized Superadmin.
Open Master Data
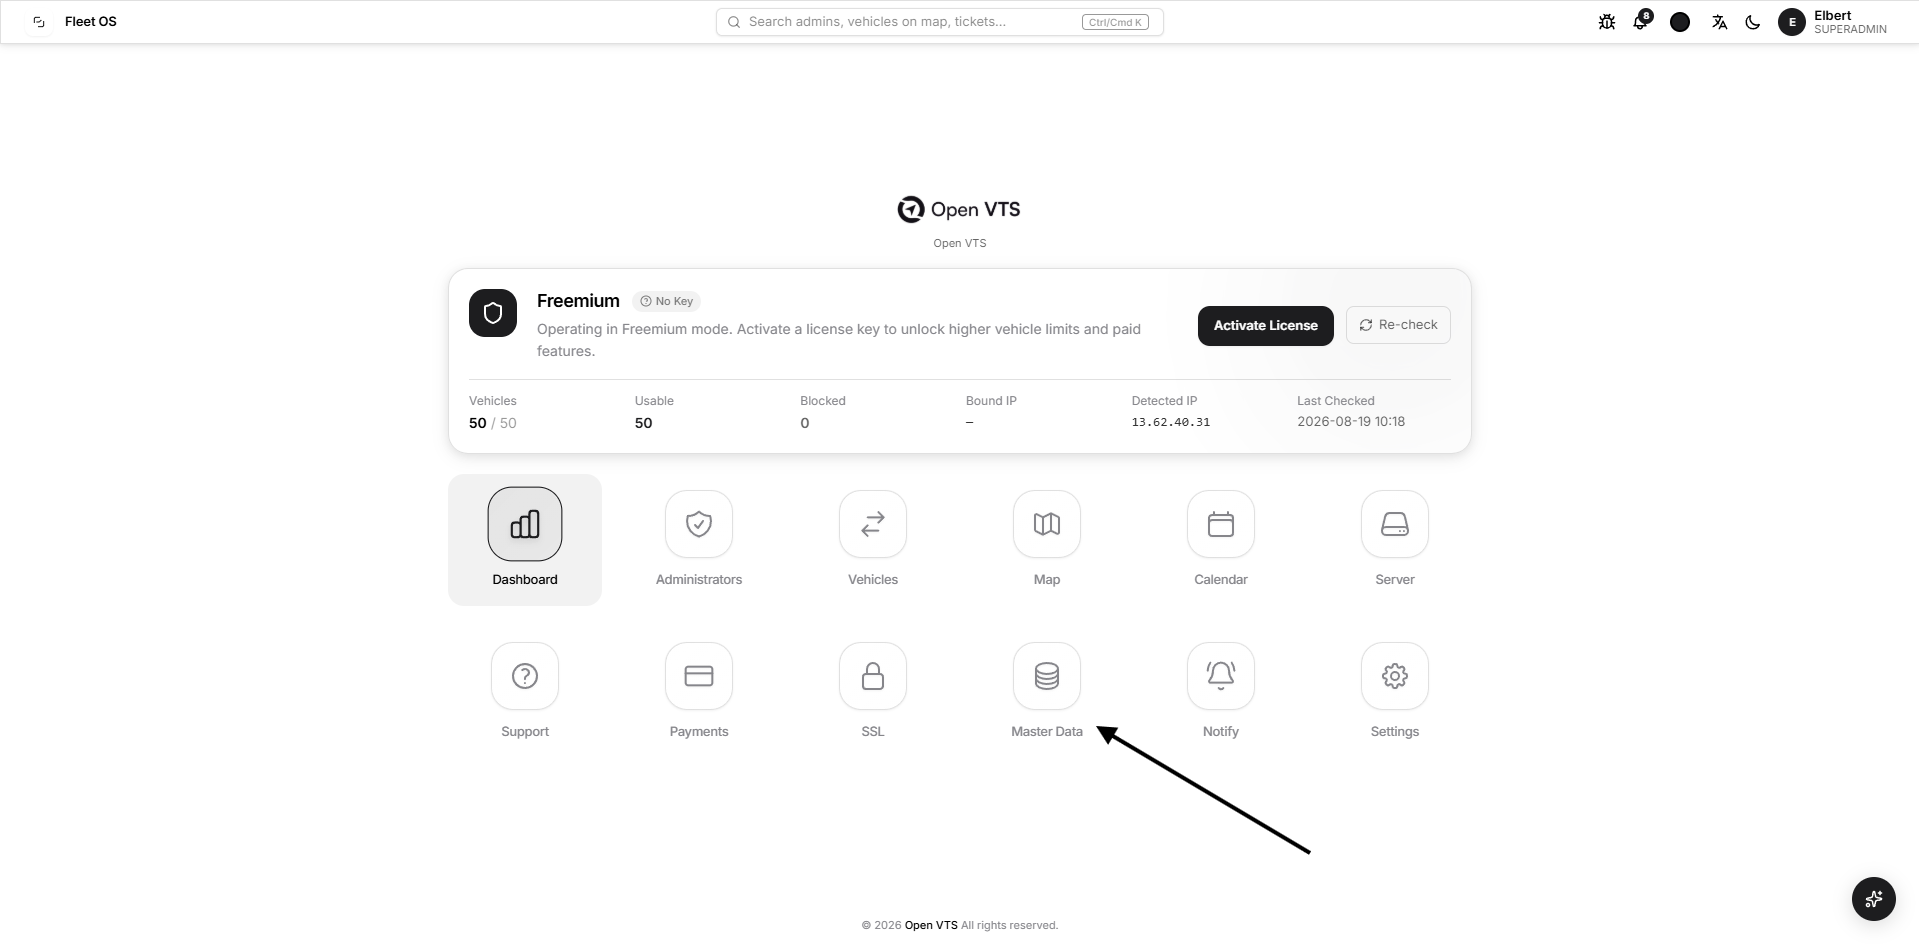
From the Superadmin home page, select Master Data.
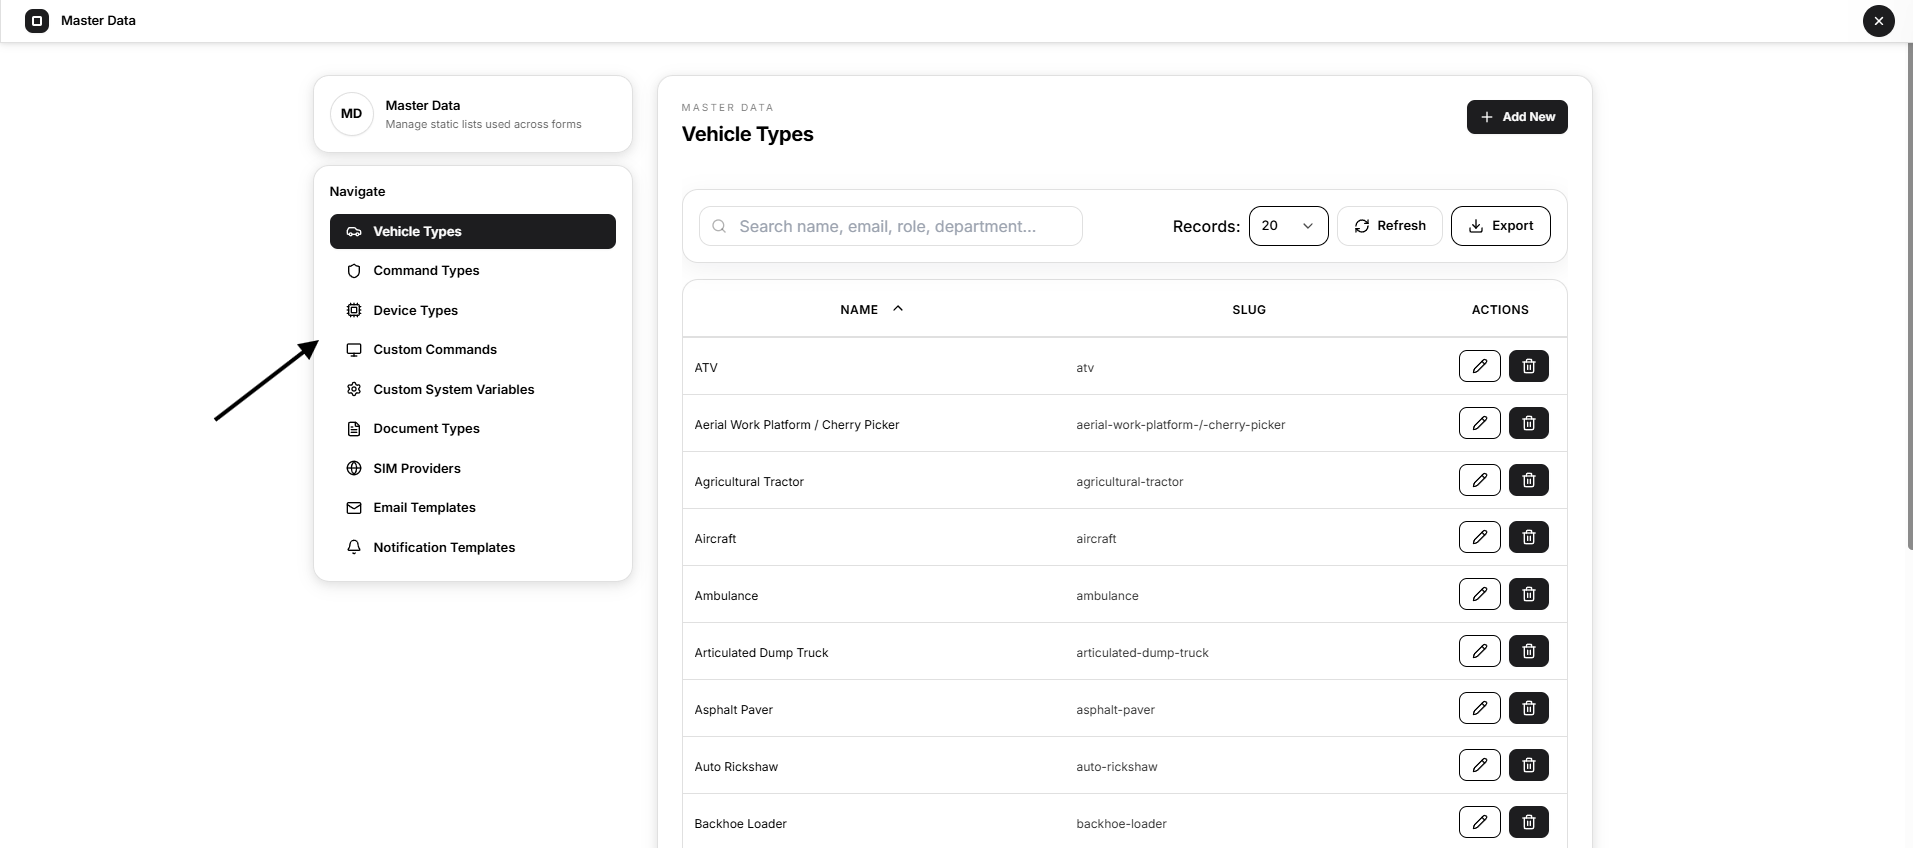
The page opens with a navigation panel on the left and the selected Master Data section on the right.
Use the left navigation to move between the available data types.
Screenshot reference: Add the screenshot showing the Master Data page with Vehicle Types selected.
Common List Controls
Most Master Data sections use the same list-management controls.
Search
Use the search field to find matching records in the selected section.
The search works across the data displayed in the current table.
Records
Choose how many records should appear on each page.
Refresh
Select Refresh to request the latest records from the server.
Export
Select Export to download the current table data in an available export format.
Sorting and pagination
Where sorting is available, select a column heading to change the record order.
Use the pagination controls at the bottom of the table to move between result pages.
Add New
Select Add New to create a record in sections that support manual creation.
Edit
Select the pencil icon beside a record to open its edit form. Update the required fields and select Save.
The edit process is generally the same across the editable Master Data sections.
Delete
Select the delete icon beside a record to open the confirmation window.
Deletion permanently removes the selected record and cannot be undone. Confirm that the record is no longer required before deleting it.
A record used by an existing vehicle, command, document, or another dependent configuration should not be removed without first reviewing that dependency.
Screenshot reference: Add one deletion-confirmation screenshot here as the shared example for all applicable Master Data sections.
Vehicle Types
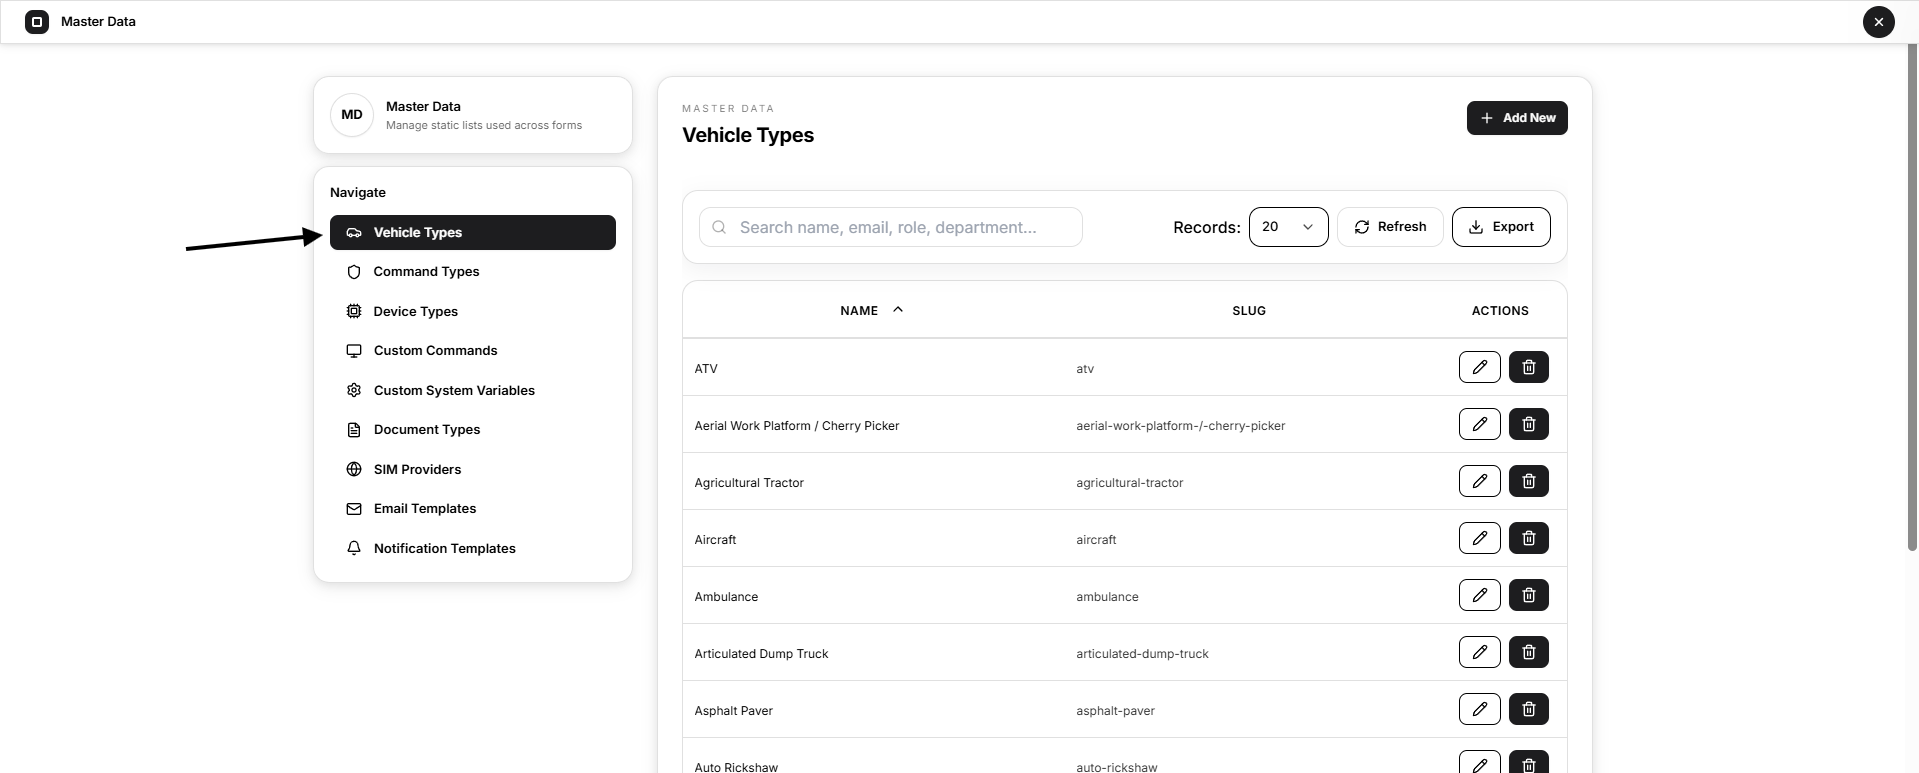
Vehicle Types define the classifications available for vehicles in Open VTS.
Examples may include car, truck, bus, ambulance, tractor, or another vehicle category required by the business.
The list displays:
- Name
- Slug
- Actions
Add a Vehicle Type
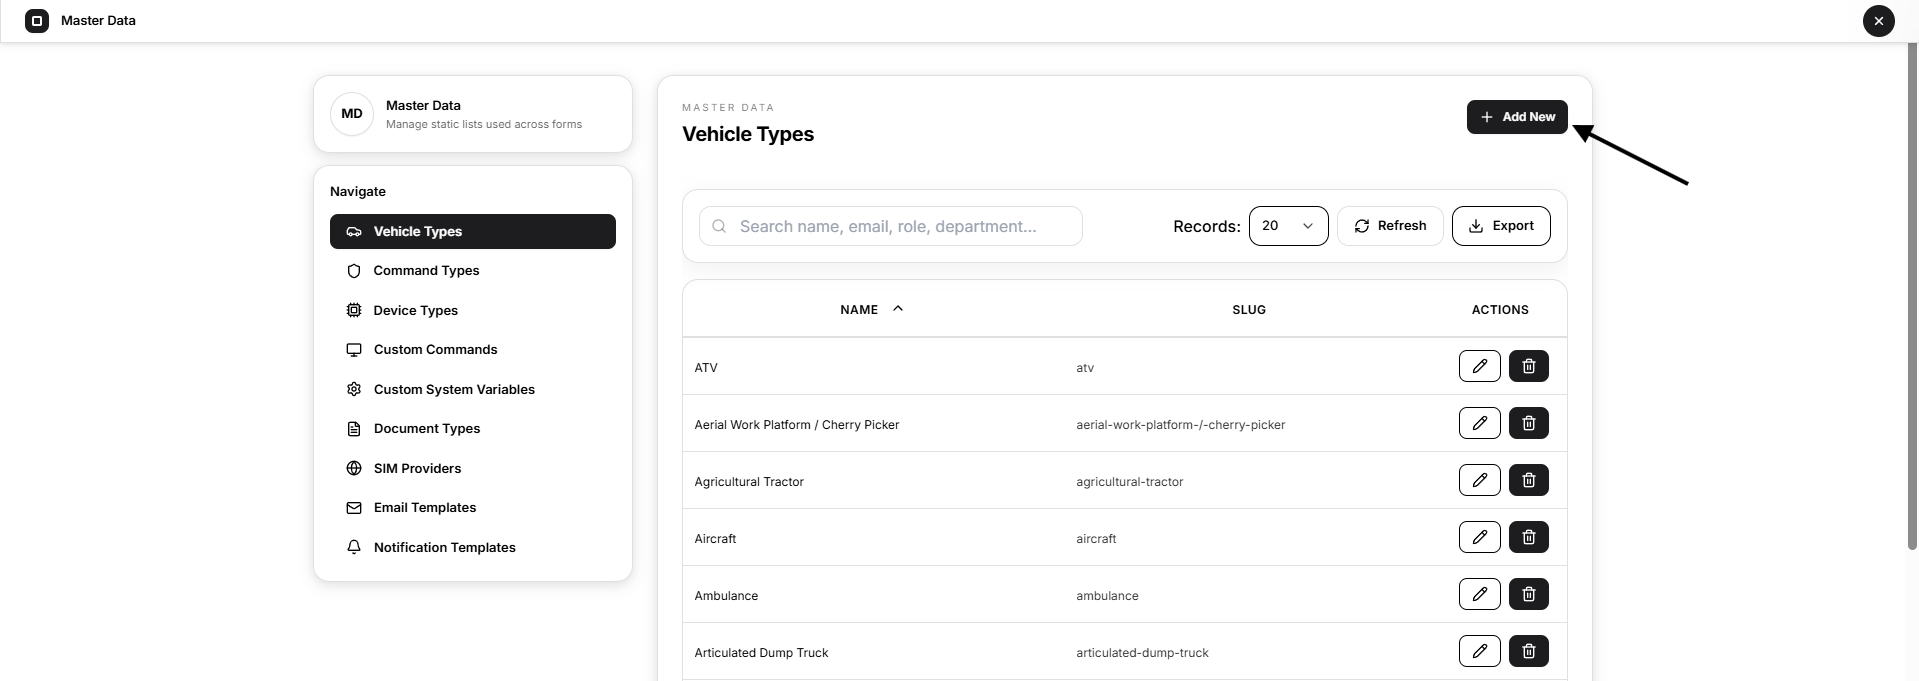
- Open Vehicle Types.
- Select Add New.
- Enter the vehicle-type name.
- Review the generated slug.
- Select Save.
Name
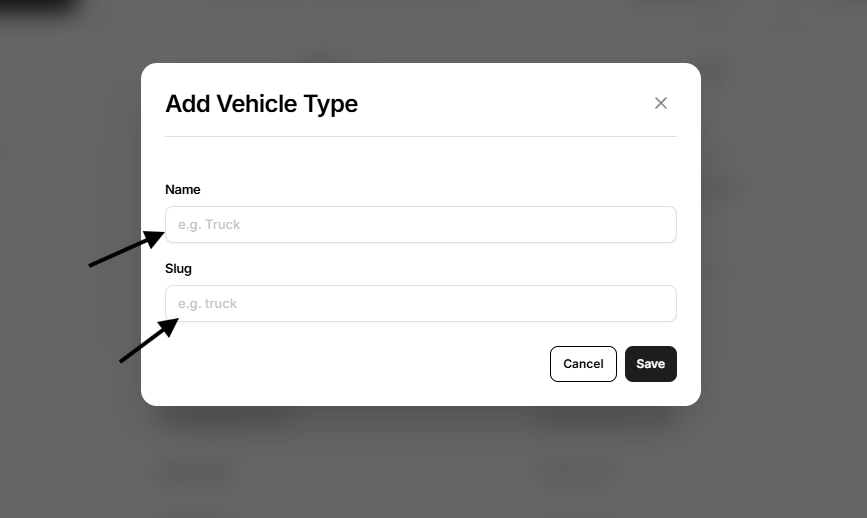
The user-facing name of the vehicle type.
Slug
A stable, system-friendly identifier for the vehicle type.
When creating a record, Open VTS automatically generates the slug from the entered name until the slug is manually changed.
For example:
Name: Aerial Work Platform Slug: aerial-work-platform
Keep slugs lowercase, clear, and consistent. Avoid changing a slug after the vehicle type is already being used unless the effect on existing records has been reviewed.
Screenshot reference: Add the Vehicle Types list screenshot here.
Screenshot reference: Add the Add Vehicle Type window after the creation steps.
Command Types
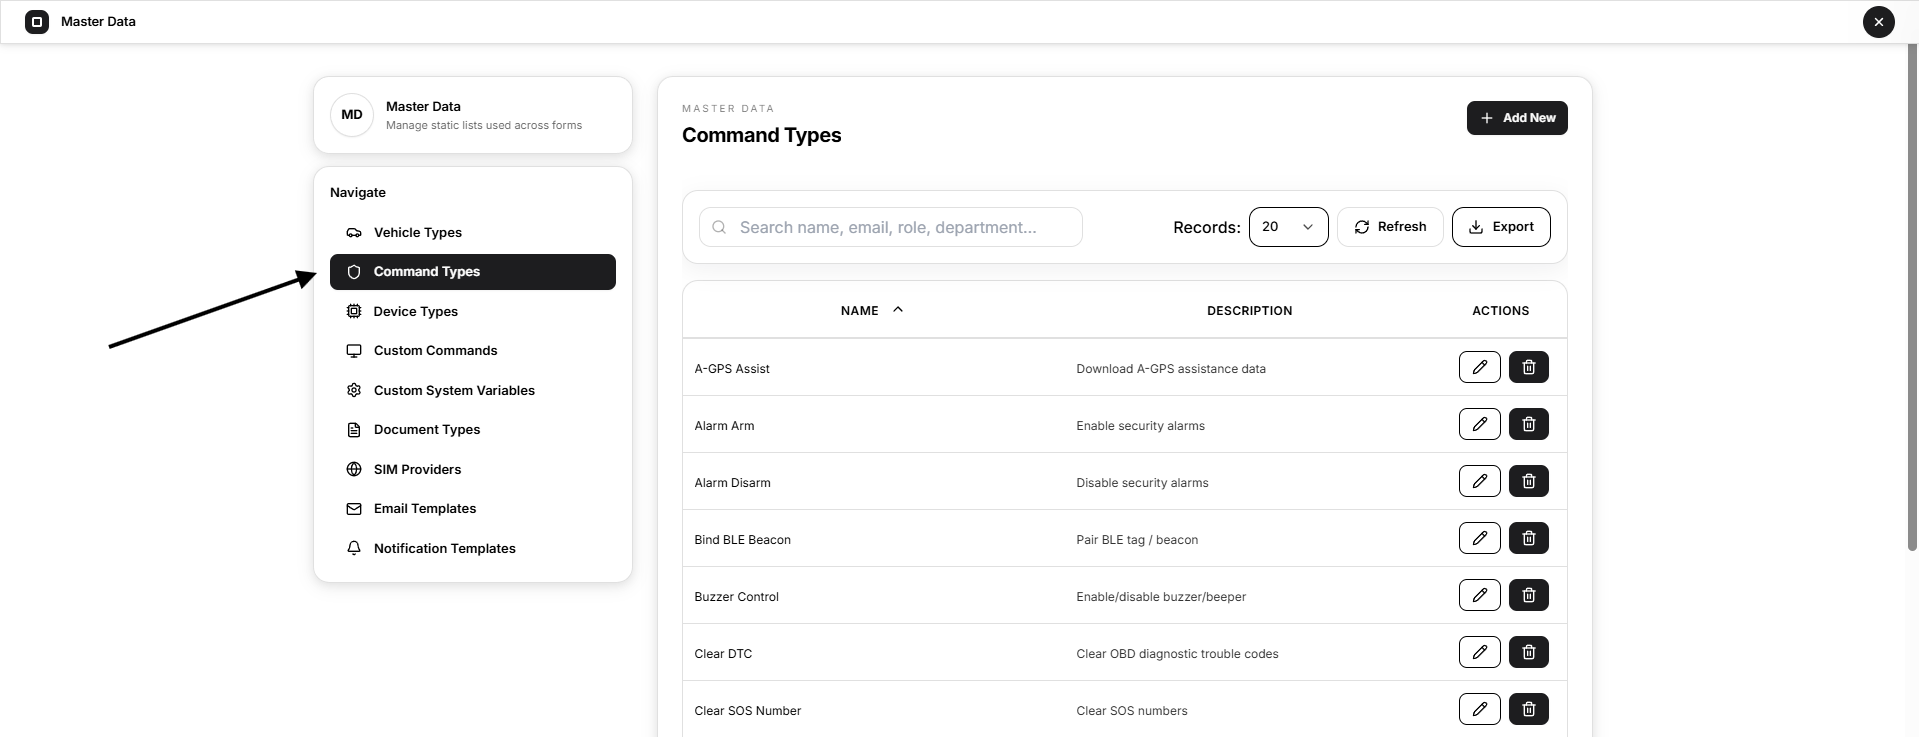
Command Types define reusable categories of commands that may be sent to supported GPS devices.
A Command Type describes the purpose of an action. It does not contain the device-specific command payload itself.
Examples may include:
- Status
- Alarm Arm
- Alarm Disarm
- Door Lock
- Set Reporting Interval
The list displays:
- Name
- Description
- Actions
Add a Command Type
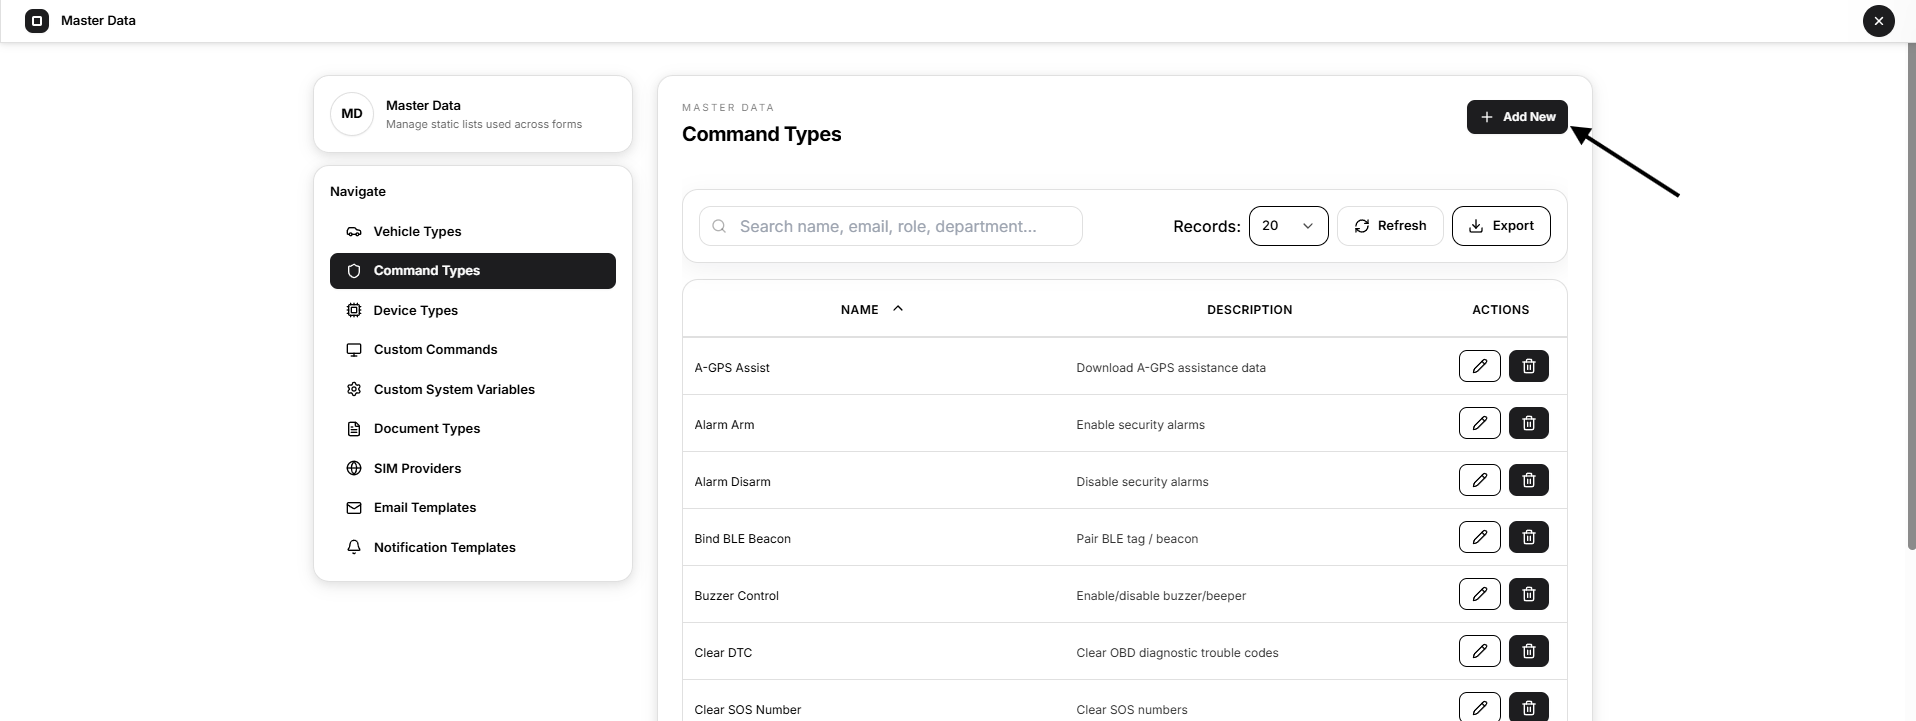
- Open Command Types.
- Select Add New.
- Enter the command-type name.
- Enter a clear description of its purpose.
- Select Save.
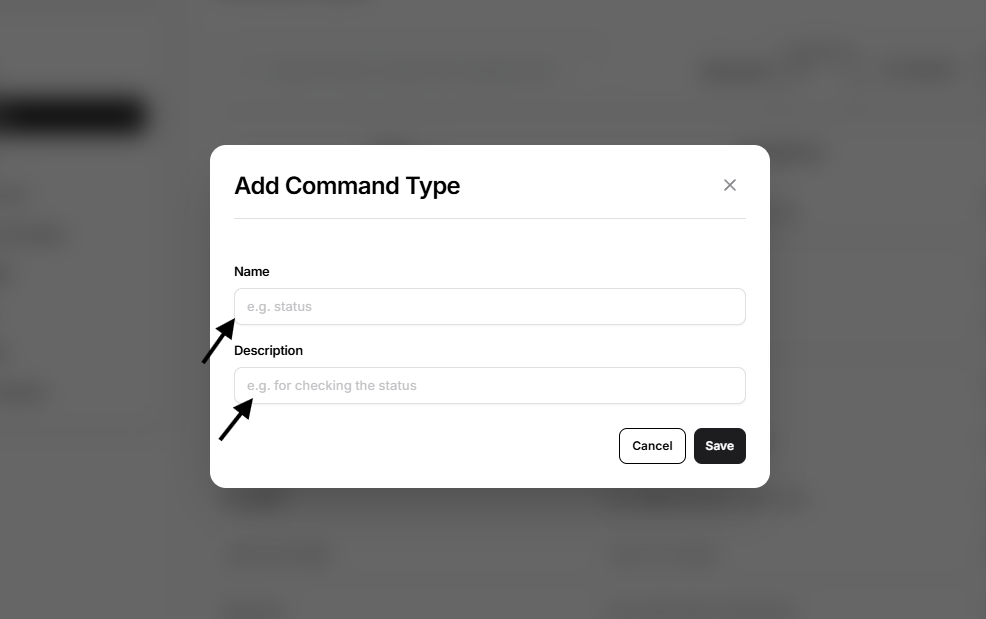
Name
The recognizable name of the command action.
Description
A short explanation of what the command is intended to do.
Actual device support depends on the configured Device Type, protocol, and Custom Command.
Screenshot reference: Add the Command Types list screenshot here.
Screenshot reference: Add the Add Command Type window after the field descriptions.
Device Types
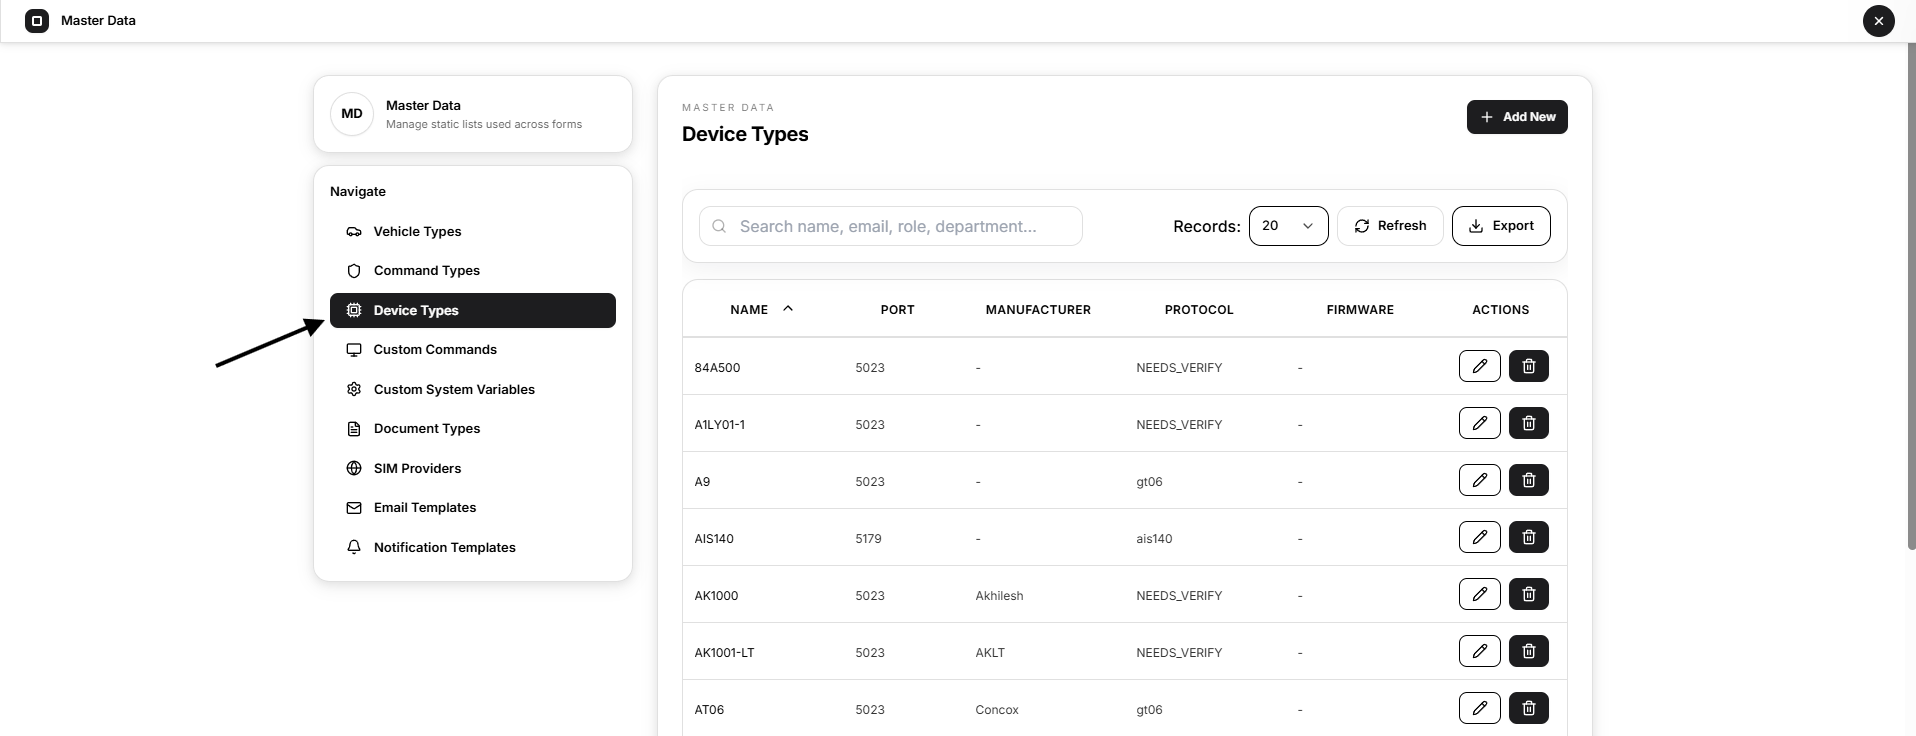
Device Types define the GPS tracker models or device definitions supported by the platform.
A Device Type is not an individual physical tracker. It describes a reusable device model or protocol configuration. The physical tracker, IMEI, SIM, and vehicle assignment are managed separately.
The list displays:
- Name
- Port
- Manufacturer
- Protocol
- Firmware
- Actions
Add a Device Type
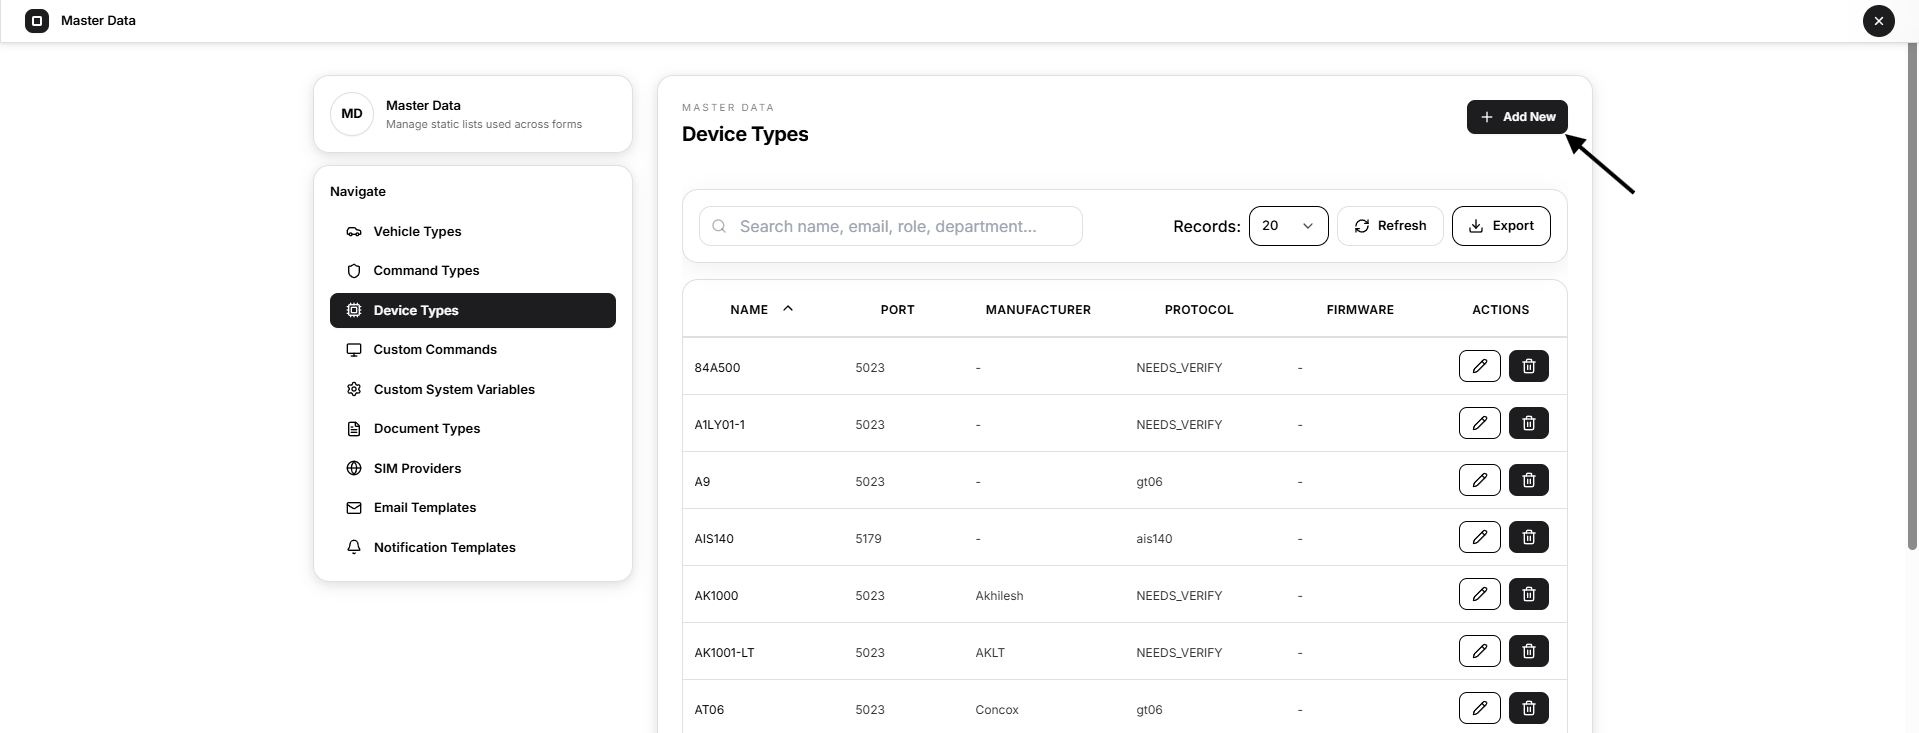
- Open Device Types.
- Select Add New.
- Complete all device fields.
- Confirm that the protocol and port match the configured listener.
- Select Save.
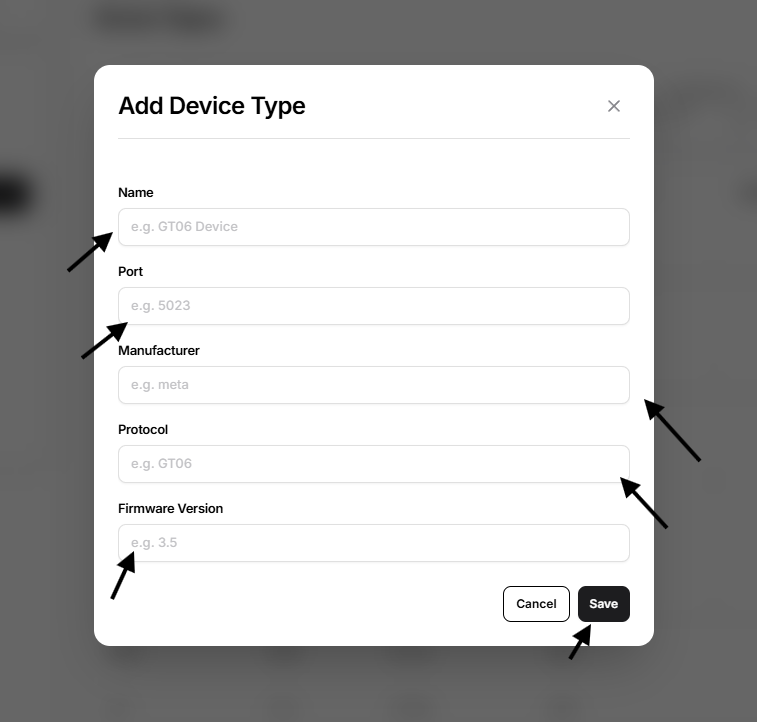
Name
The device model or identifying name used inside Open VTS.
Port
The communication or listener port associated with the device type.
The entered value must be a valid positive port number and must match the server and firewall configuration used for that device protocol.
Manufacturer
The company or brand responsible for the GPS device.
Protocol
The protocol identifier used to process data received from the device.
Enter the protocol exactly as implemented in the Open VTS listener. A similar-looking name does not guarantee that the listener will recognize it.
Firmware Version
The firmware version associated with the device definition.
All fields in the current Device Type form are required.
Creating a Device Type does not automatically implement a new GPS protocol. The required protocol must already be supported by the Open VTS listener.
Screenshot reference: Add the Device Types list screenshot here.
Screenshot reference: Add the Add Device Type window after the field explanations.
Custom Commands
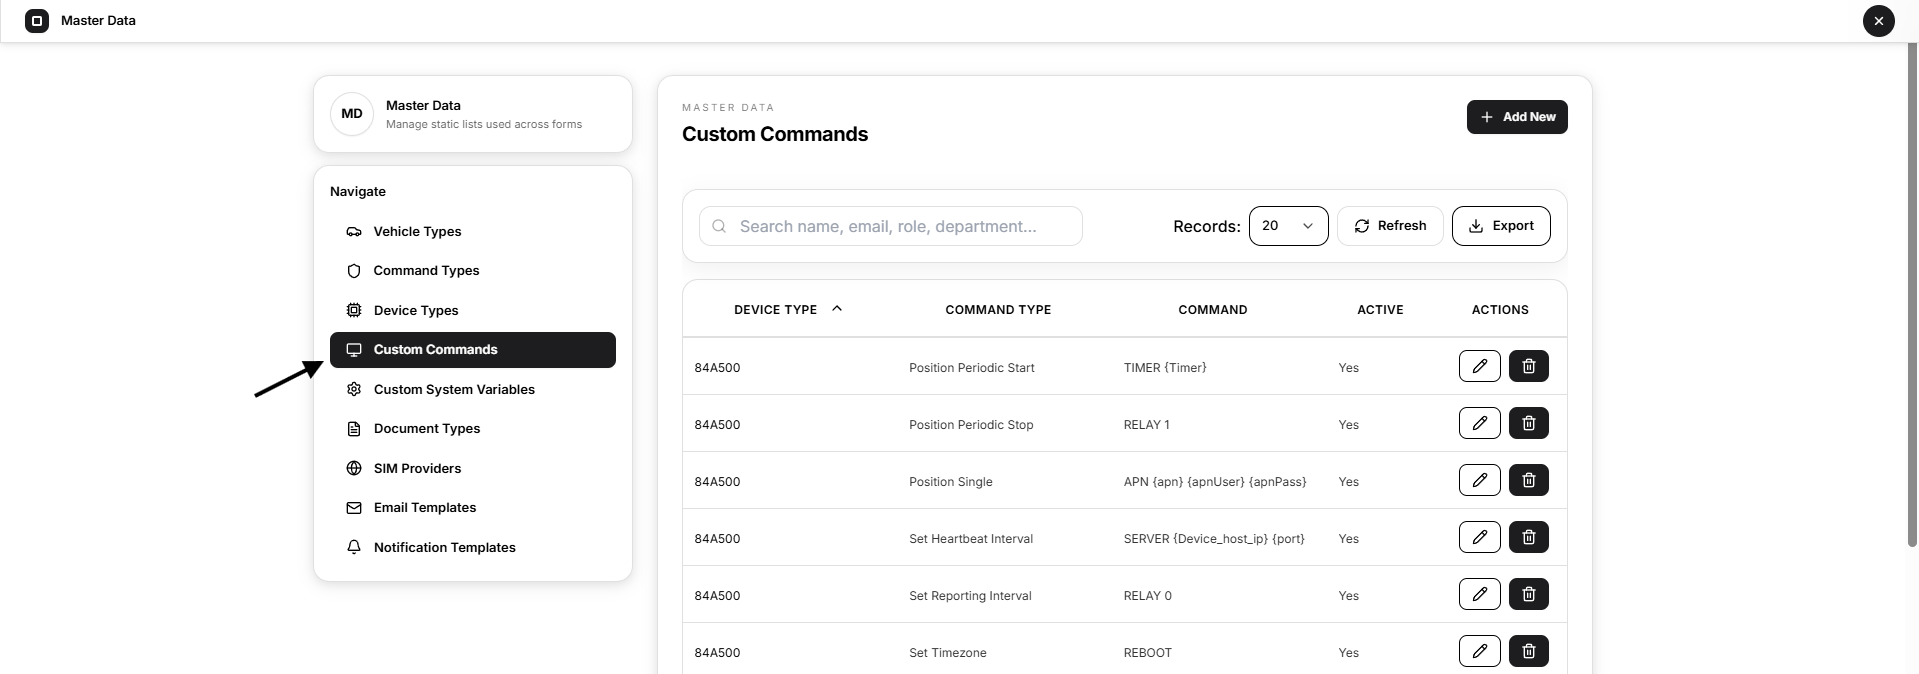
Custom Commands connect a Device Type, a Command Type, and the actual device-specific command payload.
This allows the same logical action to use different command formats for different GPS tracker models.
The relationship is:
Device Type + Command Type + Command Payload = Custom Command
For example, two device models may both support a status command, but each model may require a different payload.
The list displays:
- Device Type
- Command Type
- Command
- Active status
- Actions
Add a Custom Command
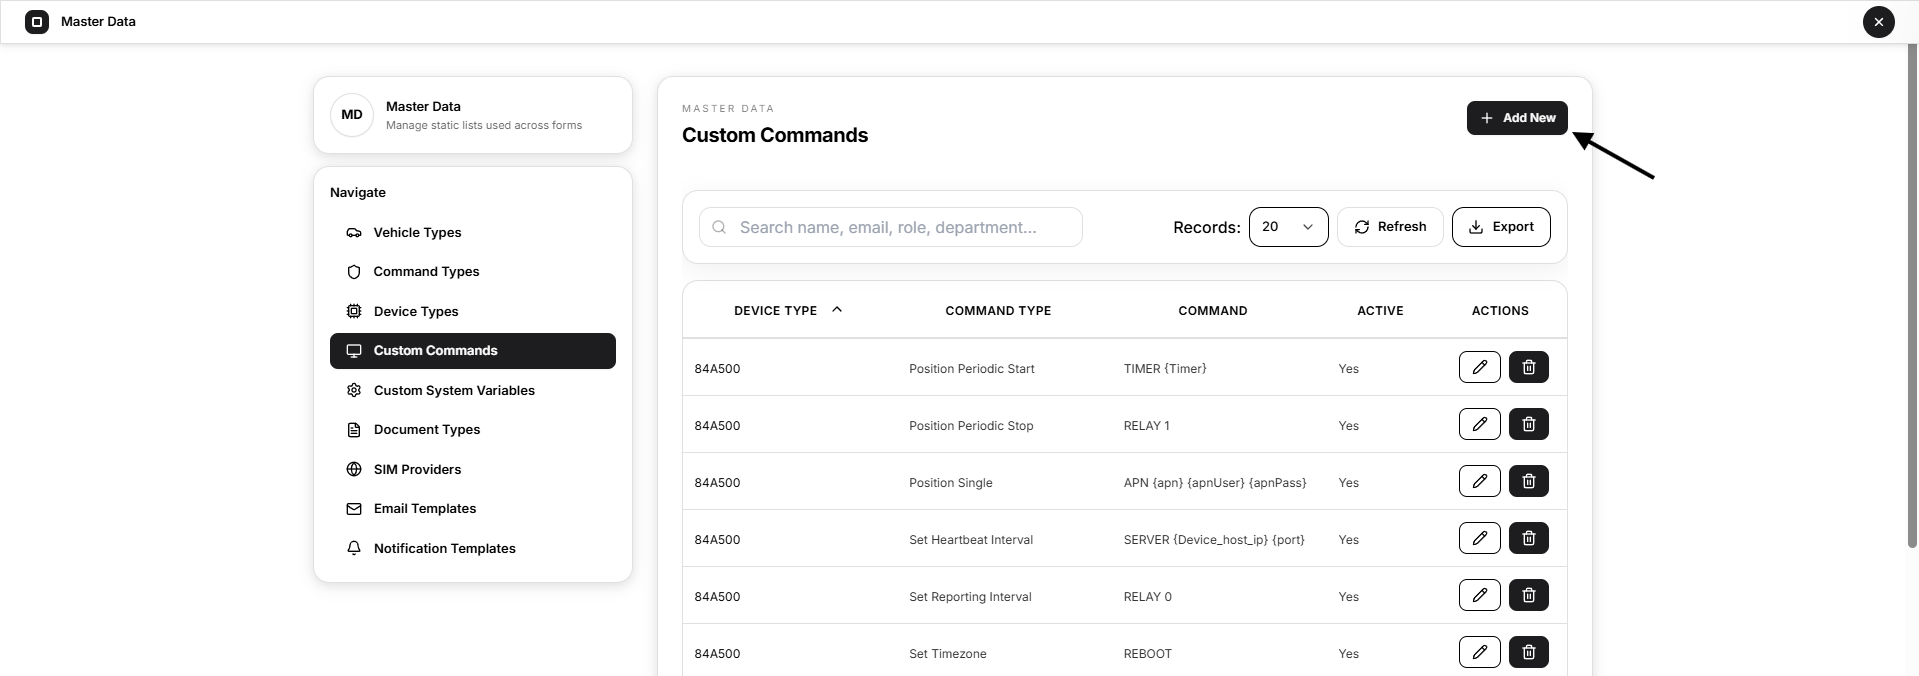
- Open Custom Commands.
- Select Add New.
- Choose the Device Type.
- Choose the Command Type.
- Enter the command payload.
- Review the Active option.
- Select Save.
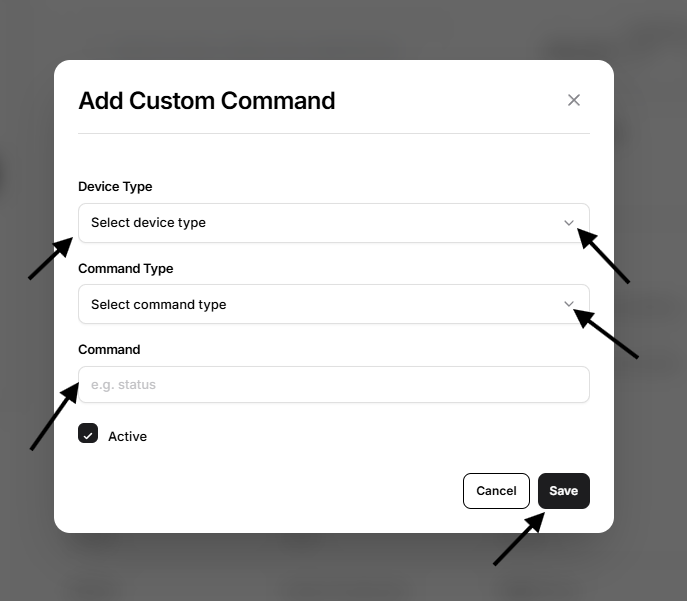
Device Type
Select the device definition for which the command is valid.
The dropdown is searchable and is populated from the Device Types section.
Command Type
Select the action represented by the command.
The dropdown is searchable and is populated from the Command Types section.
Command
Enter the exact payload expected by the selected device protocol.
Commands may include variables, for example:
TIMER {Timer}
or:
SERVER {Device_host_ip} {port}
The variable names must match the available values expected by the command workflow.
Active
Indicates whether the saved custom command is enabled for use.
Only create commands from verified protocol documentation. An incorrect payload may be rejected by the device or may trigger an unintended action.
Screenshot reference: Add the Custom Commands list screenshot here.
Screenshot reference: Add the Add Custom Command window here.
Screenshot reference: Add the opened Device Type dropdown after its explanation.
Screenshot reference: Add the opened Command Type dropdown after its explanation.
Custom System Variables
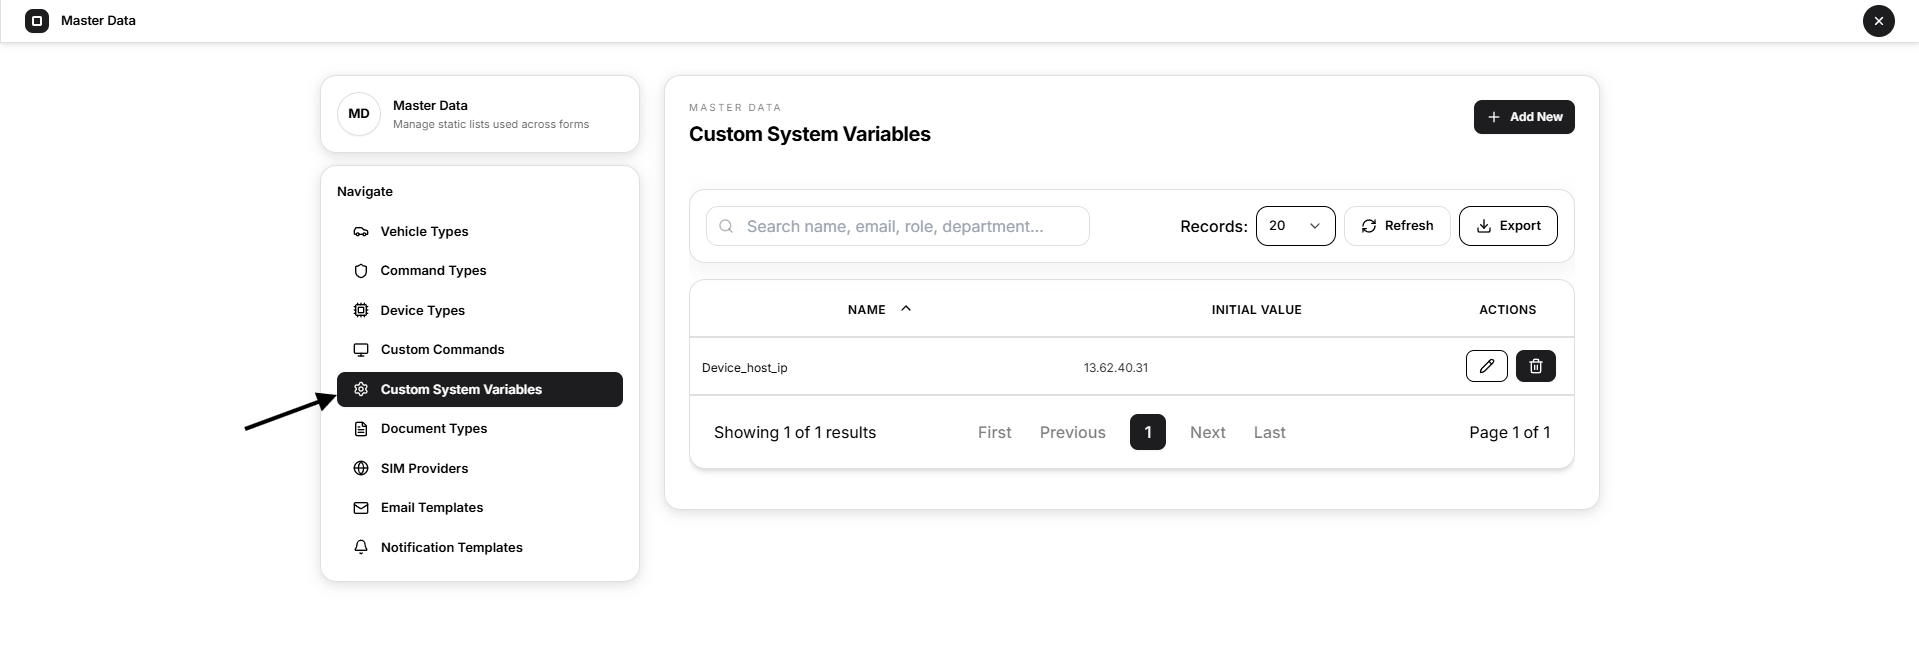
Custom System Variables store reusable name-and-value pairs that can provide default values to command templates.
For example, Open VTS creates the following system variable during initial setup:
Name: Device_host_ip Initial Value: Server public IP address
A Custom Command can reference the variable using a matching placeholder:
{Device_host_ip}
When the command is prepared in the Send Command interface, Open VTS can use the stored system-variable value as a default. Available live vehicle values, such as the IMEI or current telemetry, may also be used by supported command placeholders.
The list displays:
- Name
- Initial Value
- Actions
Add a System Variable
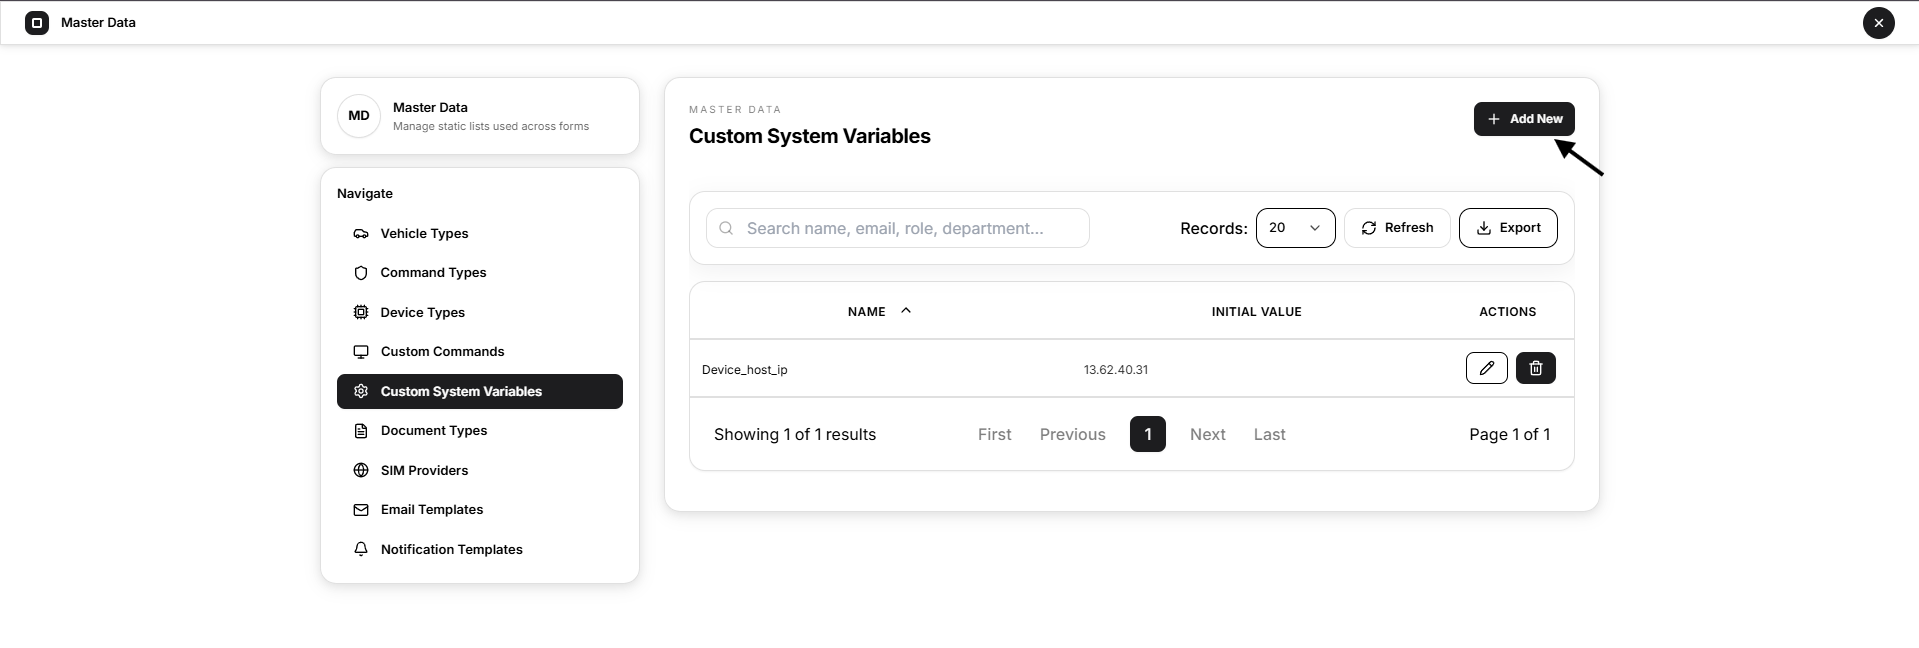
- Open Custom System Variables.
- Select Add New.
- Enter the variable name.
- Enter its initial value.
- Select Save.
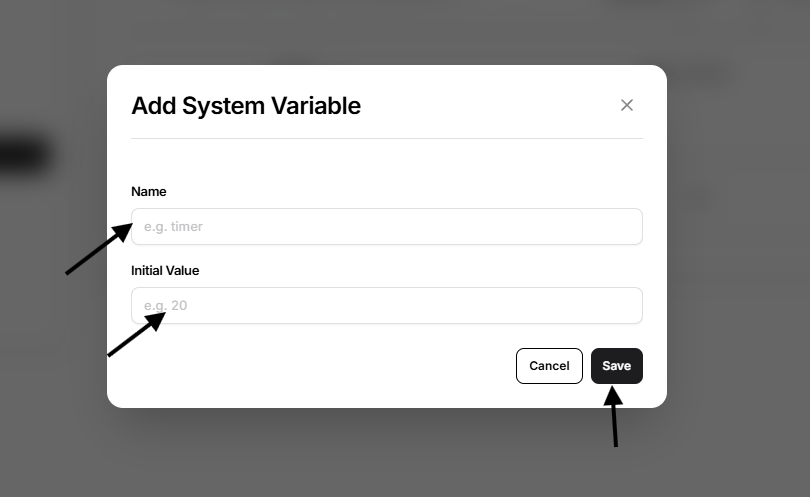
Name
The identifier referenced by a compatible command template.
The name must:
- Start with a letter
- Contain only letters, numbers, and underscores
- Remain unique
Example:
Device_host_ip
Initial Value
The default value associated with the variable.
System-variable names and values can affect command generation. Do not rename, delete, or change an existing variable unless its dependent commands have been reviewed.
Avoid storing passwords, secret keys, or other sensitive credentials unless the platform feature specifically requires and protects them.
Screenshot reference: Add the Custom System Variables list screenshot here.
Screenshot reference: Add the Add System Variable window here.
Screenshot reference: Add the Edit System Variable window after the editing explanation.
Document Types
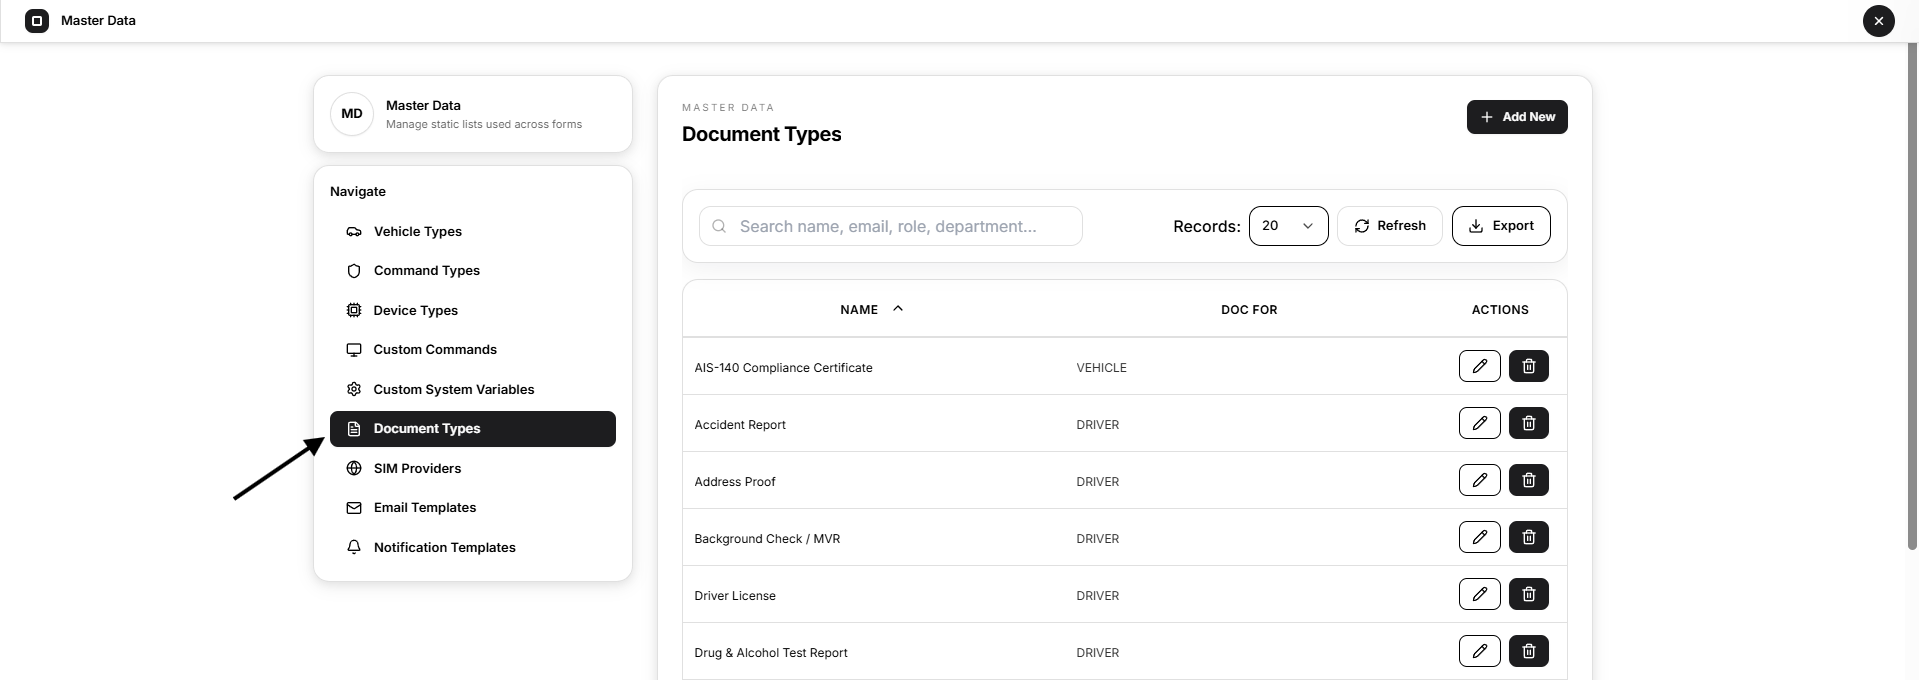
Document Types define the document classifications available when documents are uploaded for supported records.
Each Document Type is assigned to one of the following categories:
- USER
- DRIVER
- VEHICLE
The list displays:
- Name
- Doc For
- Actions
Add a Document Type
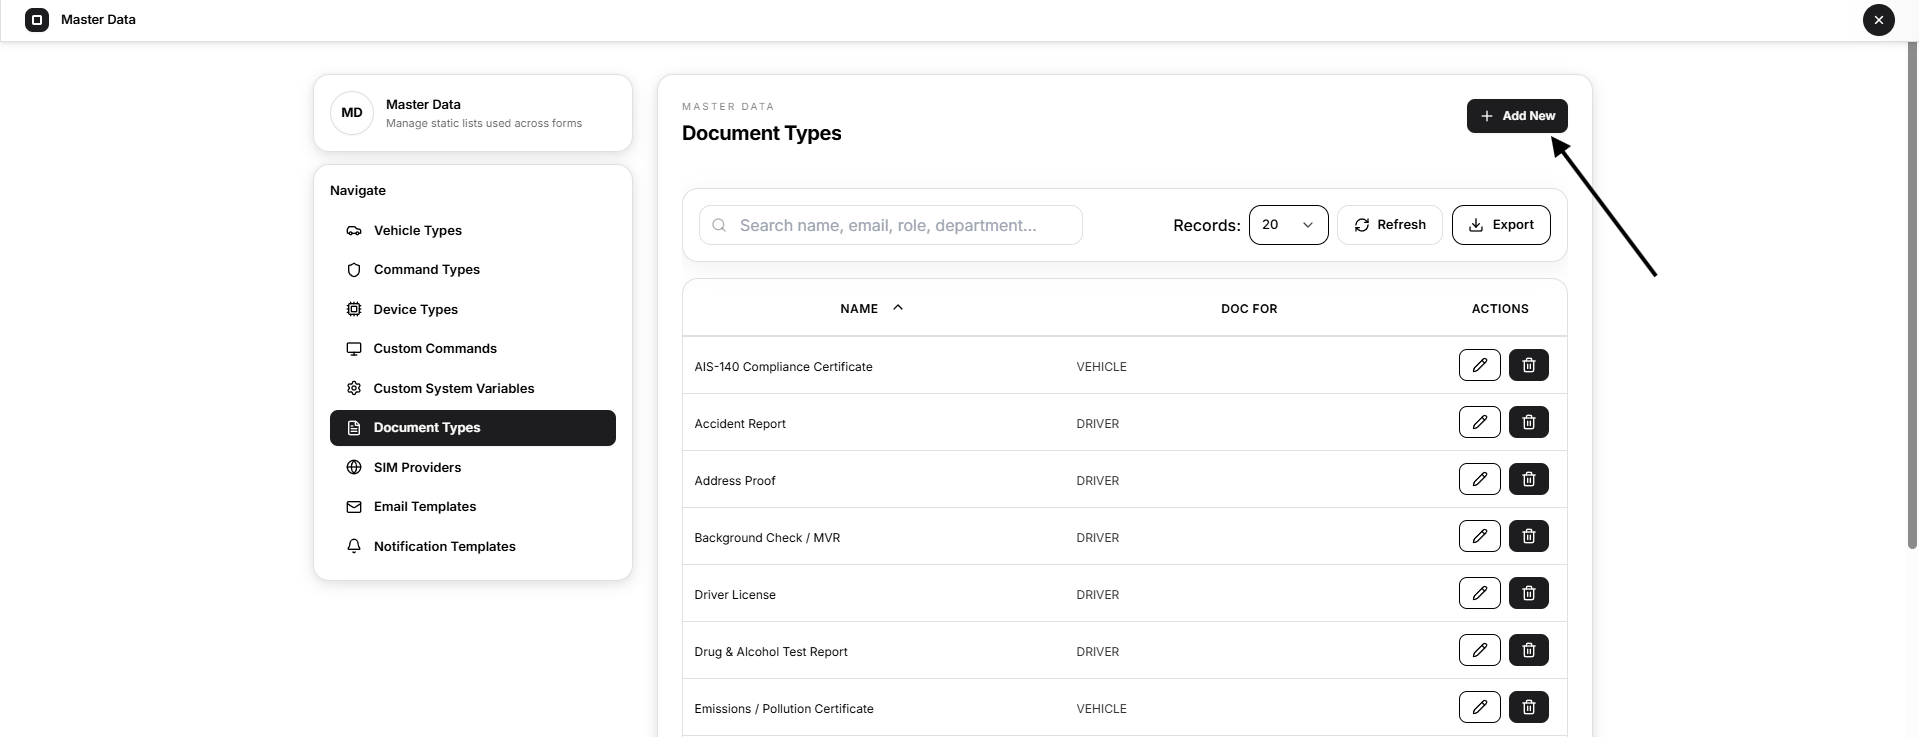
- Open Document Types.
- Select Add New.
- Enter the document-type name.
- Select the record category in Doc For.
- Select Save.
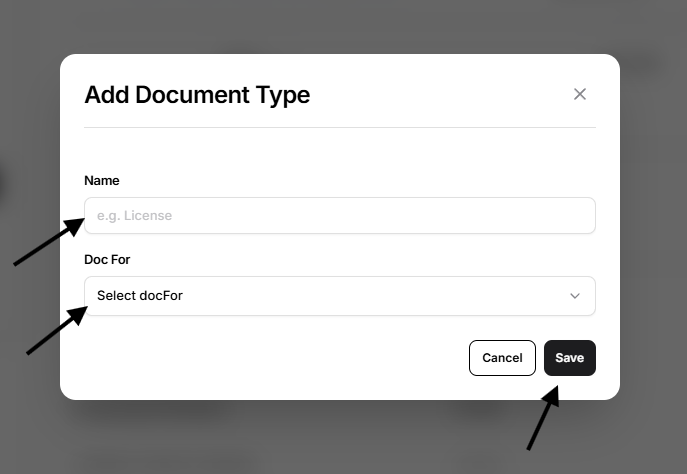
Name
The document classification shown to users when uploading or managing a document.
Examples include:
- Driver License
- Employment Contract
- Emissions Certificate
- Accident Report
Doc For
Determines where the document type is applicable.
OptionPurposeUSERDocuments associated with a platform userDRIVERDocuments associated with a driverVEHICLEDocuments associated with a vehicle
Choose the correct category because it determines where the document type can be used.
SIM Providers
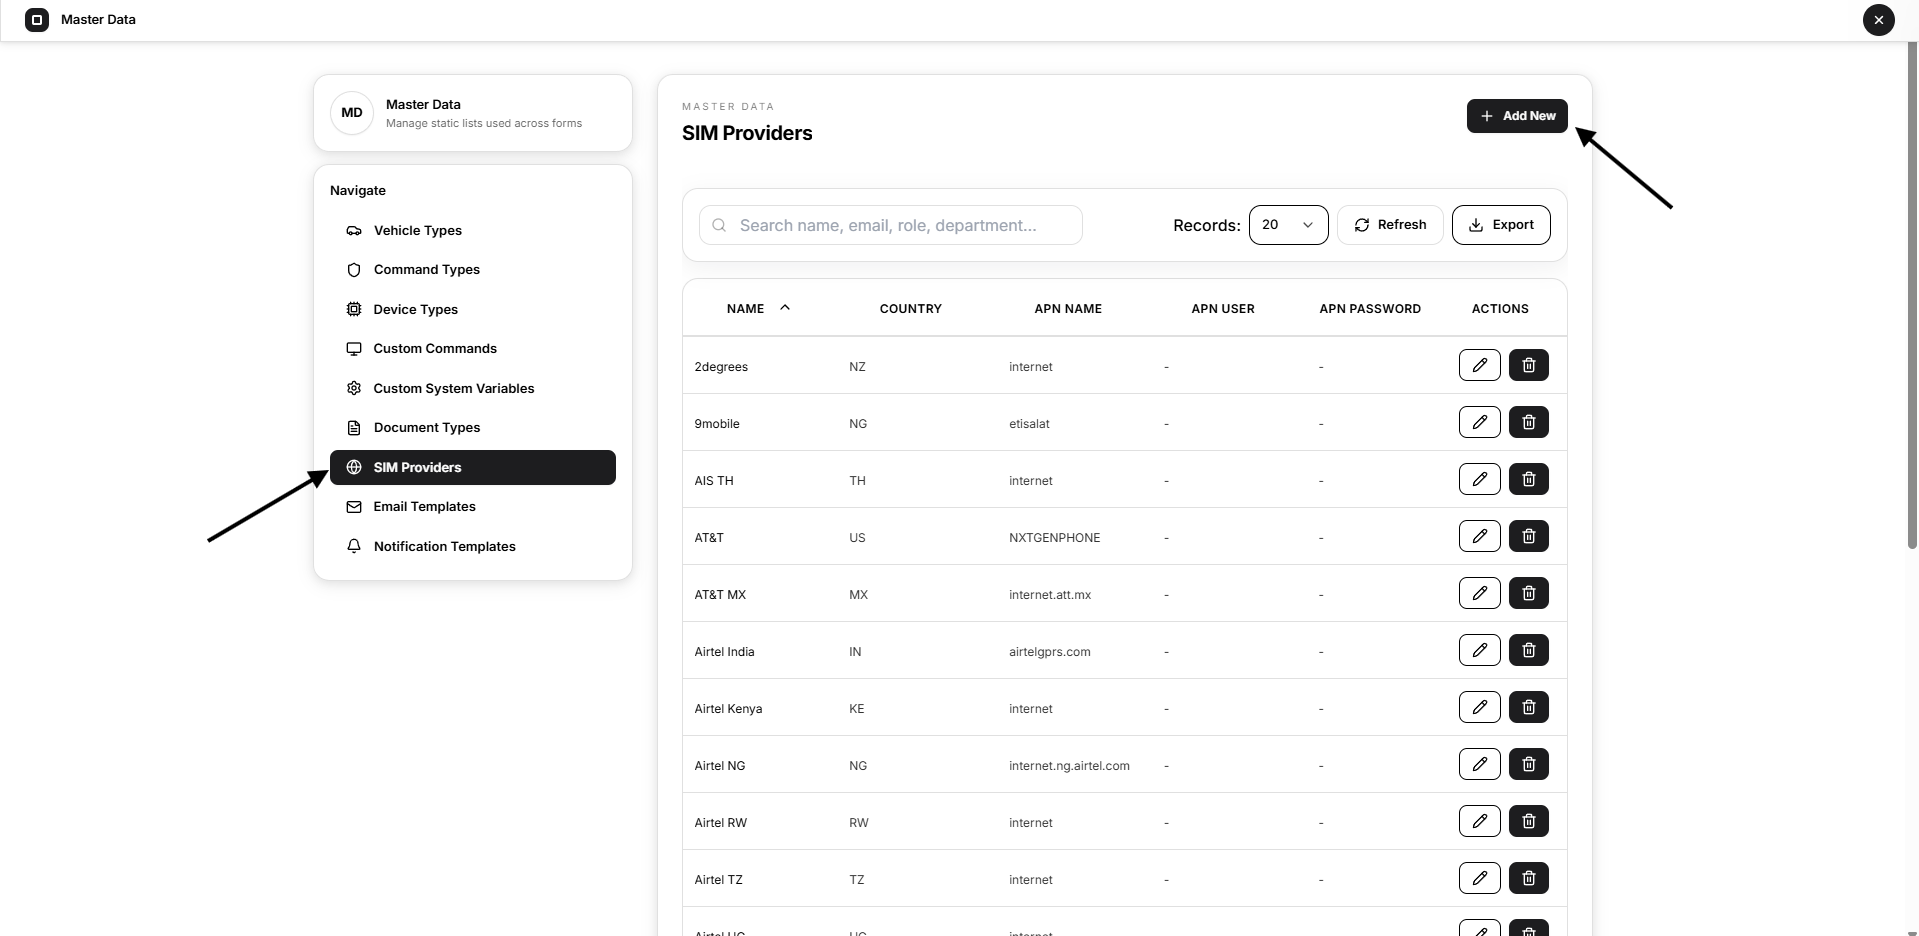
SIM Providers store reusable mobile-network and APN configuration details.
These records help standardize the network settings used by SIM cards installed in GPS tracking devices.
The list displays:
- Name
- Country
- APN Name
- APN User
- APN Password
- Actions
Add a SIM Provider
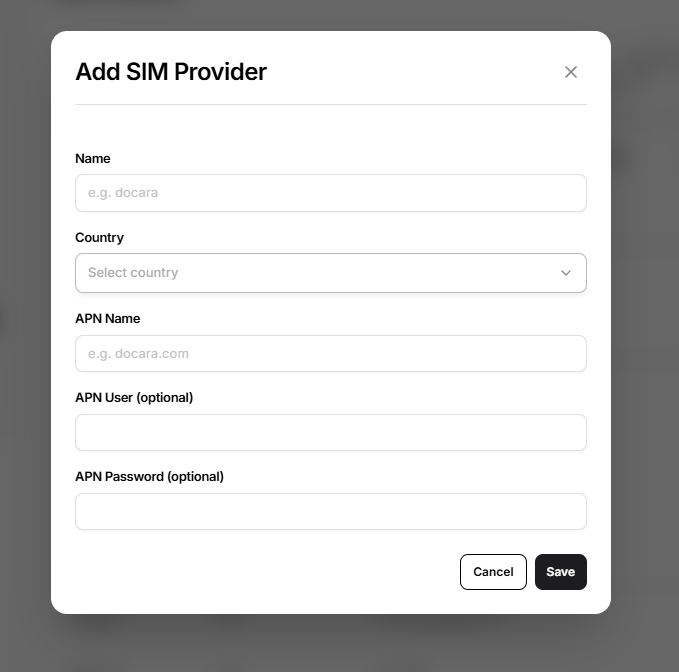
- Open SIM Providers.
- Select Add New.
- Enter the provider name.
- Select the country.
- Enter the APN name.
- Enter the APN username and password when required.
- Select Save.
Name
The name of the mobile-network or SIM provider.
Country
The country in which the SIM-provider configuration applies.
The country selector is searchable.
APN Name
The Access Point Name provided by the mobile-network operator.
Enter it exactly as supplied by the provider.
APN User
An optional APN username.
Leave this field empty when the network operator does not require authentication.
APN Password
An optional APN password.
Leave this field empty when the network operator does not require authentication.
APN settings may differ by provider, country, SIM plan, or private network. Confirm the values with the network operator before applying them to GPS devices.
Treat APN credentials as private operational information. Do not expose them in public screenshots, exported files, or external documentation.
Screenshot reference: Add the SIM Providers list screenshot here.
Screenshot reference: Add the Add SIM Provider window here.
Screenshot reference: Add the opened searchable Country dropdown after the Country explanation.
Email Templates
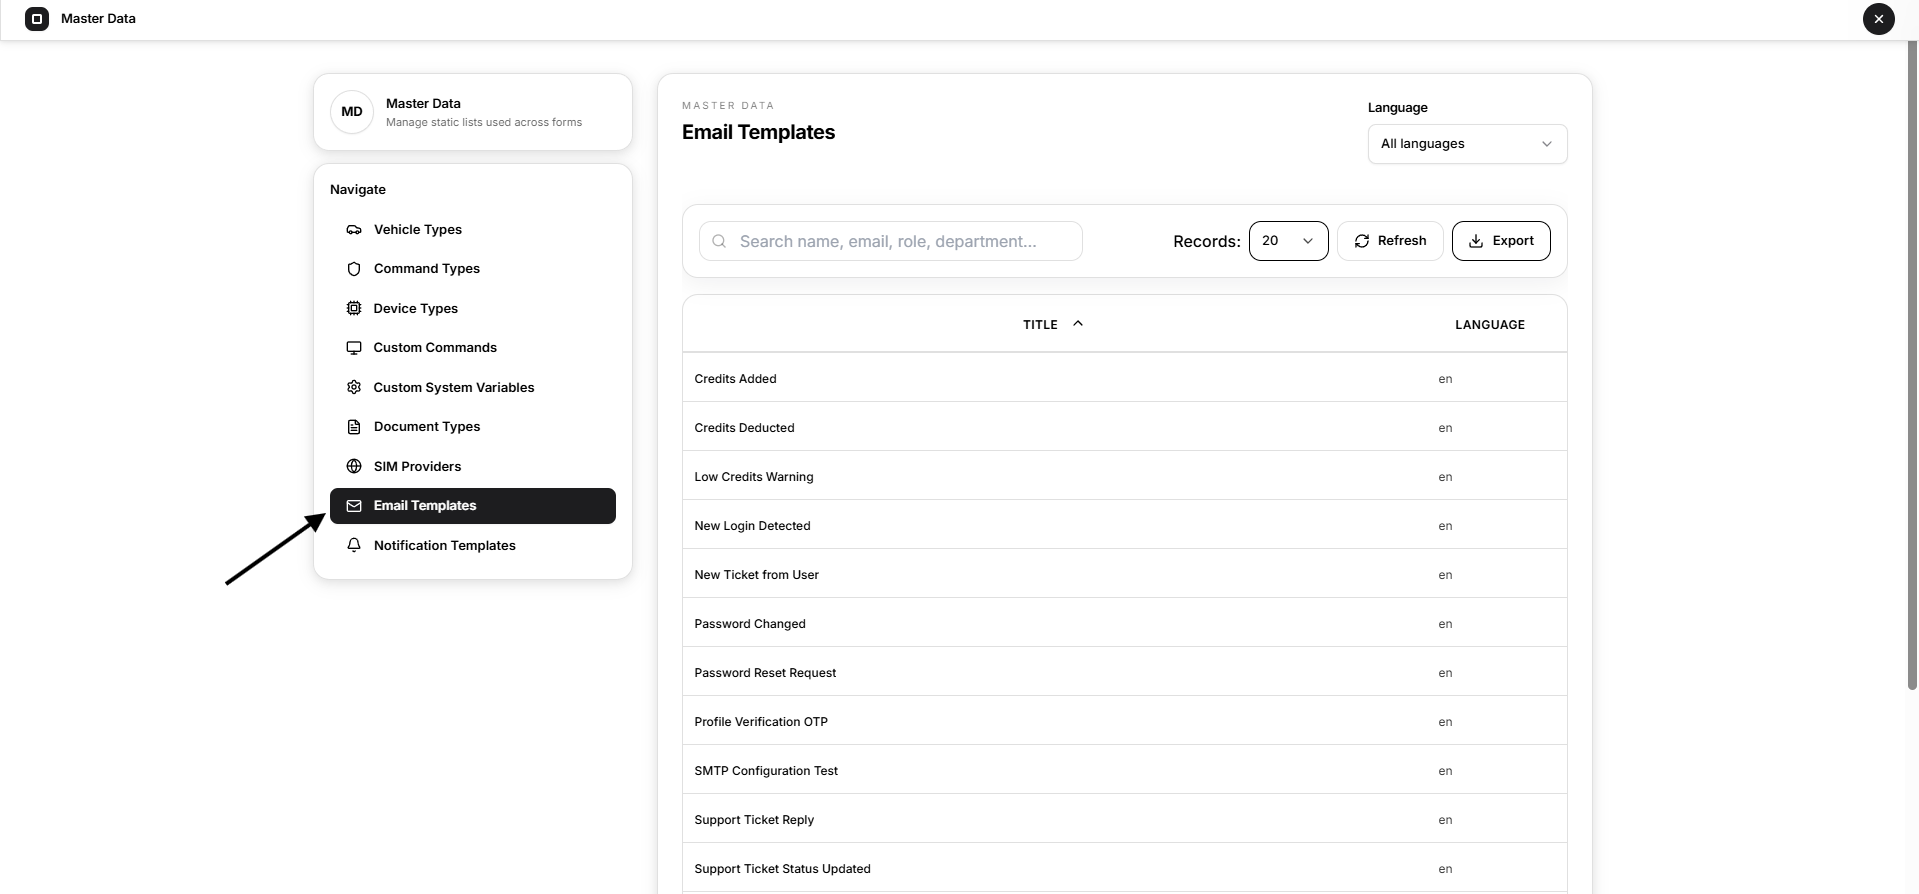
Email Templates control the subject and message content used for supported platform emails.
The list displays:
- Title
- Language
Use the Language filter to show templates for a specific language.
In the current list:
en = English
Other language codes may appear when additional localized templates are available.
Unlike other Master Data sections, Email Templates are not manually added or deleted from this page. Existing templates are opened by selecting their title.
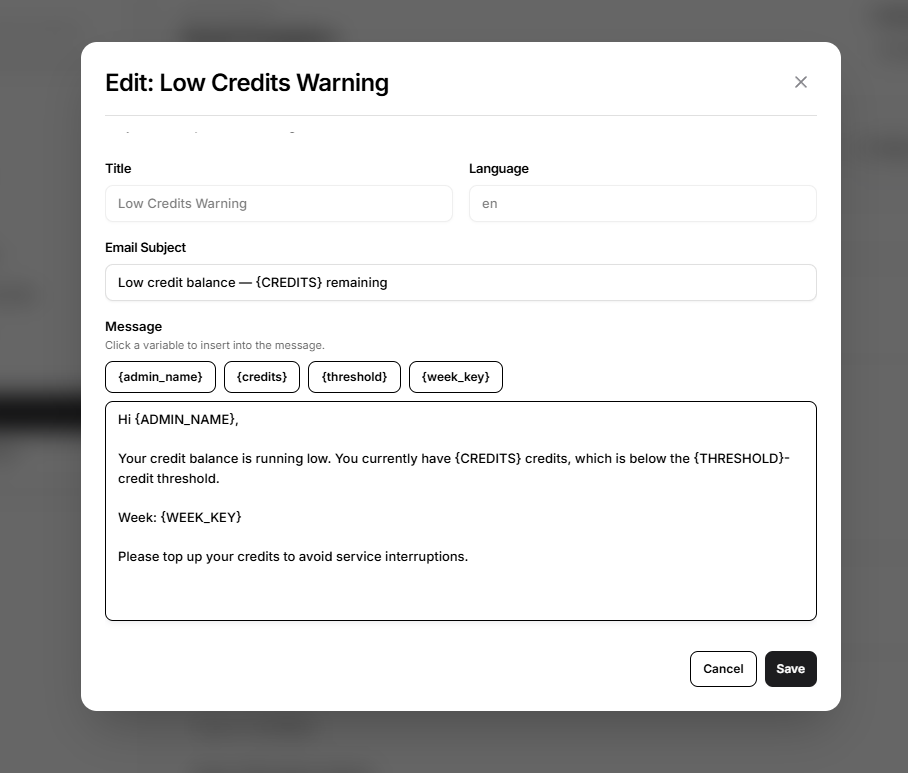
Edit an Email Template
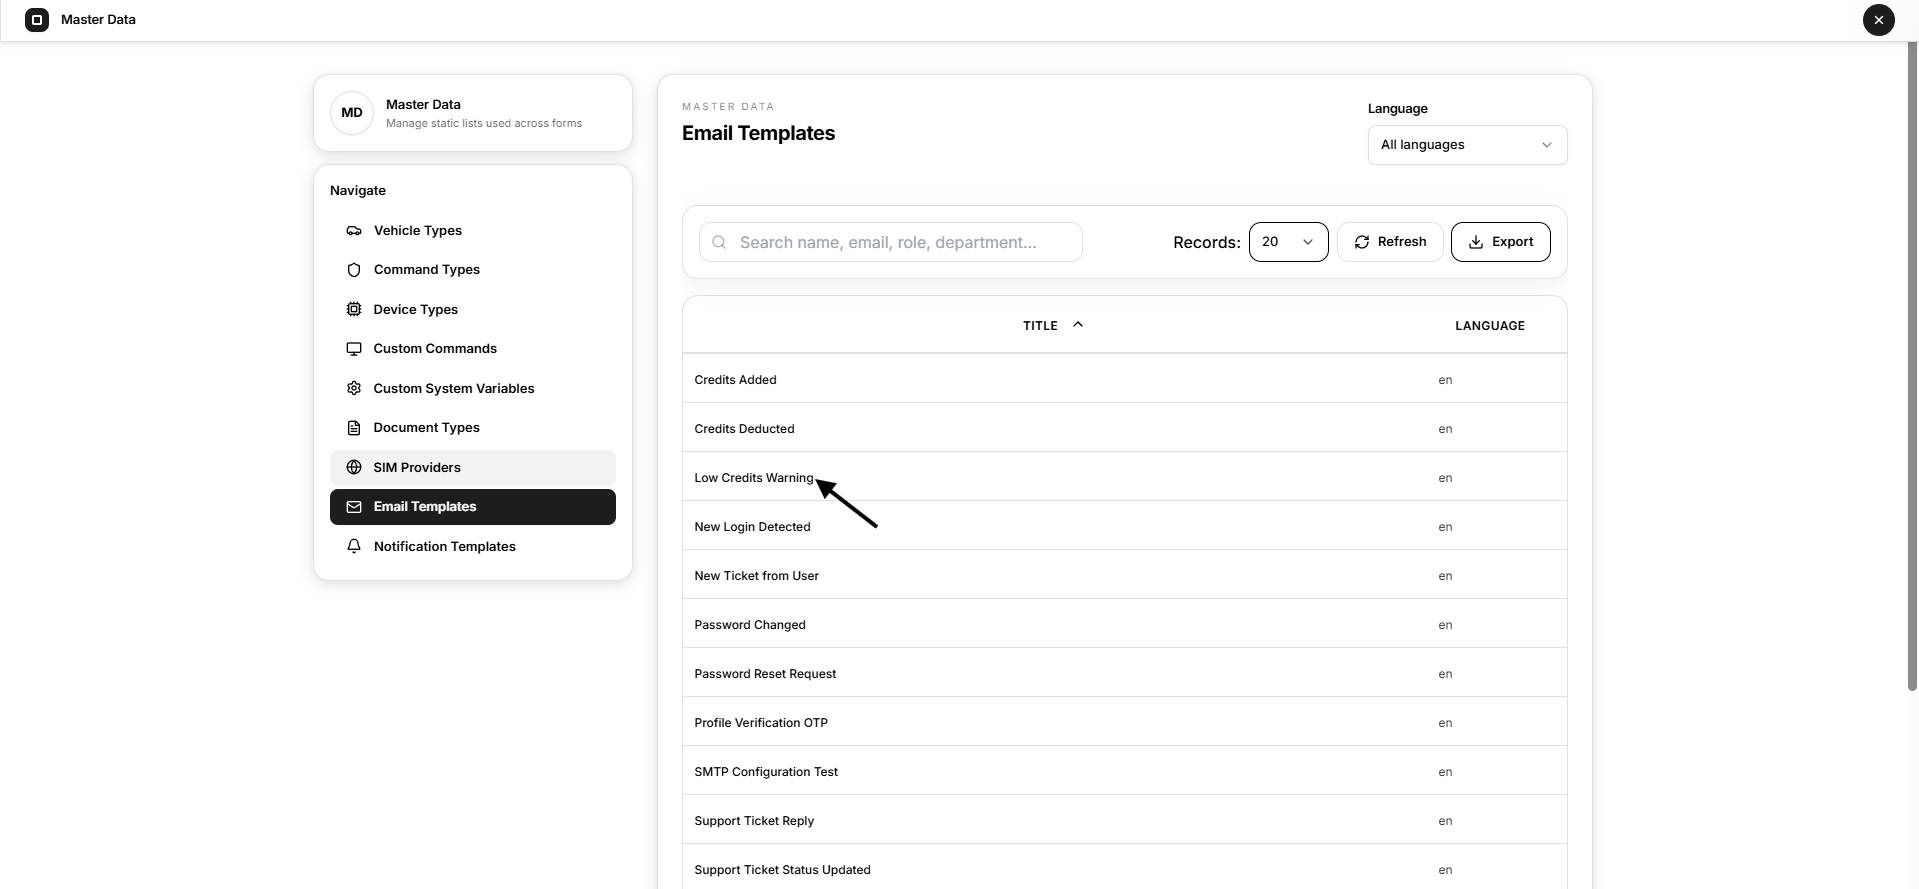
- Open Email Templates.
- Select the title of the required template.
- Review the template title and language.
- Update the email subject when required.
- Update the message.
- Insert supported variables using the displayed variable buttons.
- Select Save.
Title
Identifies the system event for which the template is used.
The title is read-only in the edit window.
Language
Shows the language code of the selected template.
The language is read-only in the edit window.
Email Subject
Defines the subject line used for the email.
Message
Defines the email body.
Variables
Variables represent dynamic values inserted when the email is generated.
For example:
{admin_name} {delta} {new_credits}
Selecting a variable button inserts that placeholder at the current cursor position in the Message field.
Do not rename or alter a placeholder unless the corresponding backend event data has also been updated. An unsupported or incorrectly written variable may remain unresolved in the delivered message.
Before saving, check that:
- The subject clearly describes the event
- Existing variables remain correctly formatted
- The message reads naturally when variables are replaced
- No confidential internal information has been added
Screenshot reference: Add the Email Templates list screenshot here.
Screenshot reference: Add the Edit Email Template window after the editing steps.
Notification Templates
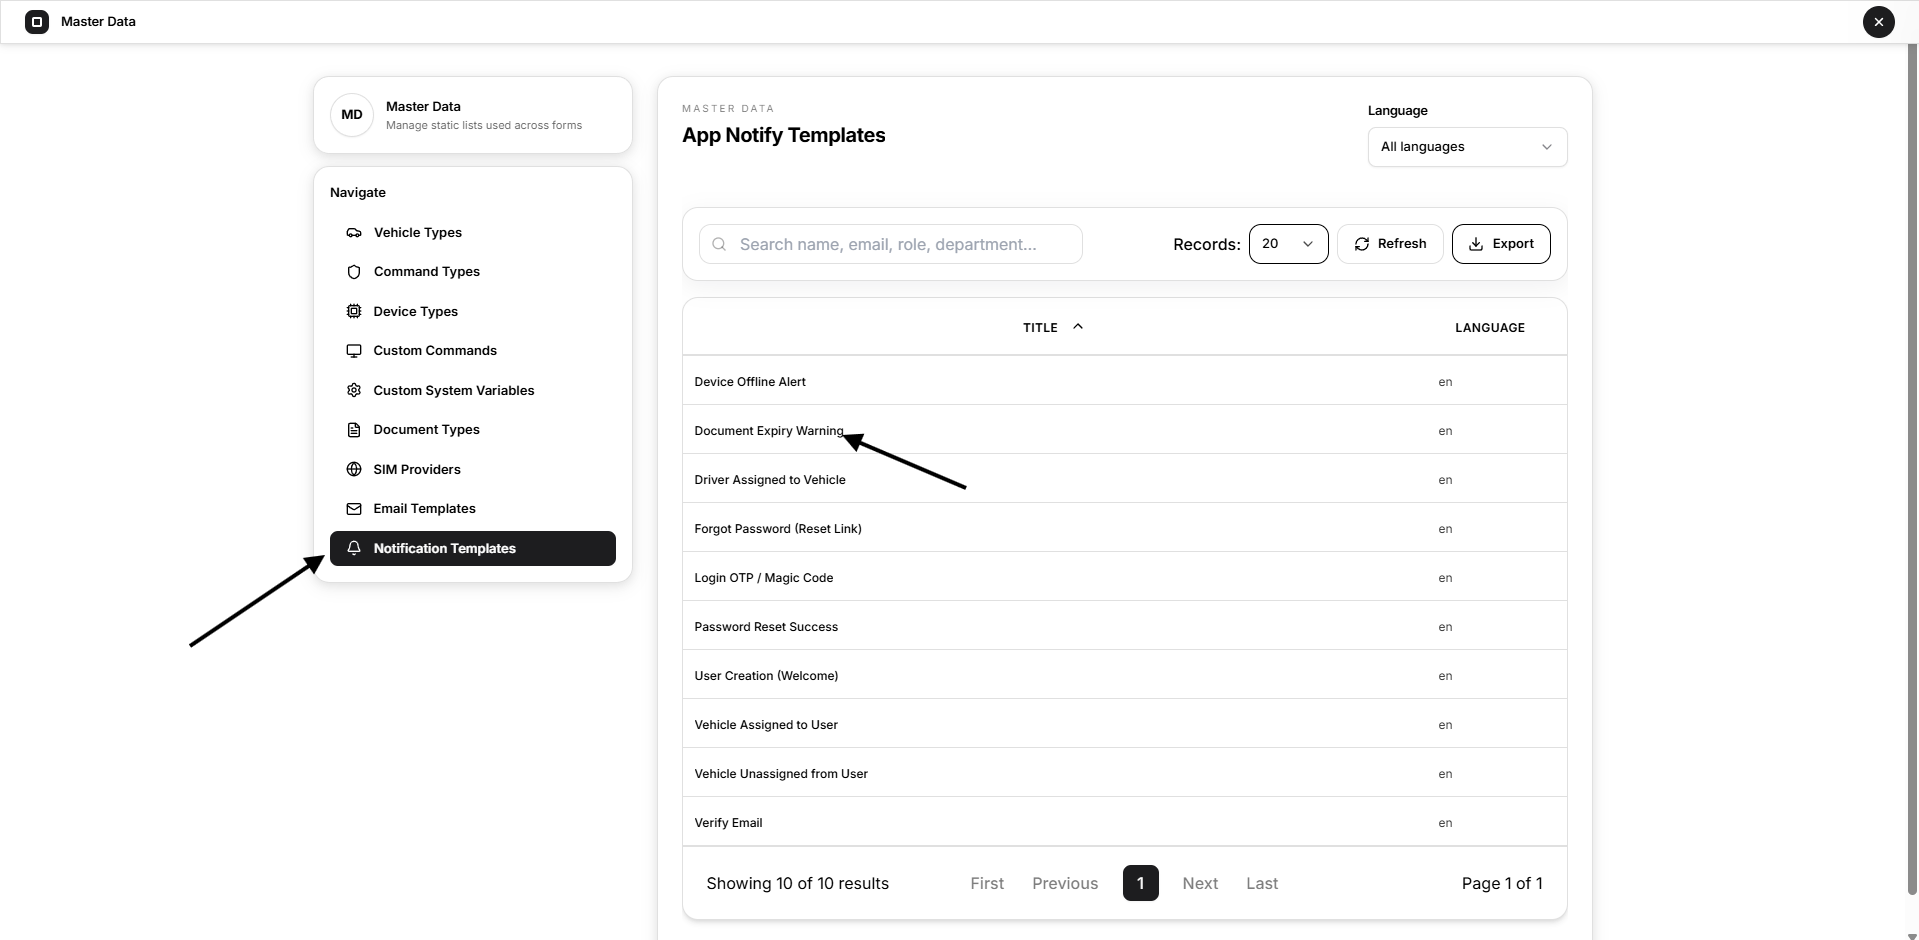
The navigation labels this section Notification Templates, while the page heading displays App Notify Templates.
These templates control the title and message used for supported in-app or application notification events.
The list displays:
- Title
- Language
Use the Language filter to display templates for a particular language.
In the current list:
en = English
Notification Templates are system-provided records. They are edited by selecting the template title and are not manually added or deleted from this page.
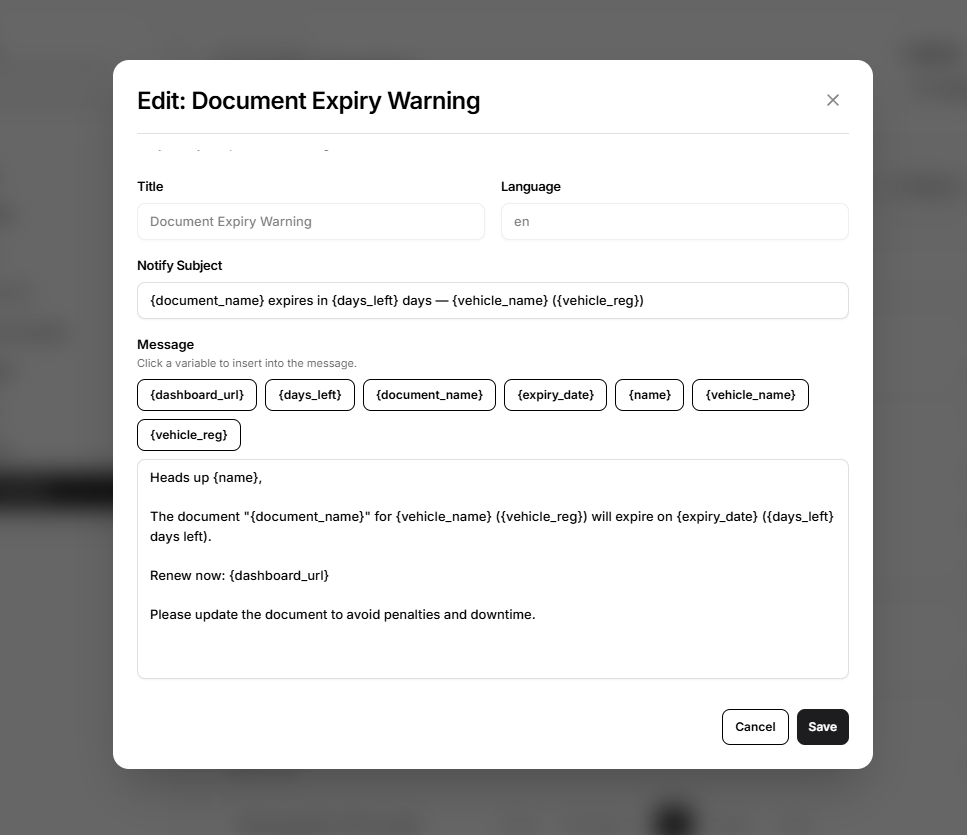
Edit a Notification Template
- Open Notification Templates.
- Select the required template title.
- Review the title and language.
- Update the notification subject.
- Update the message.
- Use the available variable buttons where required.
- Select Save.
Title
Identifies the event that triggers the notification.
The title is read-only.
Language
Shows the language code assigned to the template.
The language is read-only.
Notify Subject
Defines the main subject or heading of the notification.
Message
Defines the detailed notification content.
Variables
Variables insert event-specific values into the notification.
For example, the Device Offline Alert template may provide variables such as:
{dashboard_url} {device_name} {imei} {last_seen} {offline_for} {vehicle_name} {vehicle_reg}
Selecting a variable inserts it at the cursor position in the Message field.
Use only the variables displayed for the selected template. Different notification events can provide different variable sets.
Screenshot reference: Add the Notification Templates list screenshot here.
Screenshot reference: Add the Edit Device Offline Alert window after the variable explanation.
Recommended Configuration Order
When configuring a new Open VTS installation, use the following order:
- Create or review Vehicle Types.
- Confirm the required Command Types.
- Configure supported Device Types.
- Review the required Custom System Variables.
- Create device-specific Custom Commands.
- Configure Document Types.
- Review SIM Providers and APN settings.
- Review Email Templates.
- Review Notification Templates.
This order ensures that dependent selections are available when later records are created.
Important Safety Guidelines
Before changing Master Data:
- Confirm that the record is not already used elsewhere.
- Use exact protocol, port, command, and APN values.
- Avoid duplicate records with slightly different names.
- Keep variable names stable after they are used in commands.
- Test custom commands on a controlled device before wider use.
- Review email and notification variables before saving.
- Export or record important configuration before large changes.
- Delete records only when their dependencies have been reviewed.
Master Data provides consistency across Open VTS, but incorrect changes can also affect multiple workflows. Keep the configuration standardized, verified, and limited to authorized Superadmins.