
Configure Firebase Cloud Messaging
Connect Firebase Cloud Messaging with Open VTS to enable browser, Android, and iOS push notifications.
Last updated August 20, 2026
Configure Firebase Cloud Messaging
Firebase Cloud Messaging, or FCM, allows Open VTS to deliver push notifications to supported web browsers and mobile applications.
This setup includes:
- Web push notification configuration
- Android Firebase configuration
- iOS Firebase configuration
- Test notification verification
Before You Begin
You need:
- Access to the Open VTS Superadmin panel
- A Google account
- Access to the Firebase Console
- The Android package name used by your Open VTS mobile application
- The Apple Bundle ID used by your iOS application
The Android package name and Apple Bundle ID must exactly match the identifiers configured in the respective mobile applications.
Open the Firebase Configuration Page
From the Open VTS homepage, go to:
Settings → API Config → Firebase Cloud Messaging
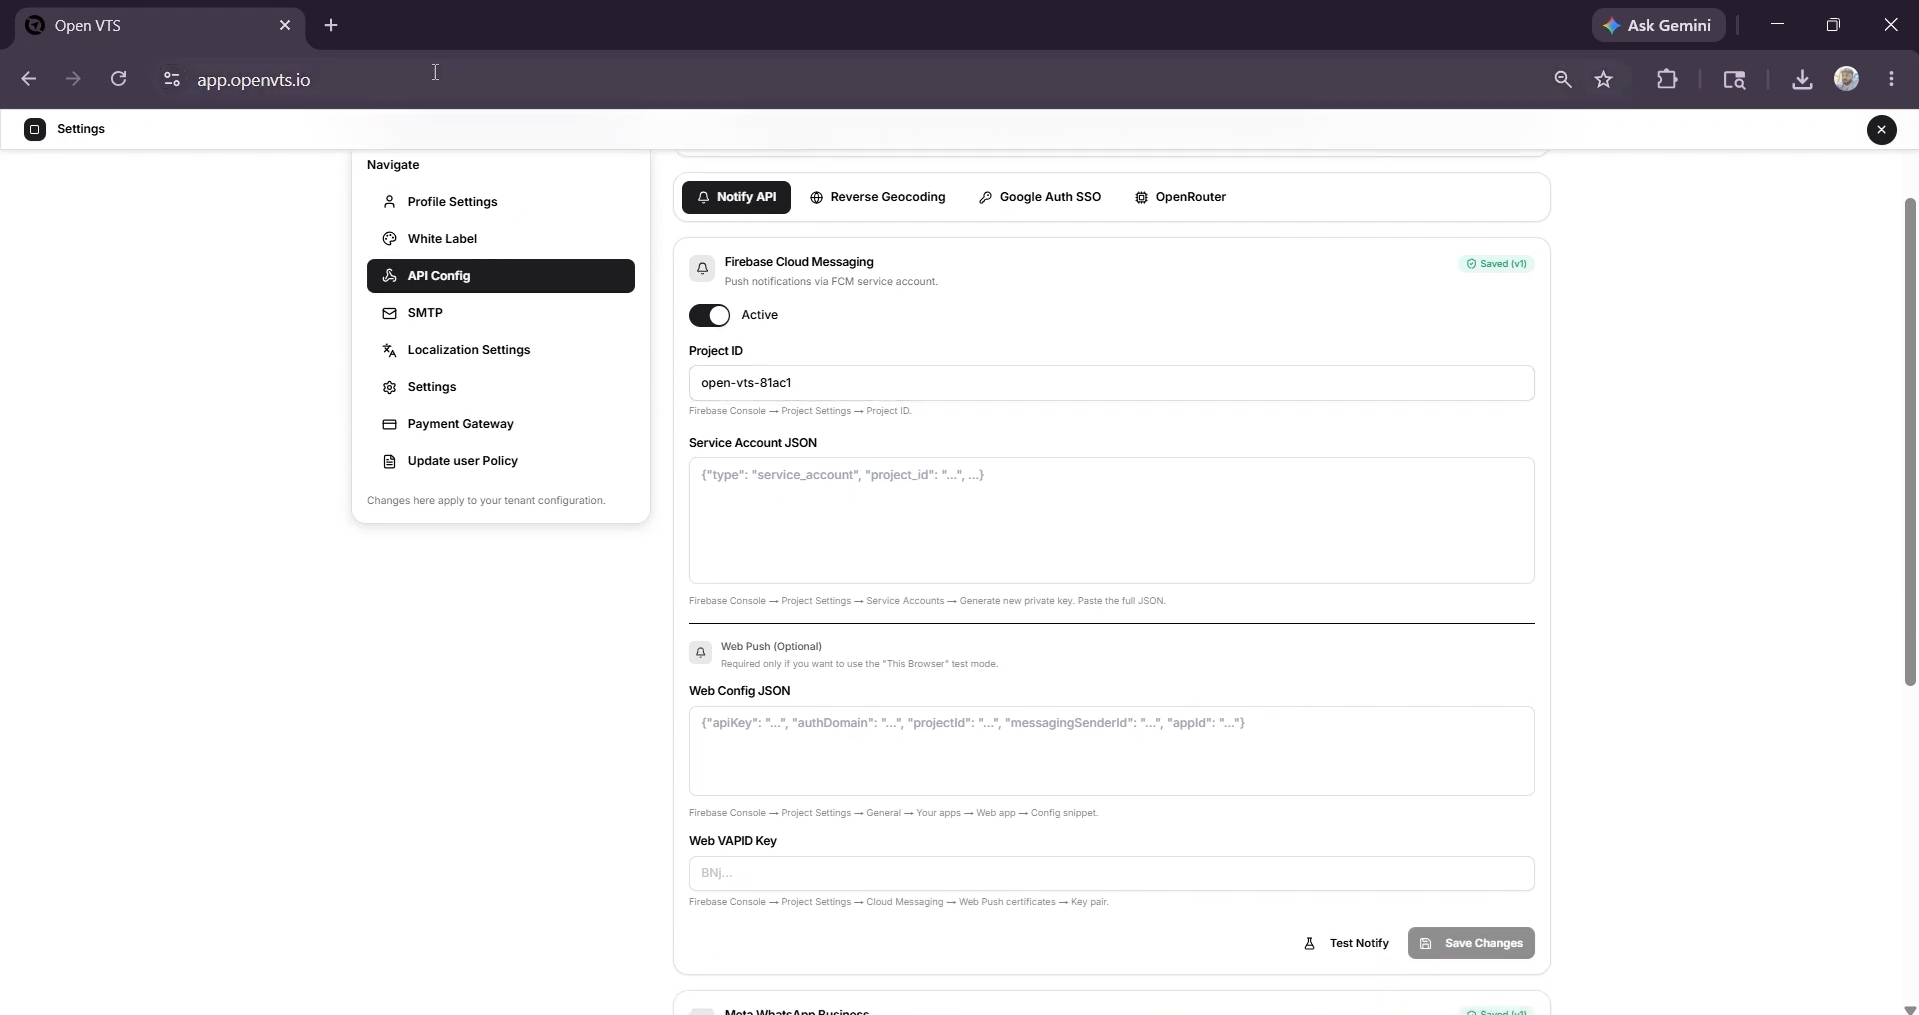
The Firebase configuration page contains fields for web, Android, and iOS push notification settings.
Step 1: Create a Firebase Project
Open a new browser tab.
Go to the Firebase Console.
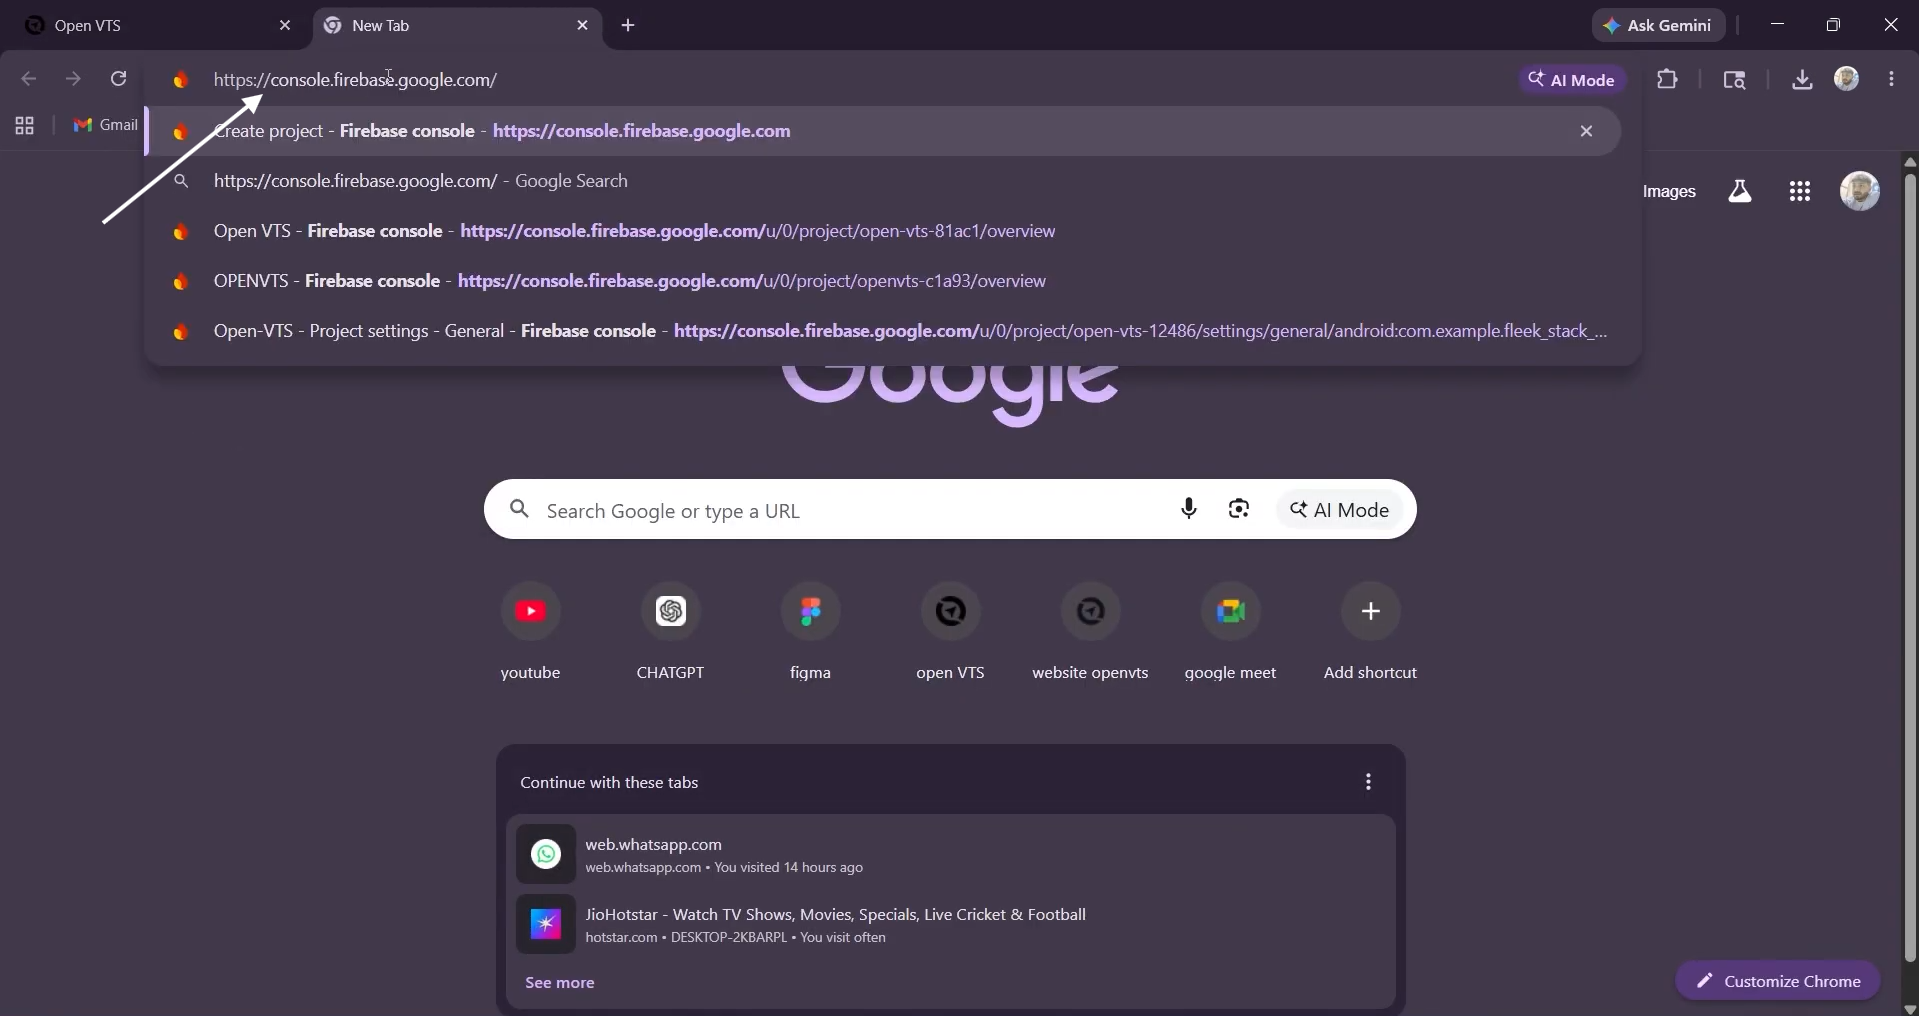
Select Create a project.
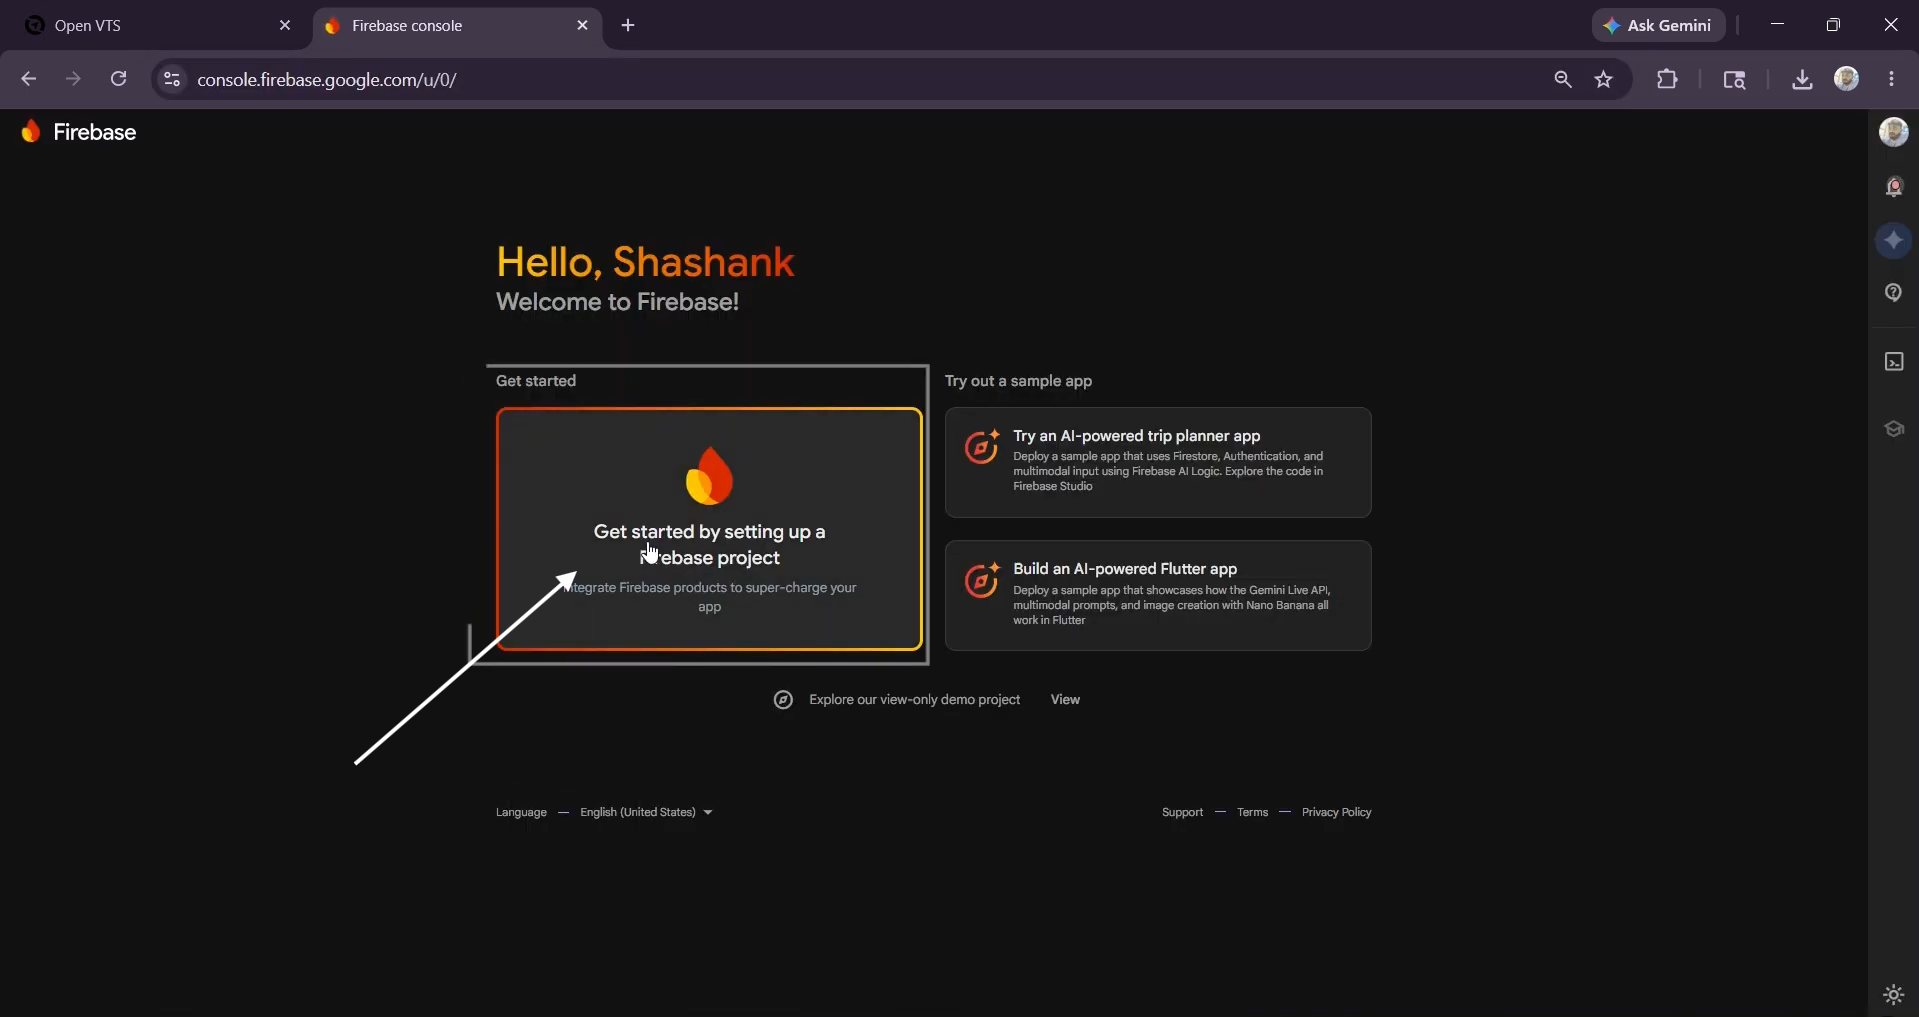
Enter a project name.
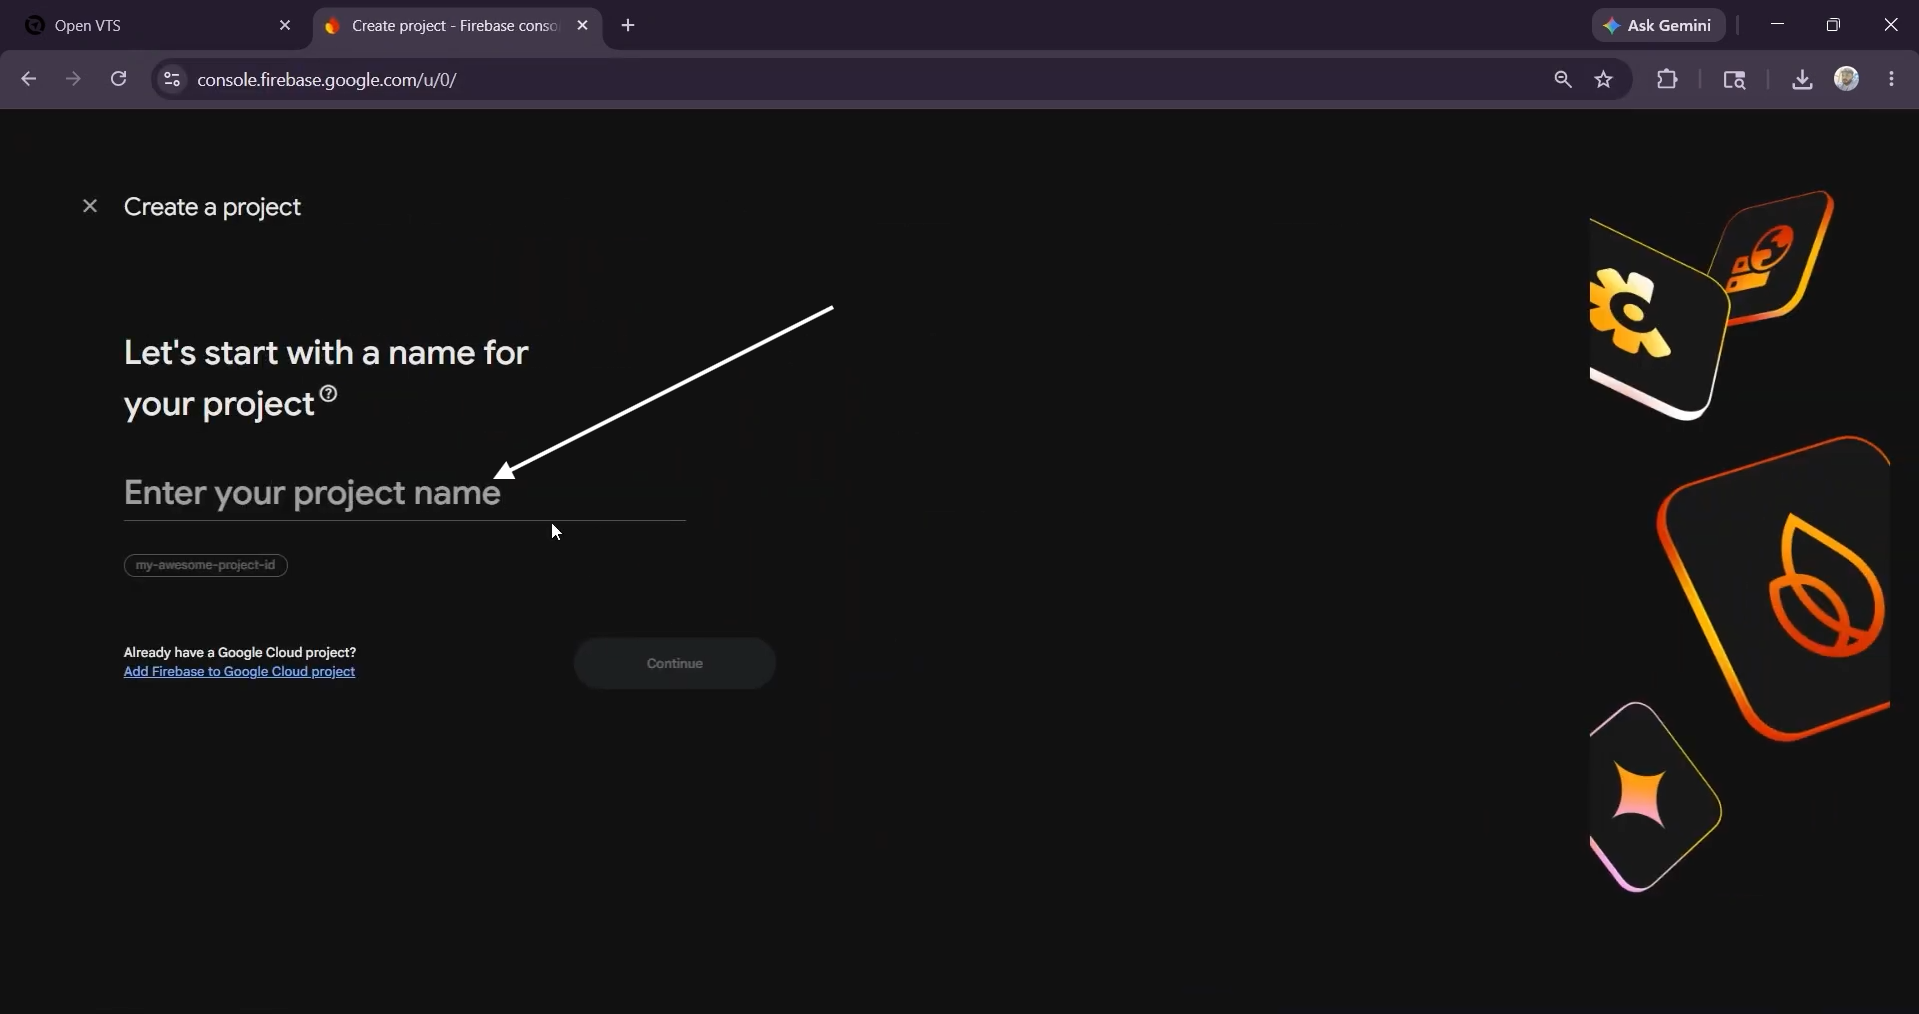
Continue through the project setup.
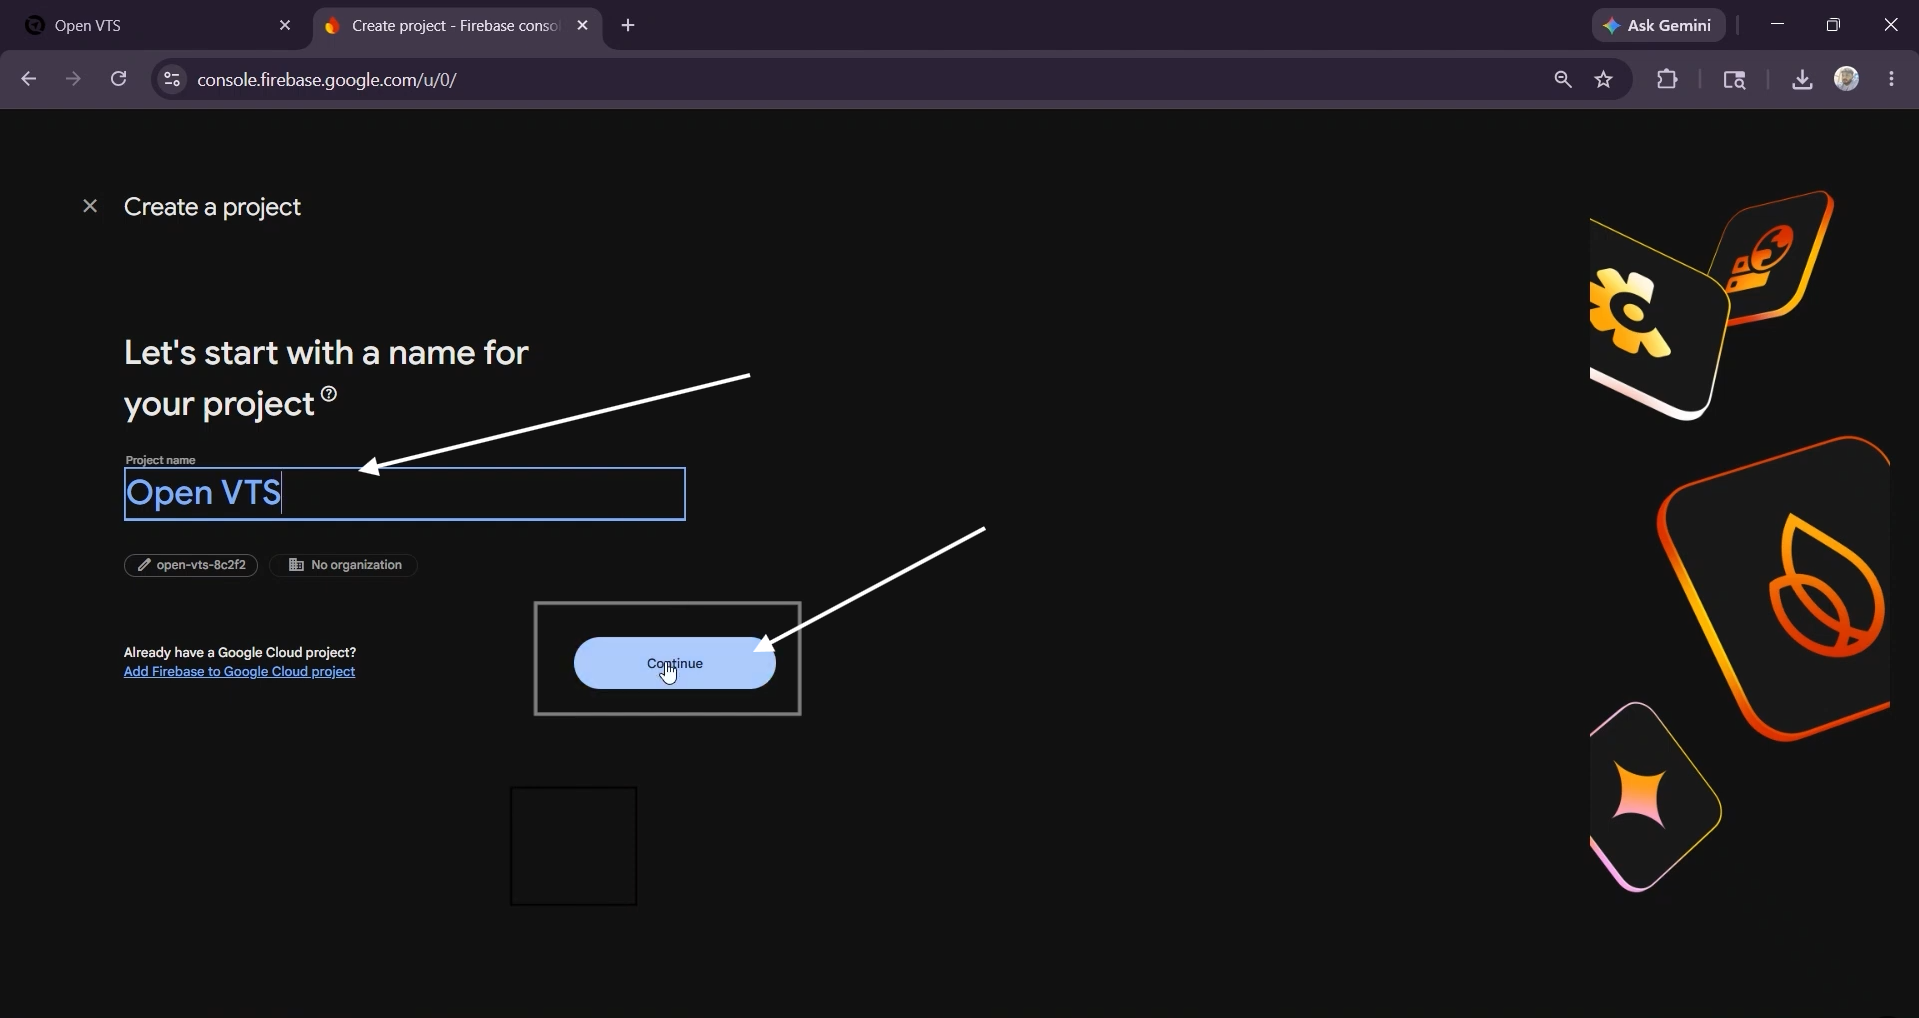
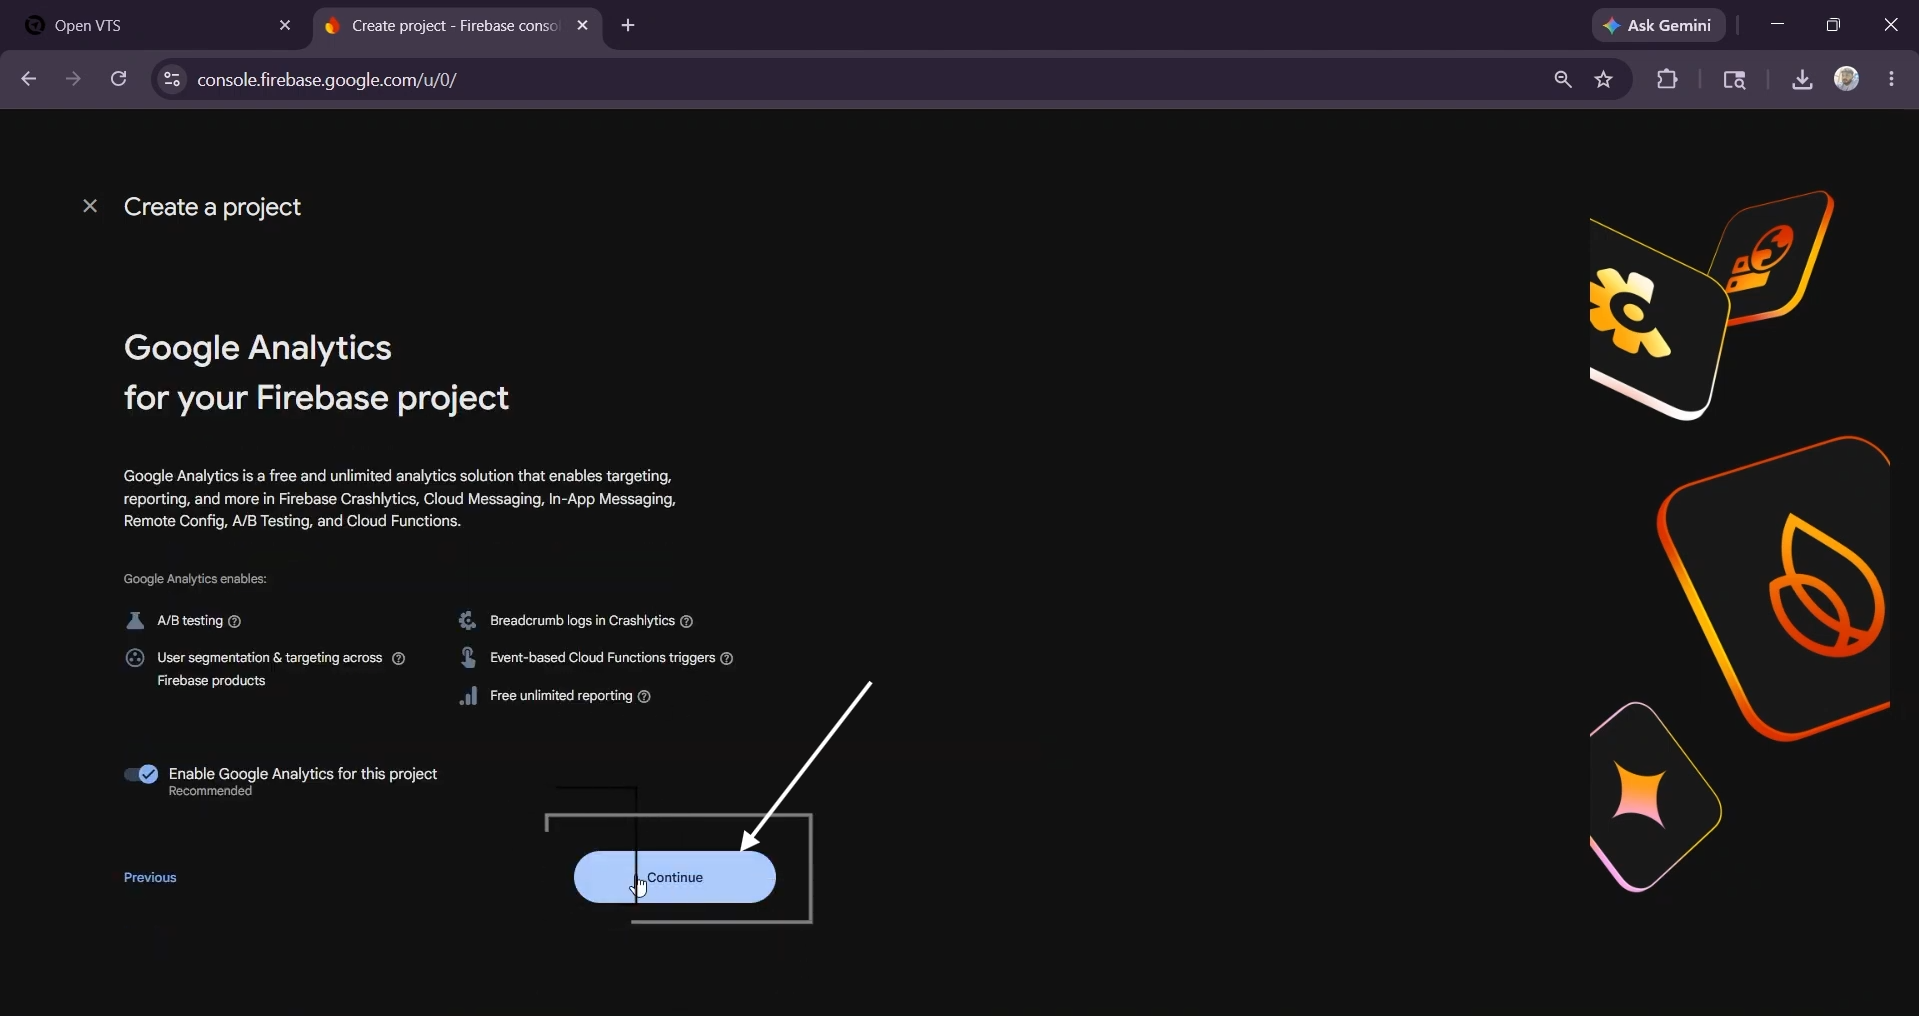
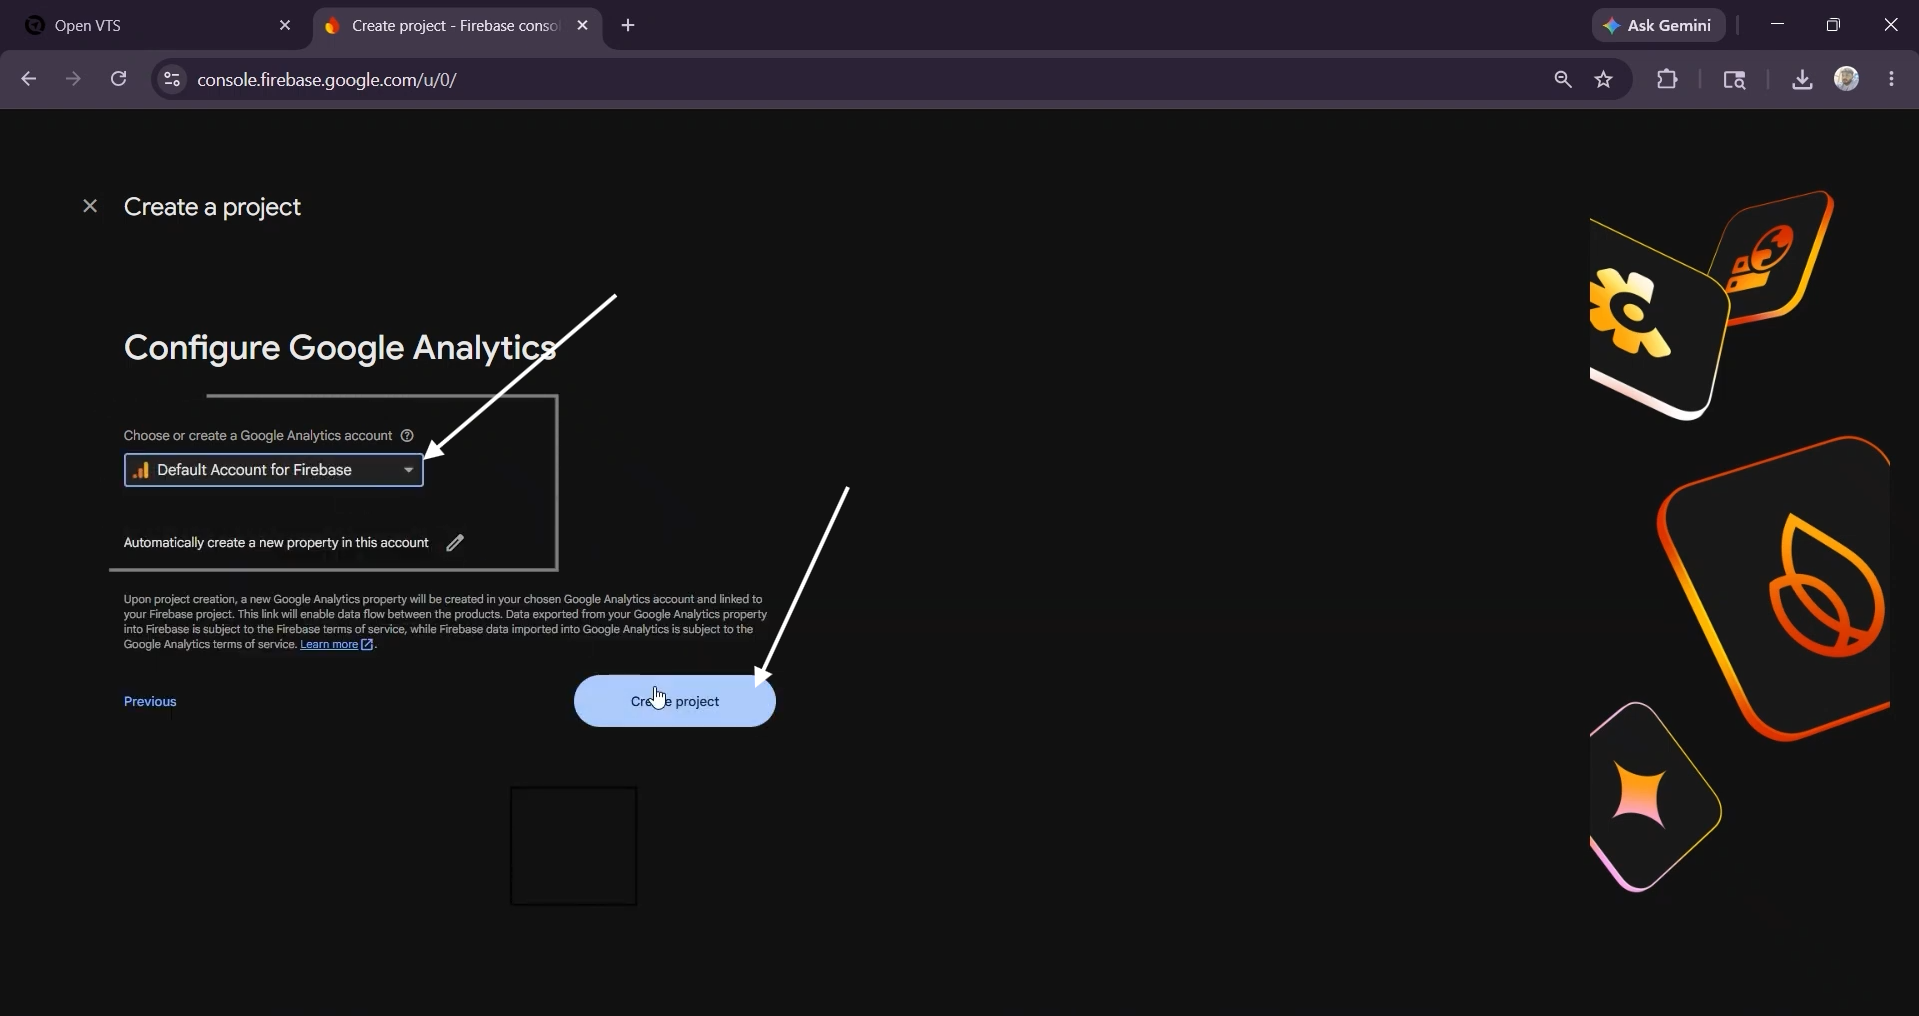
Select the available Firebase account when requested.
Select Create Project.
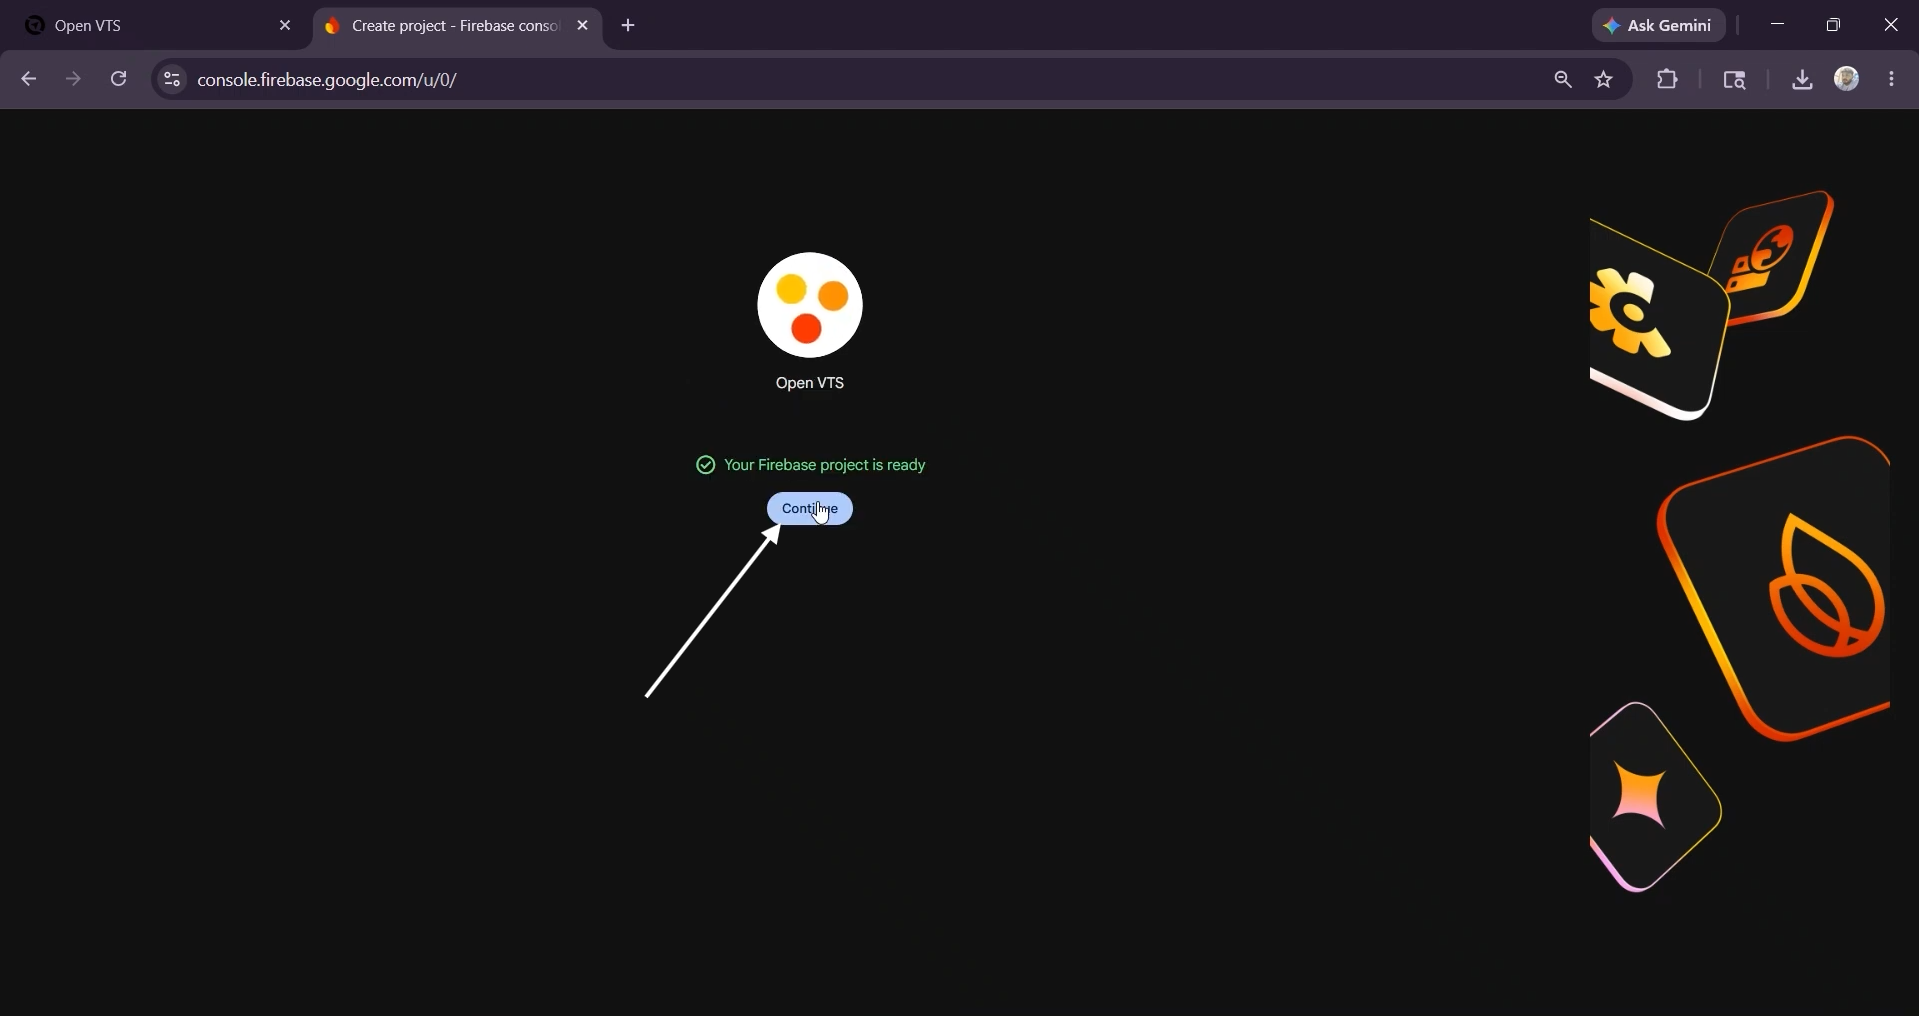
After the project is created, select Continue.
Step 2: Register the Web Application
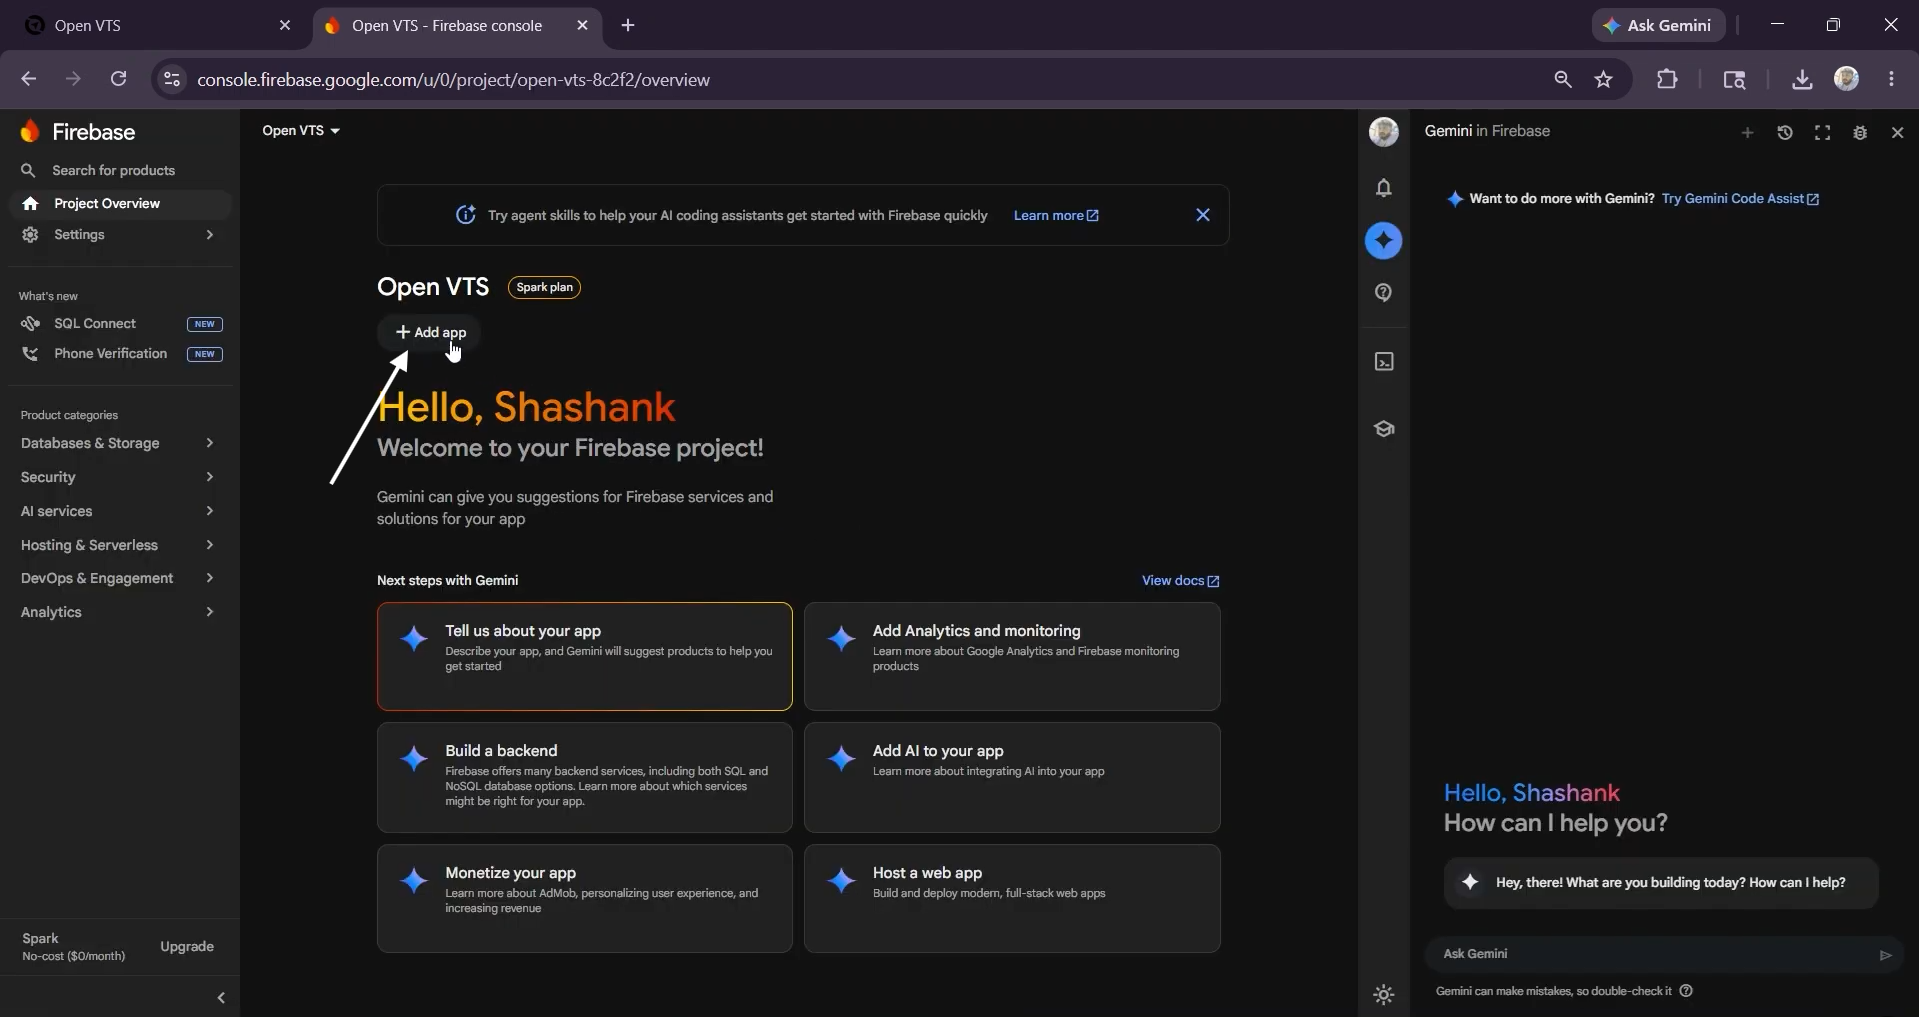
From the Firebase project homepage:
Select Add App.
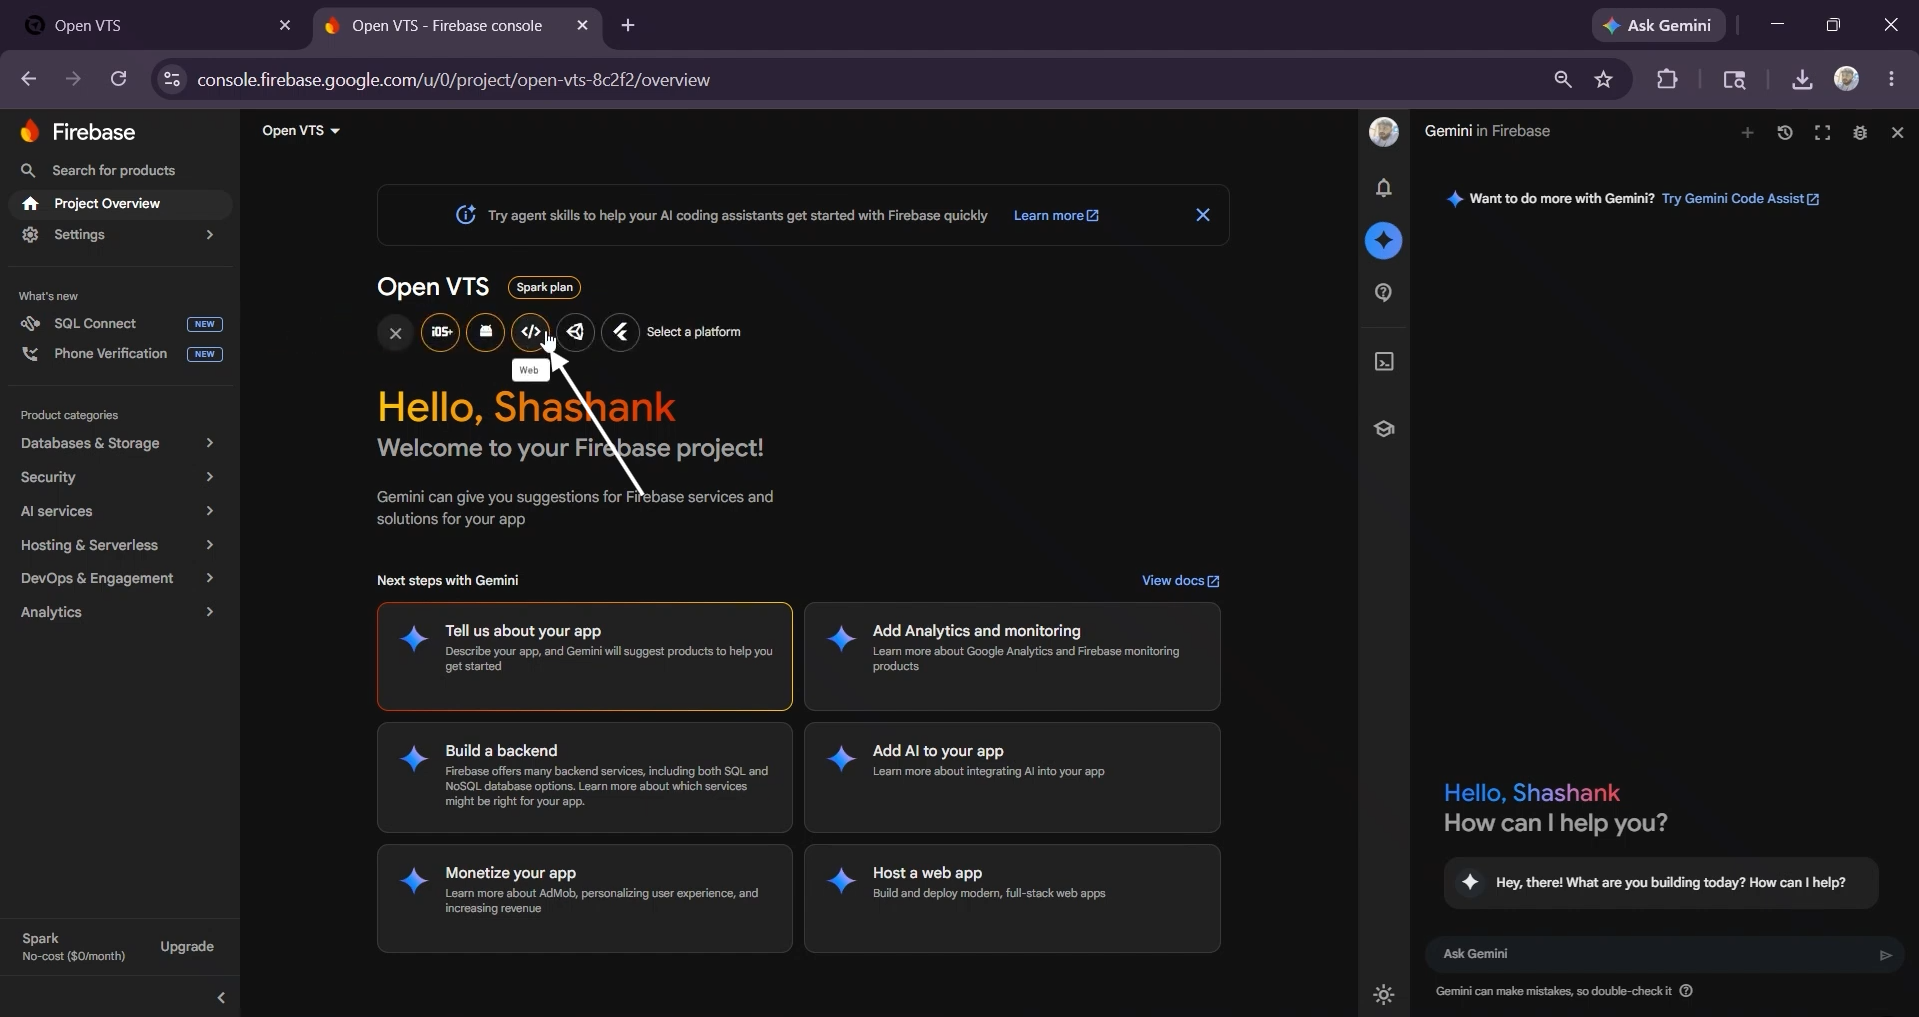
Choose the Web icon.
Enter an app nickname.
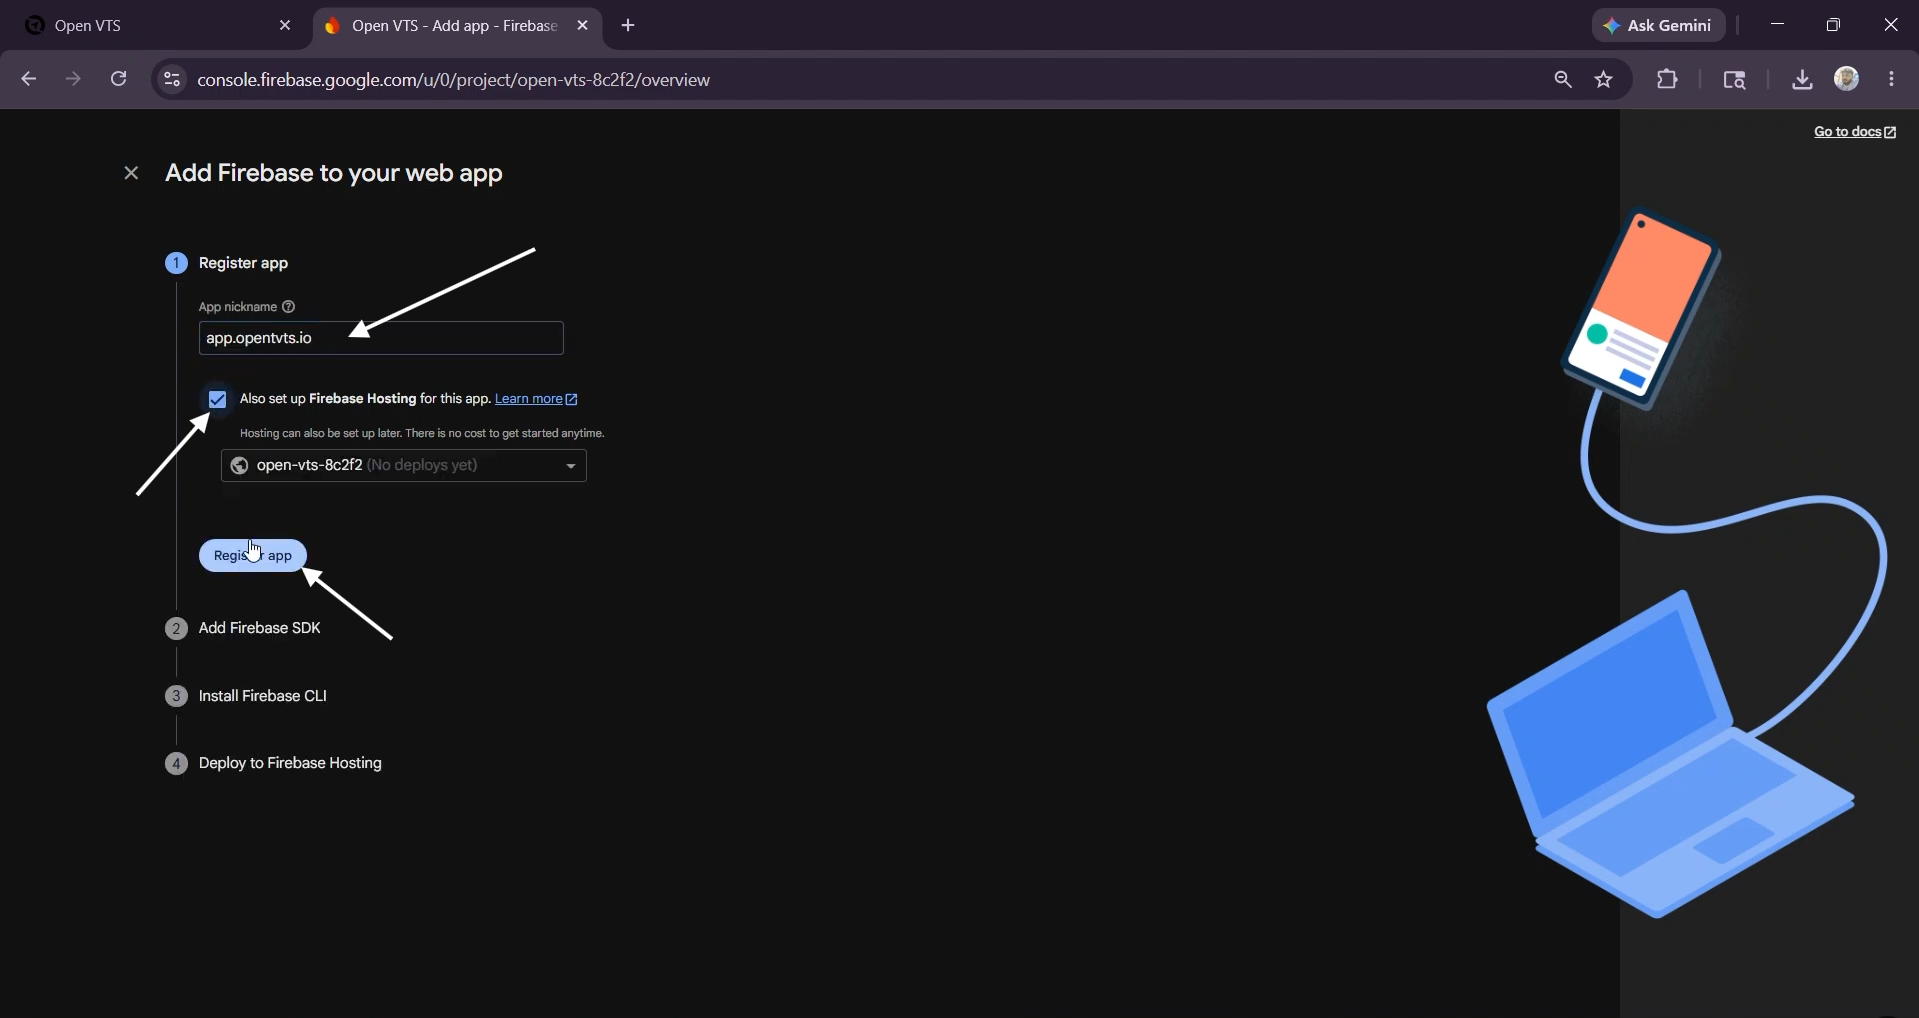
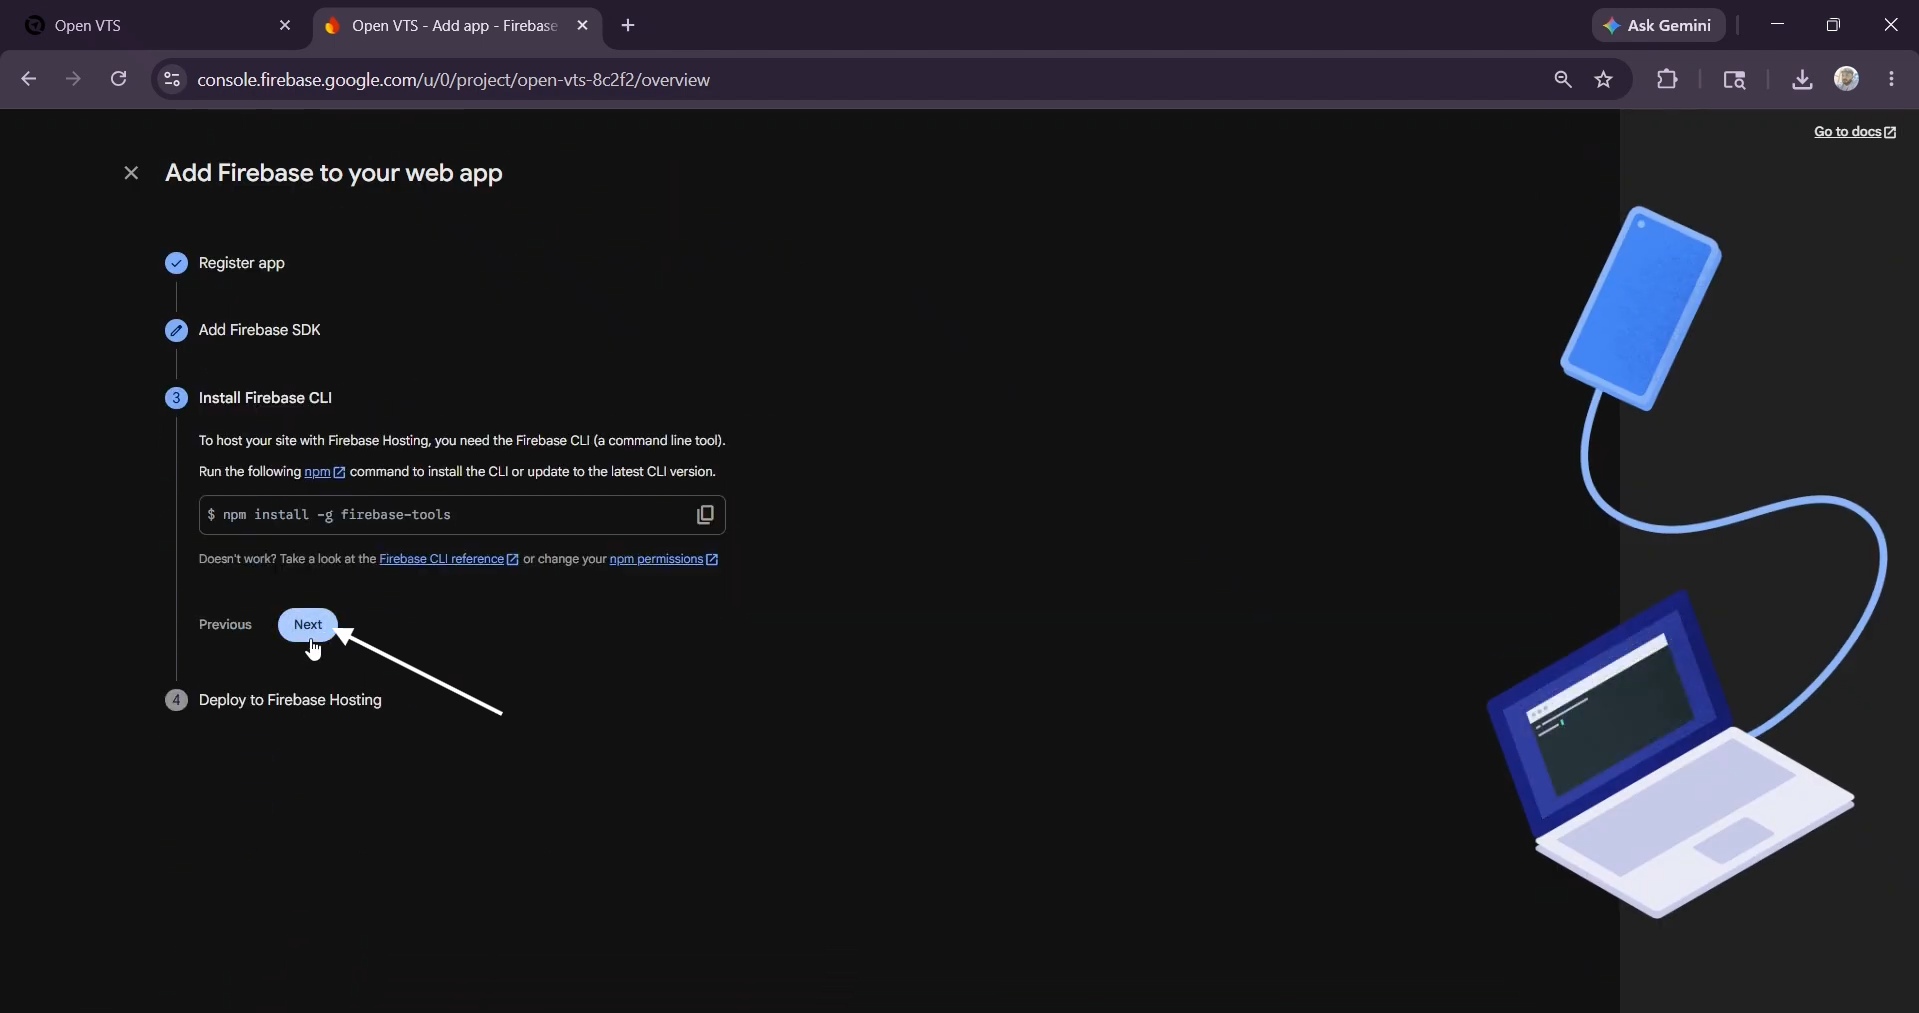
Select Register App.
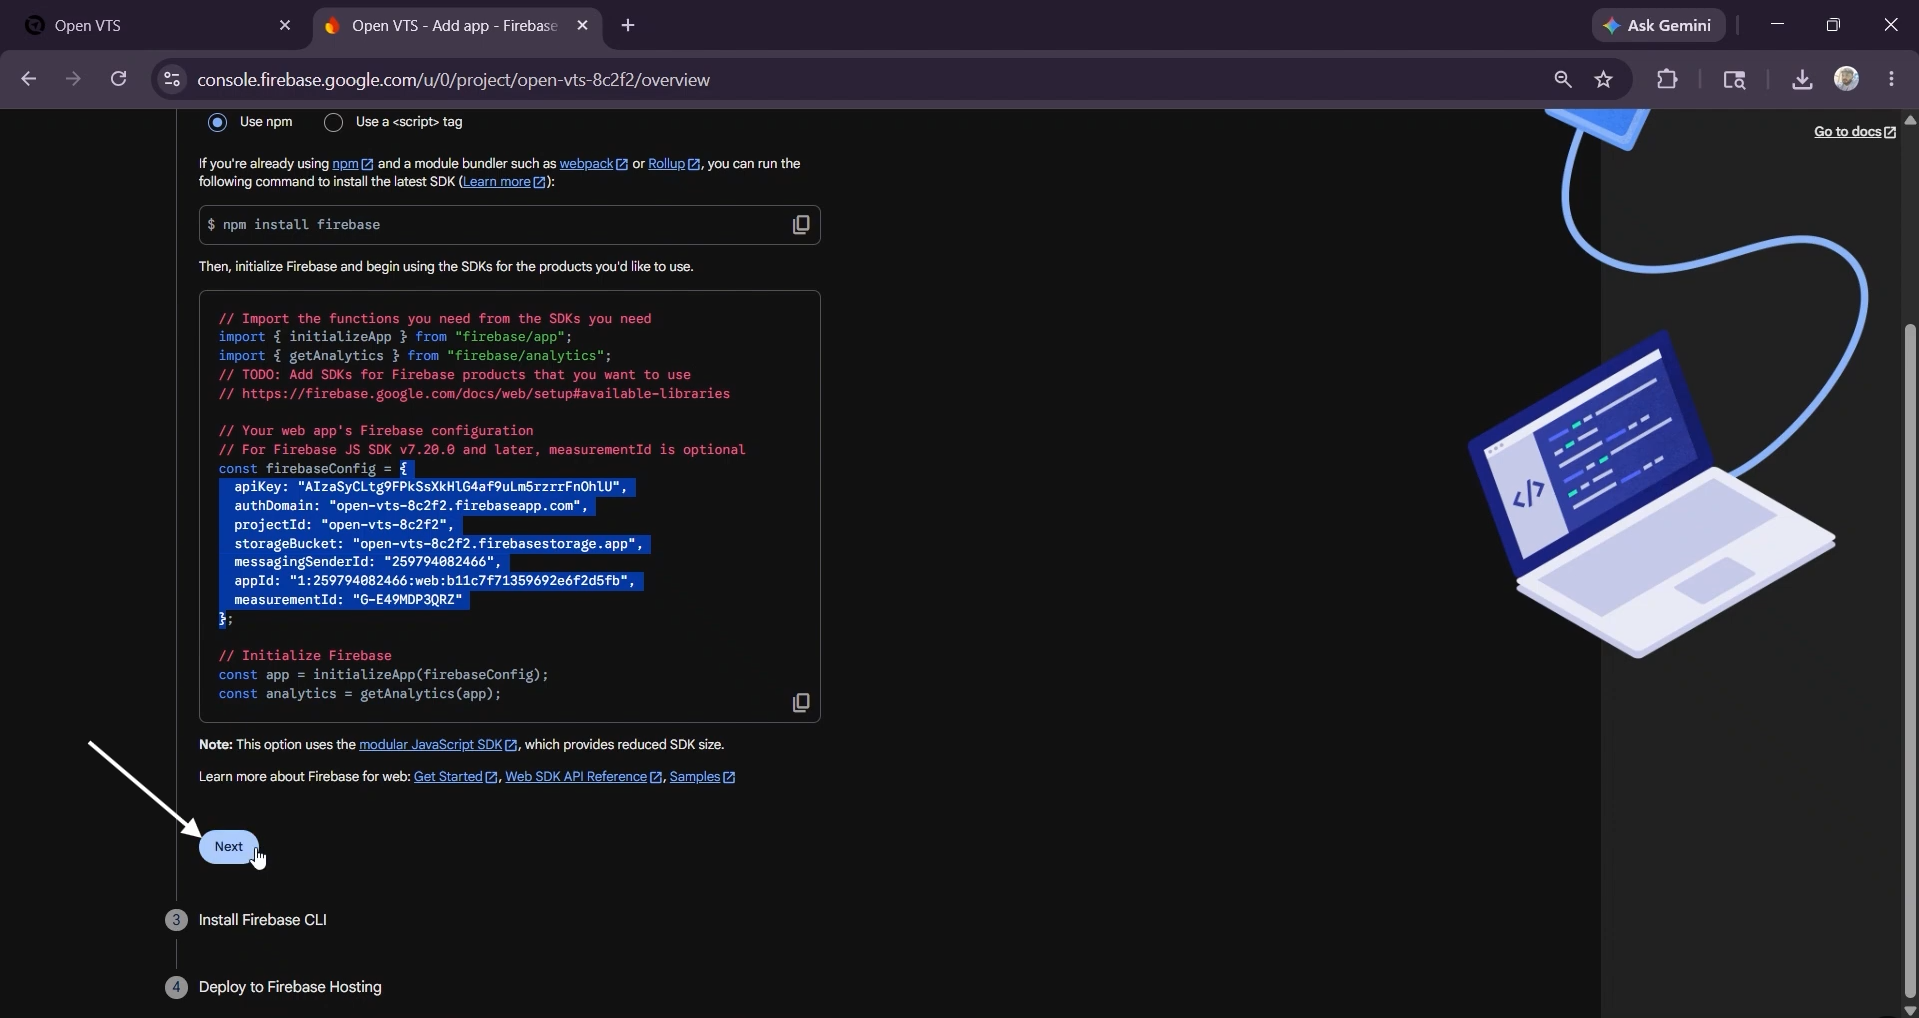
Firebase will display the web SDK configuration.
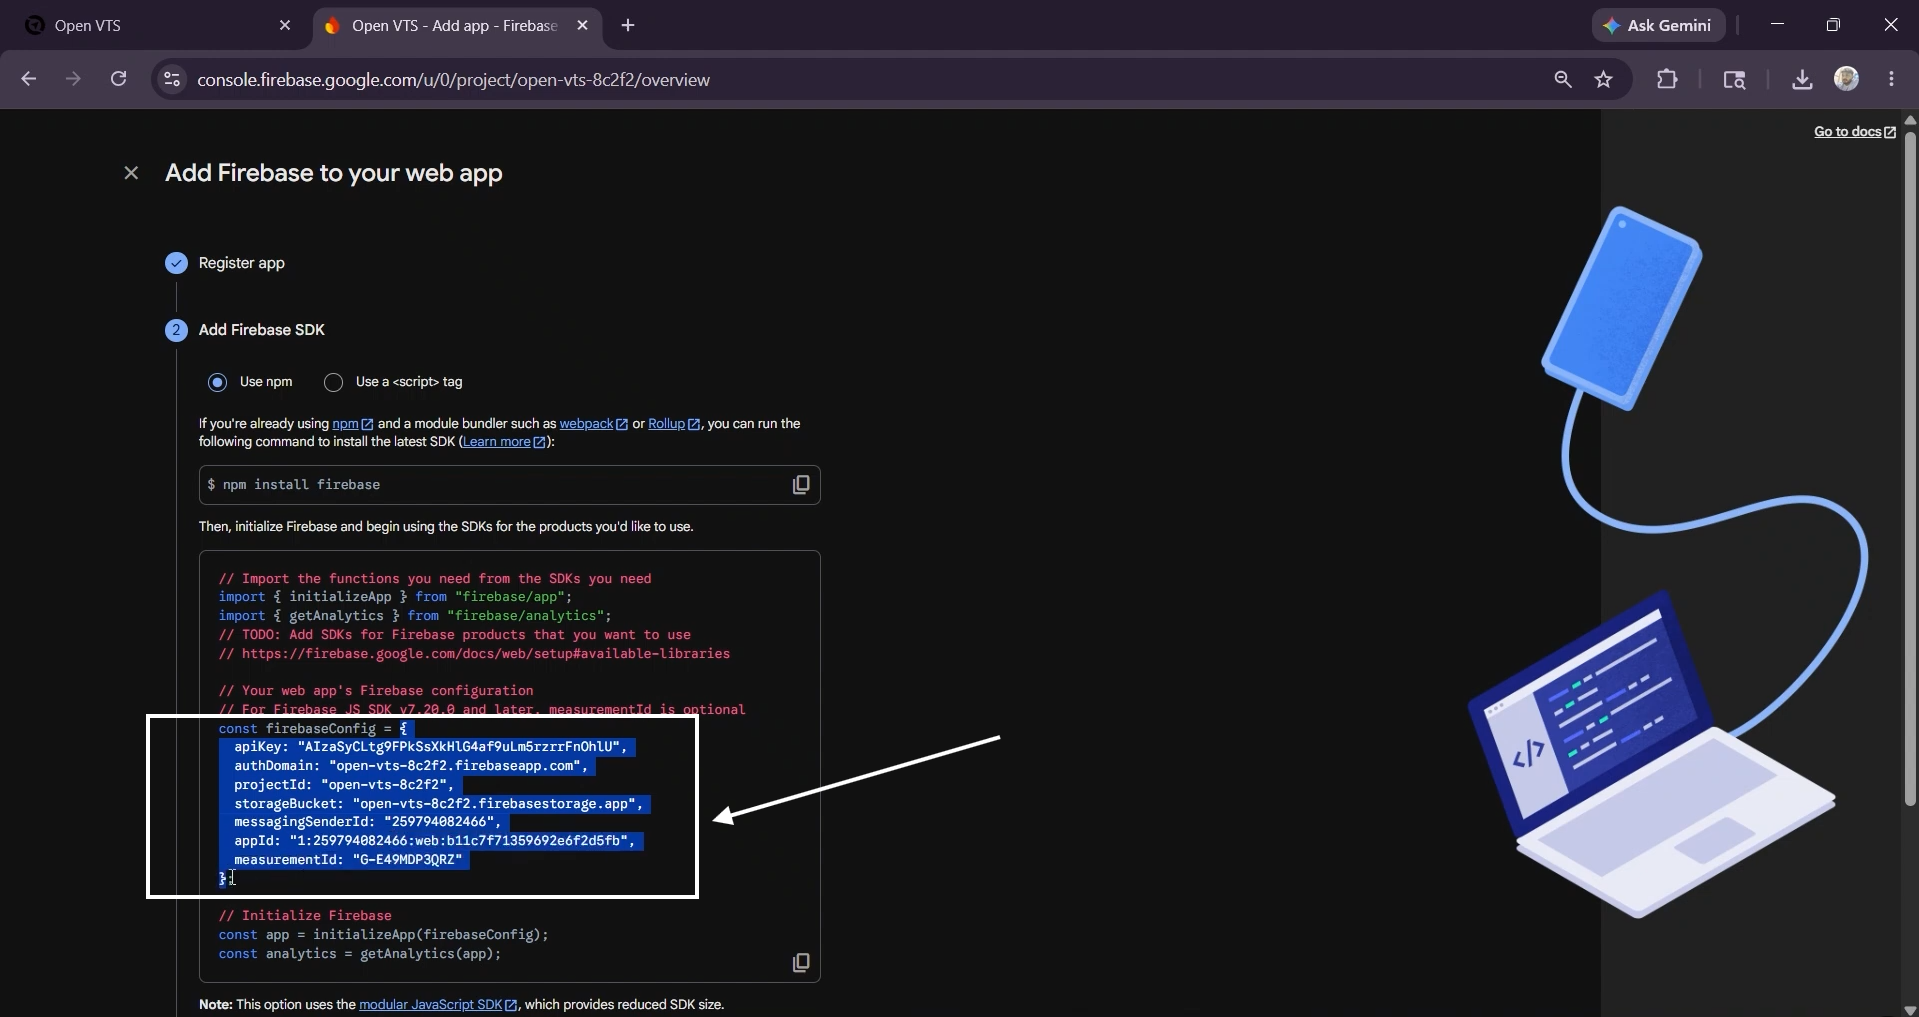
Step 3: Prepare the Web Config JSON
Firebase displays a configuration object similar to:
constfirebaseConfig= { apiKey: "...", authDomain: "...", projectId: "...", storageBucket: "...", messagingSenderId: "...", appId: "..." };
Copy only the content inside the firebaseConfig object and convert it into valid JSON.
Valid JSON requires double quotation marks around every key:
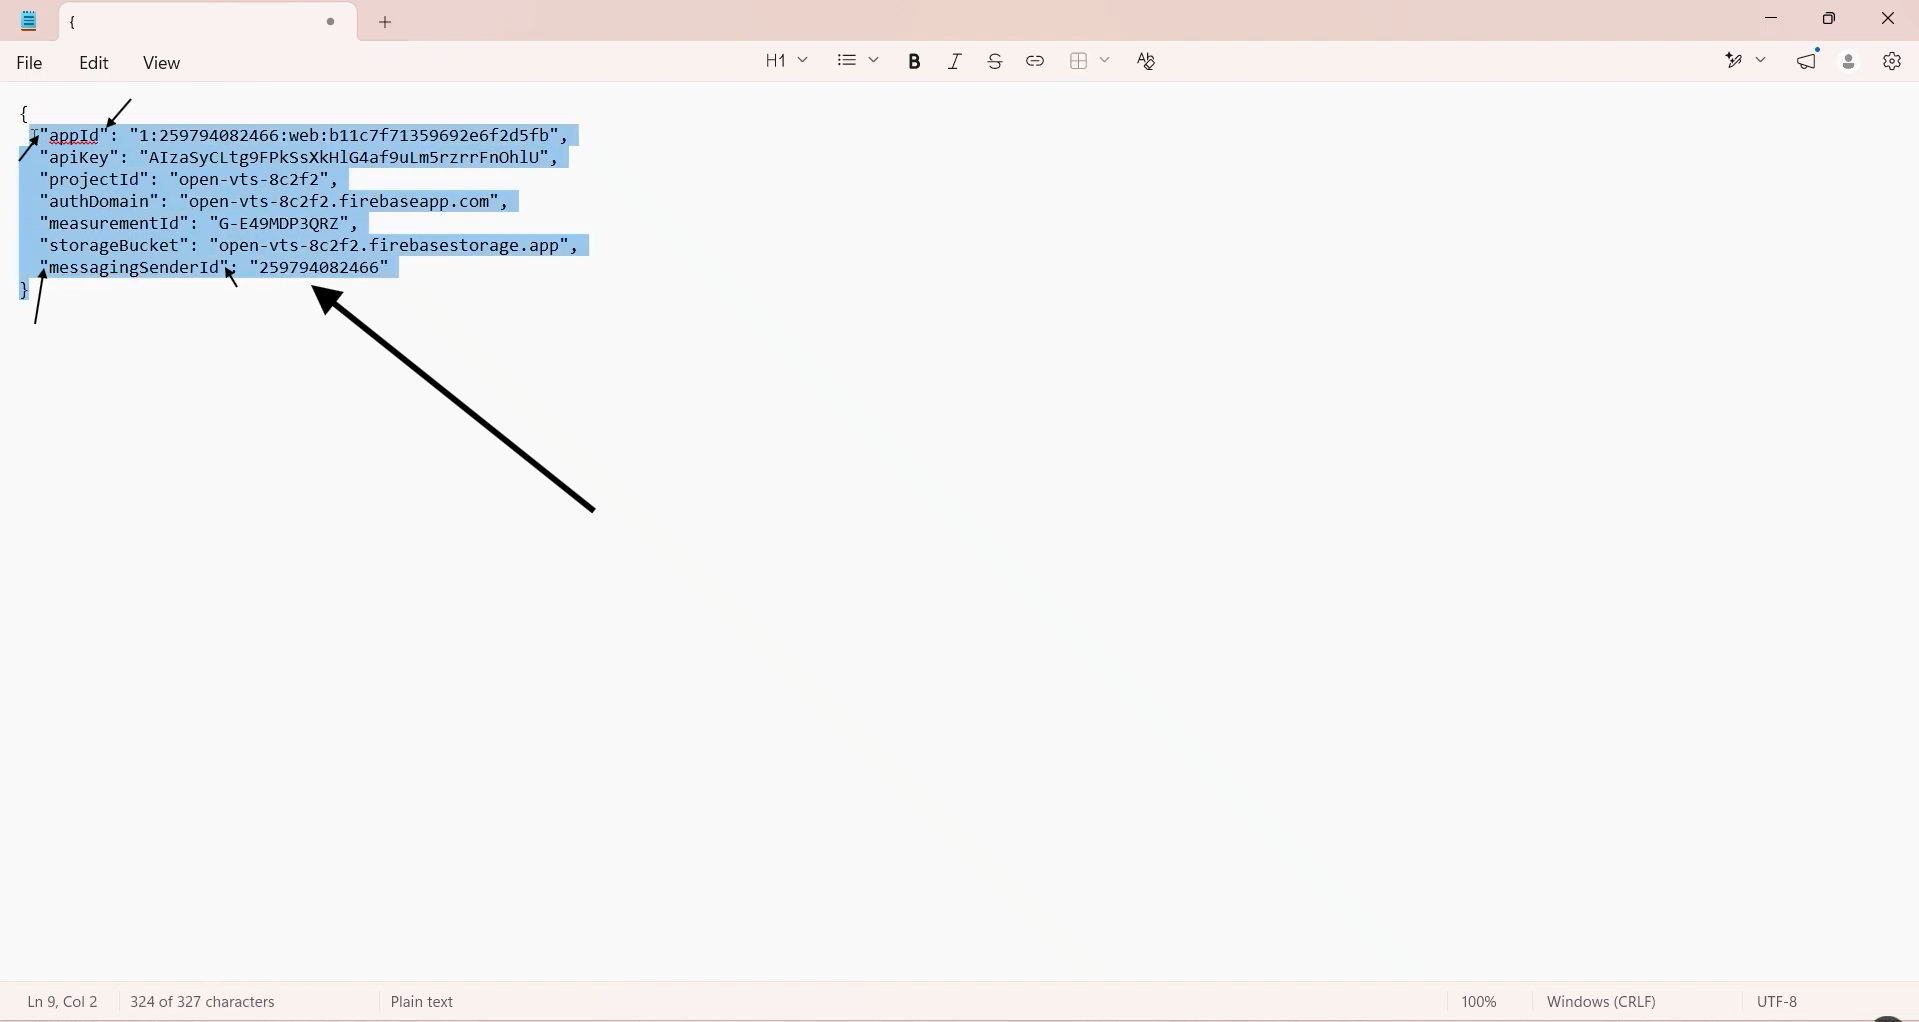
{ "apiKey": "...", "authDomain": "...", "projectId": "...", "storageBucket": "...", "messagingSenderId": "...", "appId": "..." }
Do not include:
- const firebaseConfig =
- JavaScript comments
- A trailing semicolon
- Trailing commas
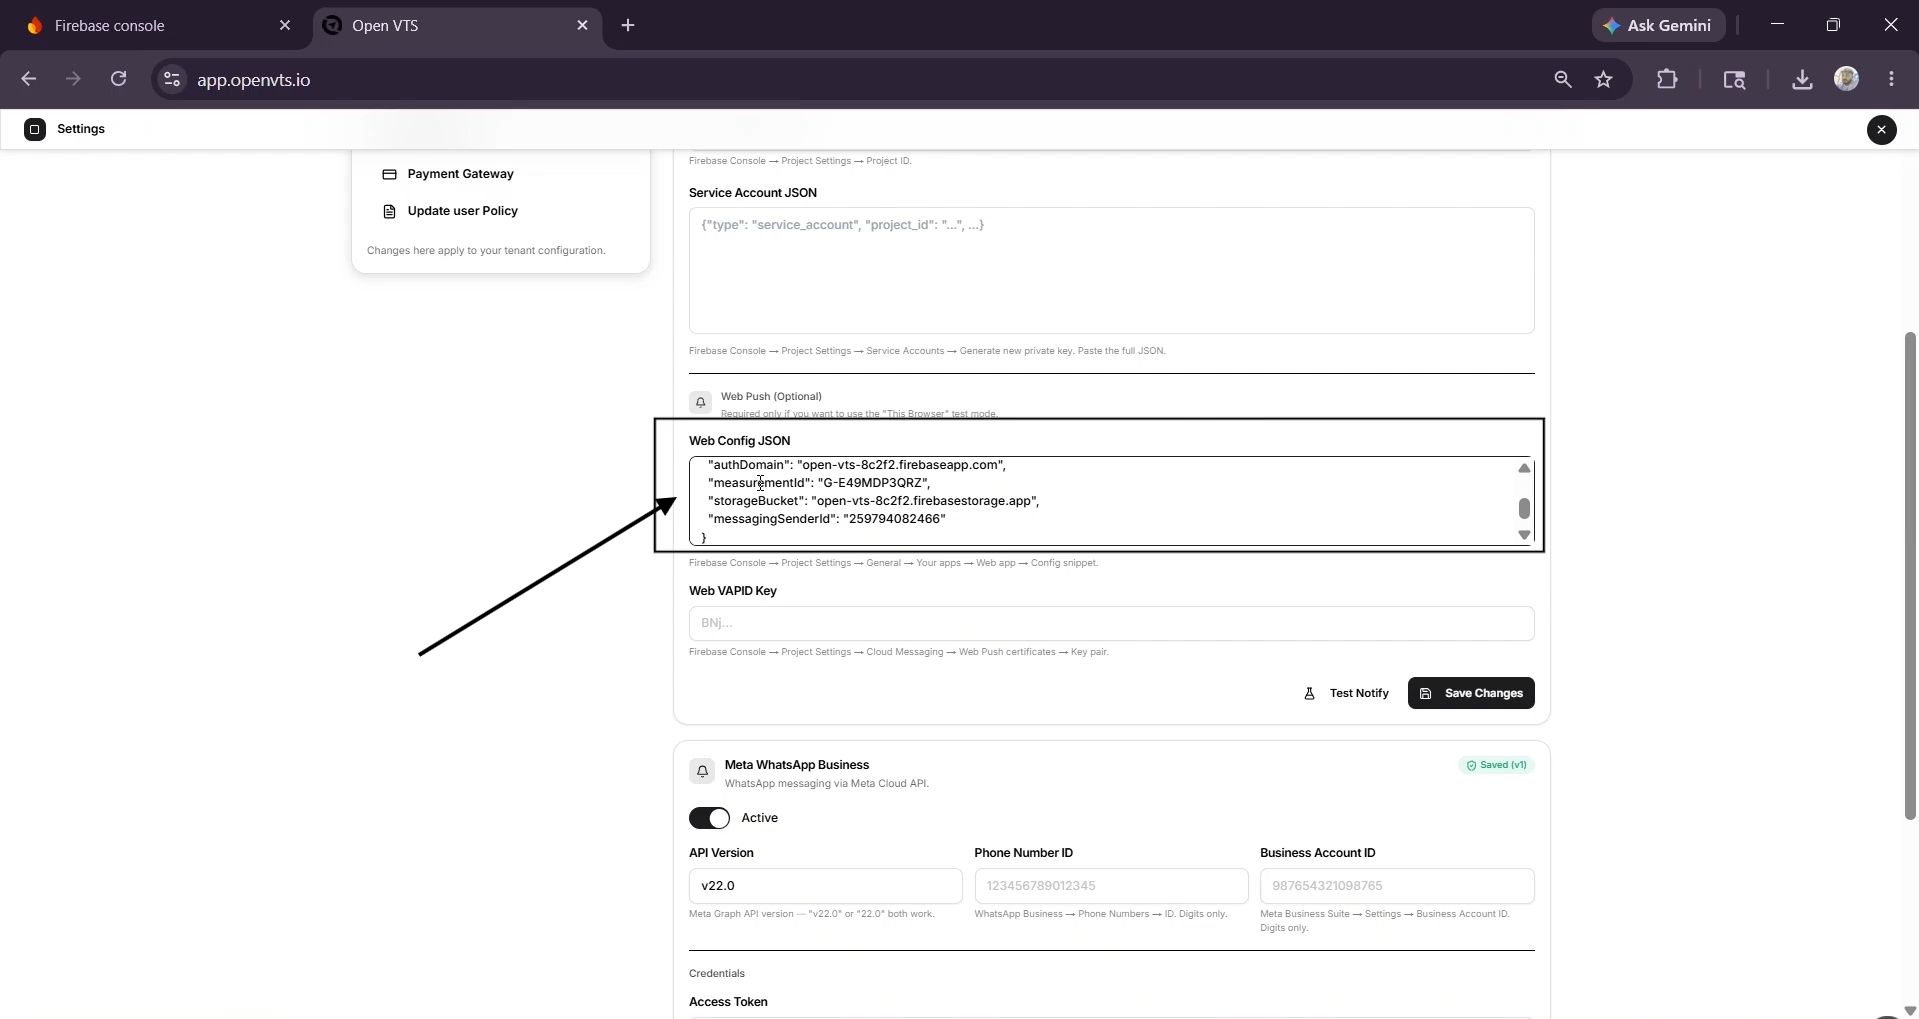
Paste the completed JSON into the Web Config JSON field in Open VTS.
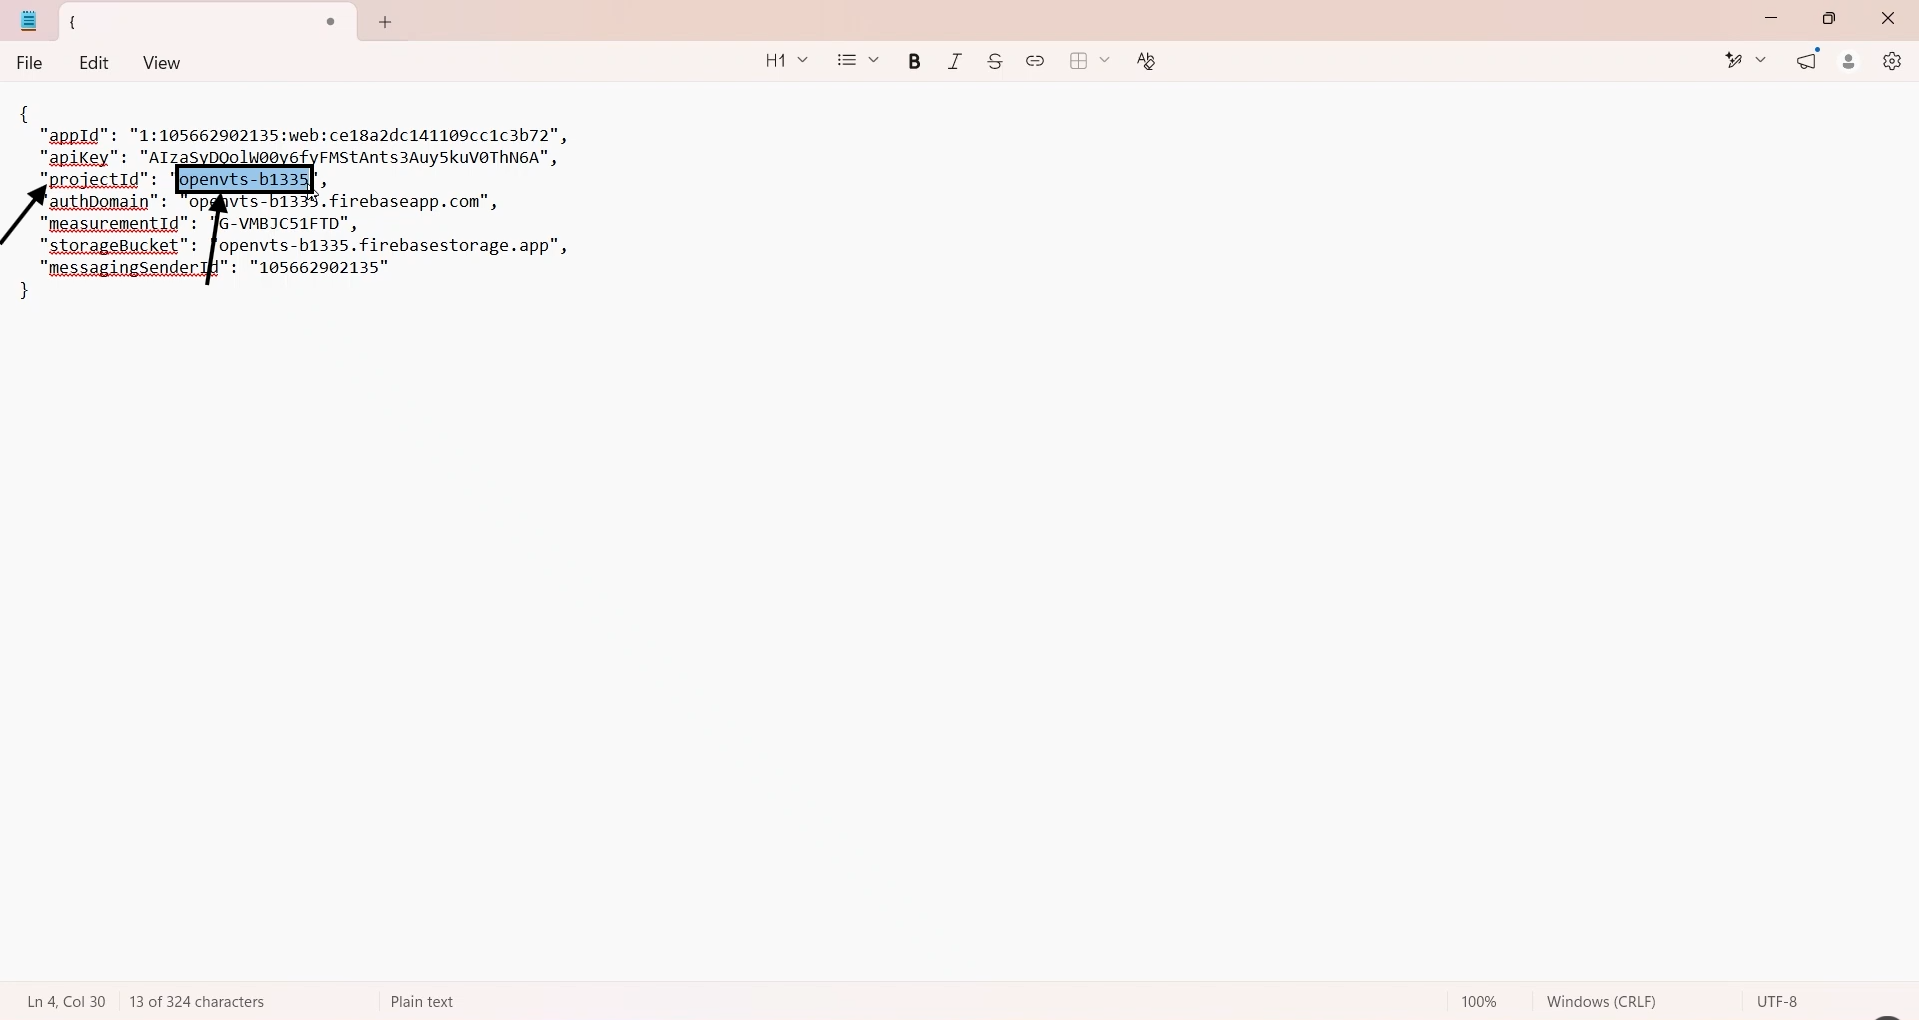
Copy the value of projectId and paste it separately into the Project ID field.
Step 4: Generate the Service Account JSON
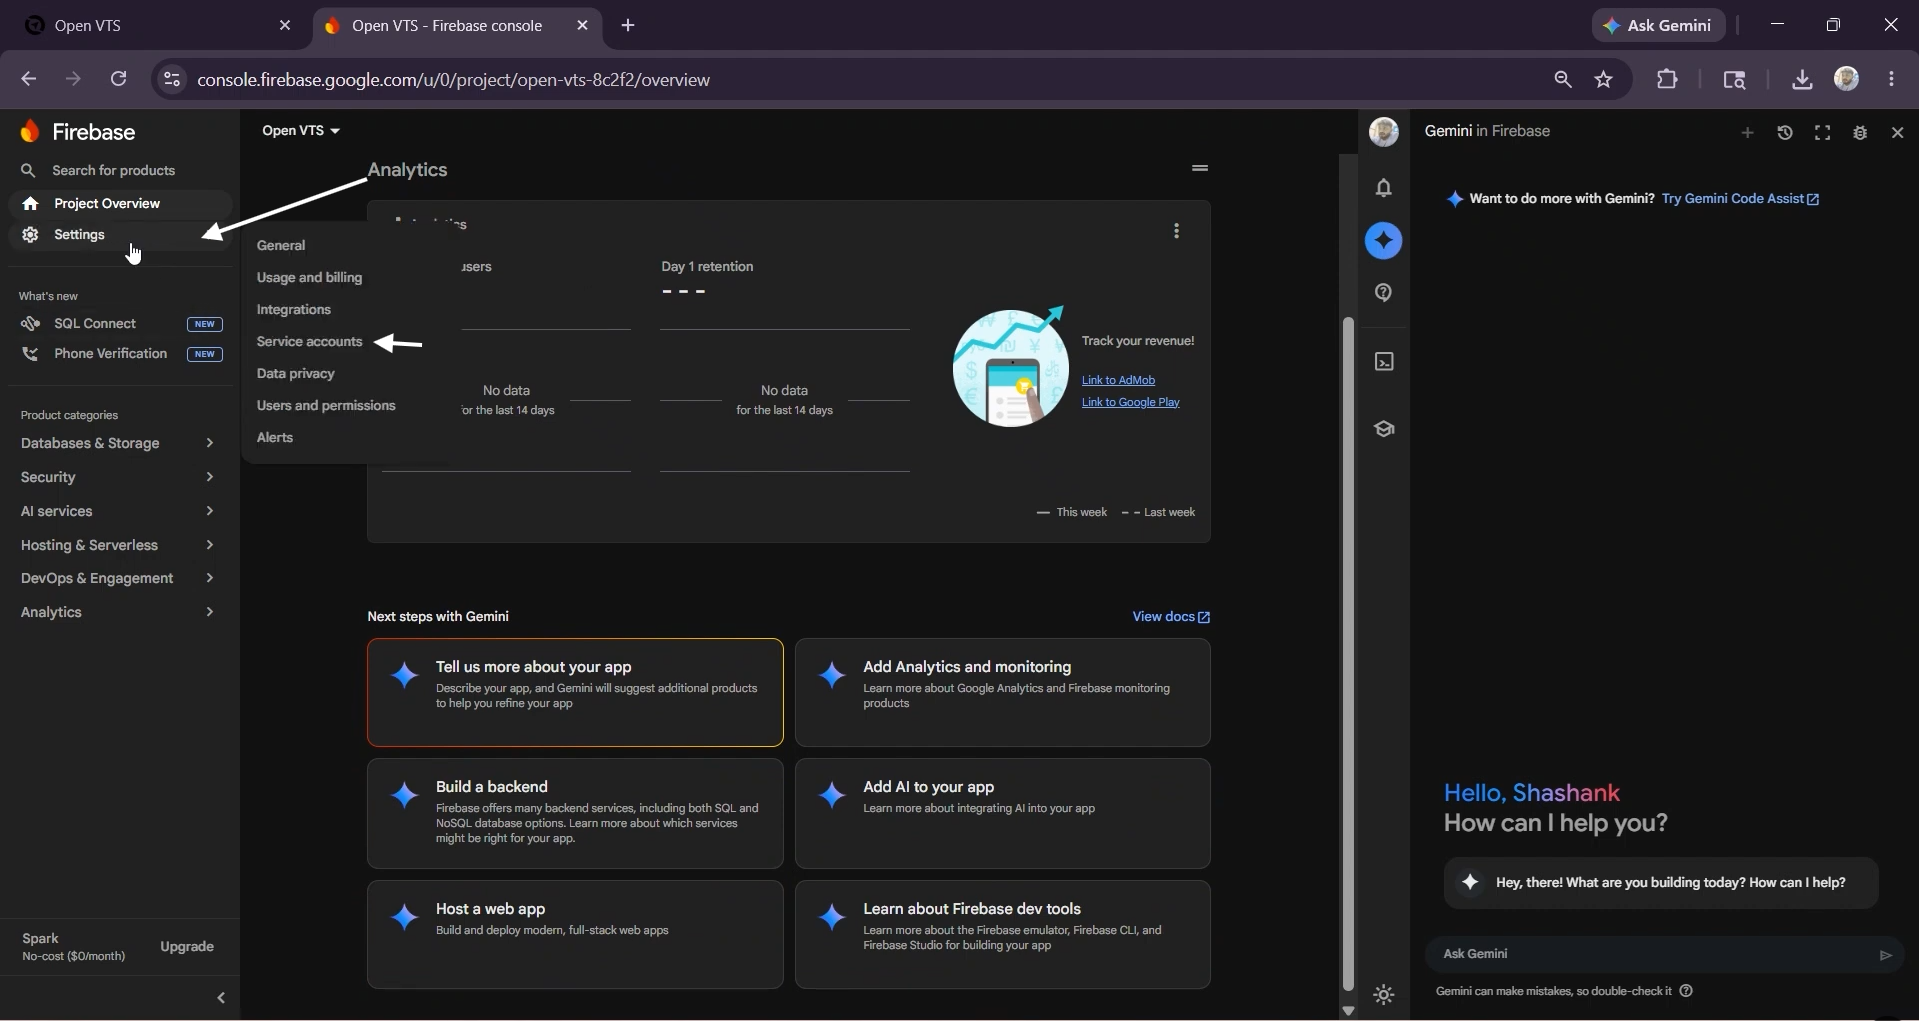
Return to Firebase and open:
Project Settings → Service Accounts
Then:
Select Node.js.
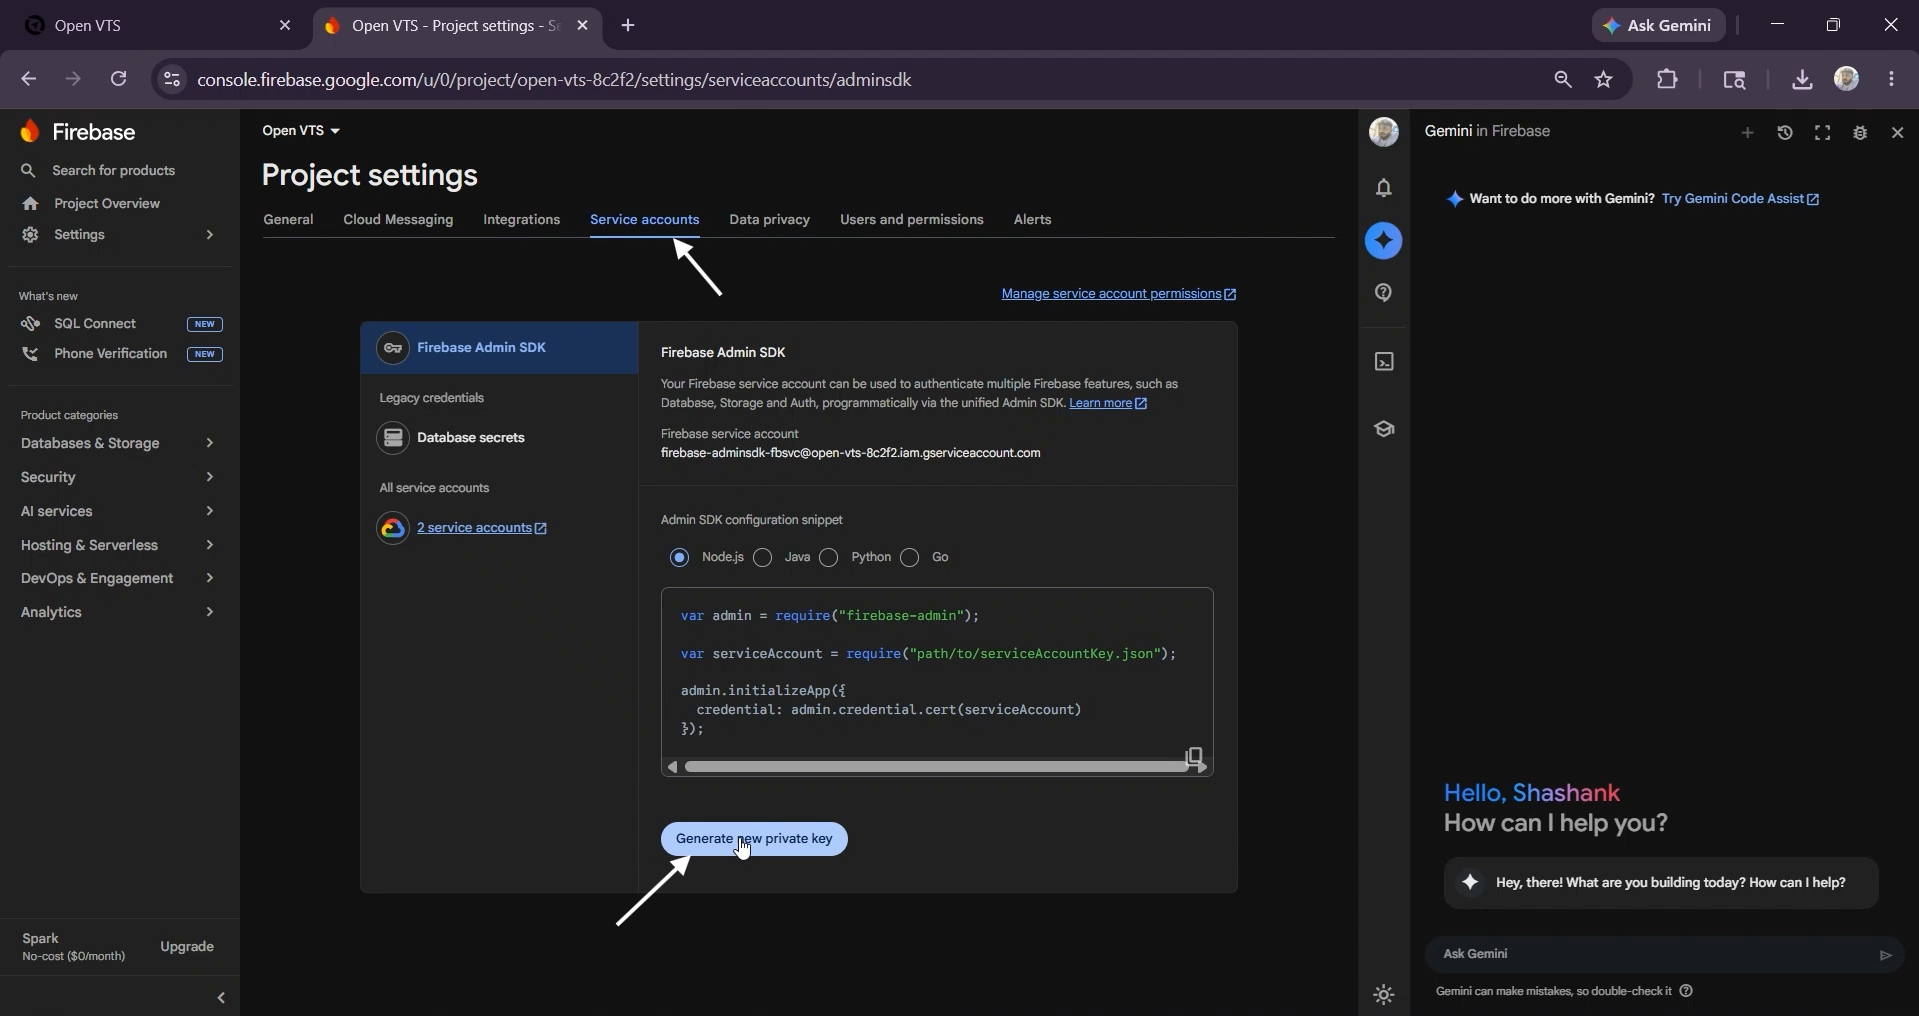
Select Generate New Private Key.
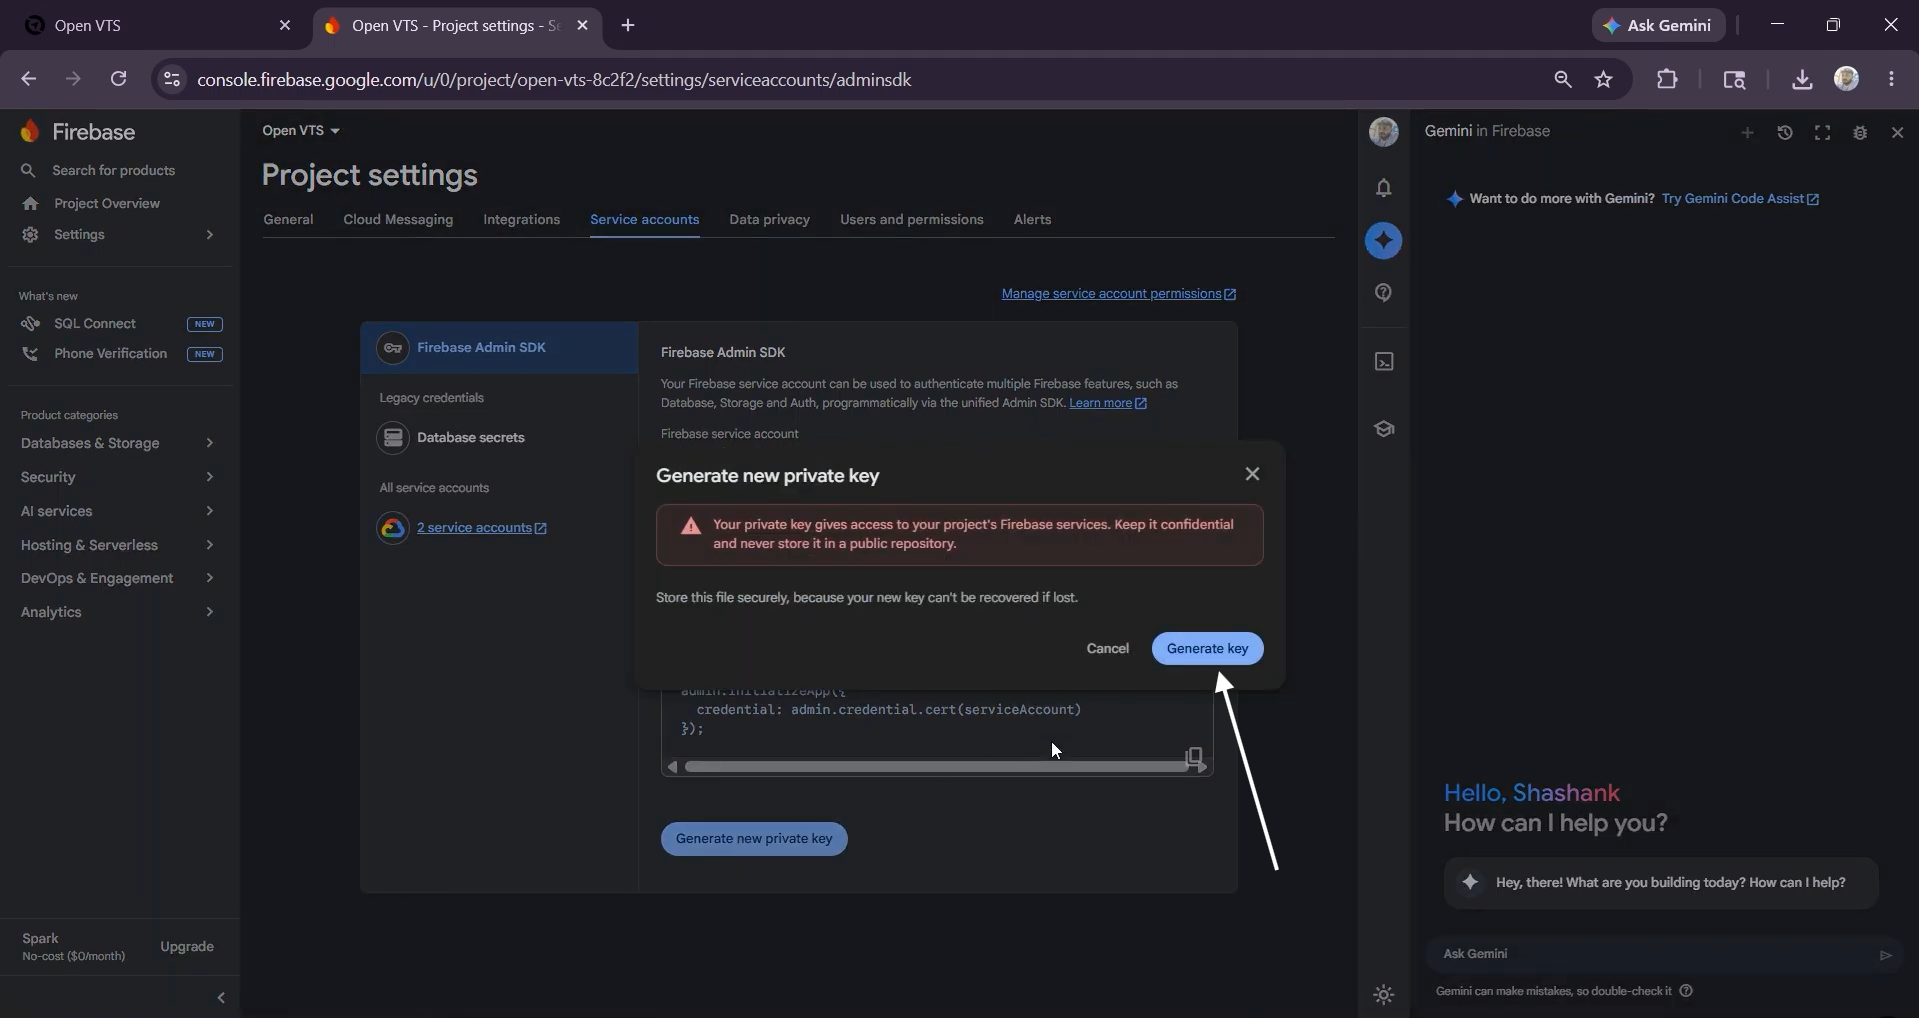
Confirm by selecting Generate Key.
Save the downloaded JSON file securely.
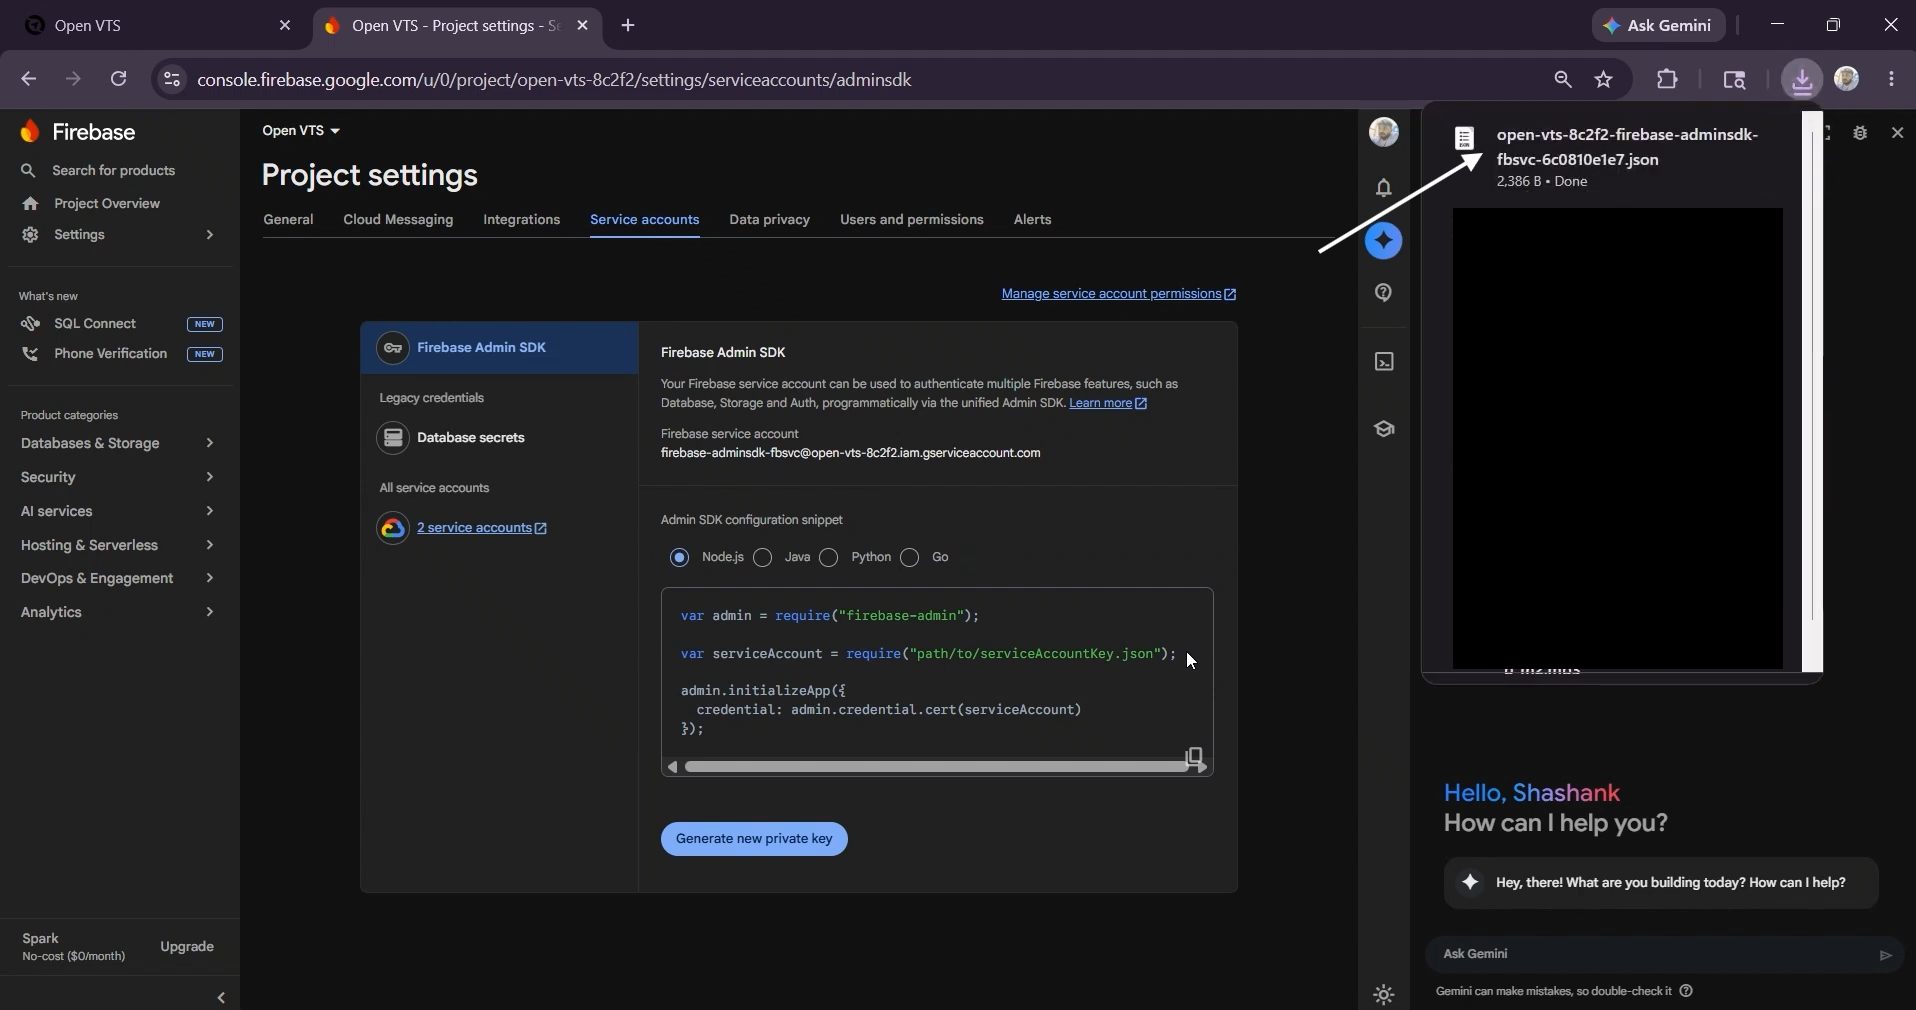
Open the file in a text editor.
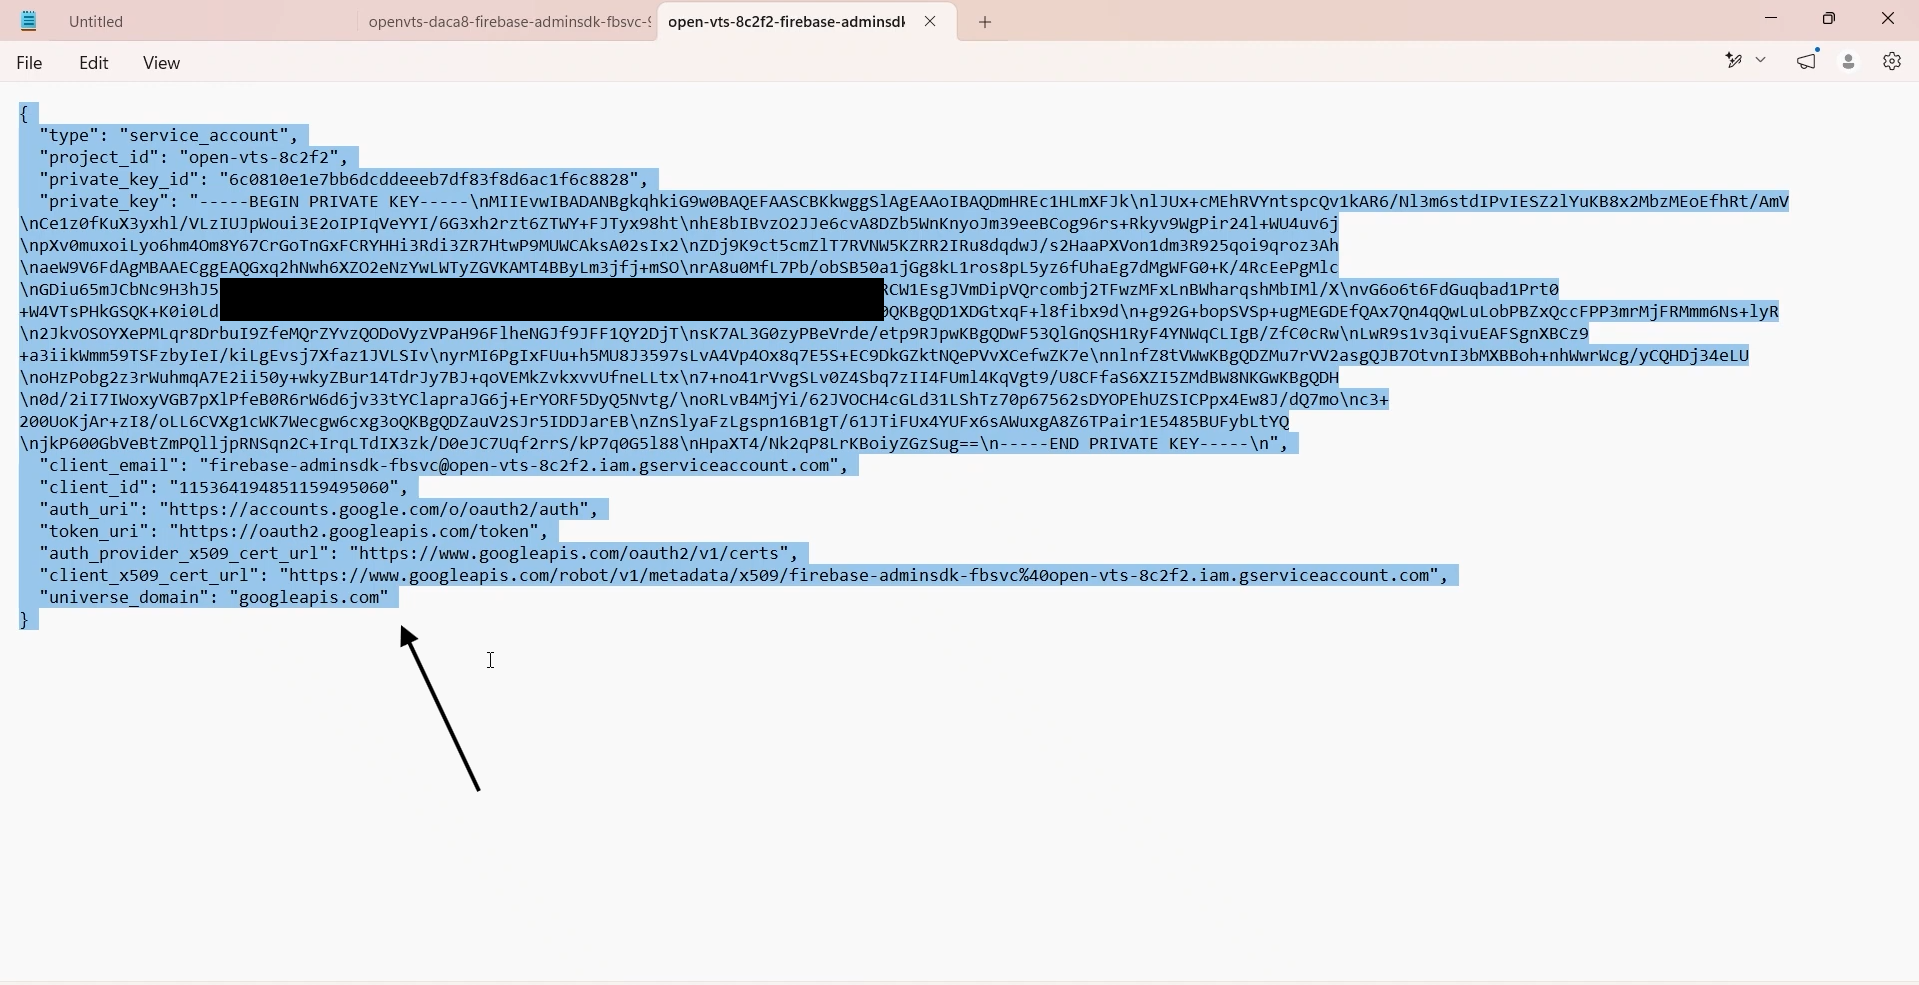
Copy the complete JSON content.
Paste it into the Service Account JSON field in Open VTS.
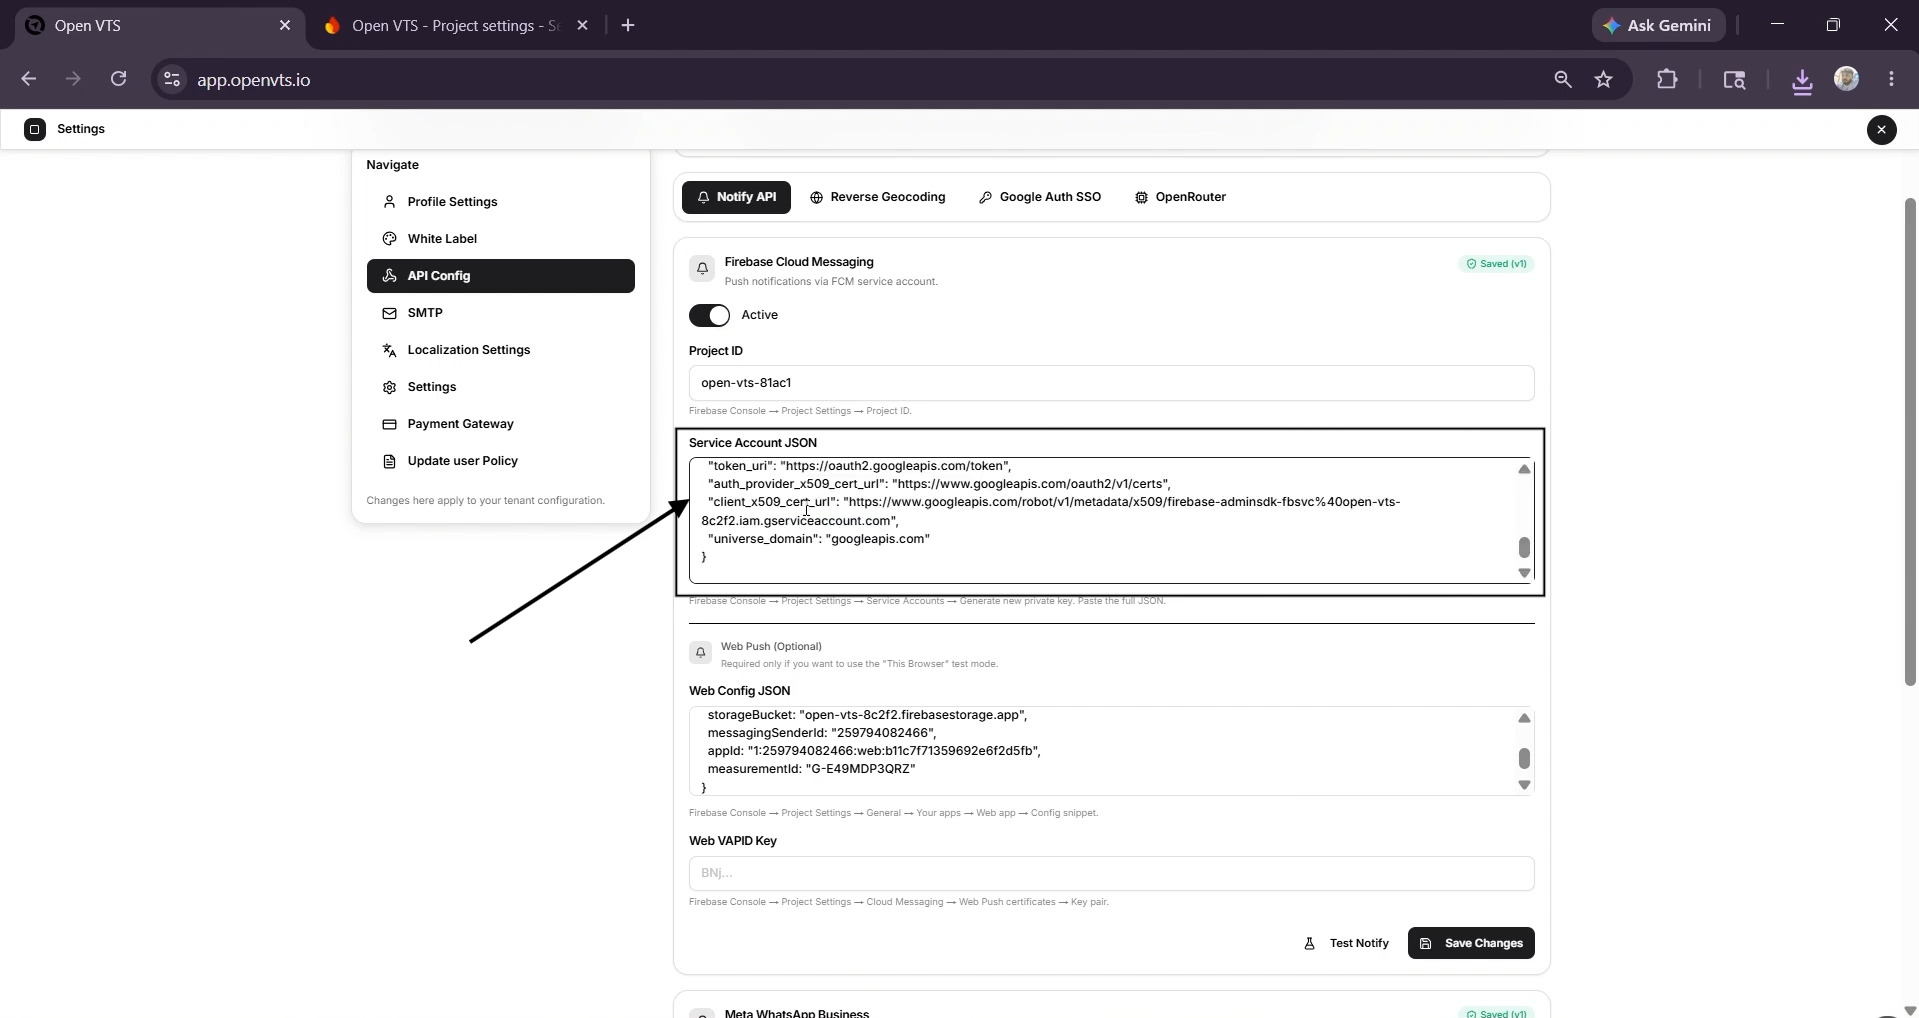
Keep the service account file private. It contains credentials that can provide access to Firebase services and must not be shared publicly.
Step 5: Generate the Web VAPID Key
In Firebase, open:
Project Settings → Cloud Messaging
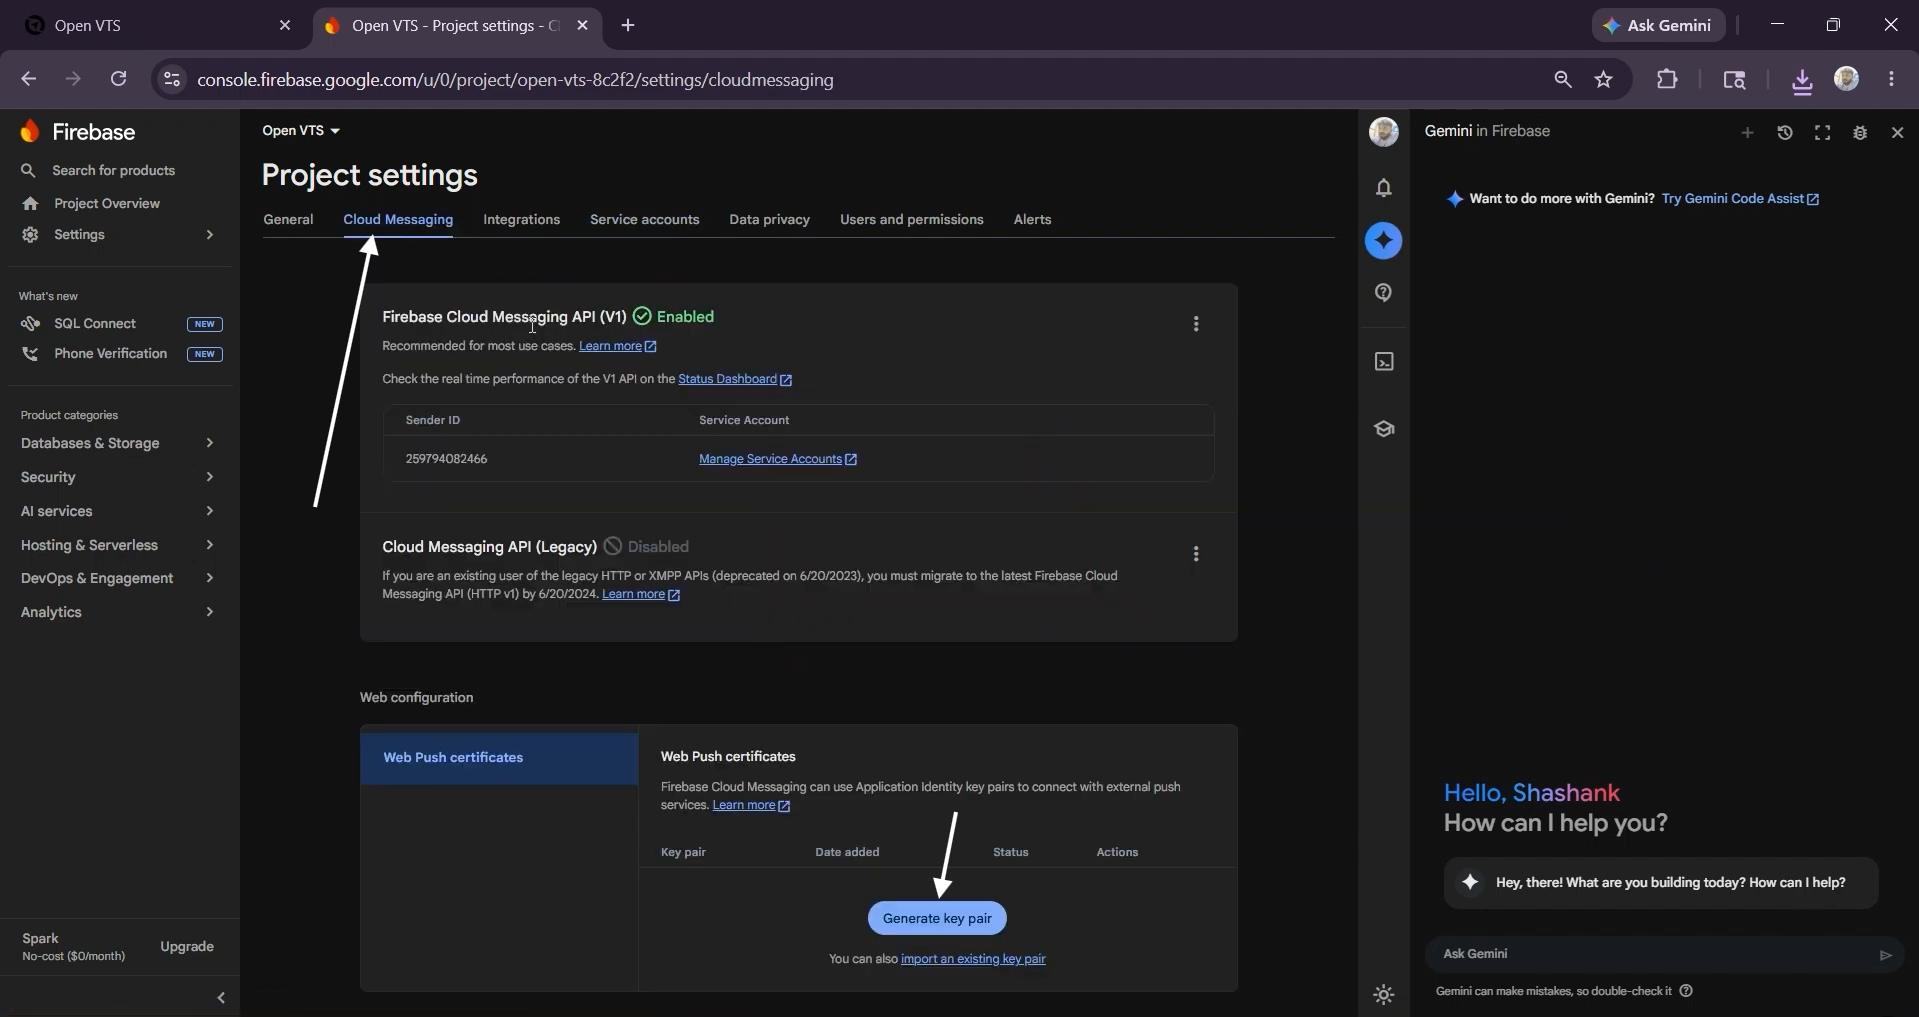
Find the Web Push Certificates section.
Select Generate Key Pair.
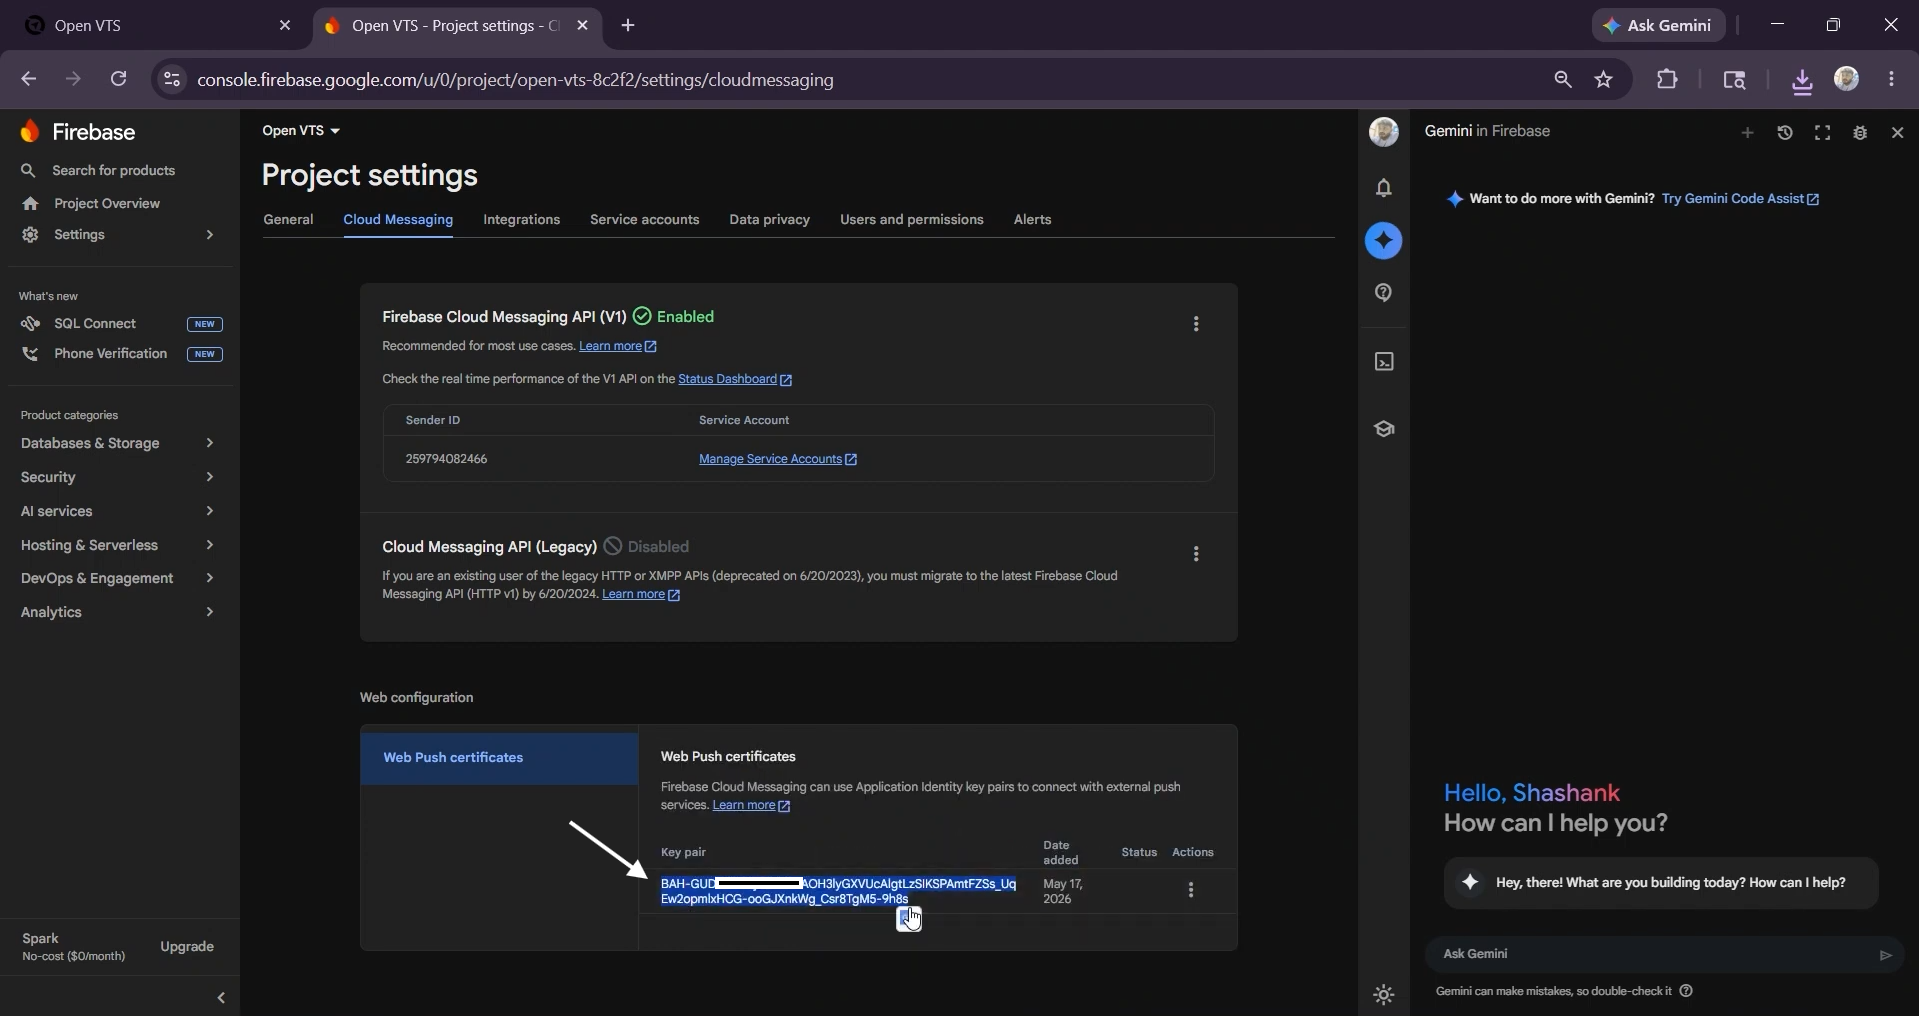
Copy the generated key.
Return to Open VTS.
Paste the key into the Web VAPID Key field.
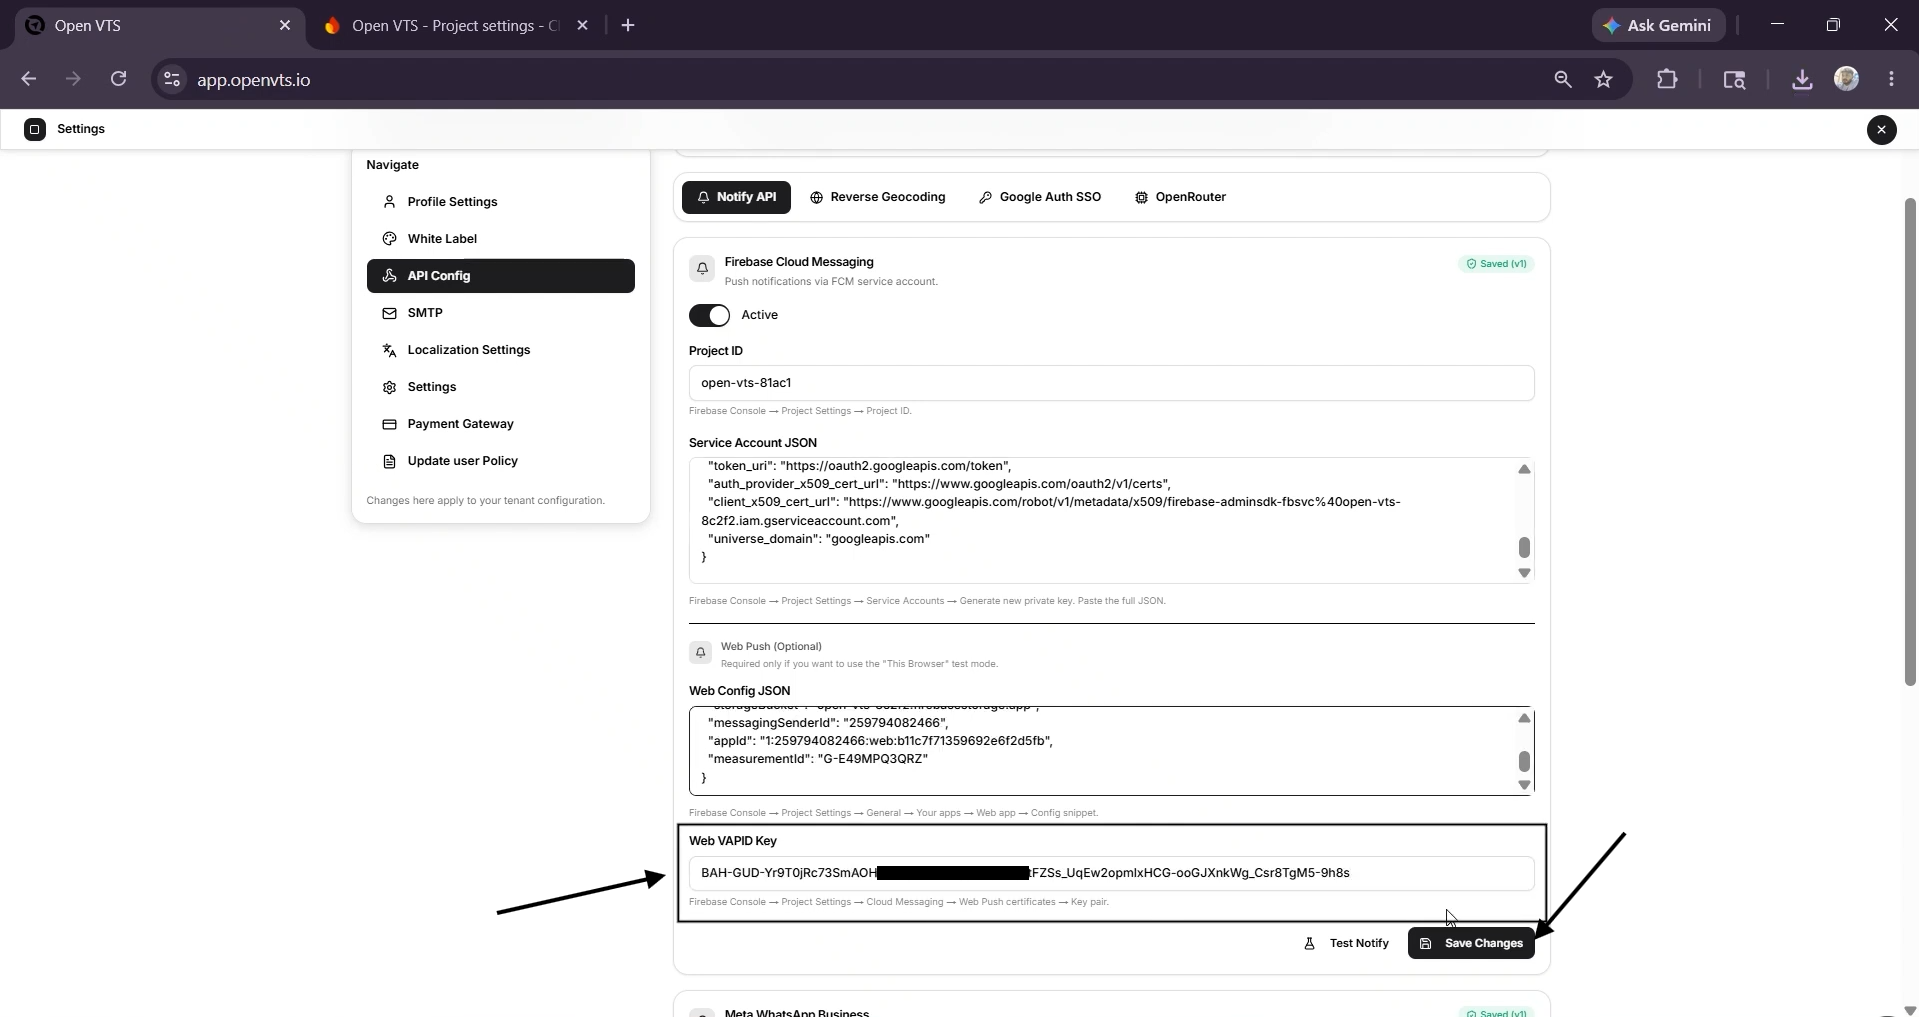
The VAPID key is used to identify and authorize web push notification delivery.
Select Save Changes.
Step 7: Register the Android Application
Return to the Firebase project overview.
Select Add App.
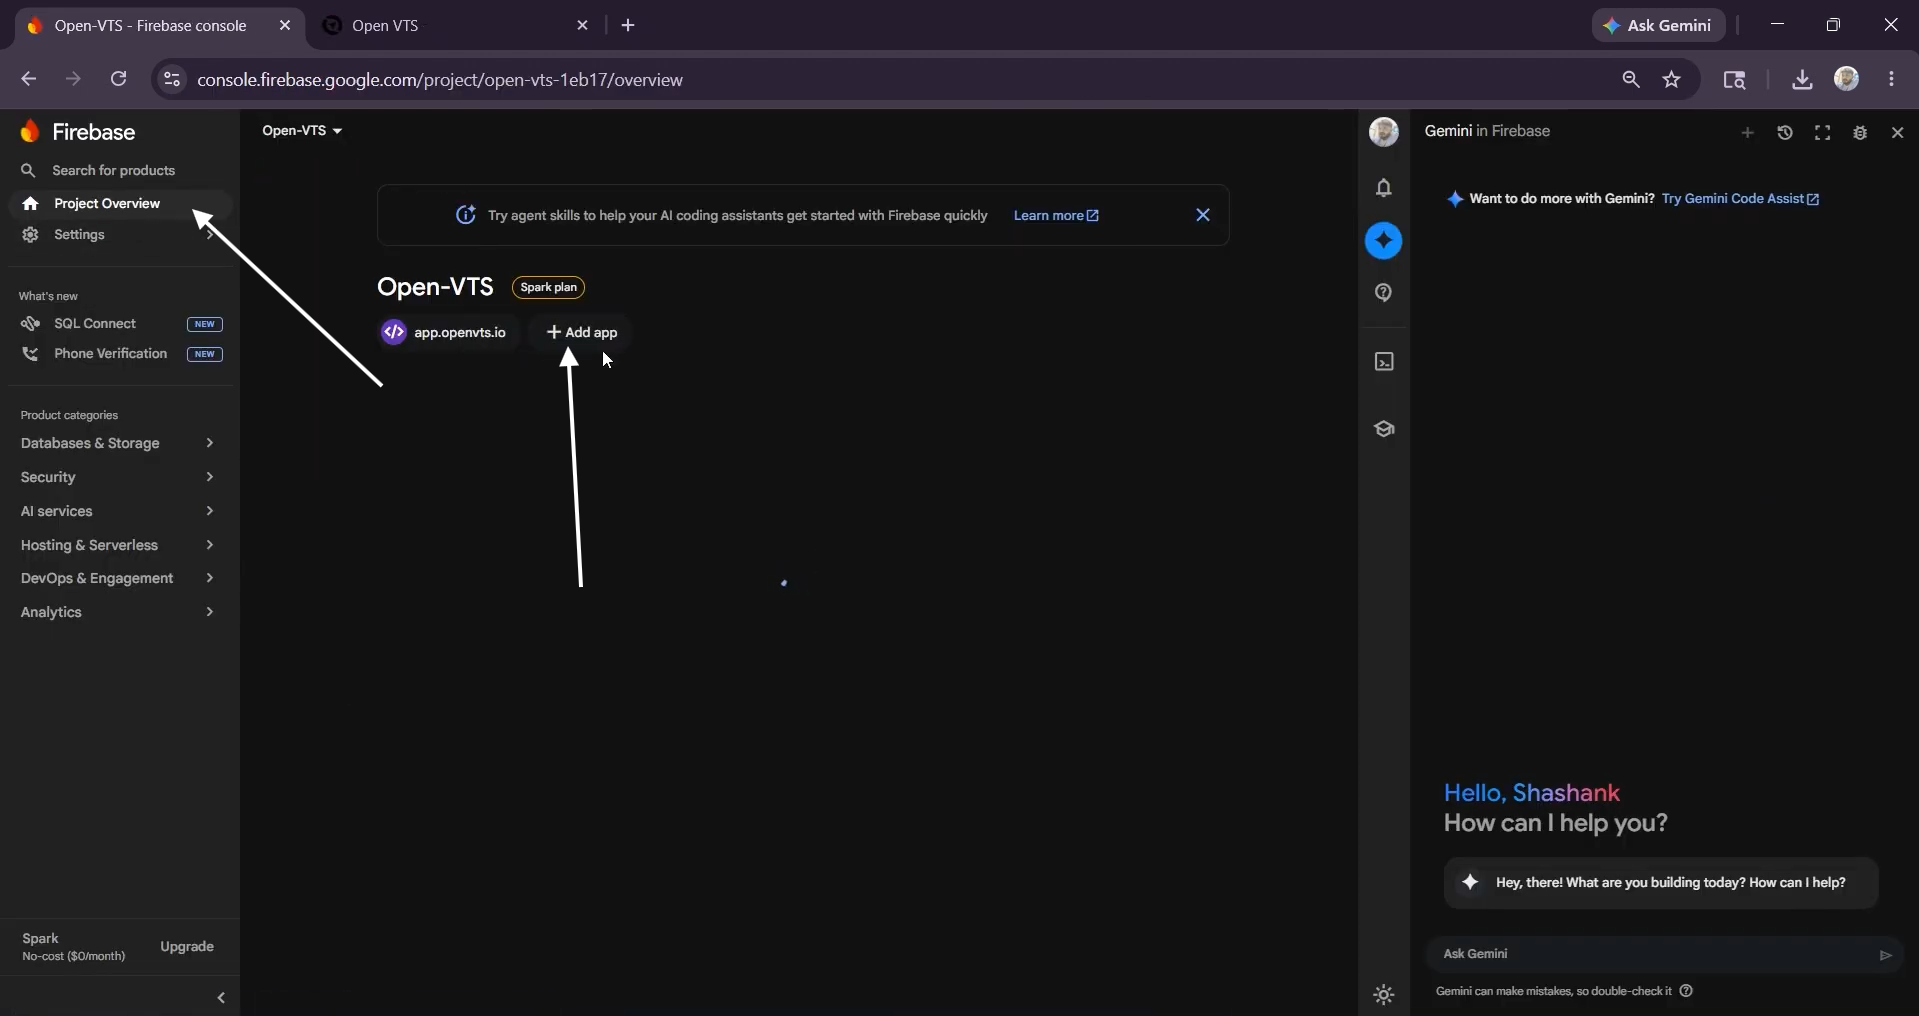
Choose the Android icon.
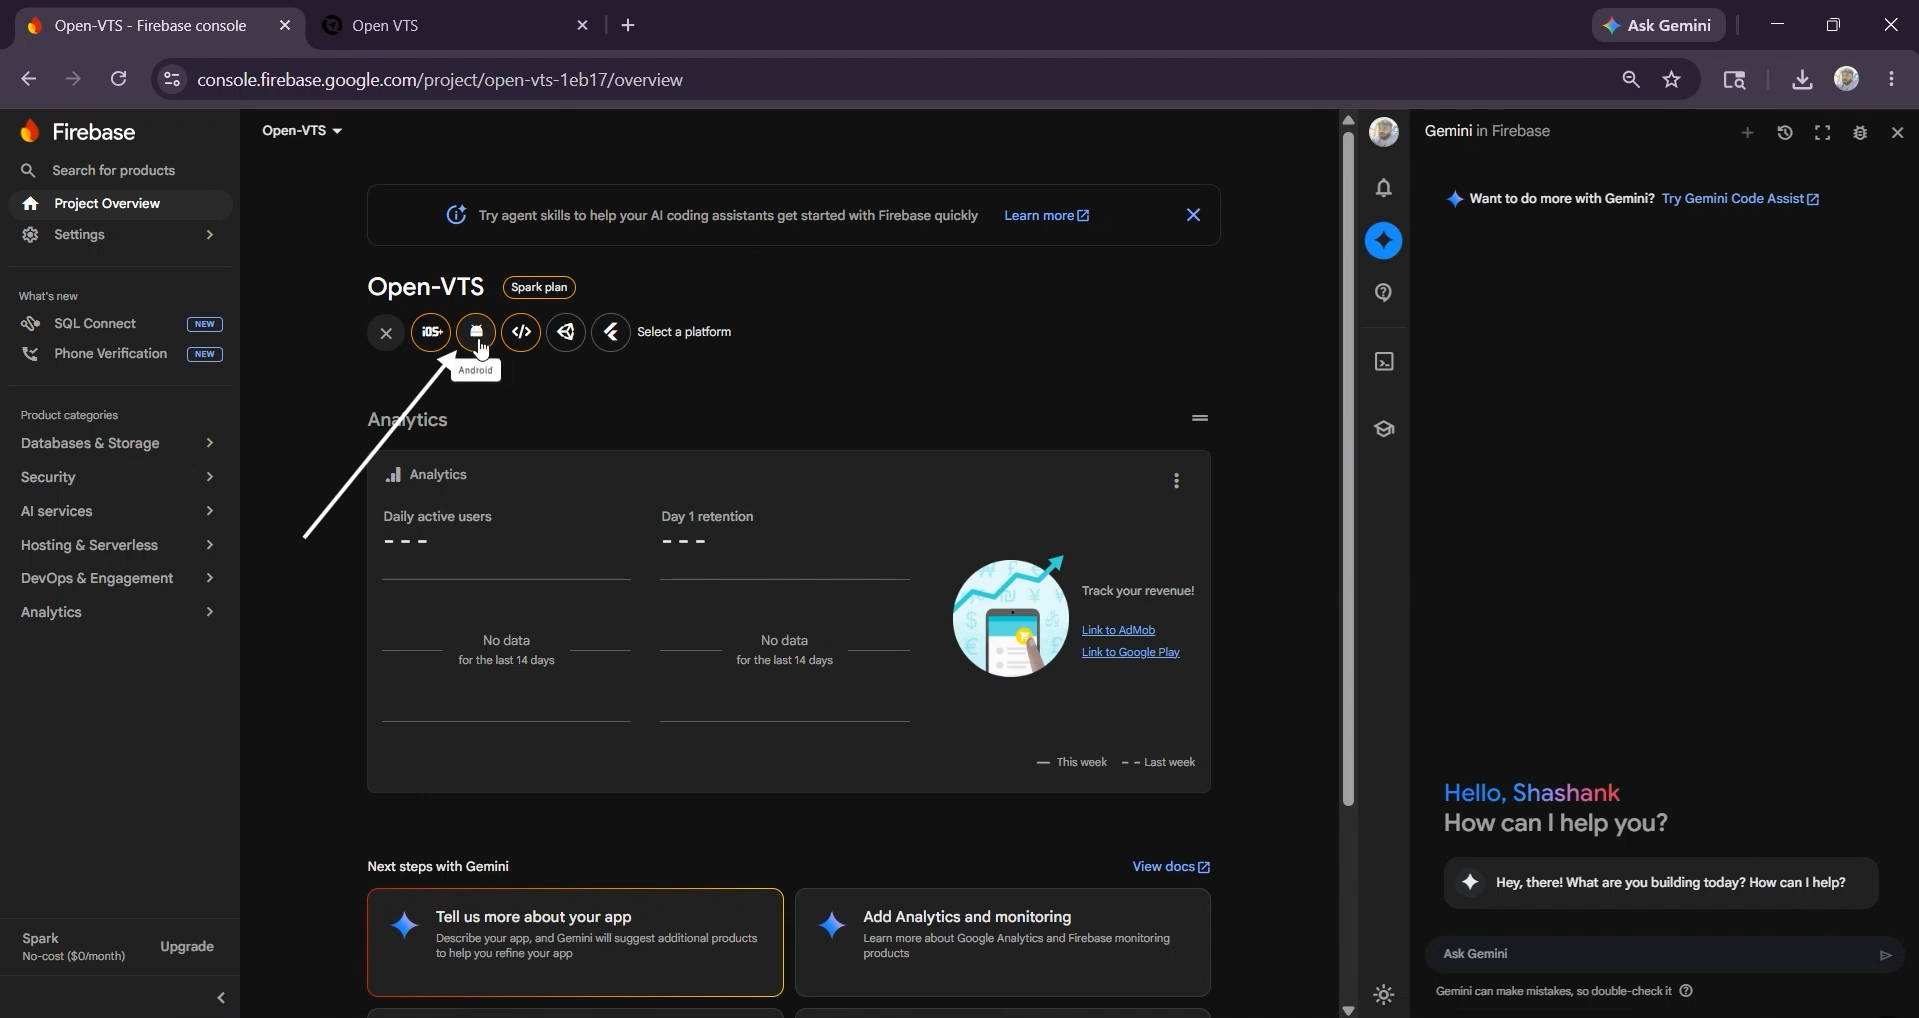
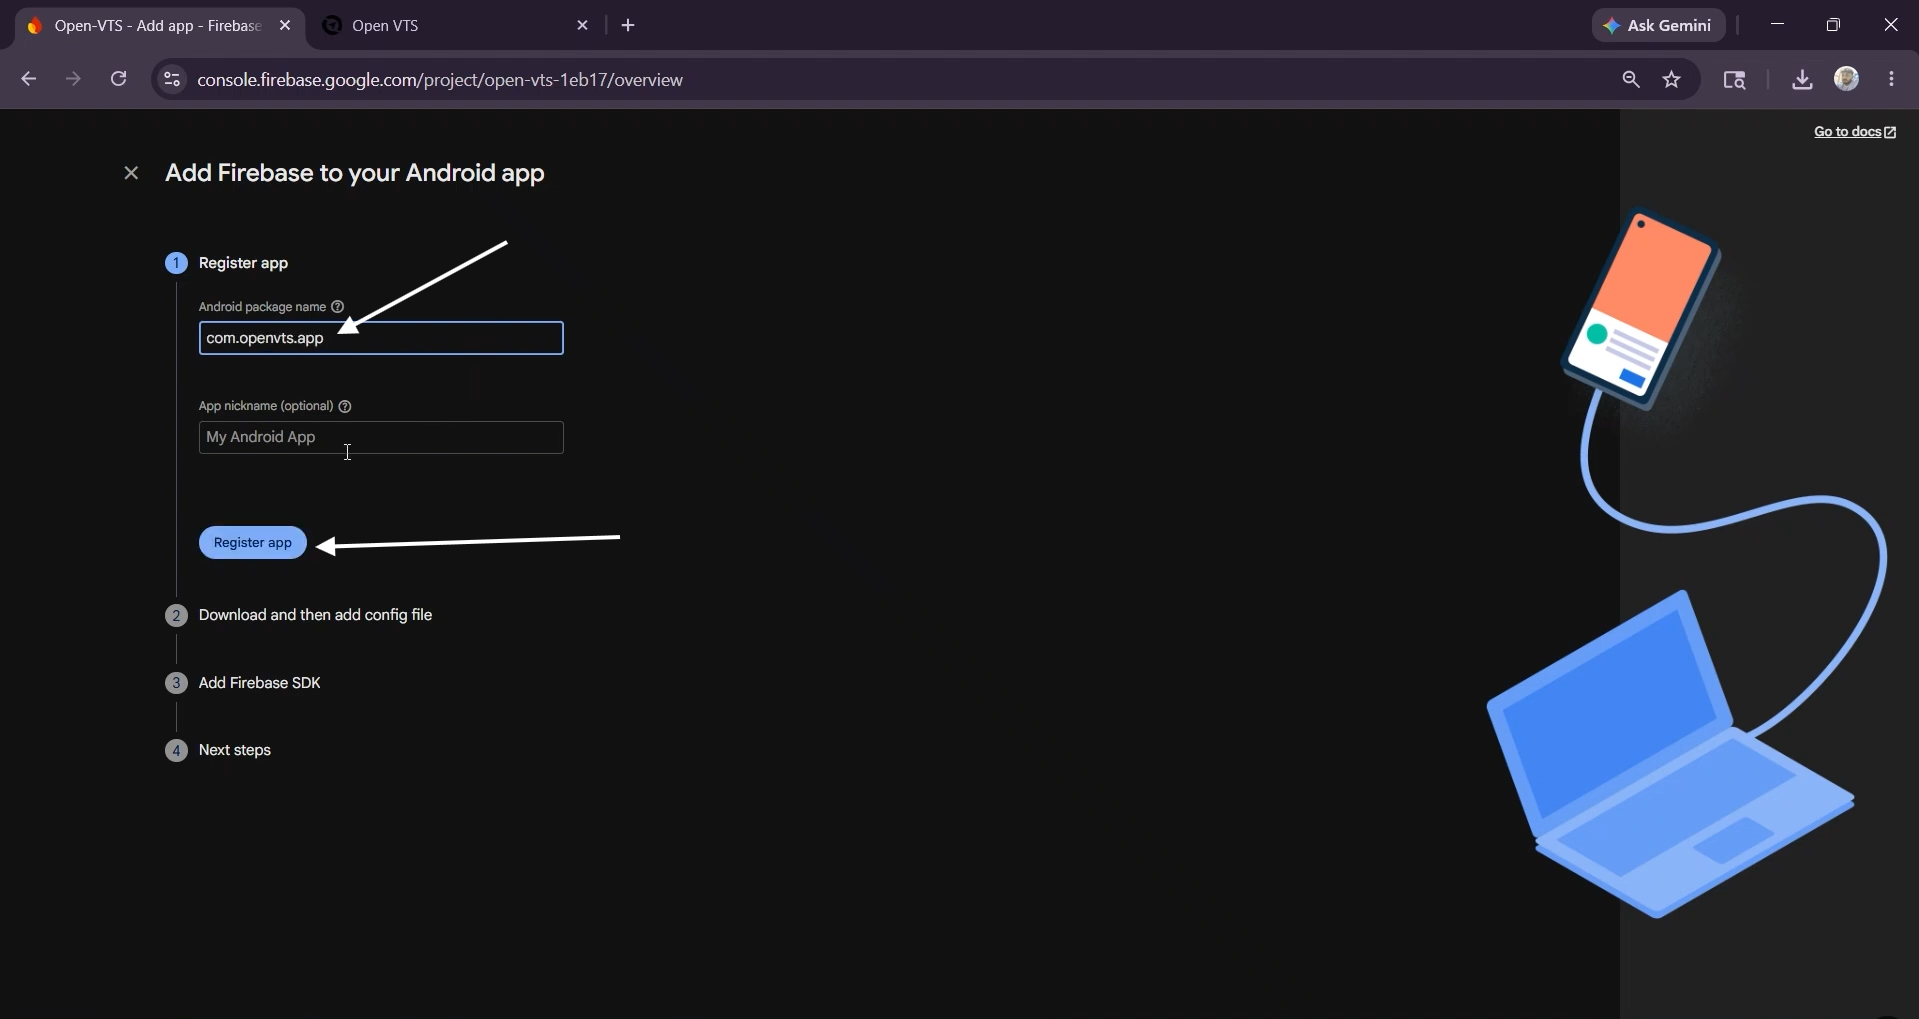
Enter the Android package name.
Select Register App.
Download the google-services.json file.
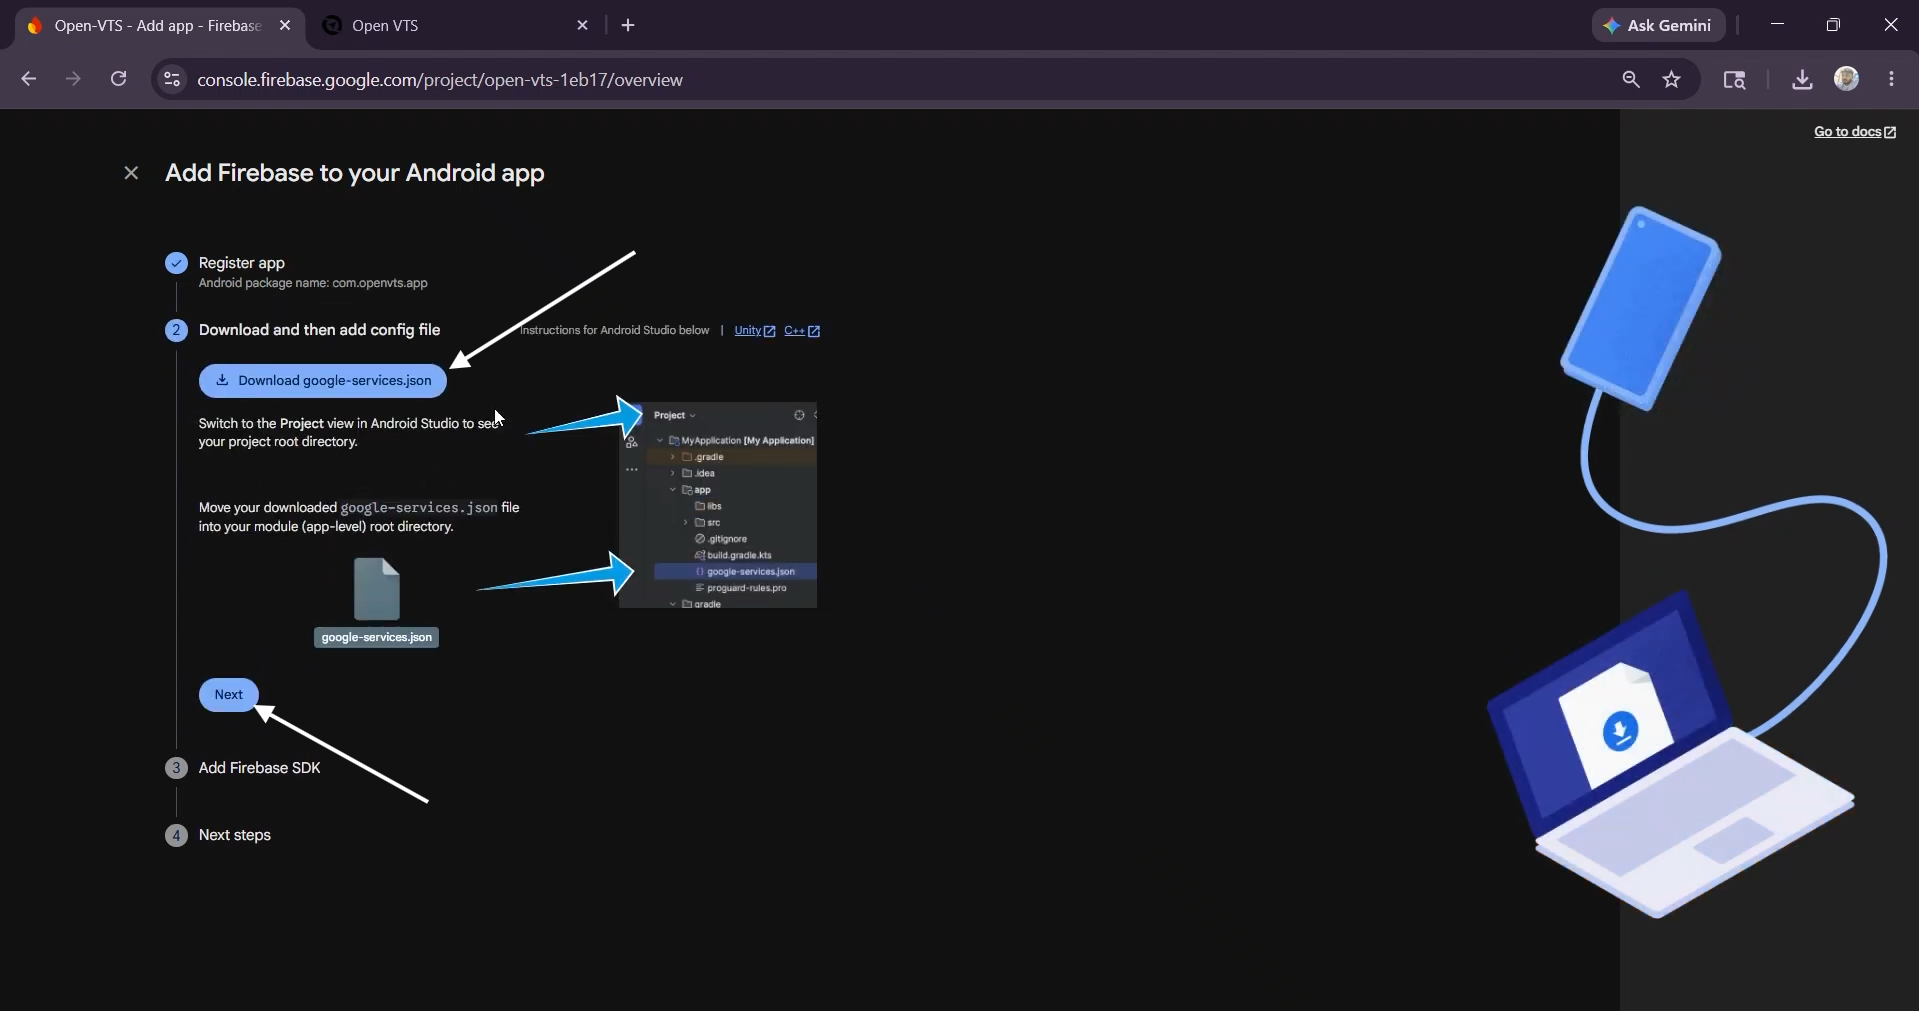
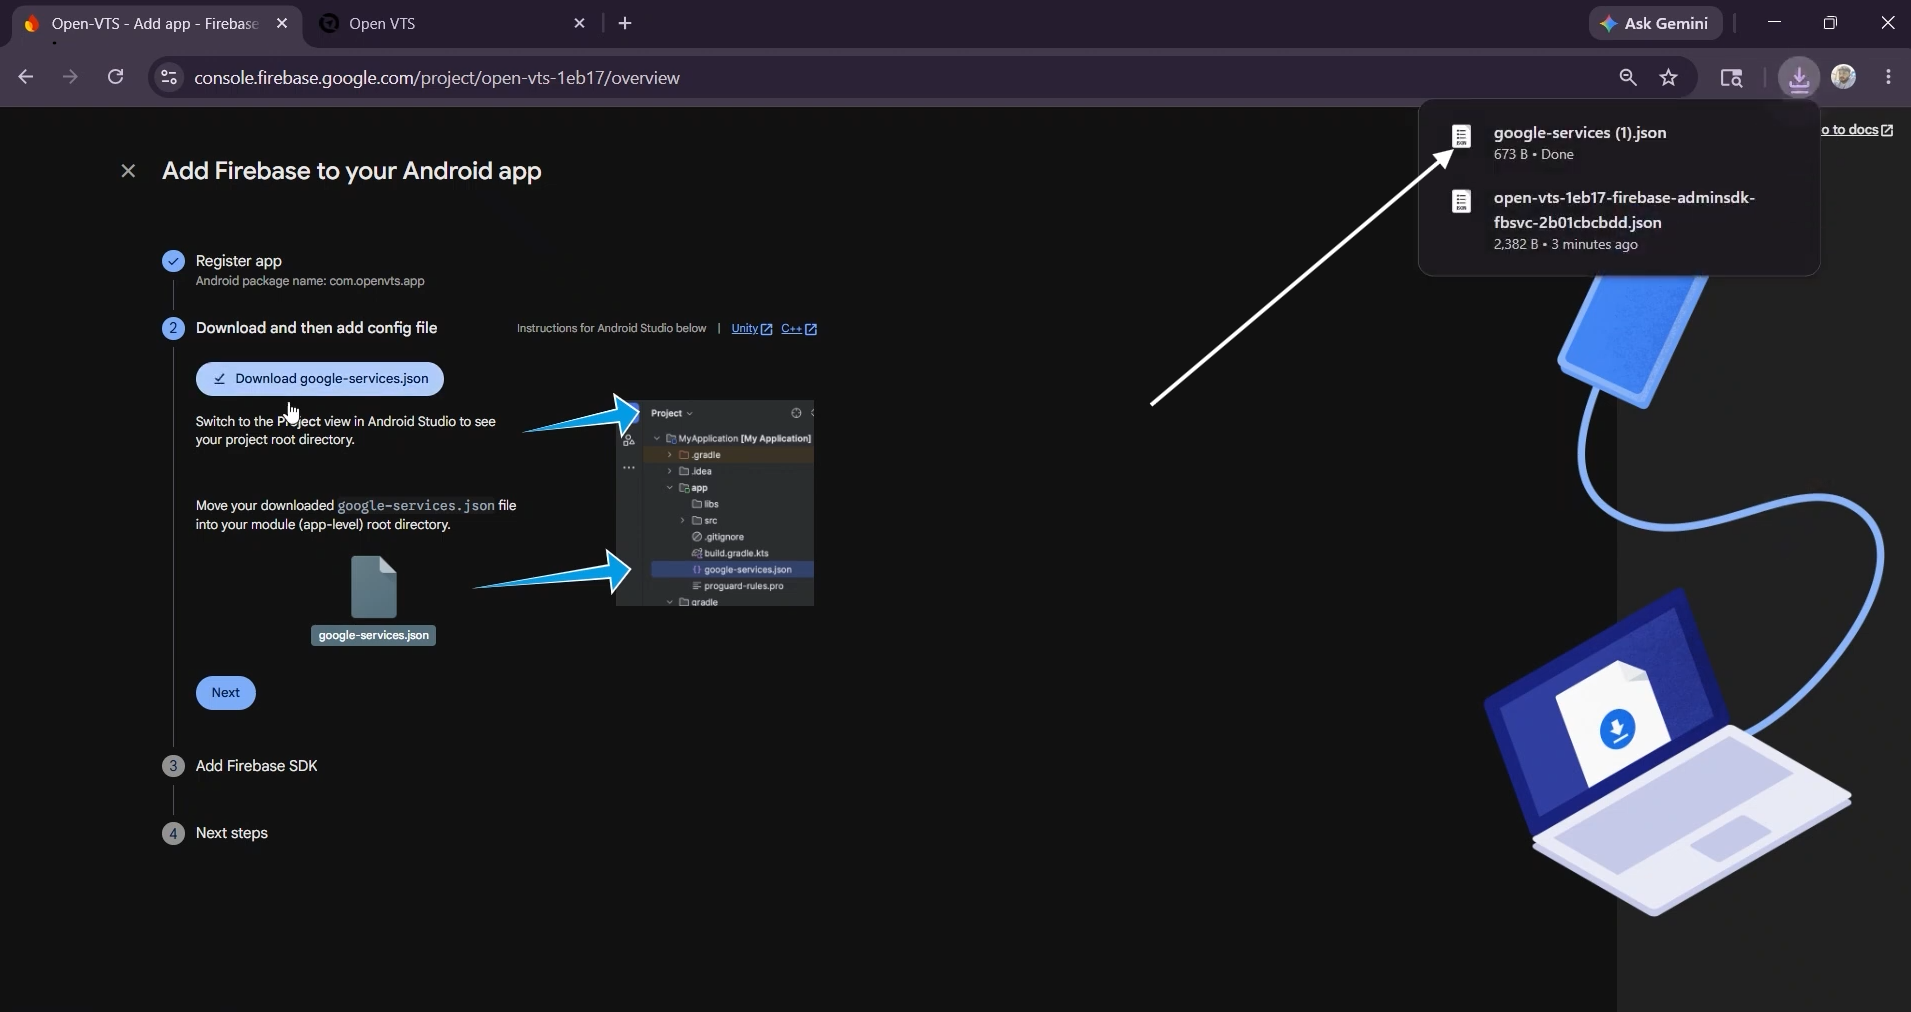
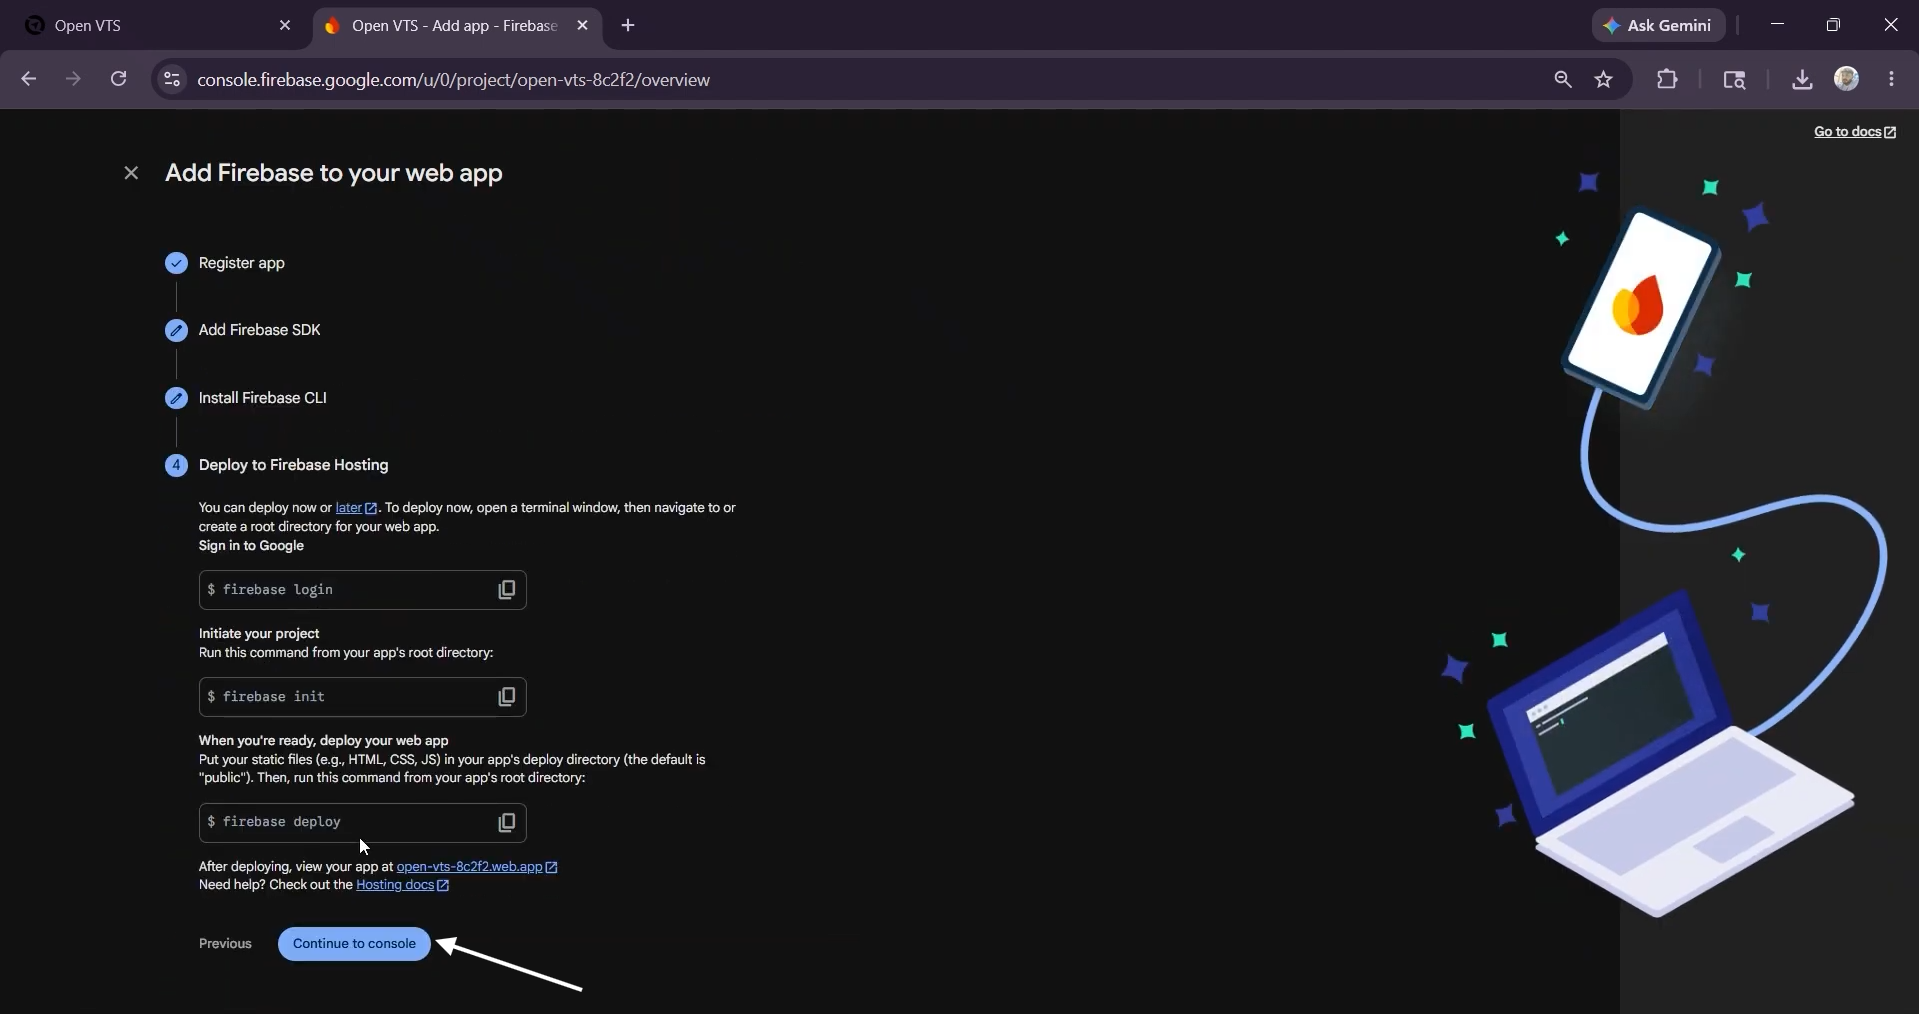
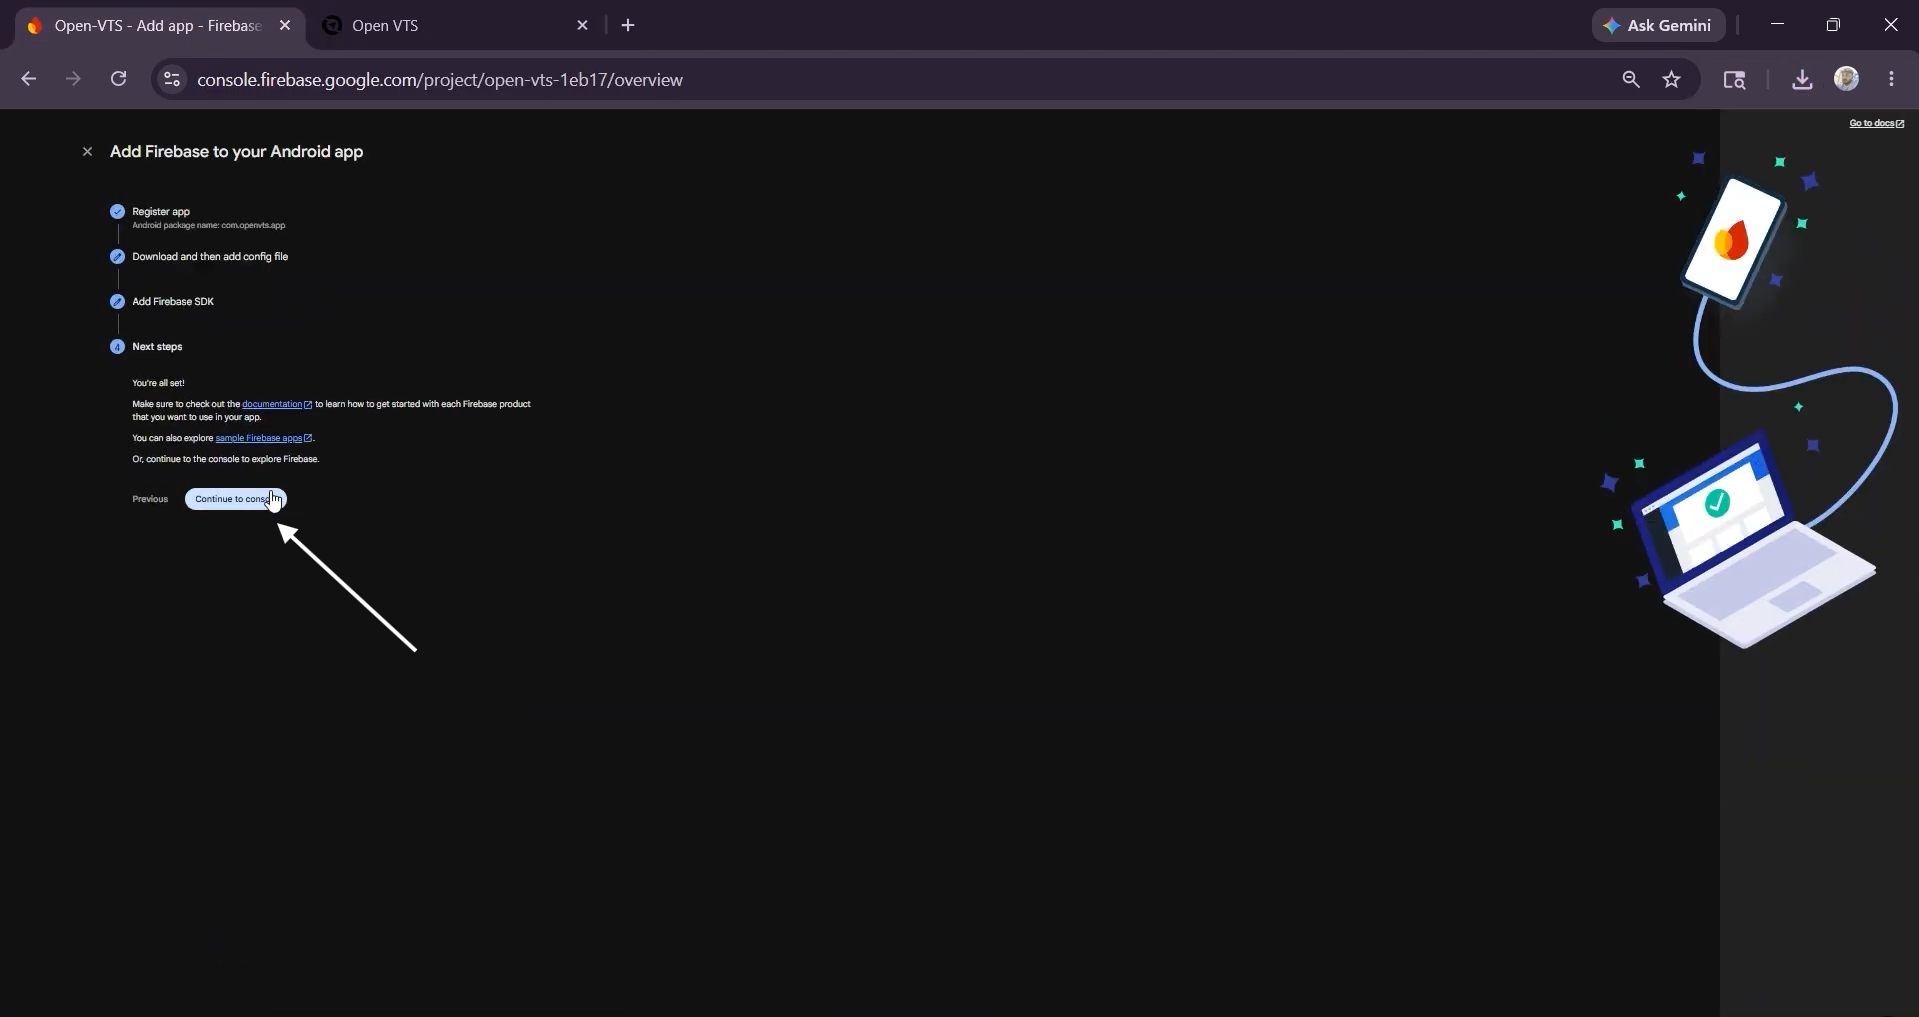
Continue through the remaining Firebase setup screens.
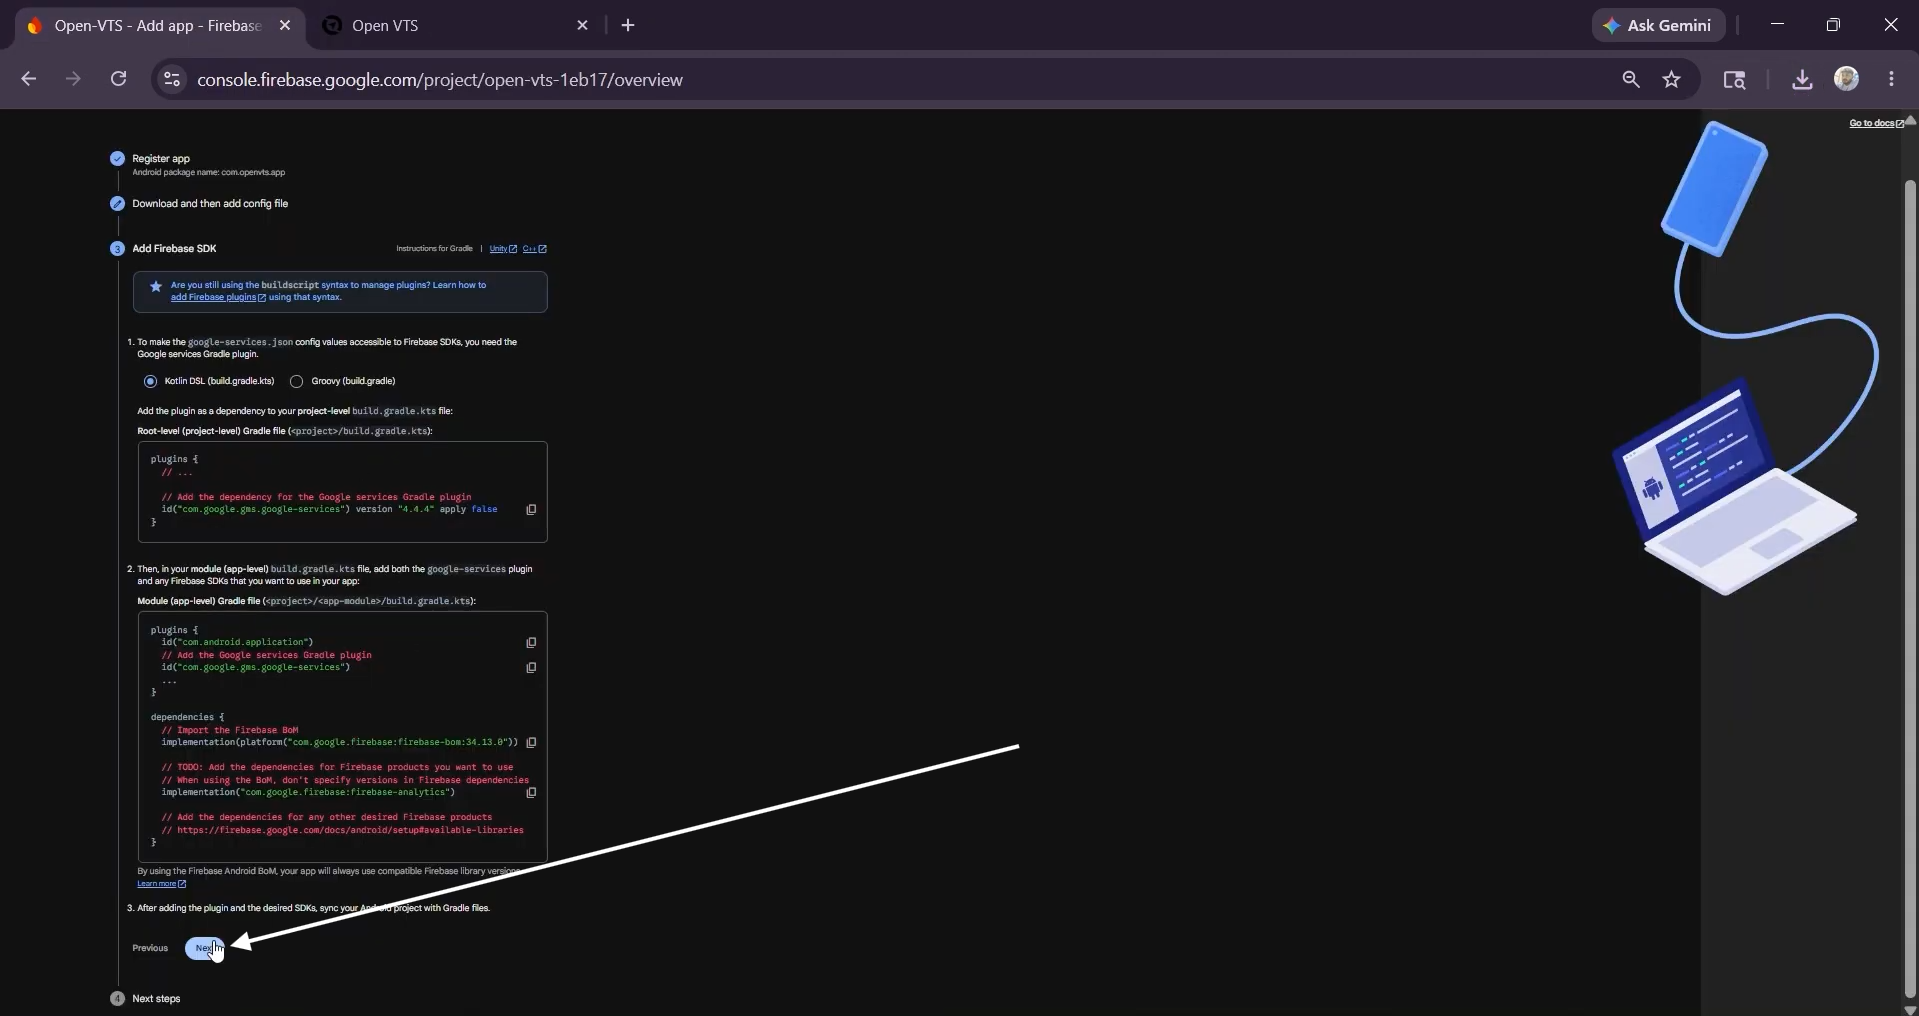
Select Continue to Console.
Step 8: Import the Android Configuration
Return to Open VTS.
Under Android Firebase Config JSON:
Select Import google-services.json.
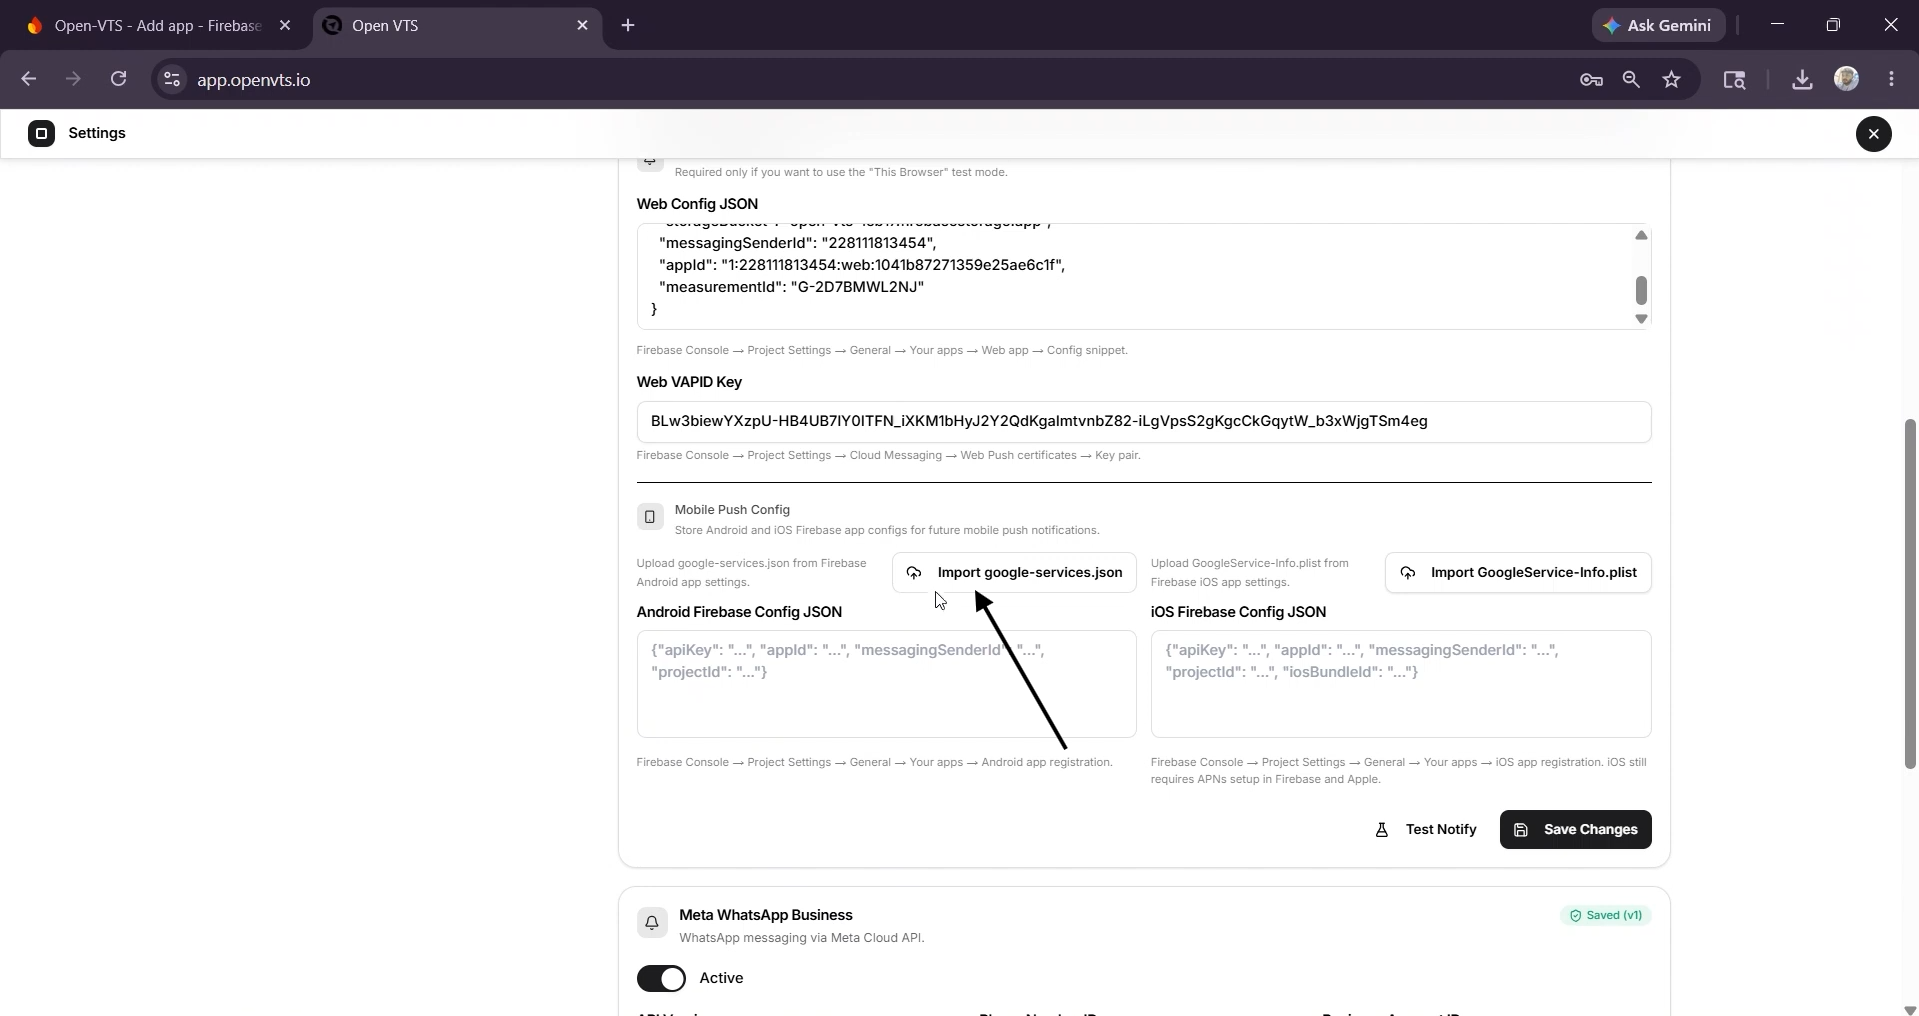
Choose the downloaded google-services.json file.
Confirm that the configuration is imported successfully.
Step 9: Register the iOS Application
Return to Firebase and select Add App again.
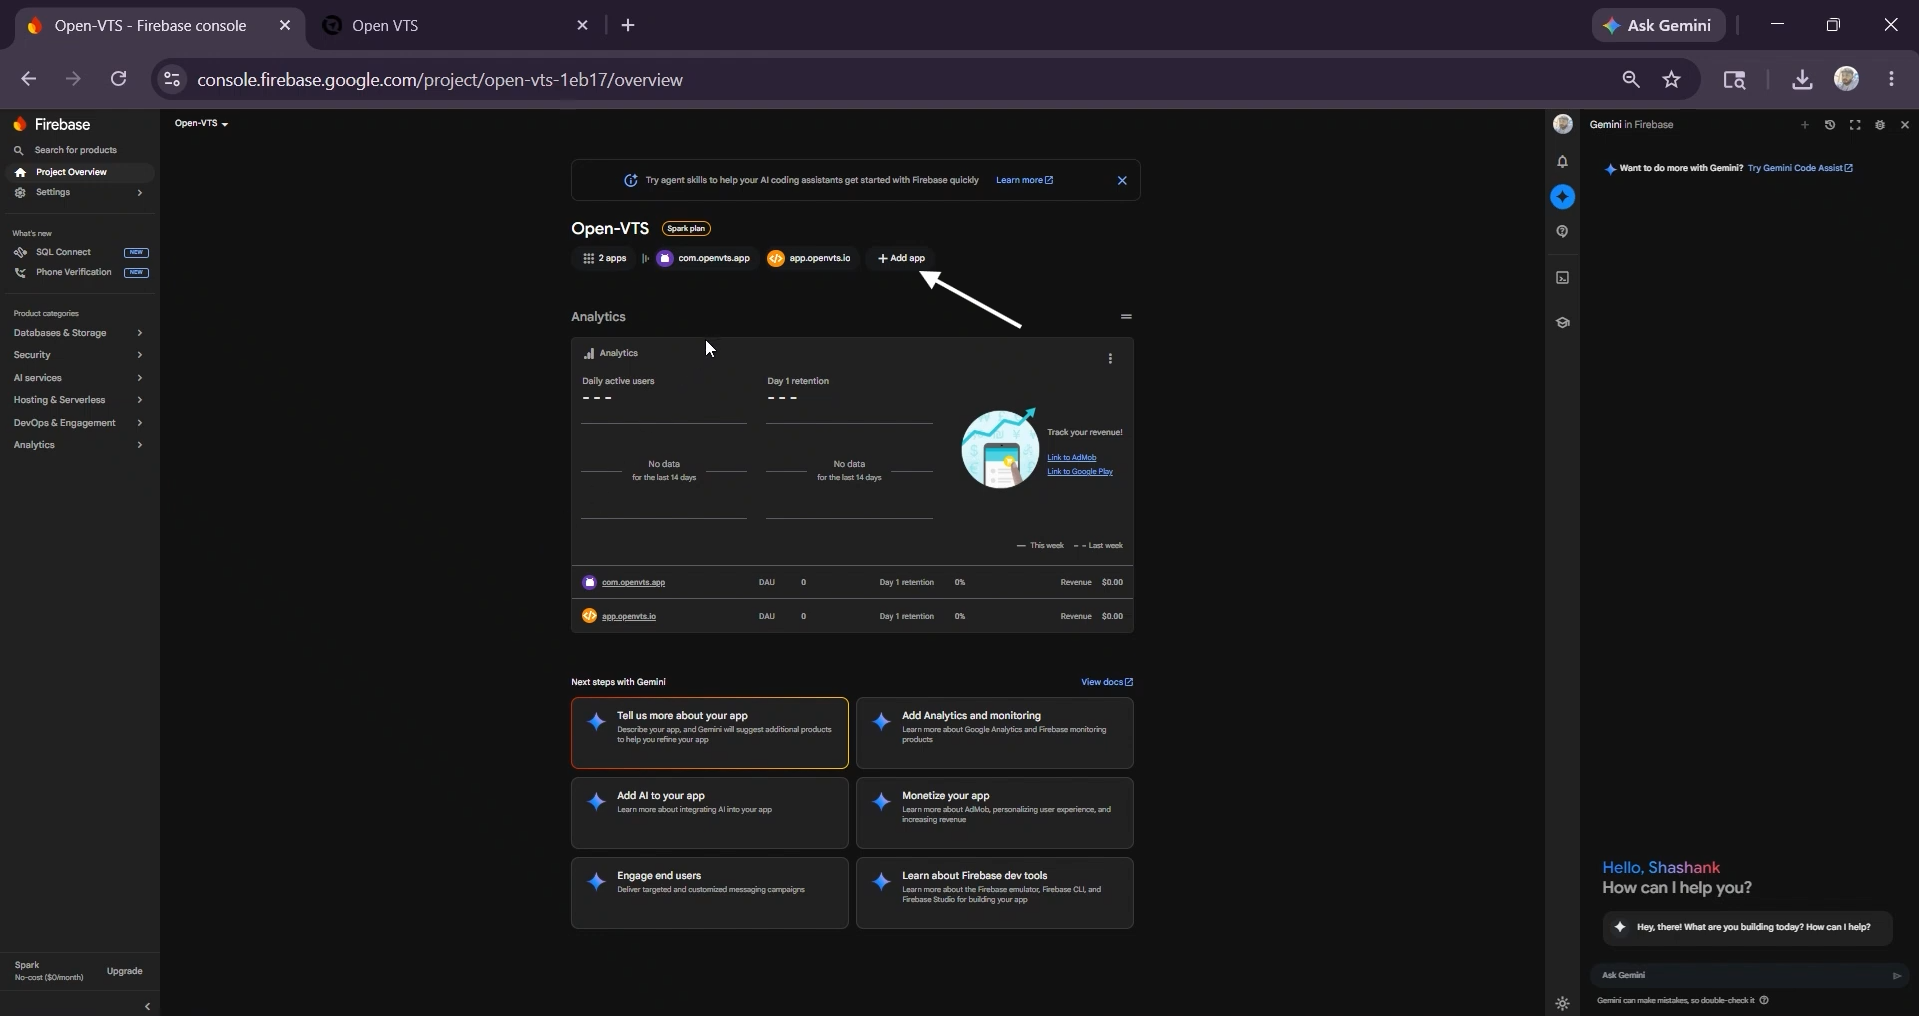
Choose the iOS icon.
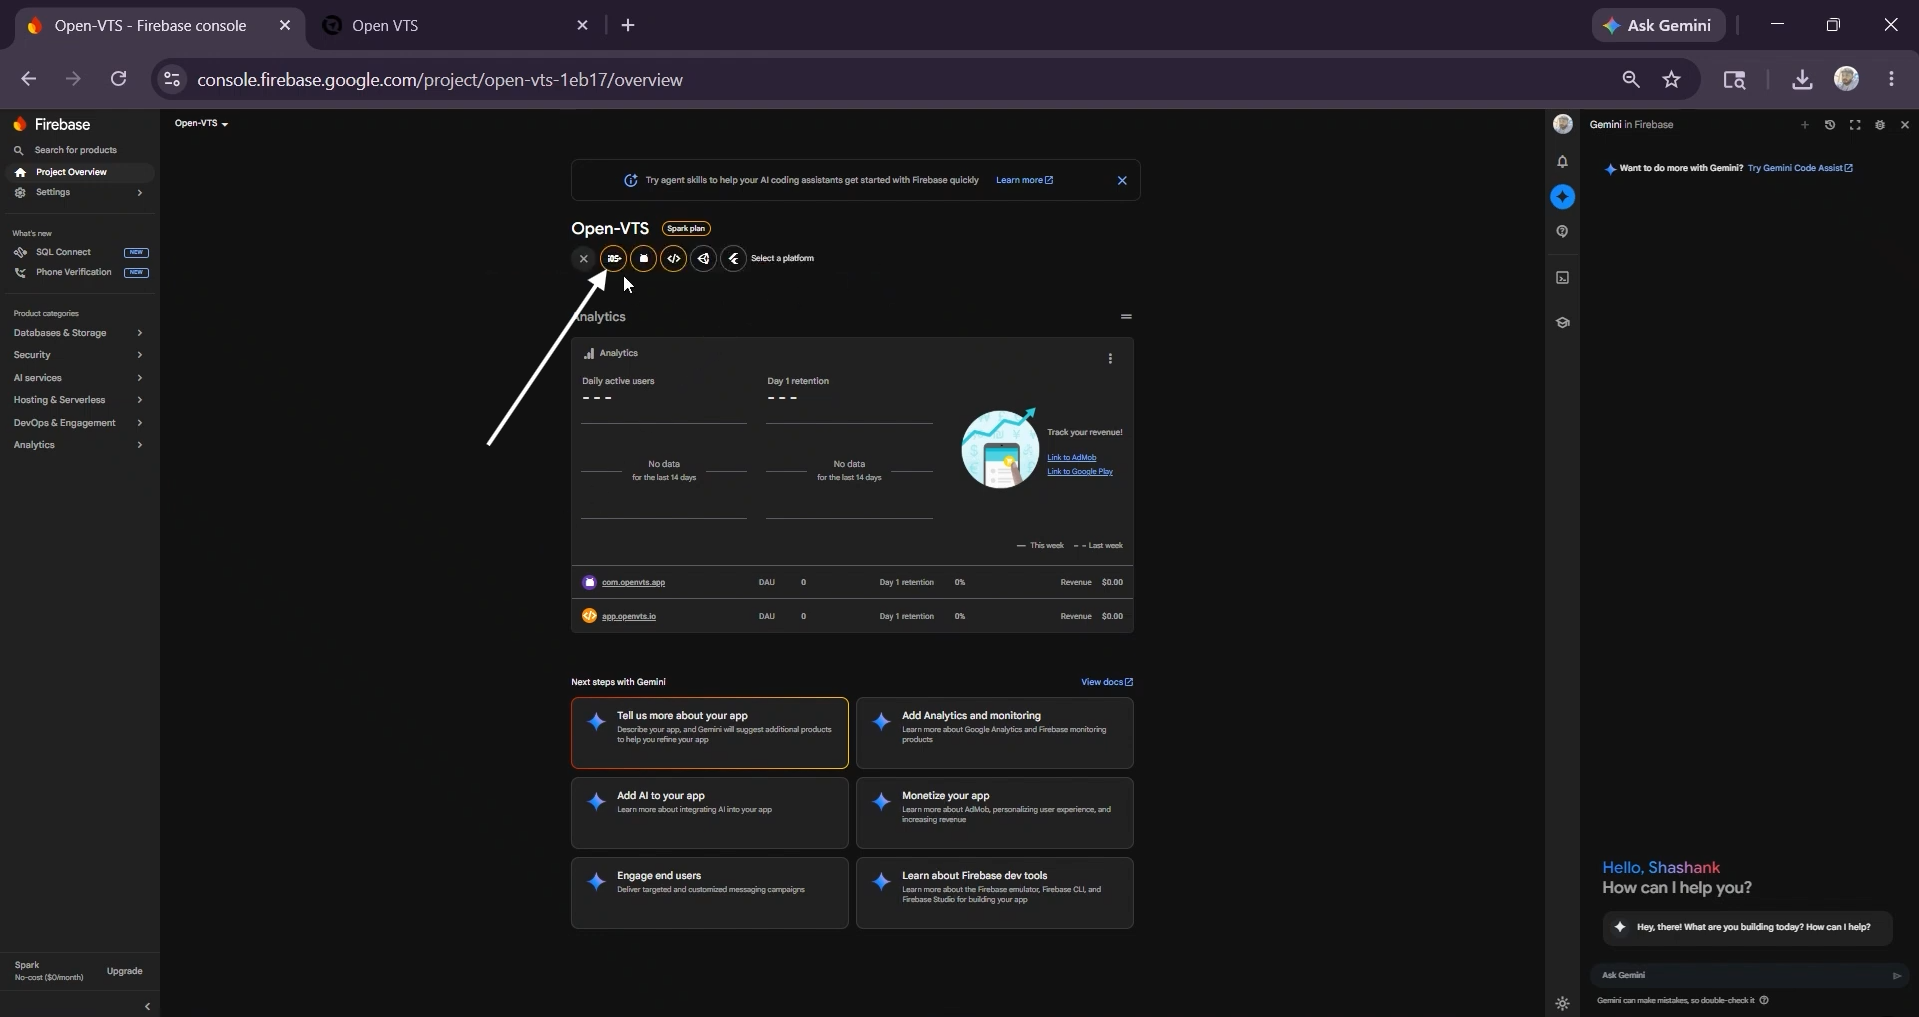
Enter the Apple Bundle ID.
Select Register App.
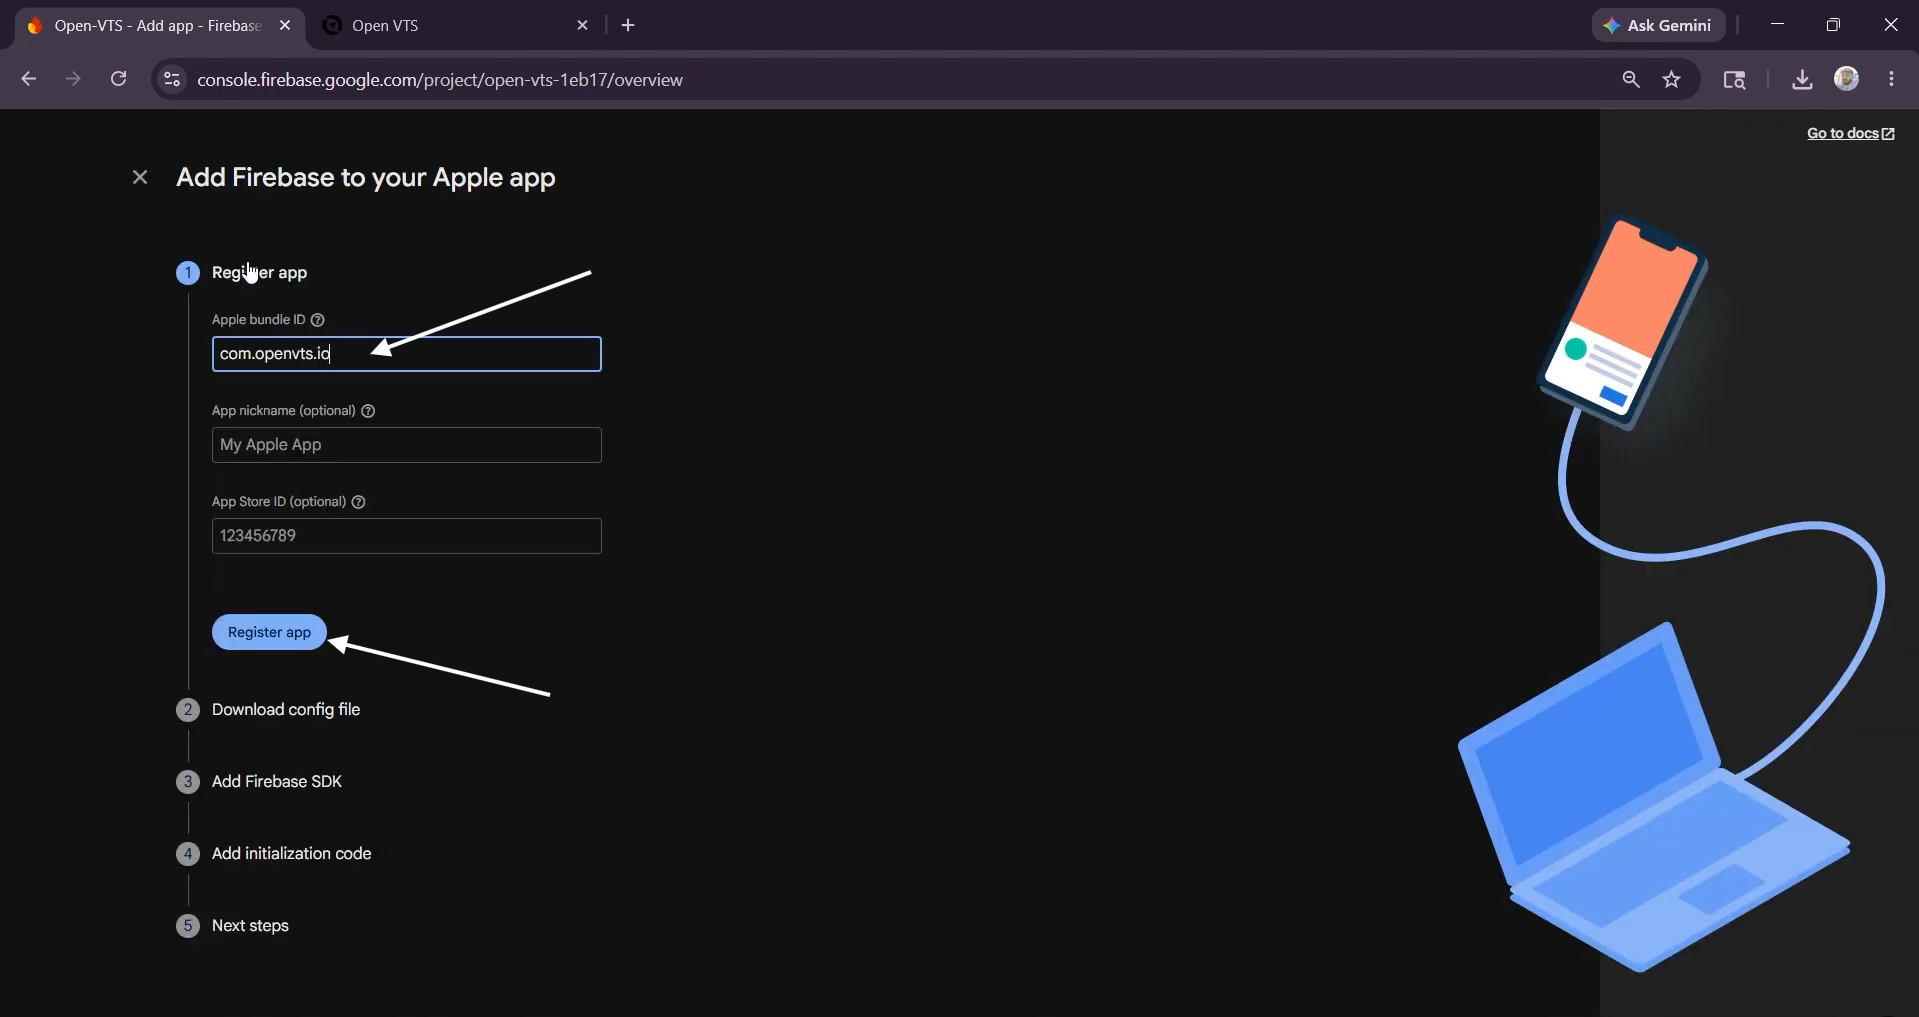
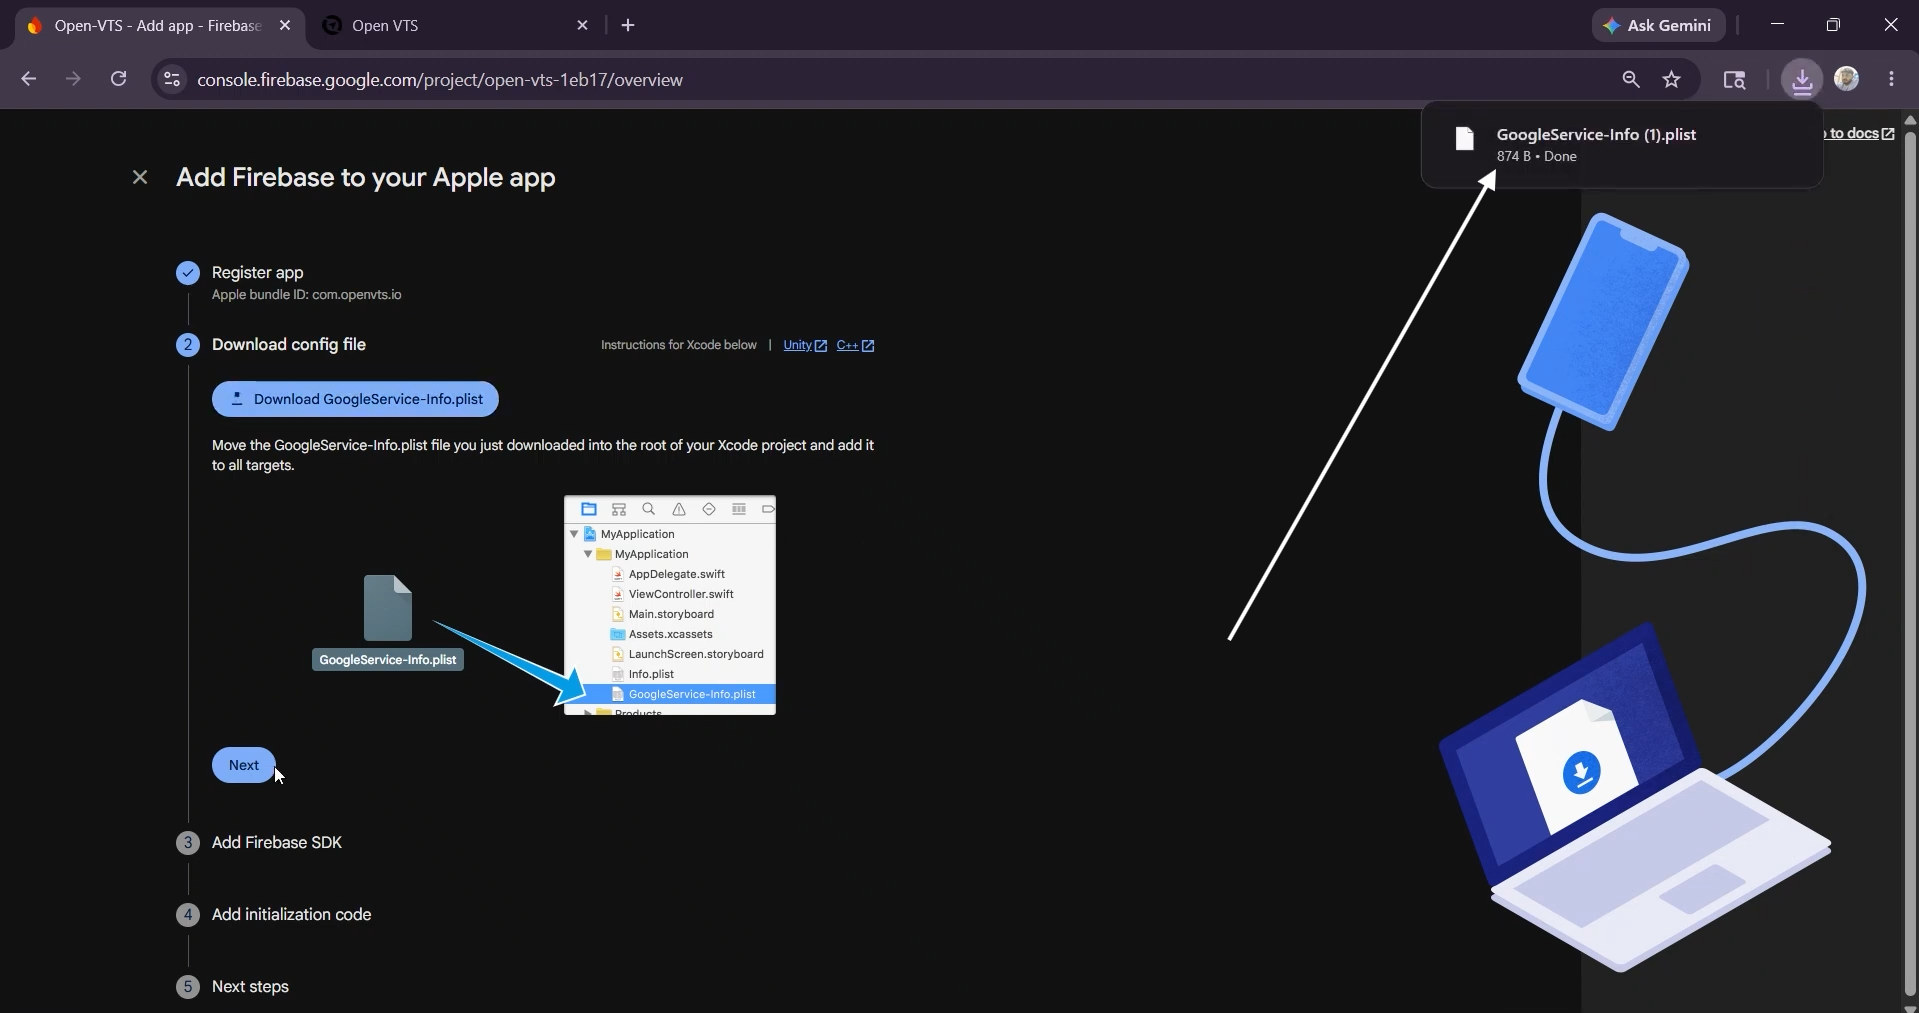
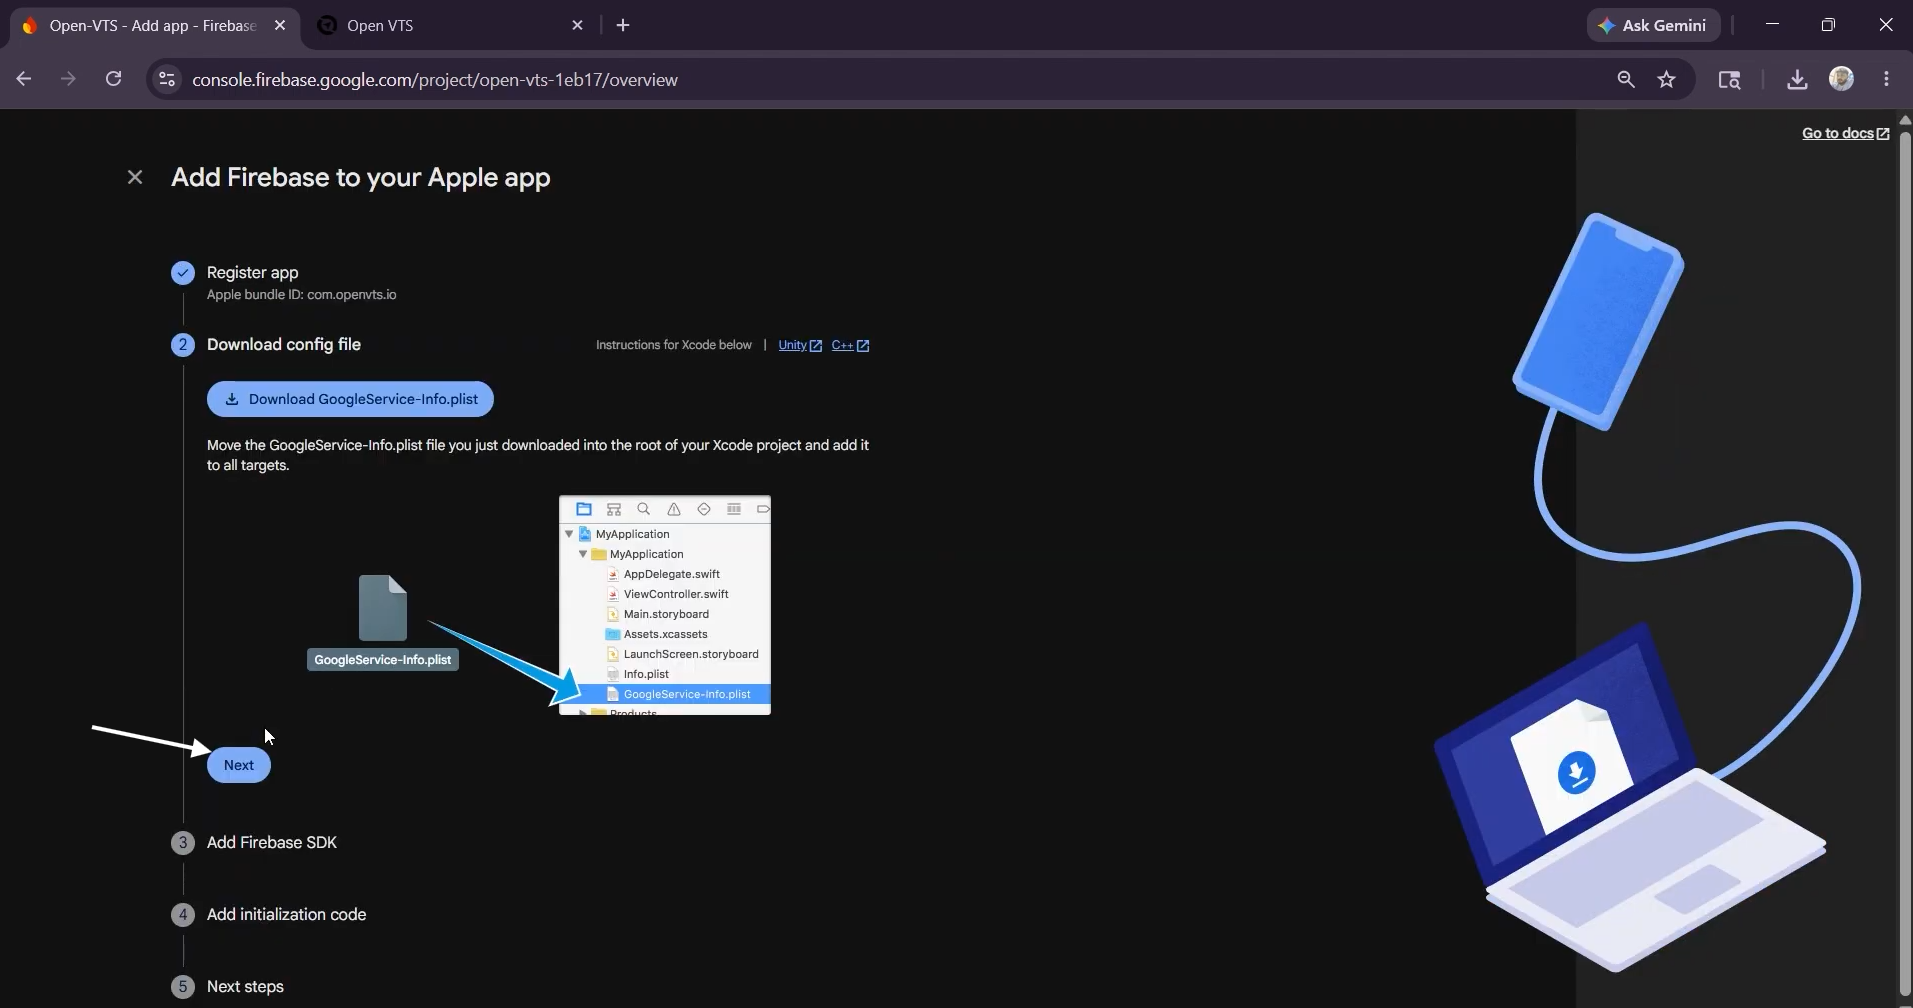
Download the GoogleService-Info.plist file.
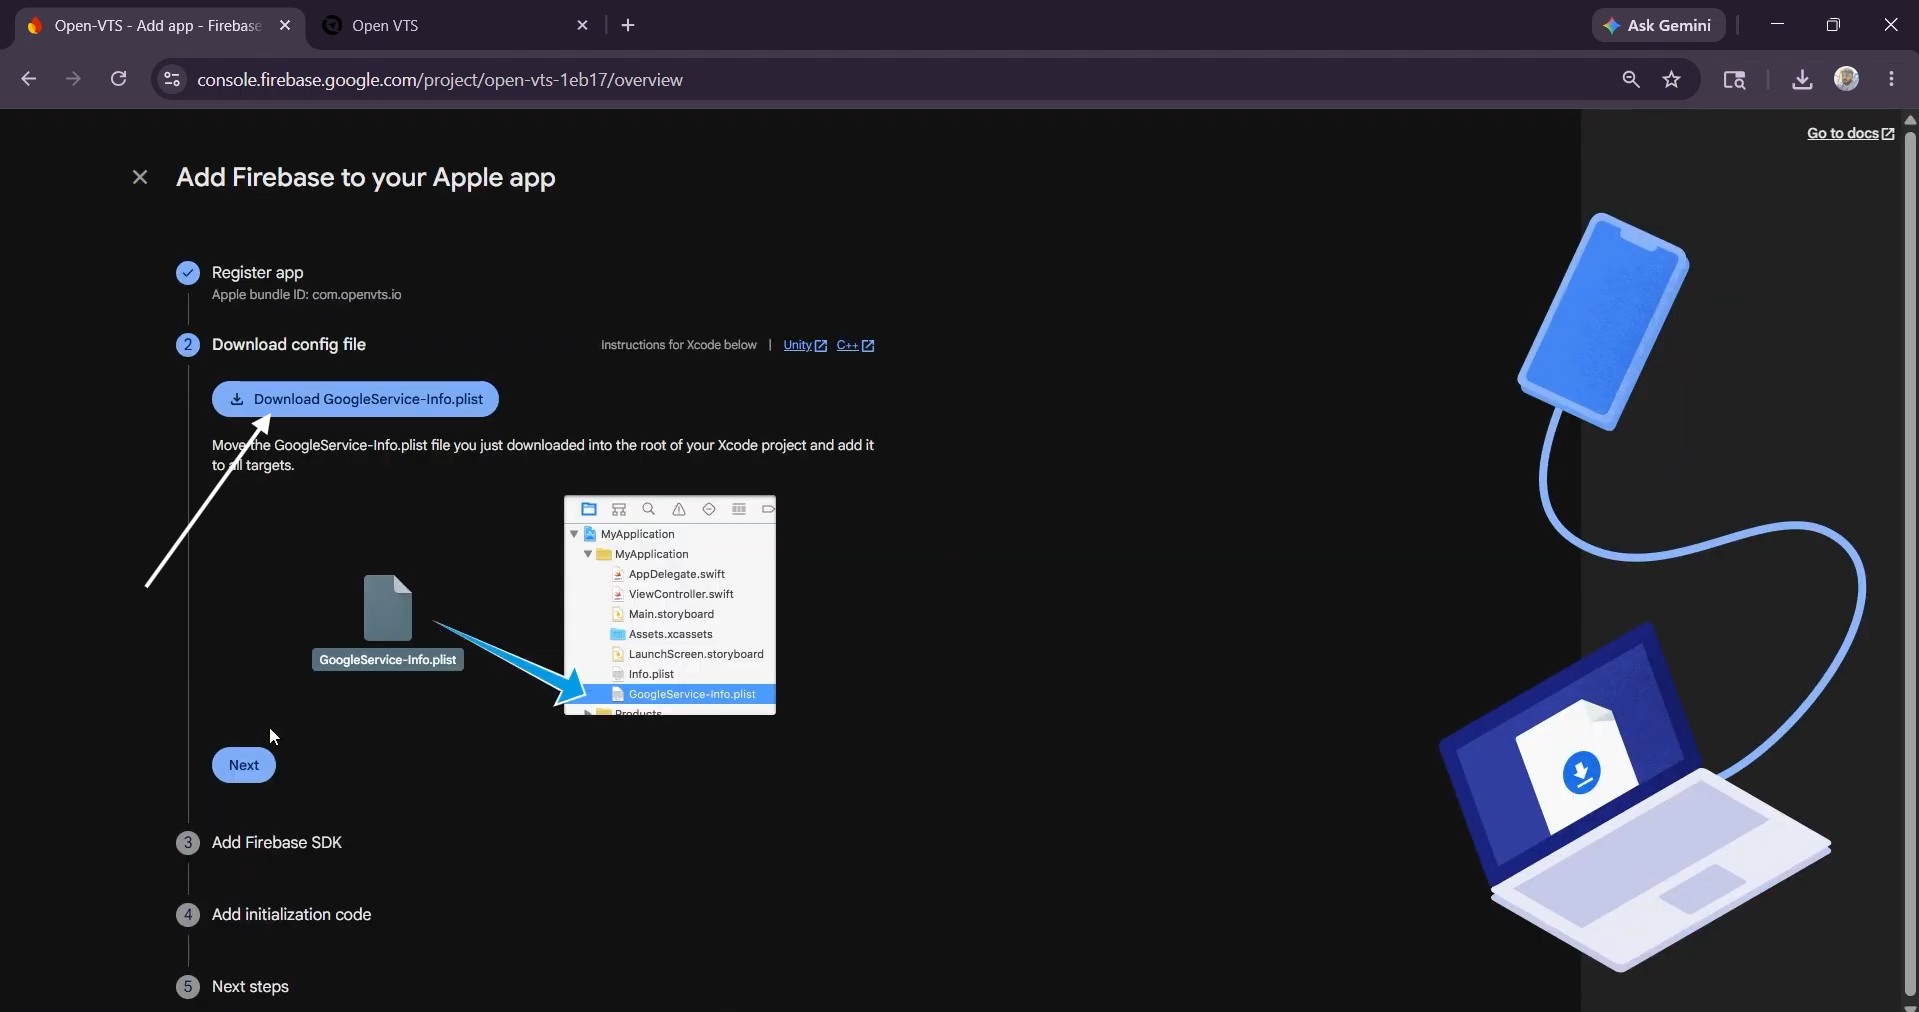
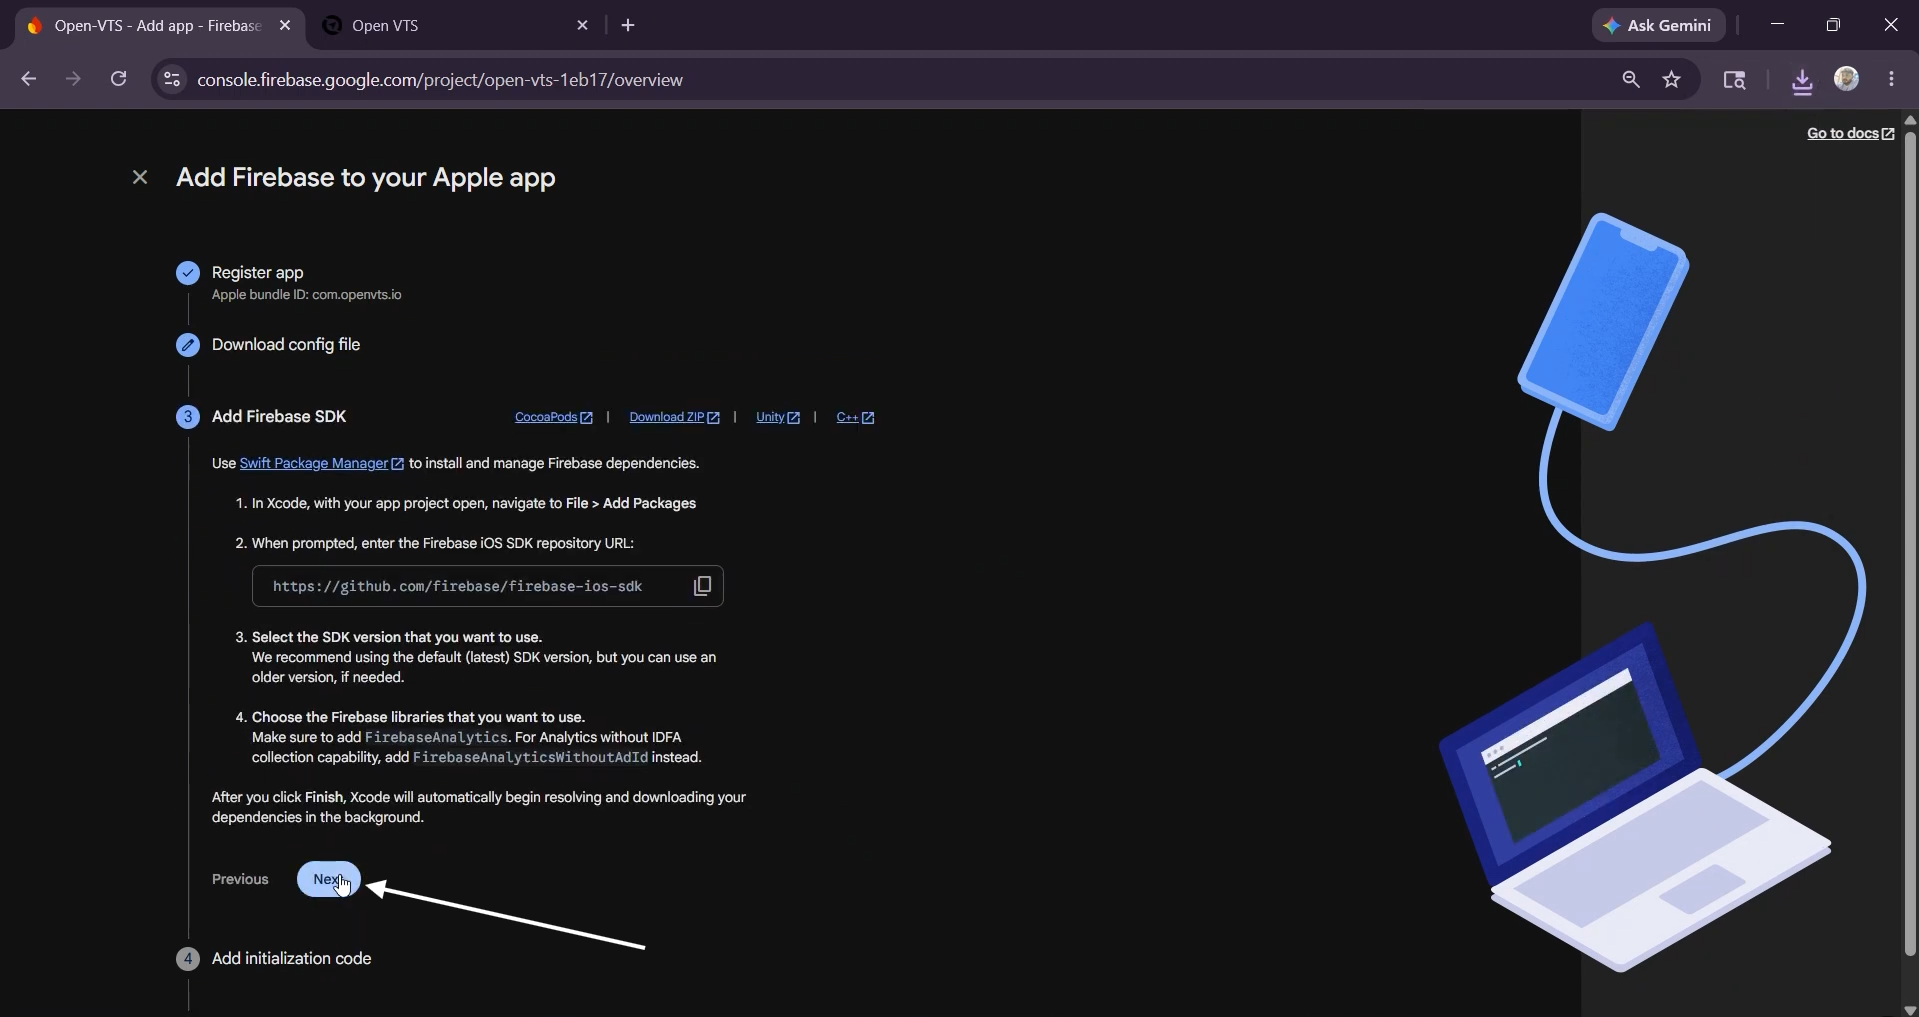
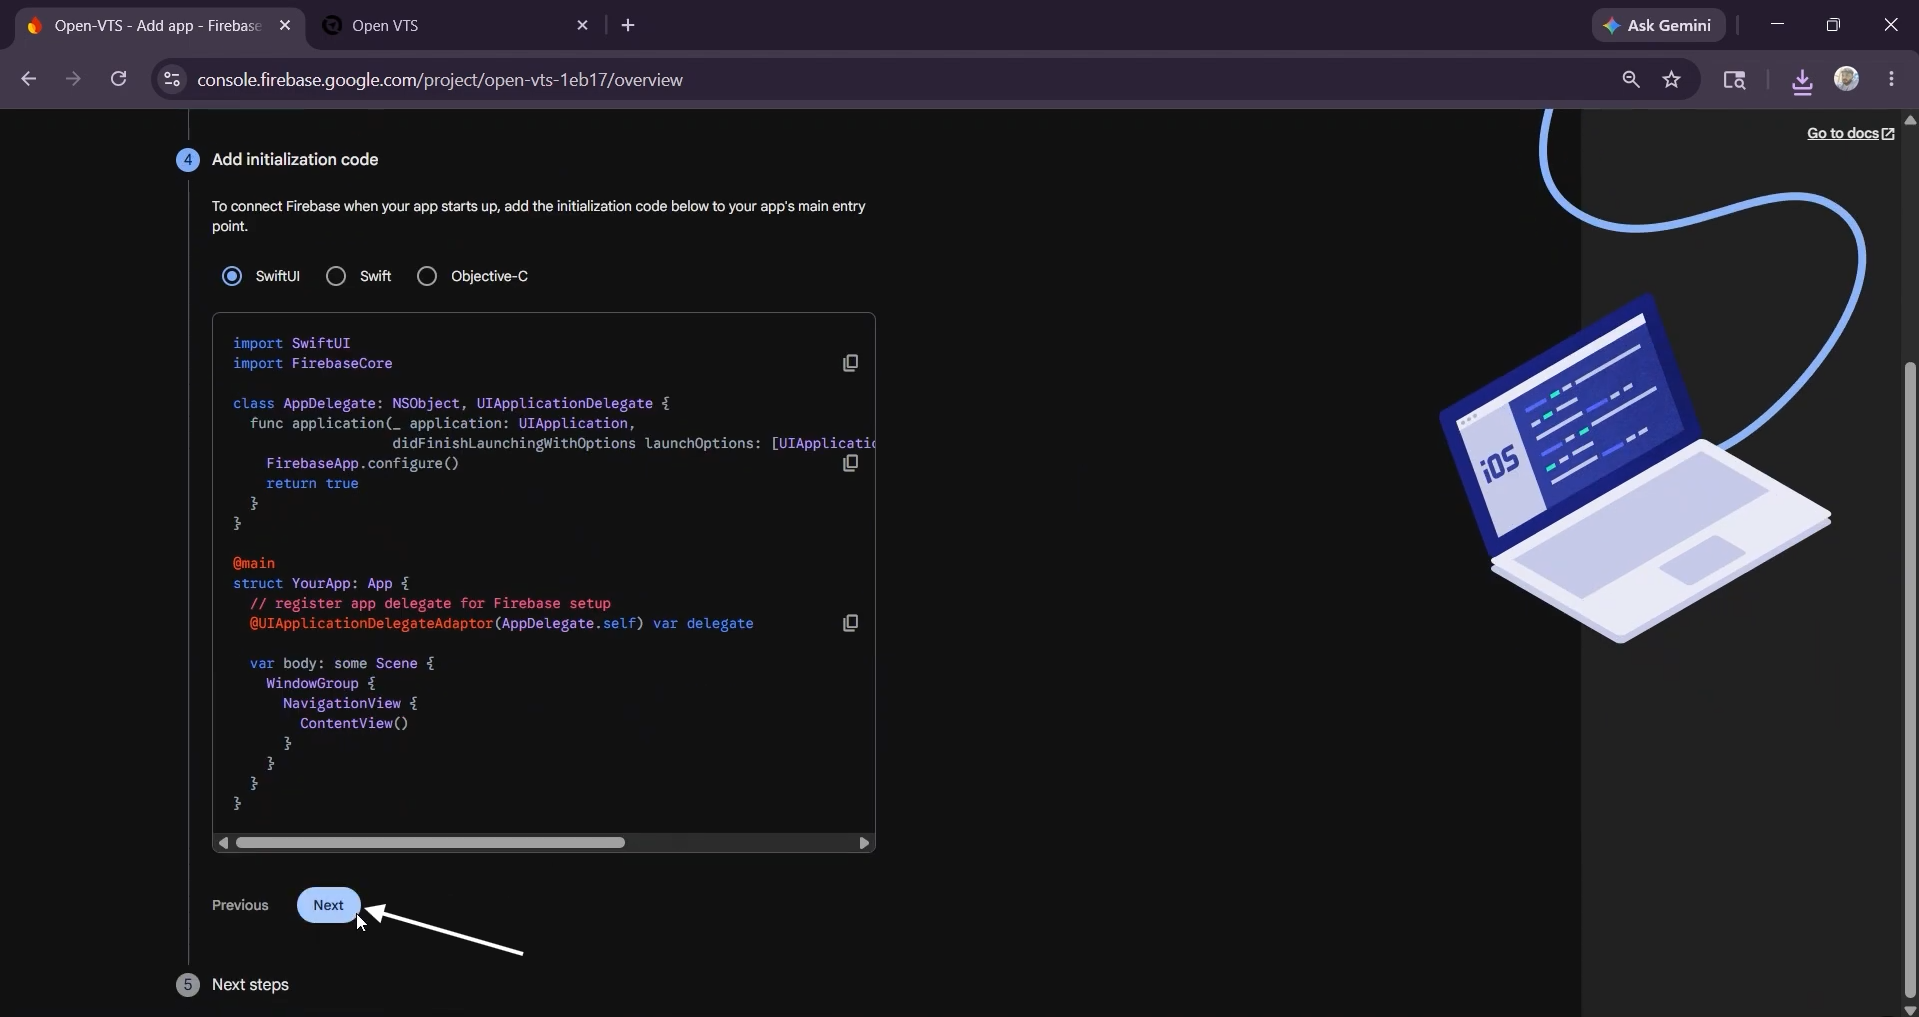
Continue through the remaining setup screens.
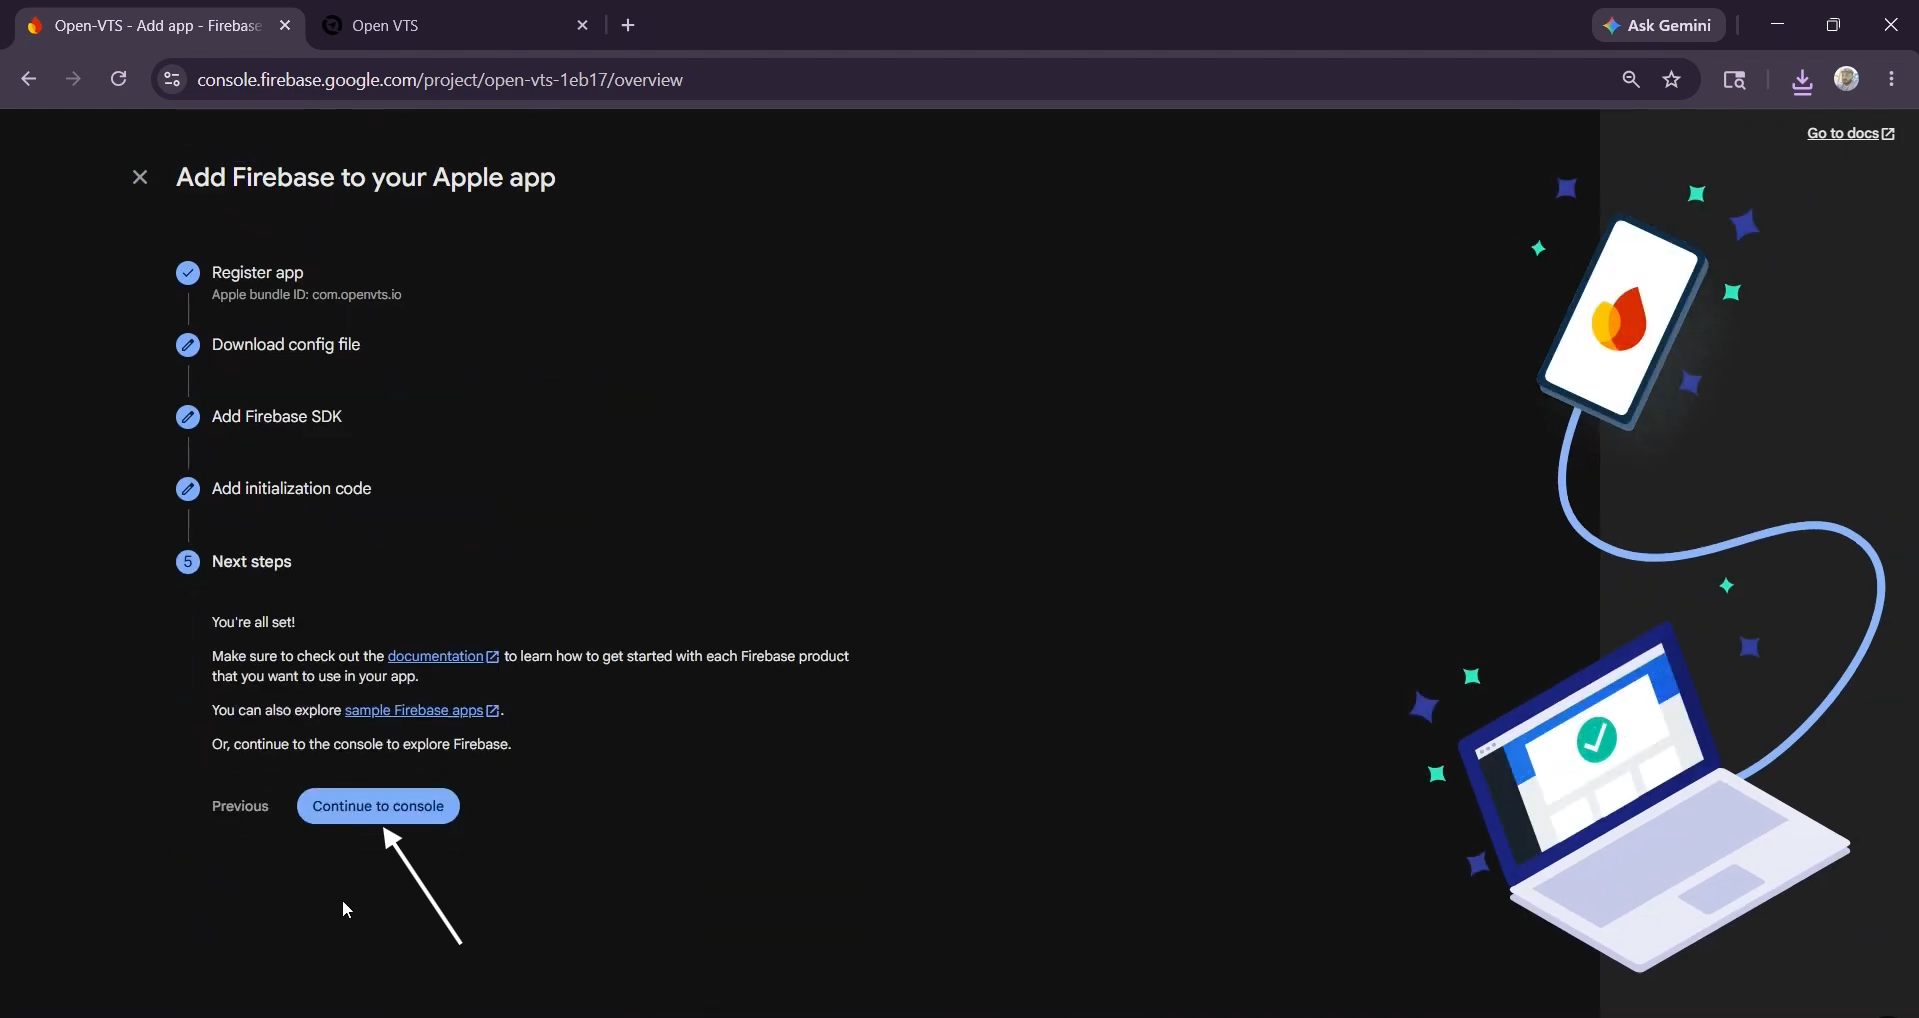
Select Continue to Console.
Step 10: Import the iOS Configuration
Return to Open VTS.
Under iOS Firebase Config JSON:
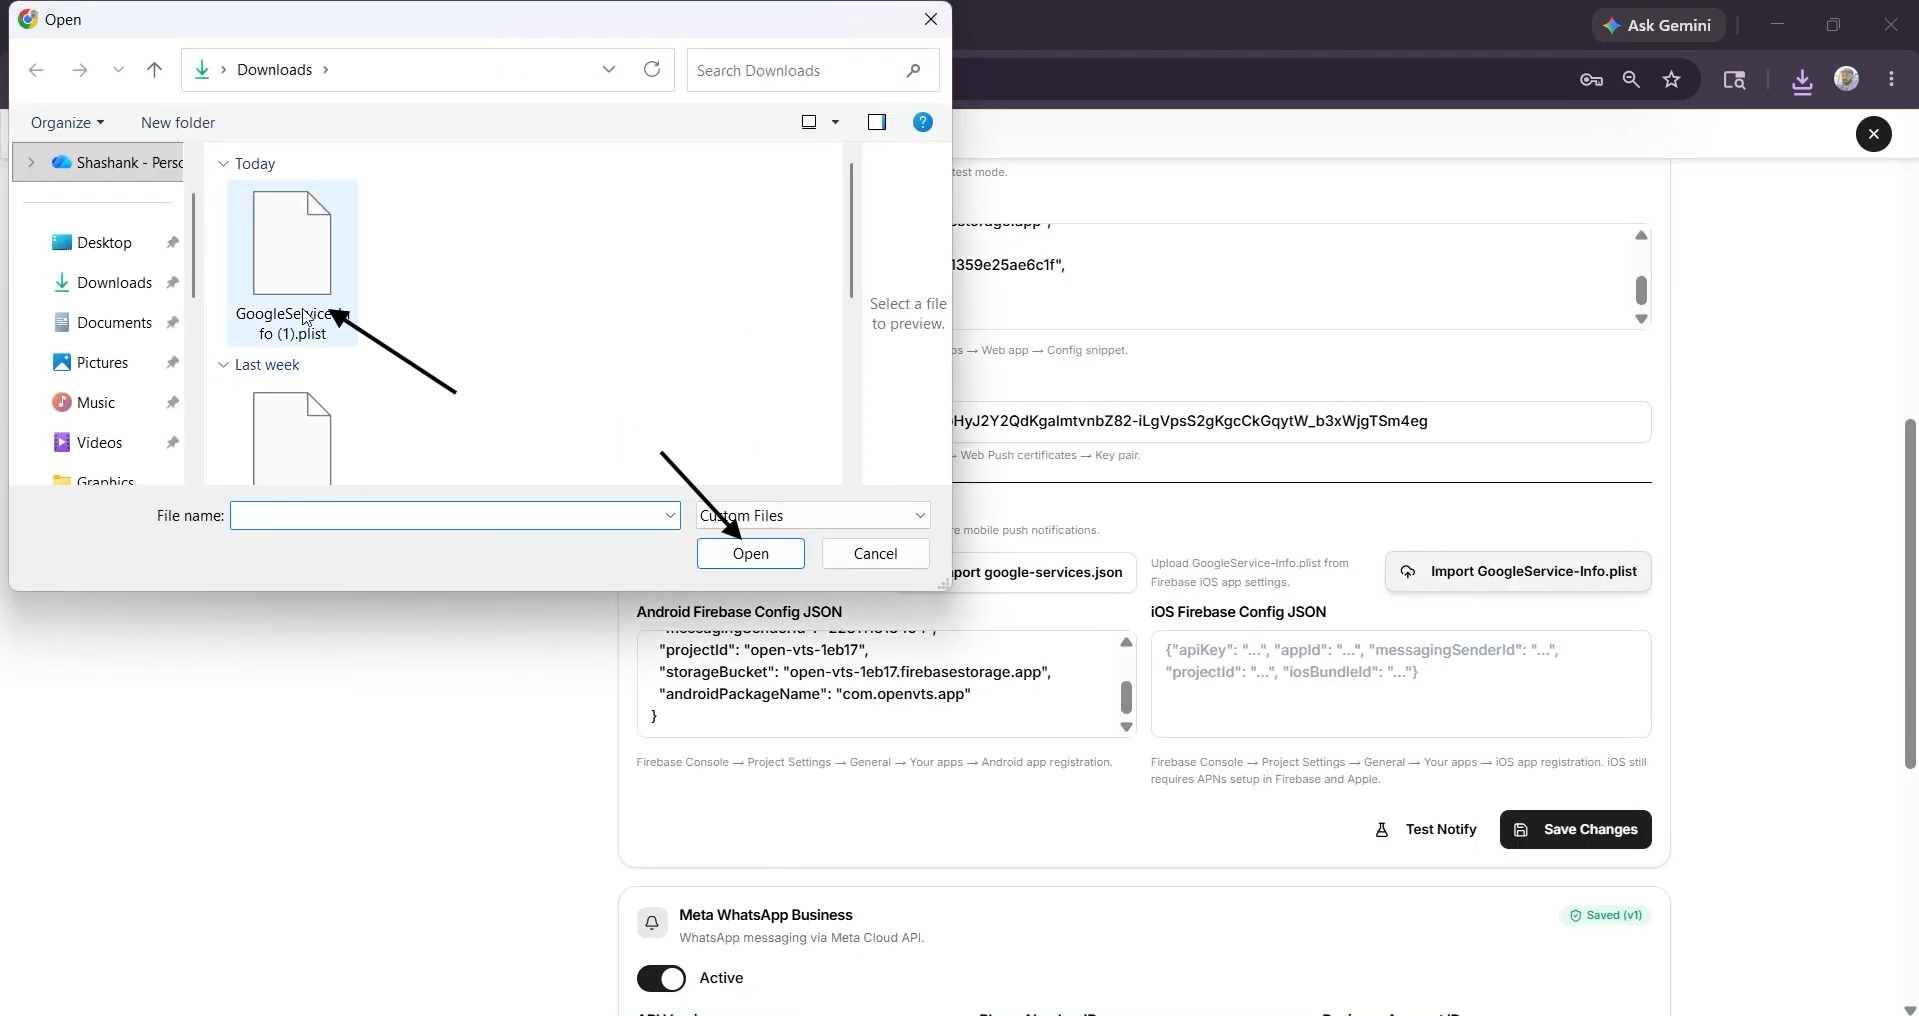
Select Import GoogleService-Info.plist.
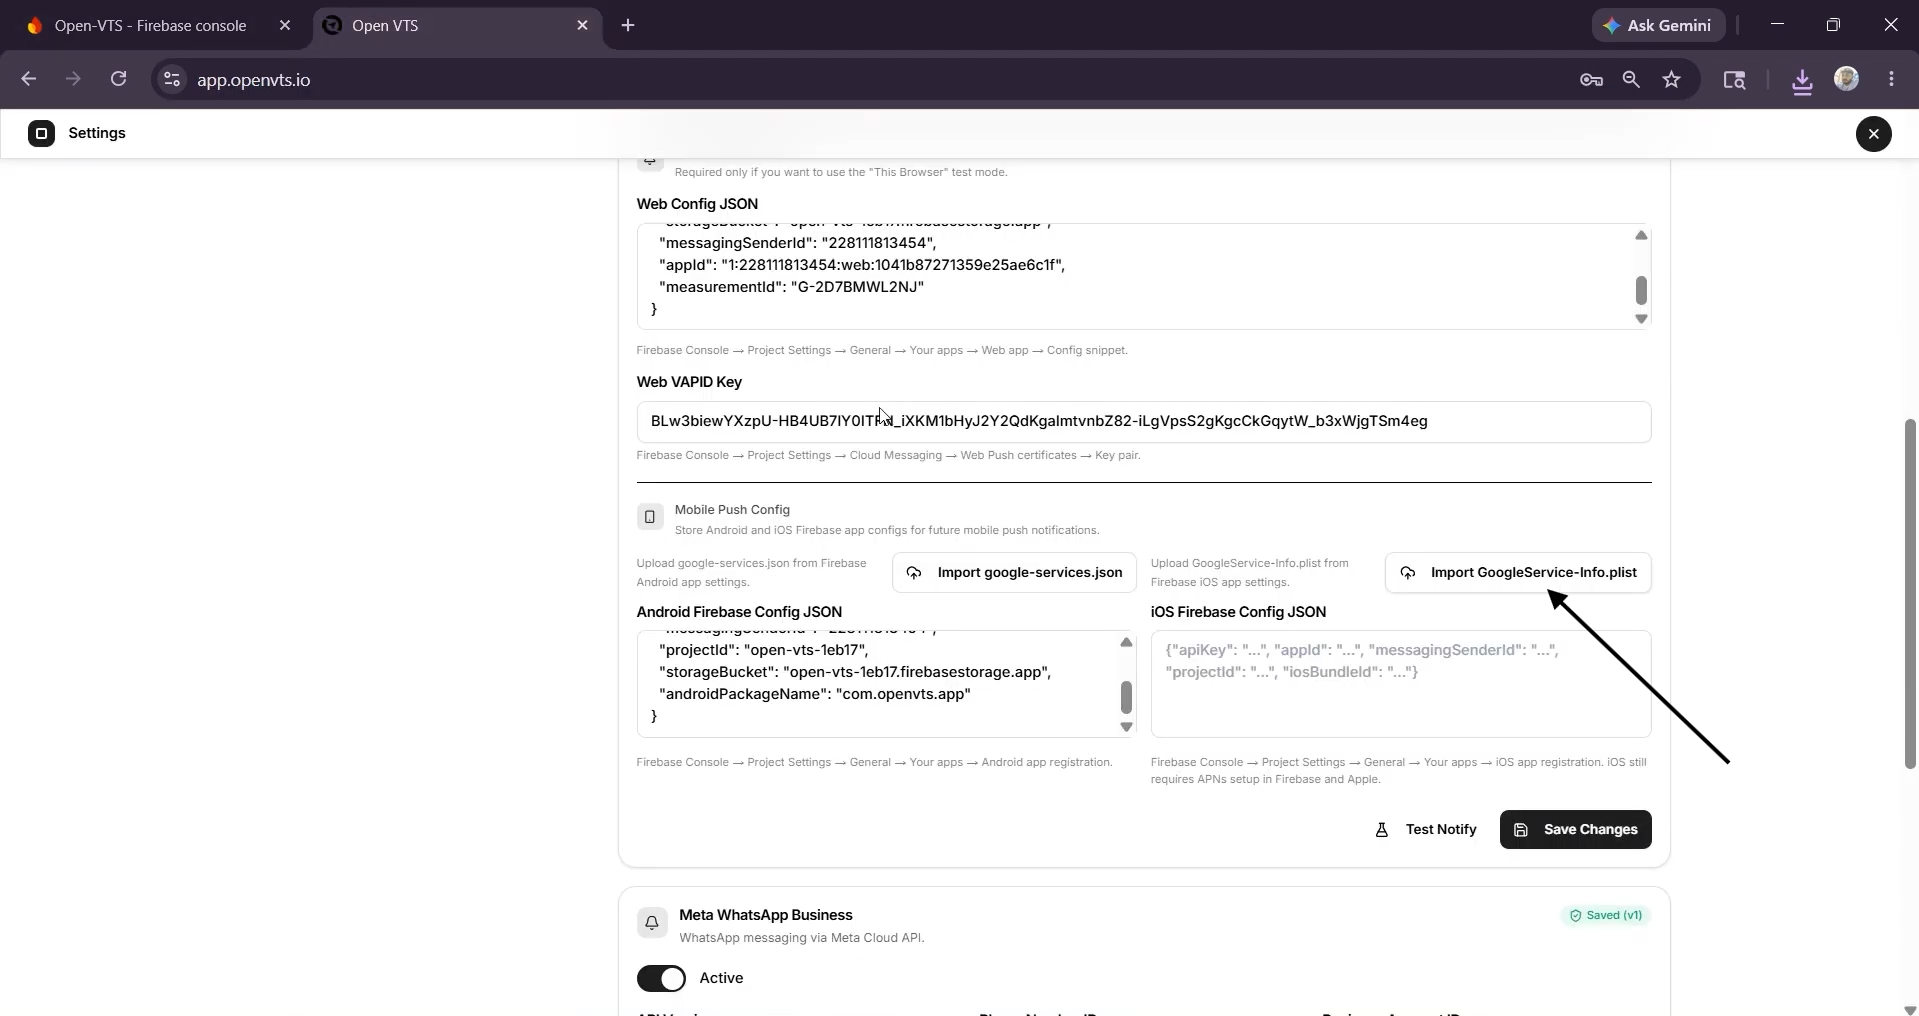
Choose the file downloaded from Firebase.
Confirm that the configuration is imported successfully.
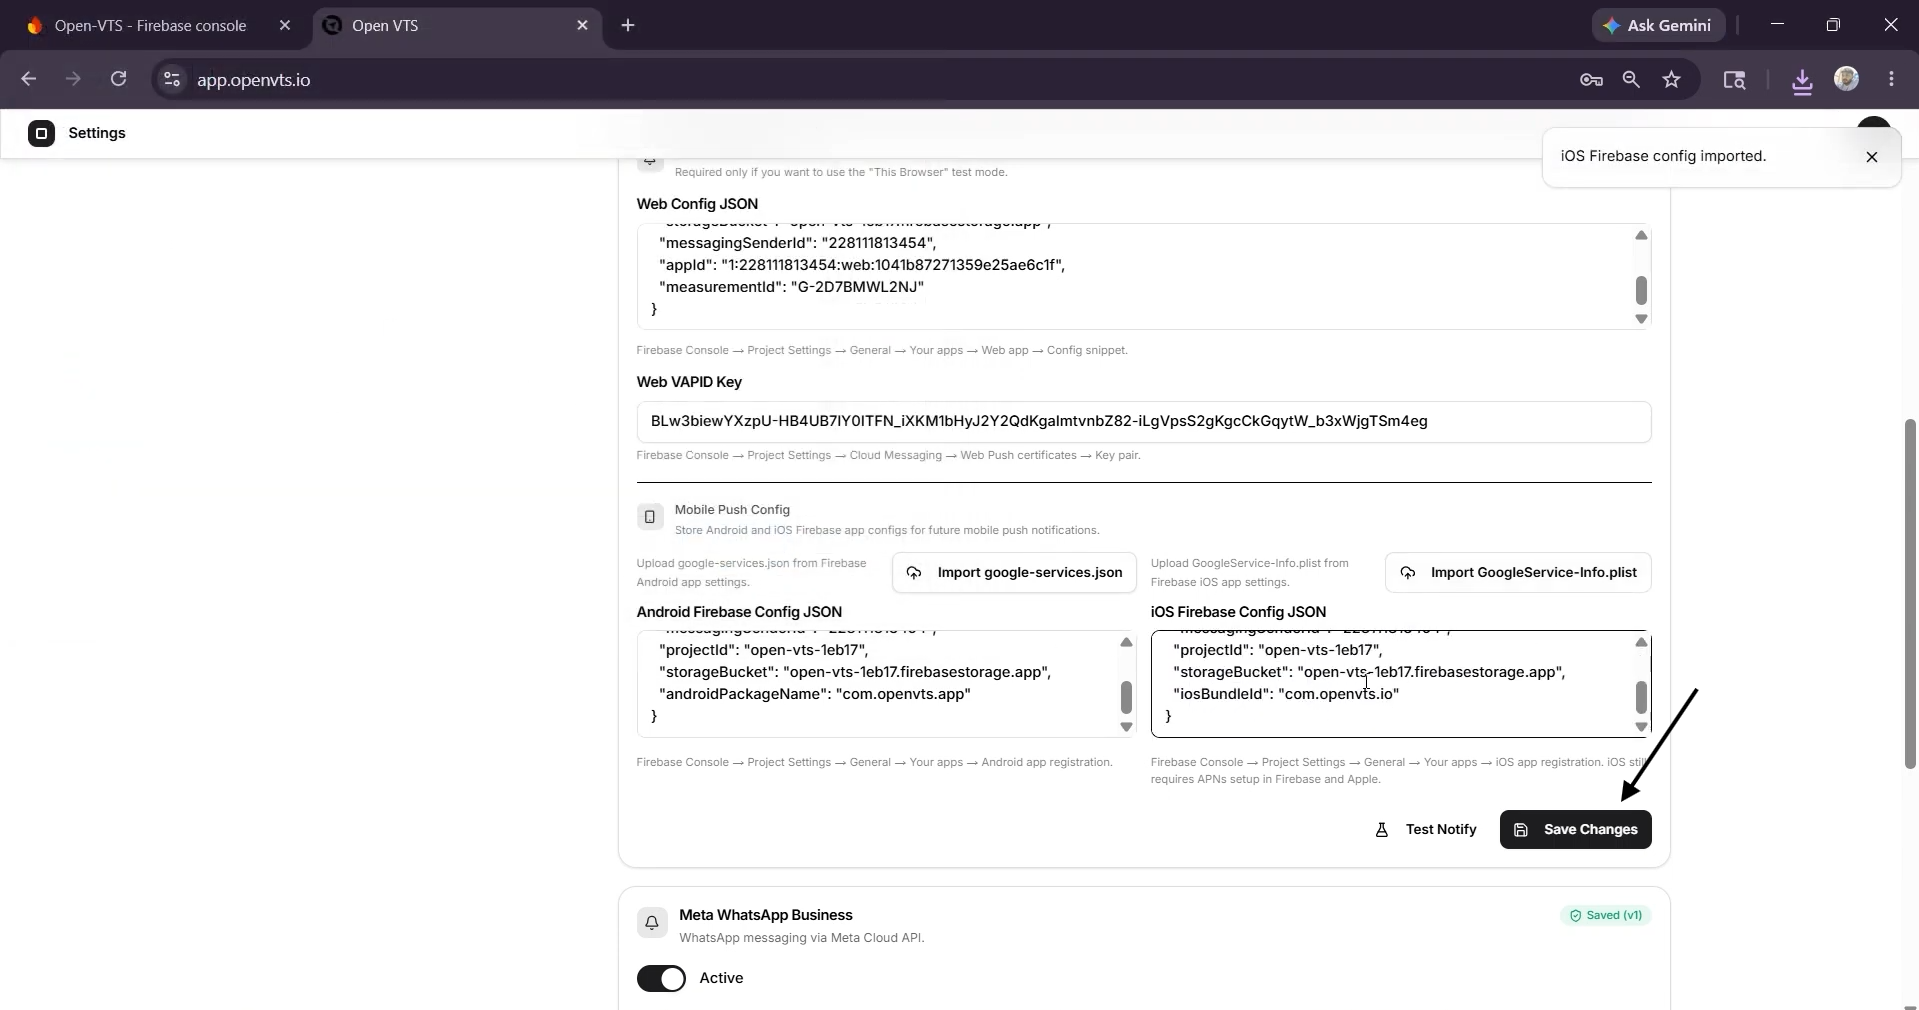
Step 11: Save the Complete Configuration
After the web, Android, and iOS details have been entered, select Save Changes.
Confirm that no required field displays an error.
Test Firebase Notifications
To verify the configuration:
- Refresh the Open VTS page.
- Return to Settings → API Config → Firebase Cloud Messaging.
- Select Test Notify.
- Allow browser notifications if the browser requests permission.
- Wait for the test notification.
When the test notification is received, Firebase Cloud Messaging is successfully connected to Open VTS.
Configuration Summary
A complete Firebase setup should contain:
- Valid web Firebase configuration
- Correct Firebase project ID
- Valid service account JSON
- Generated Web VAPID key
- Imported Android google-services.json
- Imported iOS GoogleService-Info.plist
- Successful test notification
After this setup, Open VTS can use Firebase Cloud Messaging for supported web and mobile push notifications.