
Install Open VTS on Windows Server
Download and install Open VTS on a prepared Windows Server, start the required services, complete the first Superadmin registration, and sign in to the platform.
Last updated July 27, 2026
Install Open VTS on Windows
This guide explains how to install Open VTS on a prepared Windows Server, start the required services, complete the first registration, and sign in to the Superadmin workspace.
You will:
- Connect to the Windows Server
- Install a supported browser
- Download Open VTS
- Run the Windows installer
- Start the Open VTS services
- Open the registration page
- Create the first Superadmin account
- Sign in for the first time
Watch Tutorial for Install Open VTS on Windows
Before You Begin
Confirm that:
- The Windows Server is running
- Remote Desktop access is working
- You have Windows Administrator access
- At least 100 GB SSD storage is available
- Ports 80 and 443 are open
- A static public IPv4 address is assigned
- The server has a stable internet connection
You should also have the server IP address, Windows username, and password available.
Step 1: Connect to the Windows Server
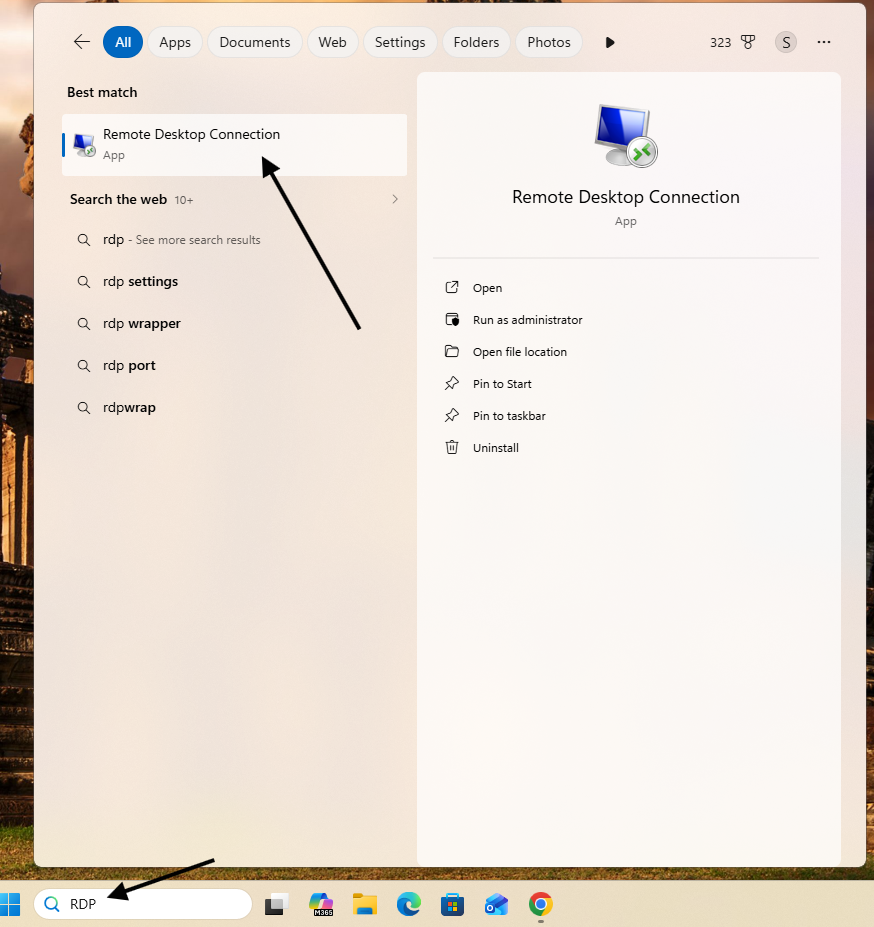
Open Remote Desktop Connection on your local Windows computer.
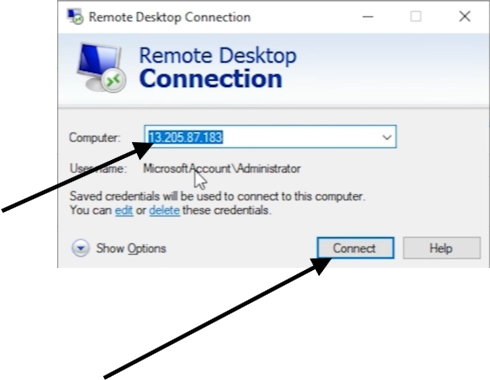
Enter the static public IP address of the server and select Connect.
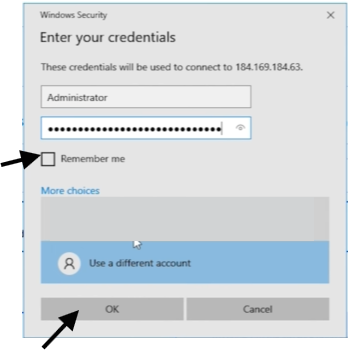
Sign in using the Windows username and password created or retrieved during server preparation.
Step 2: Install a Browser
A supported browser is required to download Open VTS and access the platform.
If a suitable browser is not already installed:
Copy the browser installer from your local computer.
Paste it into the Remote Desktop session.
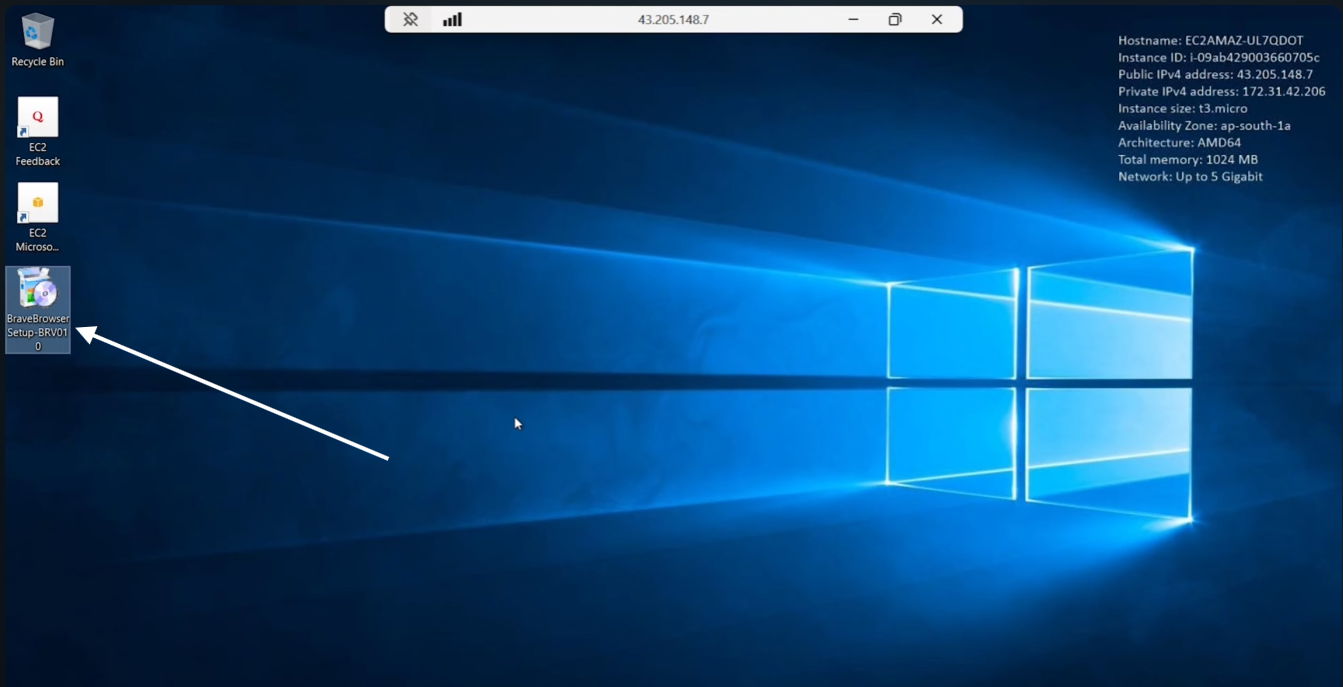
Run the installer.
Complete the browser installation.
Step 3: Download Open VTS
Open the browser and visit:
openvts.io
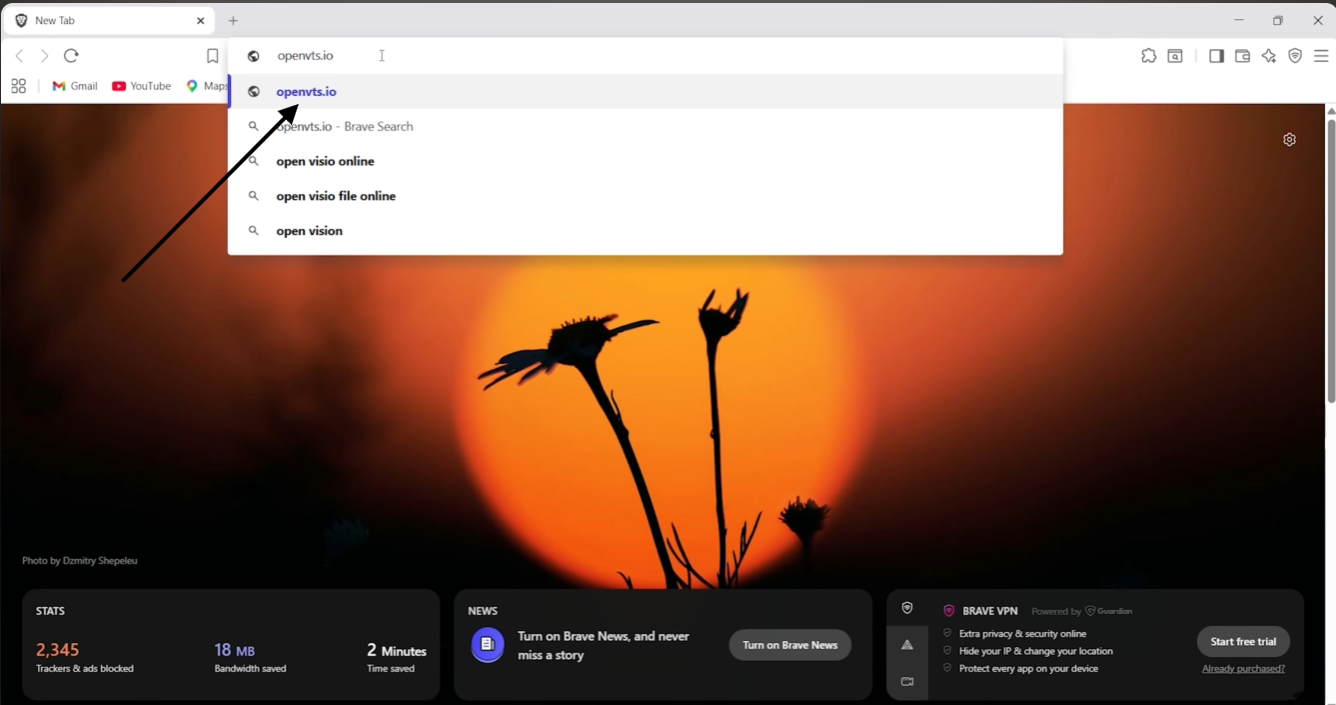
On the Open VTS website:
Select Download Now.
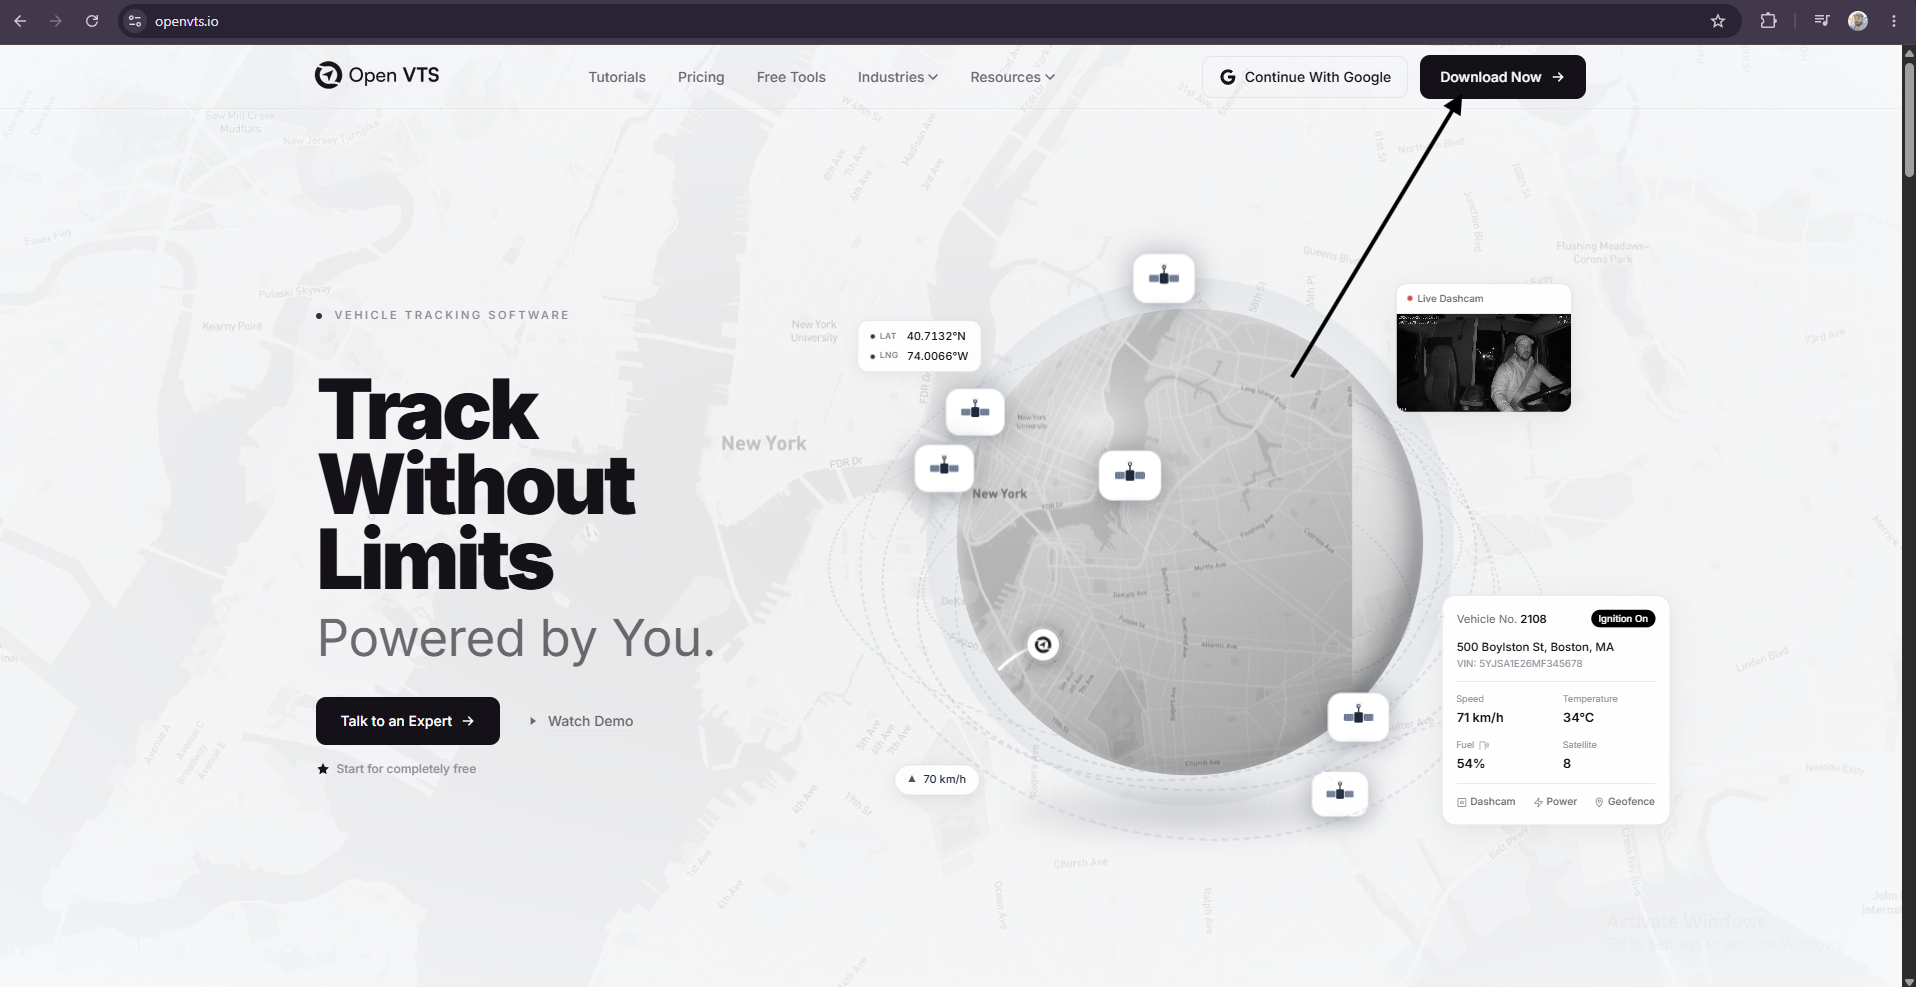
Choose the Windows version.
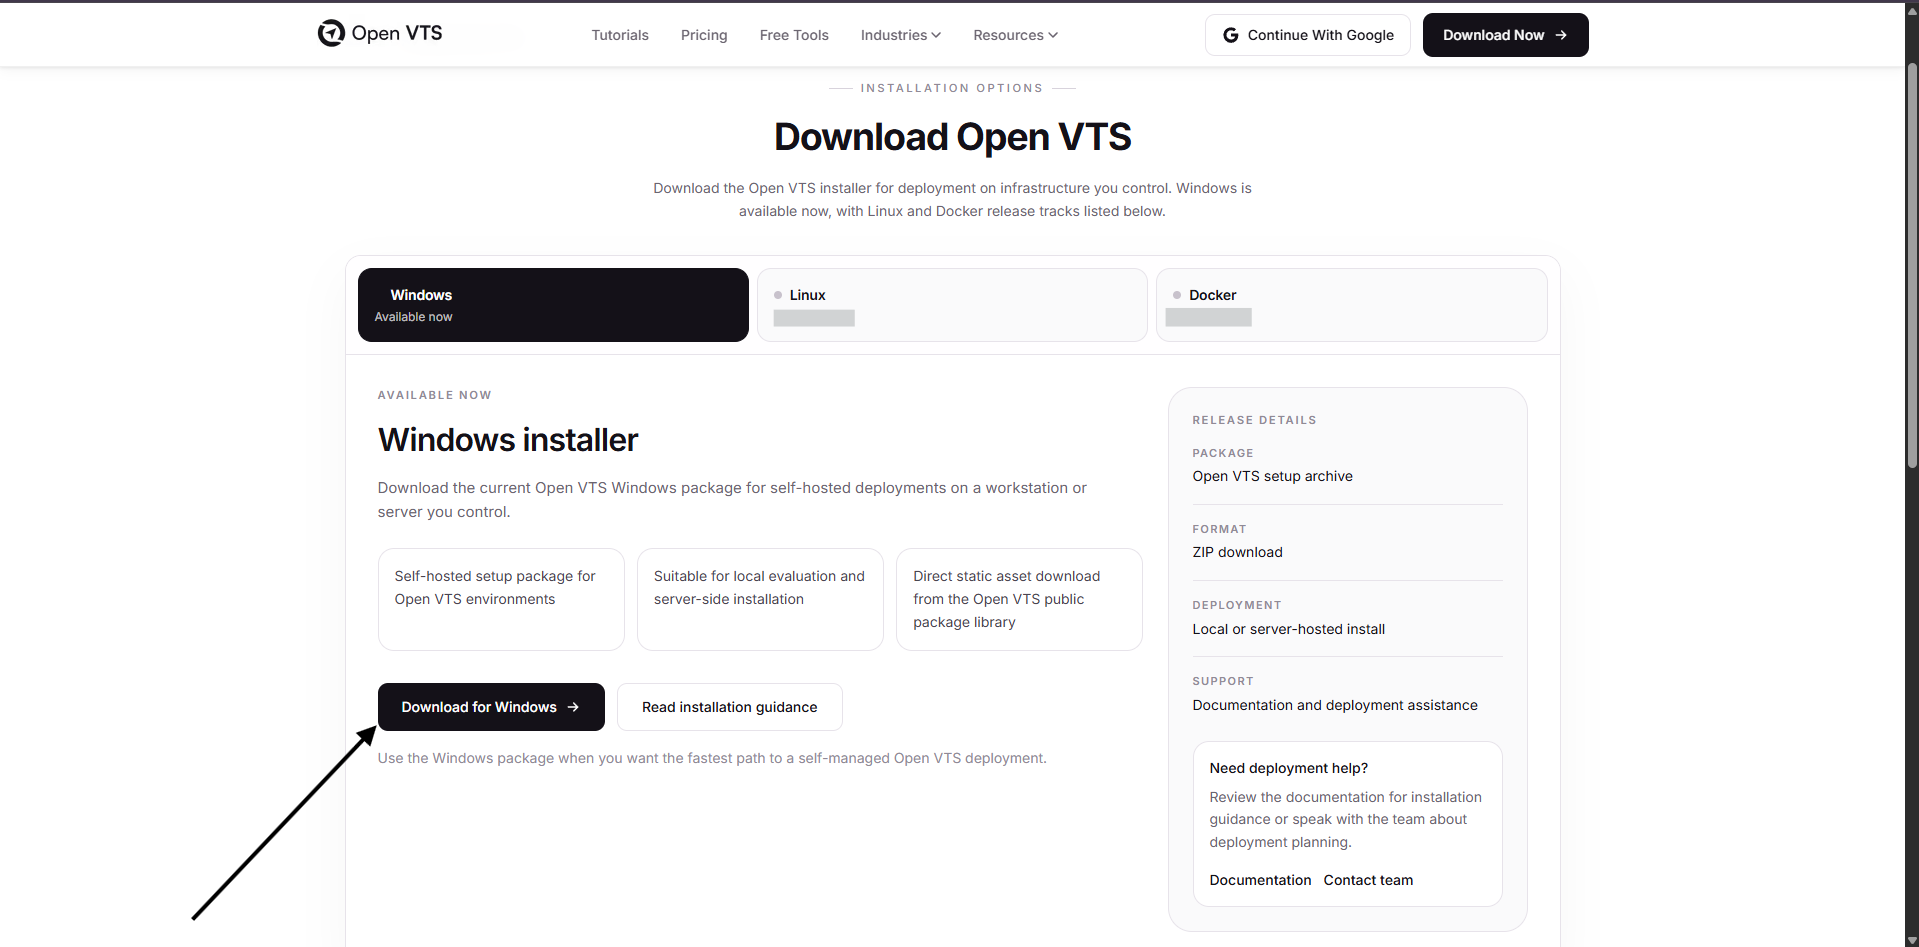
Save the installation file on the server.
Wait for the download to finish.
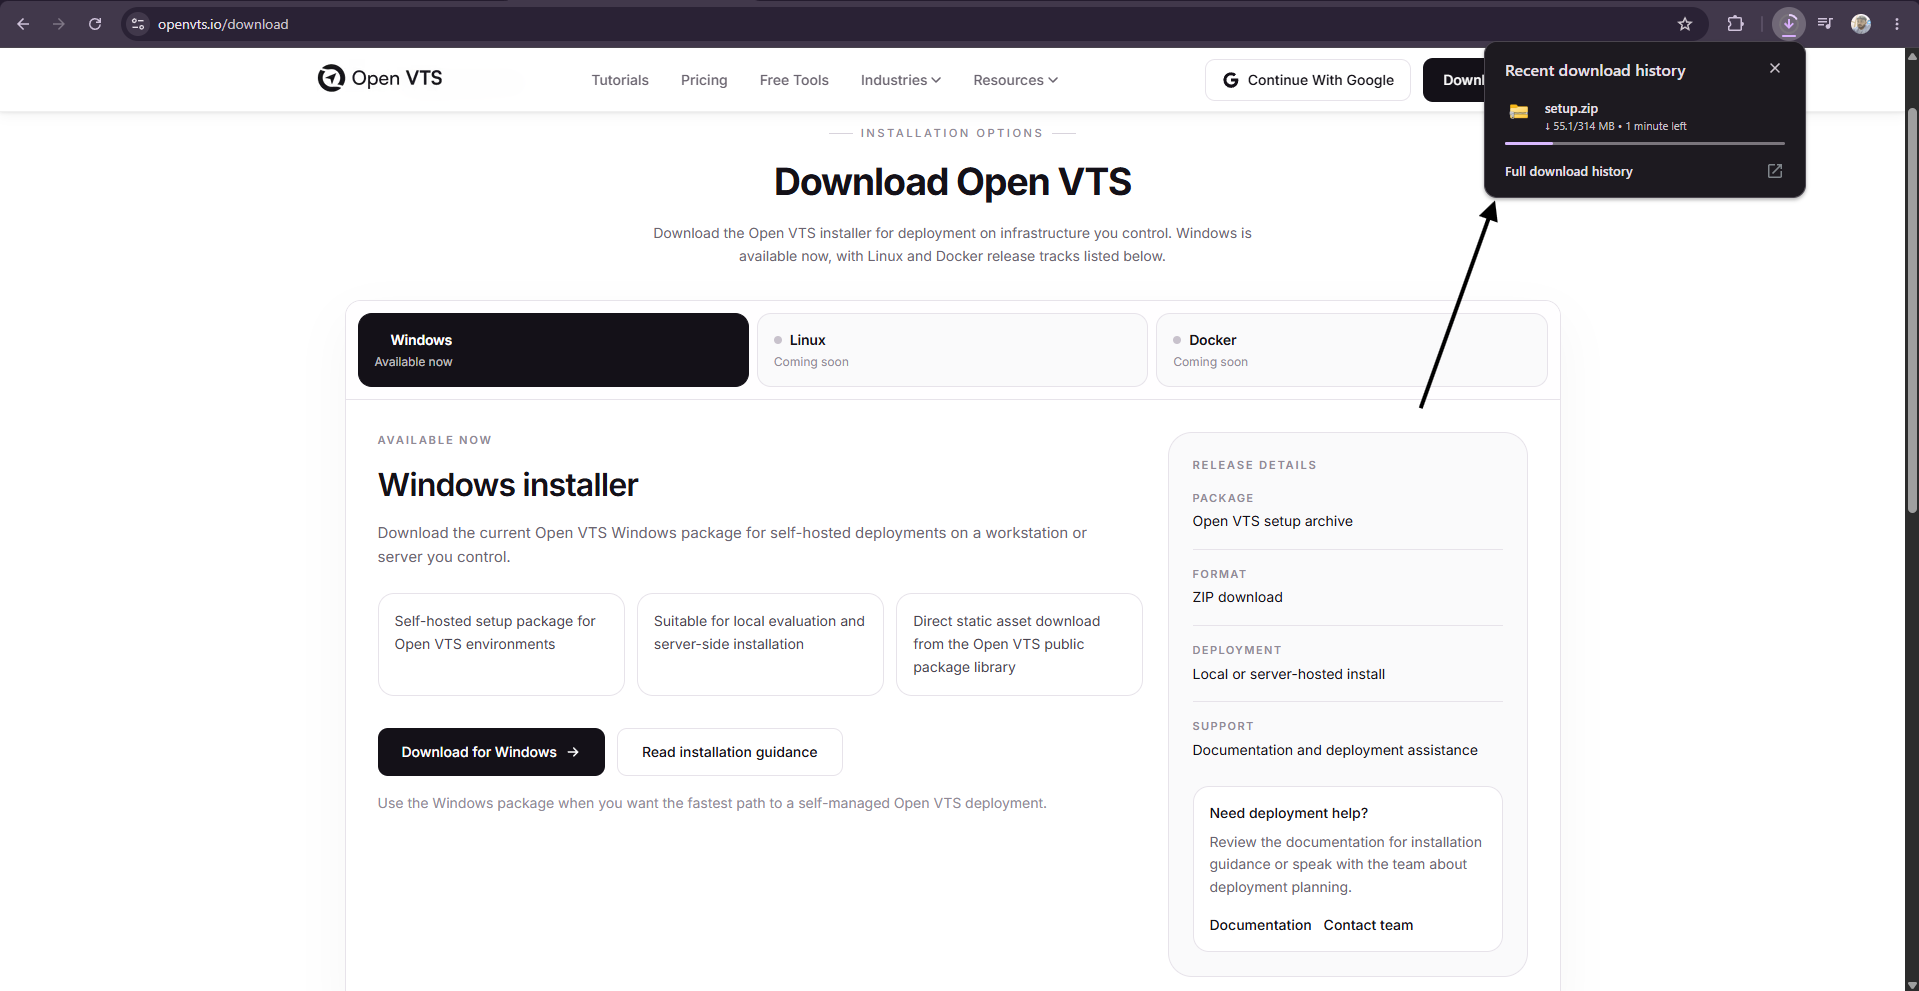
Linux and Docker versions will be available separately when officially released.
Only download Open VTS from the official website.
Step 4: Extract the Downloaded File
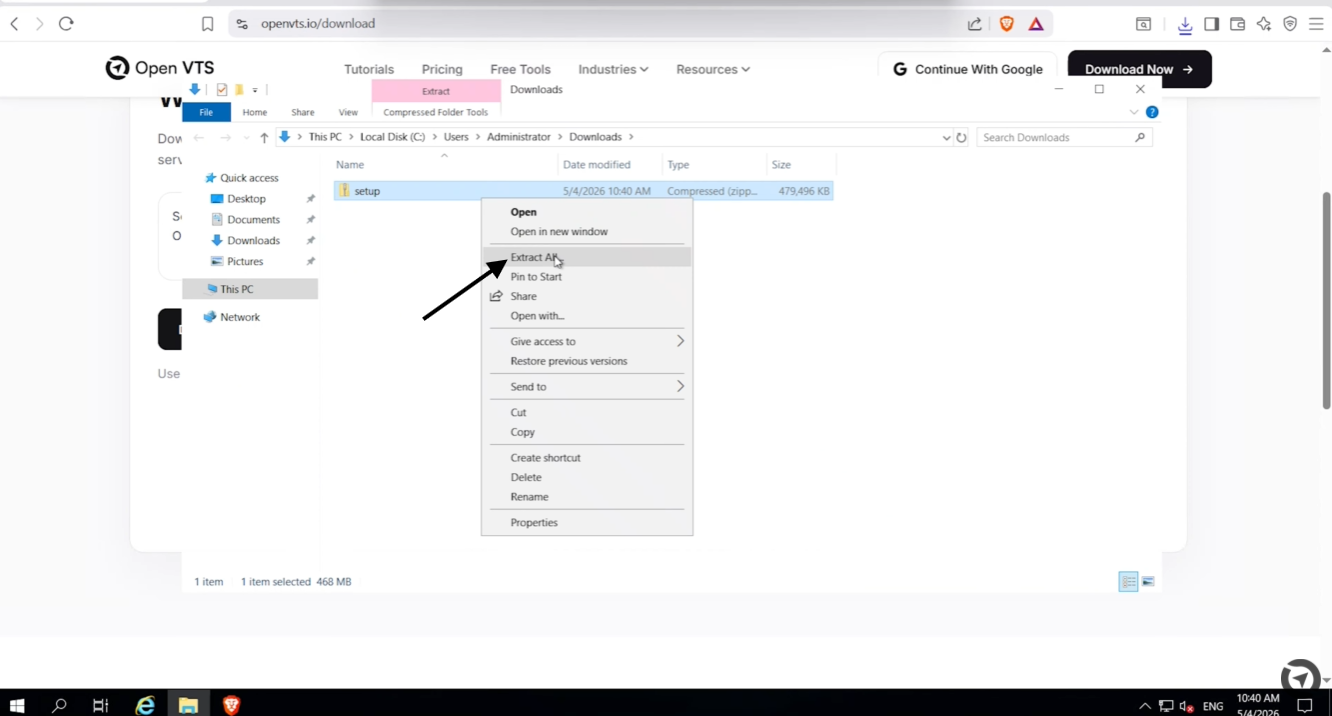
Open the folder containing the downloaded file and select extract all after right click.
Step 5: Run the Open VTS Installer
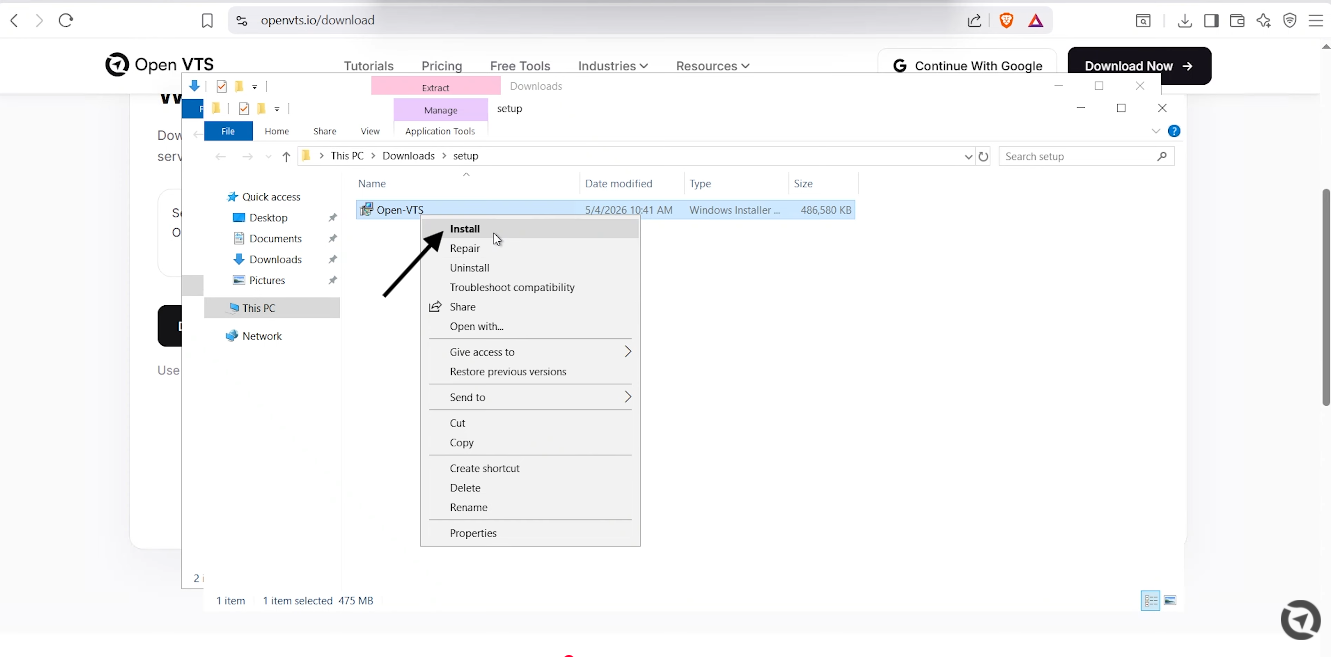
Open the extracted folder and click install after right click.
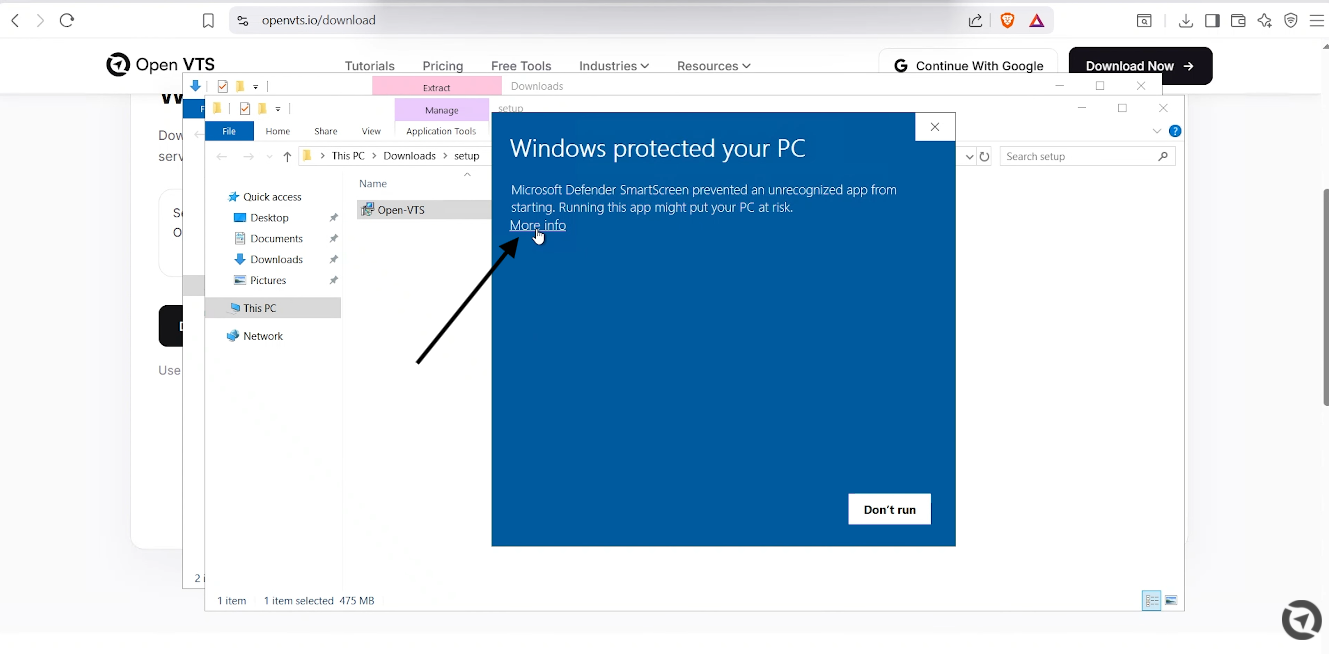
Windows may display a security warning.
When this happens:
Confirm that the installer was downloaded from the official Open VTS website.
Select More info.
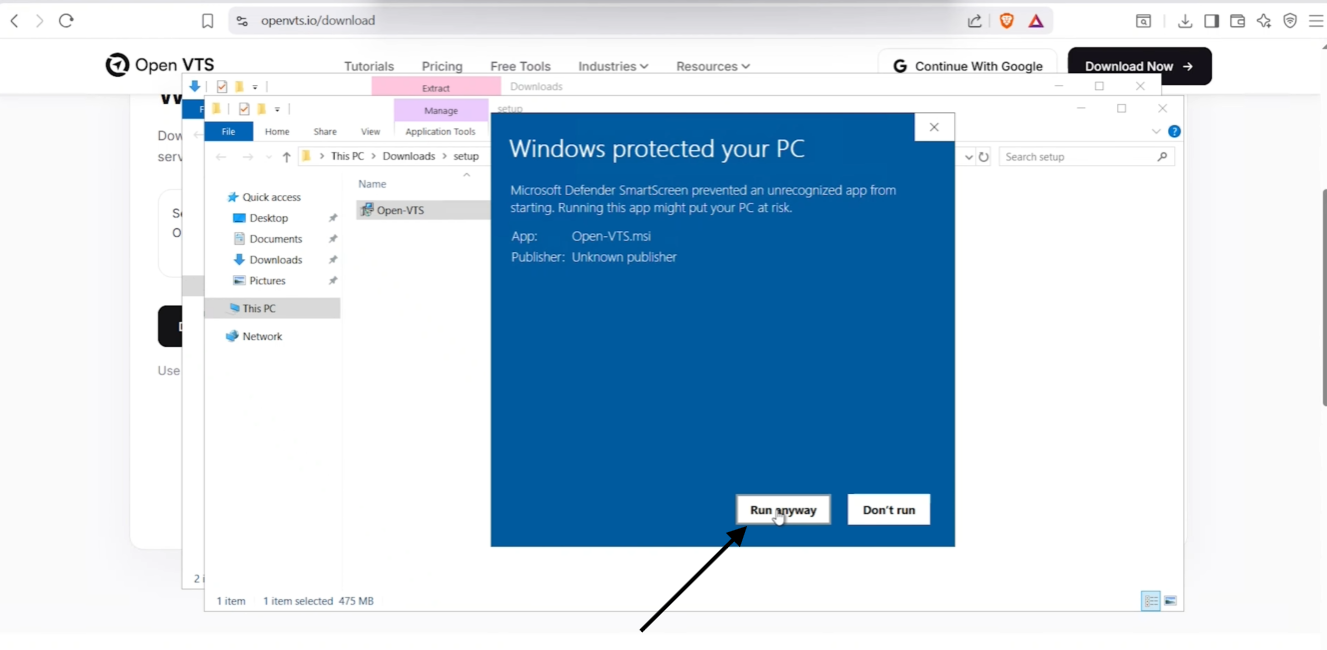
Select Run anyway.
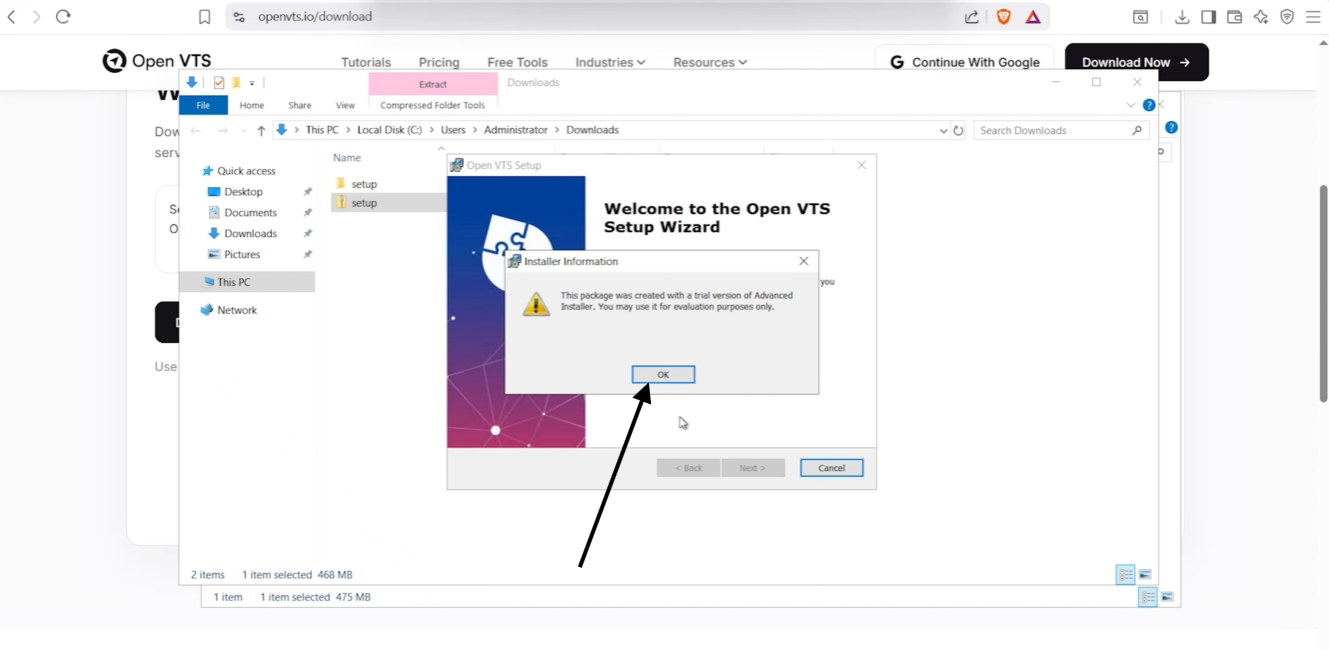
Select OK when prompted.
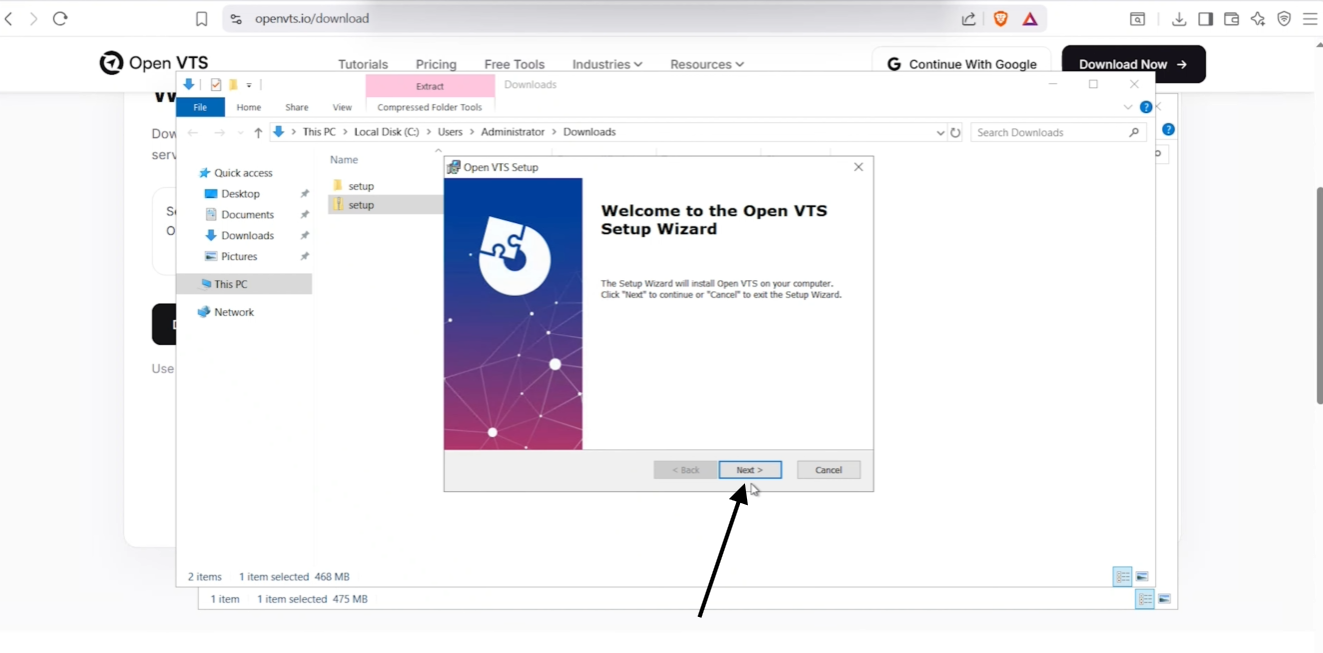
Select Next.
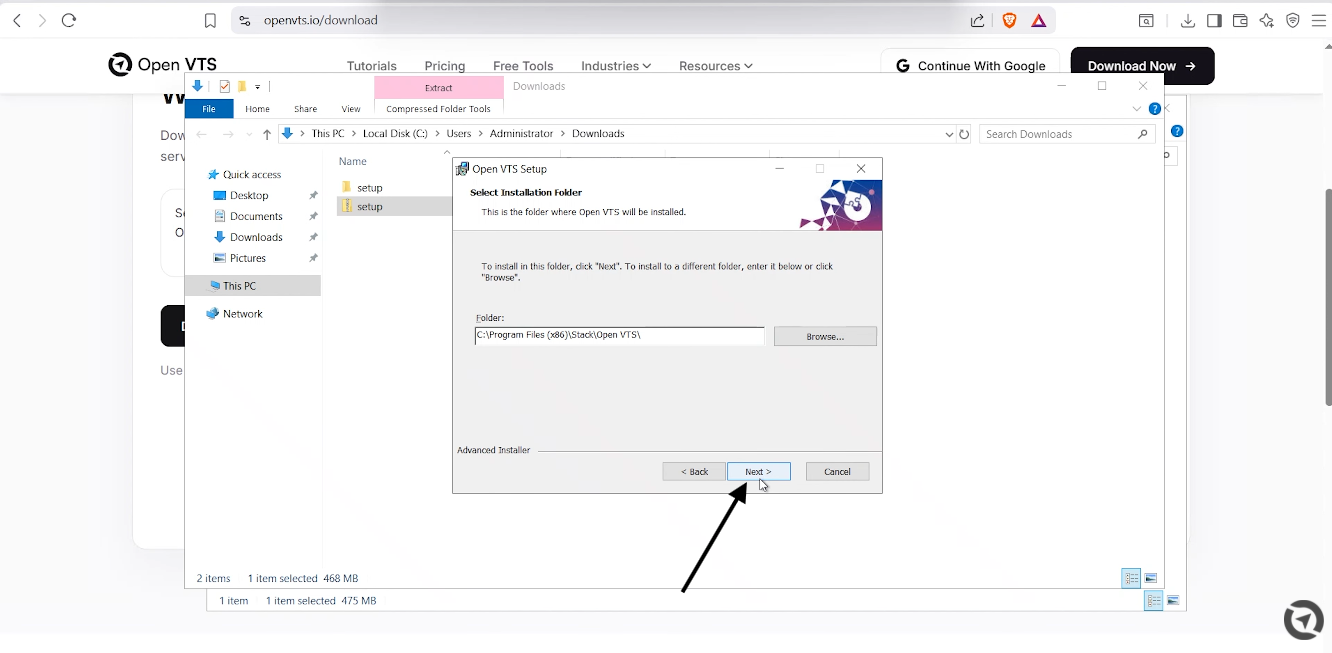
Review the installation information.
Select Next again.
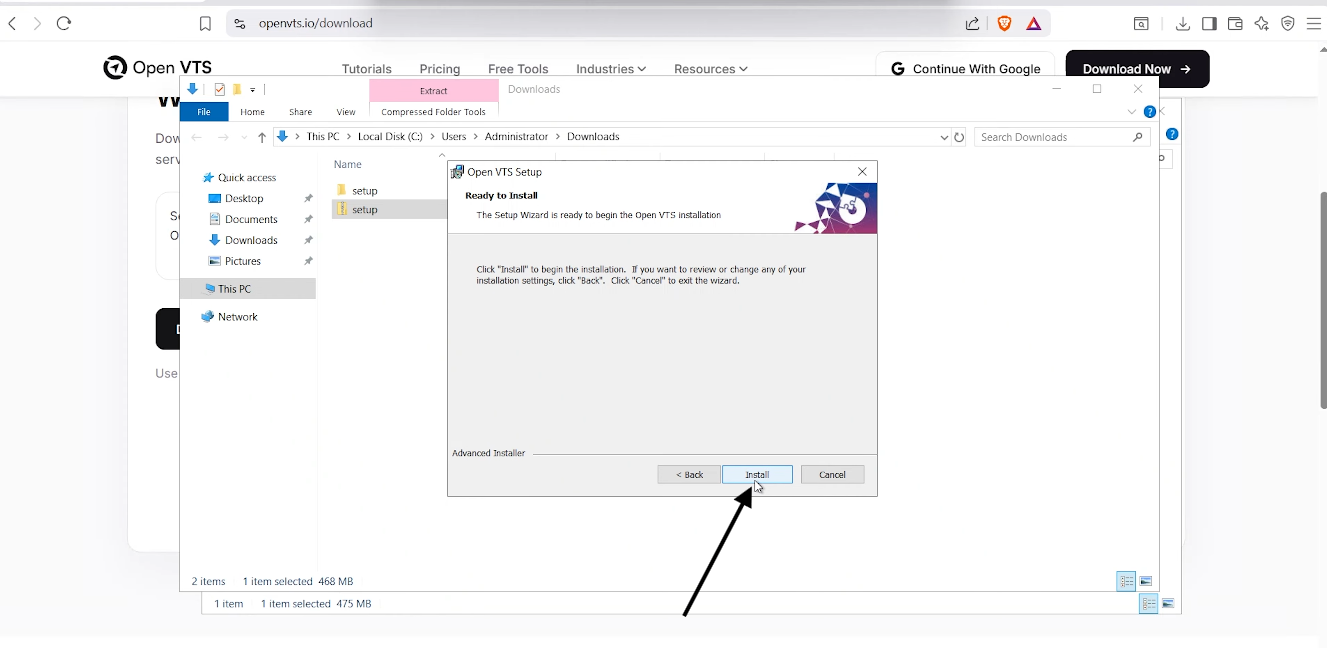
Select Install.
Accept the software agreement by selecting I Agree when requested.
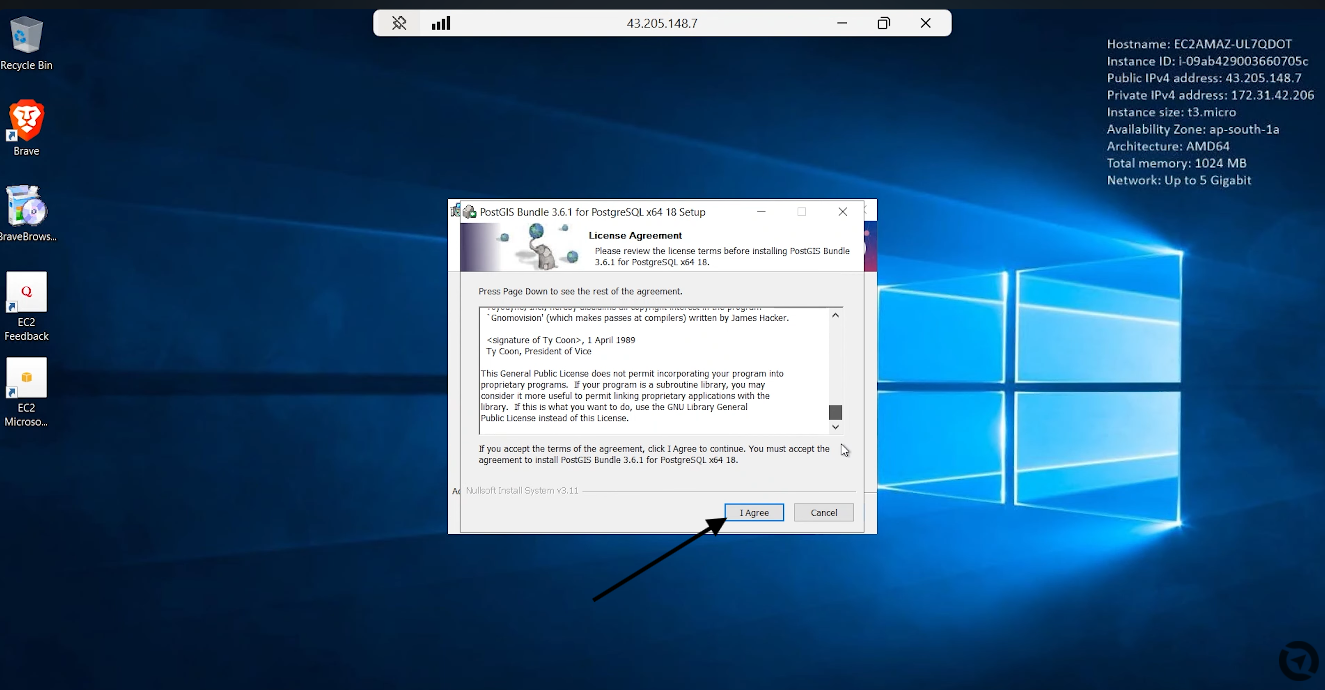
Wait for all installation processes to finish.
Select Close.
Select Finish.
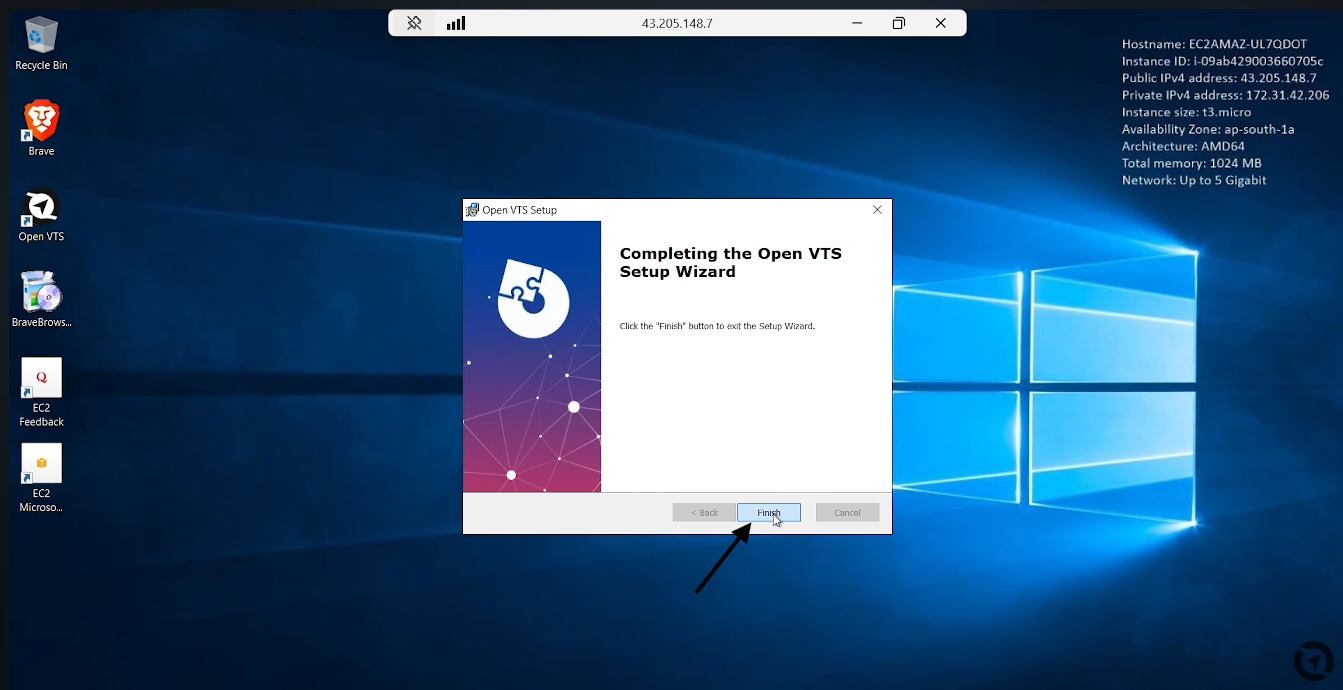
Do not shut down or restart the server while the installation is running.
Step 7: Open the Open VTS Setup Manager
After installation, an Open VTS icon will appear on the Windows desktop.
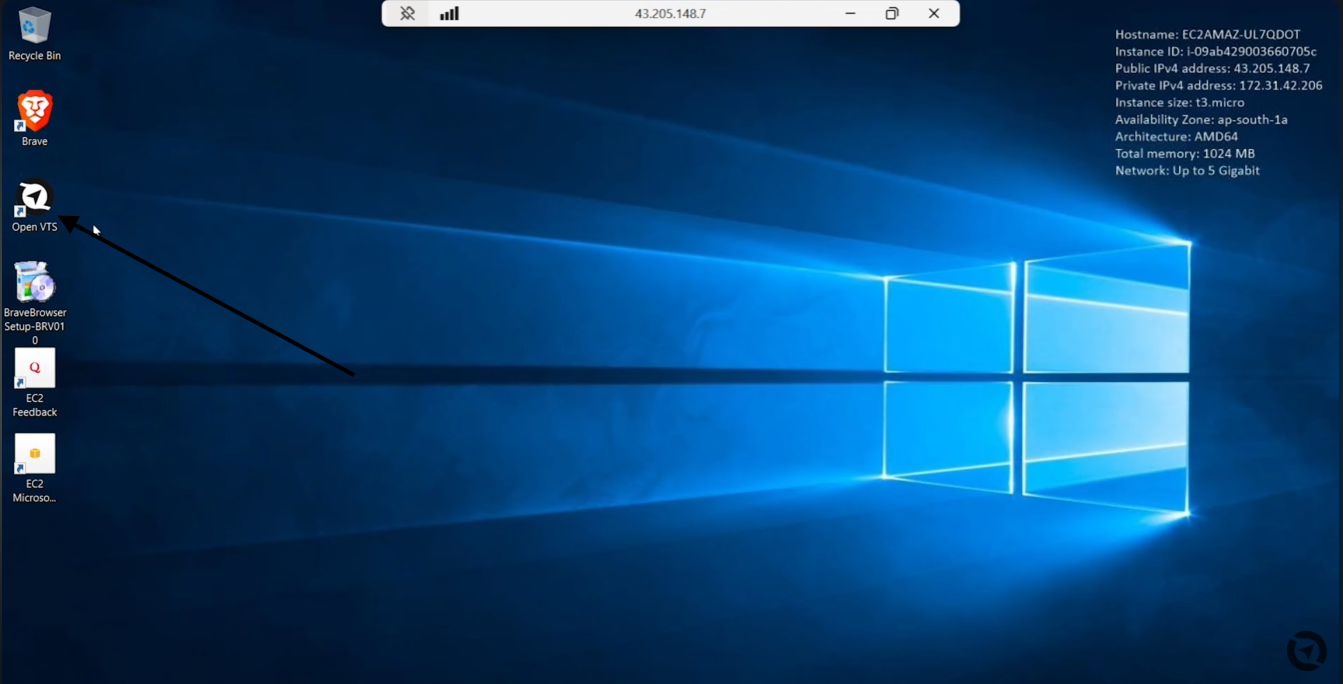
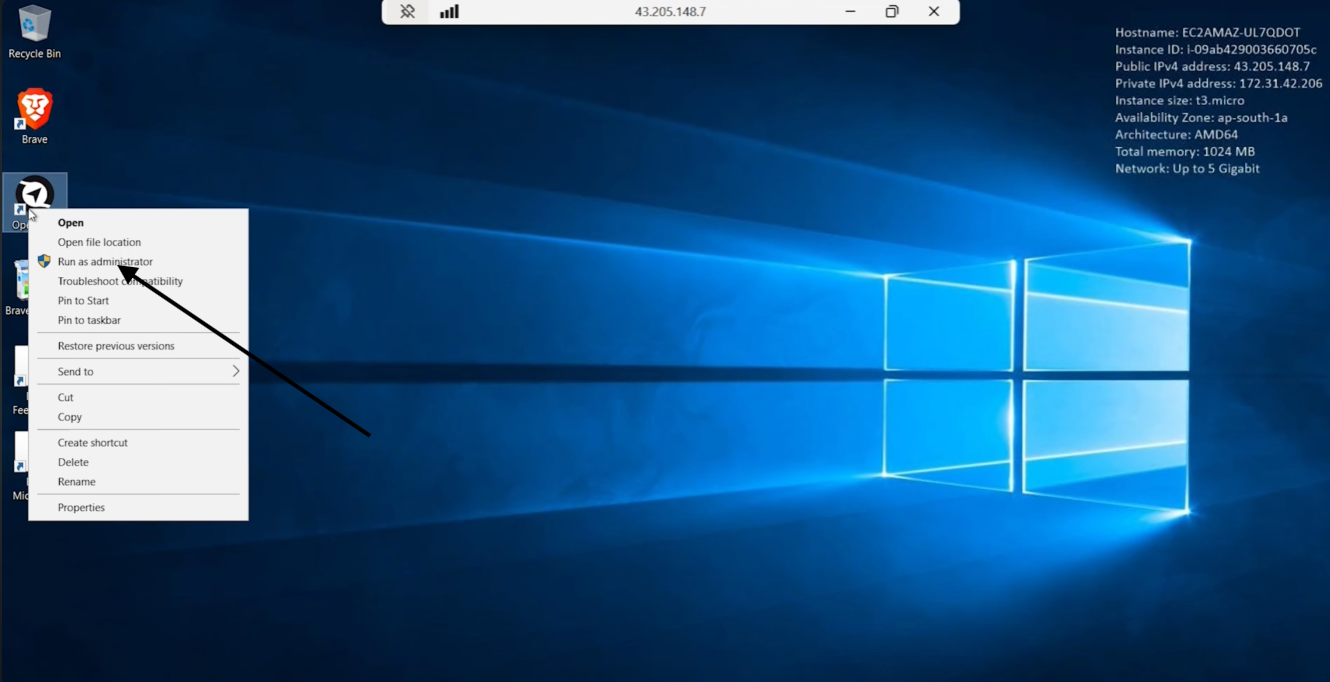
Right-click the icon and select Run as administrator.
The Open VTS Setup Manager will open.
Always run the Setup Manager with administrator permission so it can install dependencies and manage the required Windows services.
Step 8: Install the Required Dependencies
In the Open VTS Setup Manager, select:
Install Node Dependency
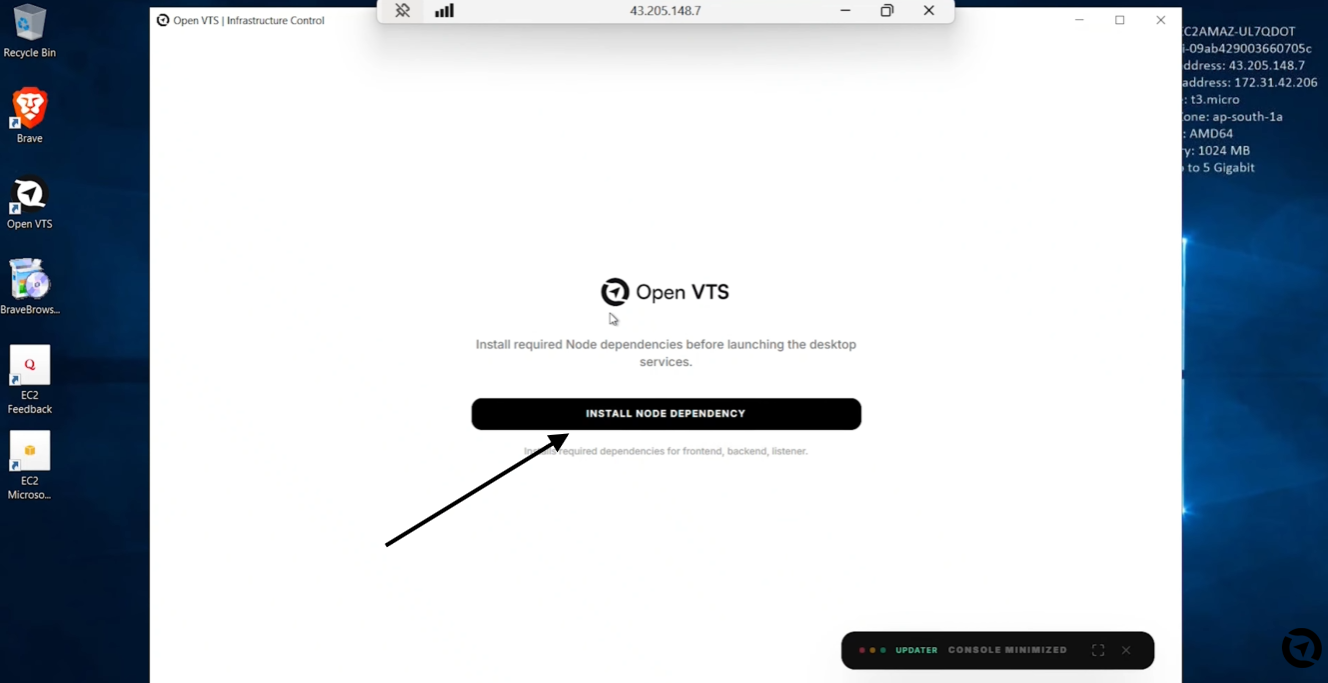
Wait until the dependency installation finishes successfully.
The Windows installer manages the required Open VTS components, including:
- Node.js runtime
- PostgreSQL
- TimescaleDB
- PostGIS
- Redis
- Nginx
- Frontend
- Backend
- Listener
- Databases and initial data
- Windows services
Do not close the Setup Manager while dependencies are being installed.
Step 9: Launch the Open VTS Instances
Start the application components in this order one by one:
Select Launch Frontend Instance.
Select Launch Backend Instance.
Select Launch Listener Instance.
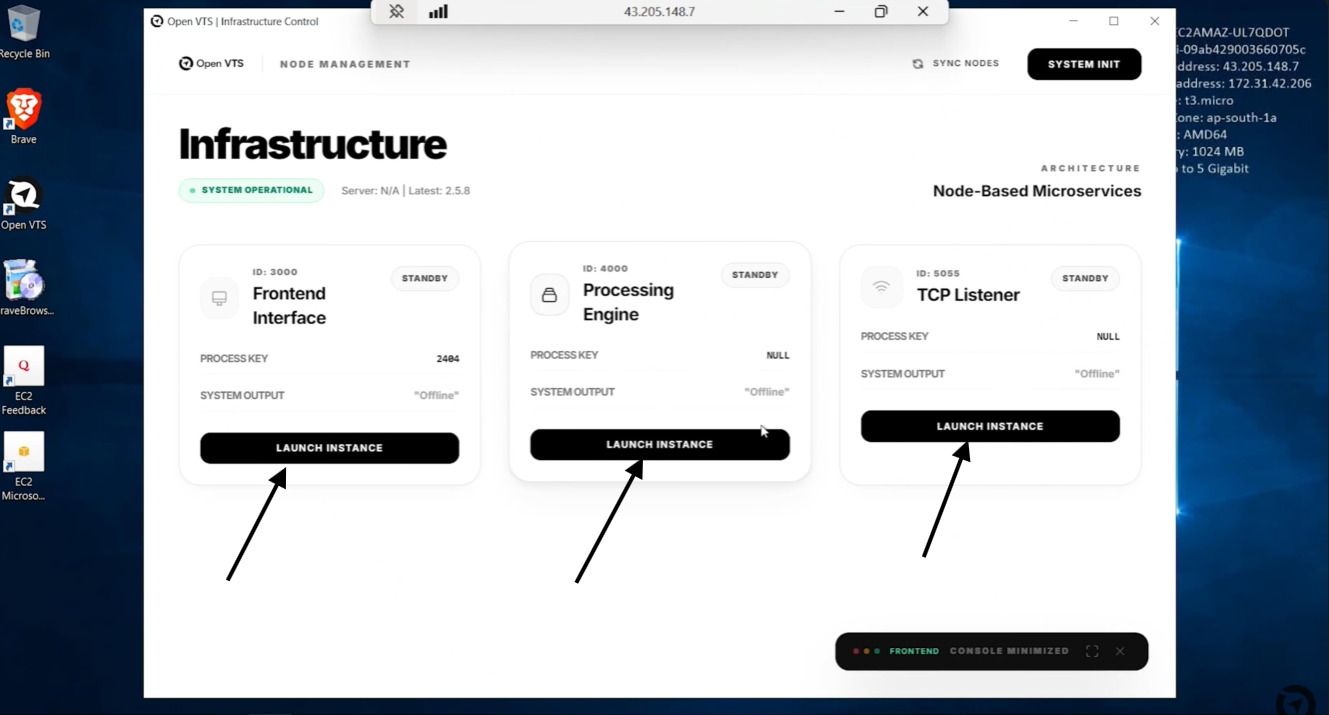
Wait for each process to complete before starting the next one.
Confirm that each service shows a successful or running status.
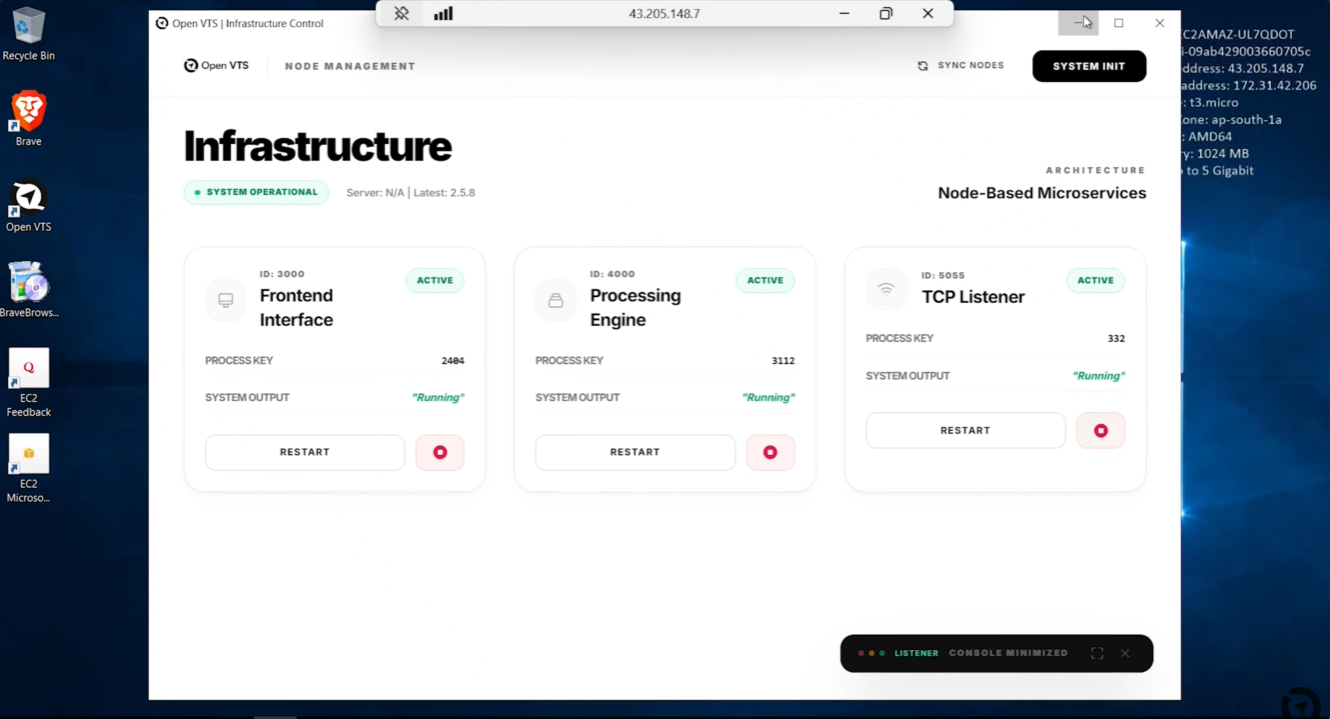
Step 10: Now copy paste the IP at local Browser.
After all services are running, minimize the Setup Manager.
Open a browser on your local computer or inside the server.
Enter the static public IP address of the server:
Example:
http://203.0.113.10
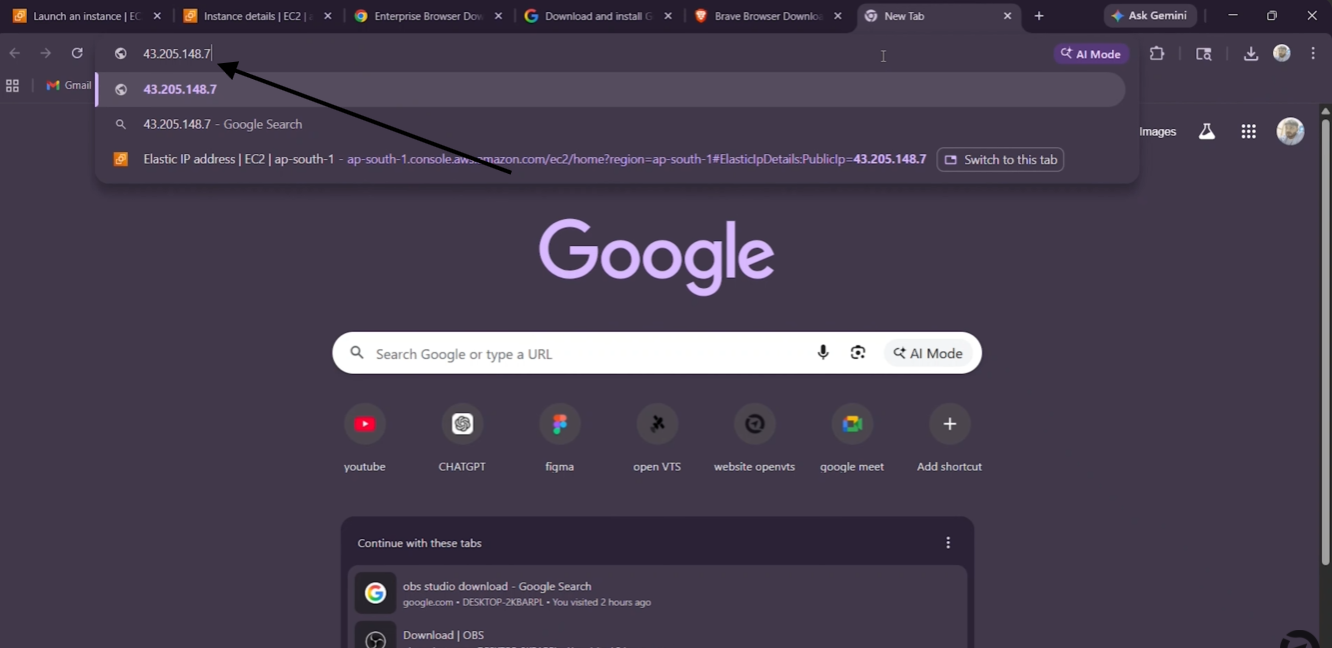
The Open VTS first-registration page should open.
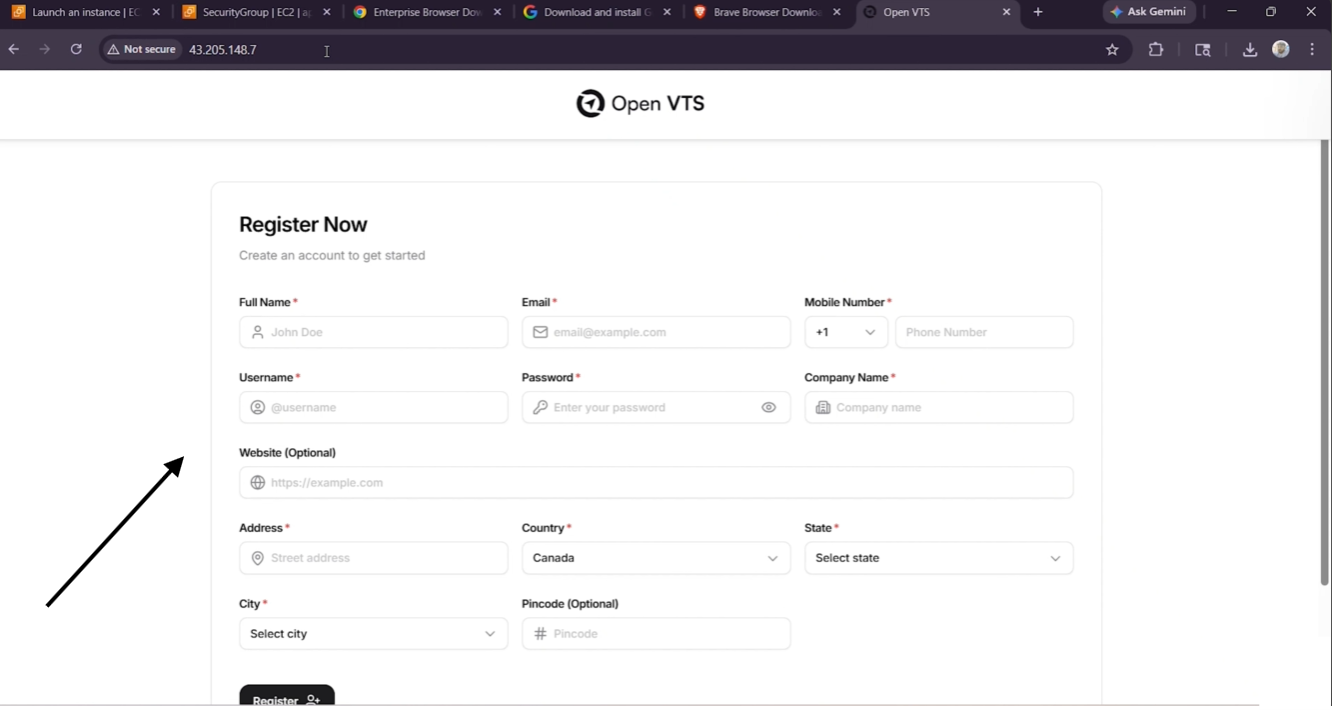
Using the server IP over HTTP is acceptable for the initial setup. For production, configure a domain name and SSL so users can access Open VTS securely through HTTPS.
Step 11: Complete the First Registration
The first registration creates the main Superadmin account.
Enter the required information:
Use an email address and mobile number controlled by the business.
Create a strong password containing a secure combination of letters, numbers, and special characters. Do not reuse a password from another service.
After completing the form, select Register.
Watch tutorial for the registration here
Step 12: Sign In for the First Time
After successful registration, Open VTS redirects you to the login page.
Enter:
- The username created during registration
- The password created during registration
Select Sign In.
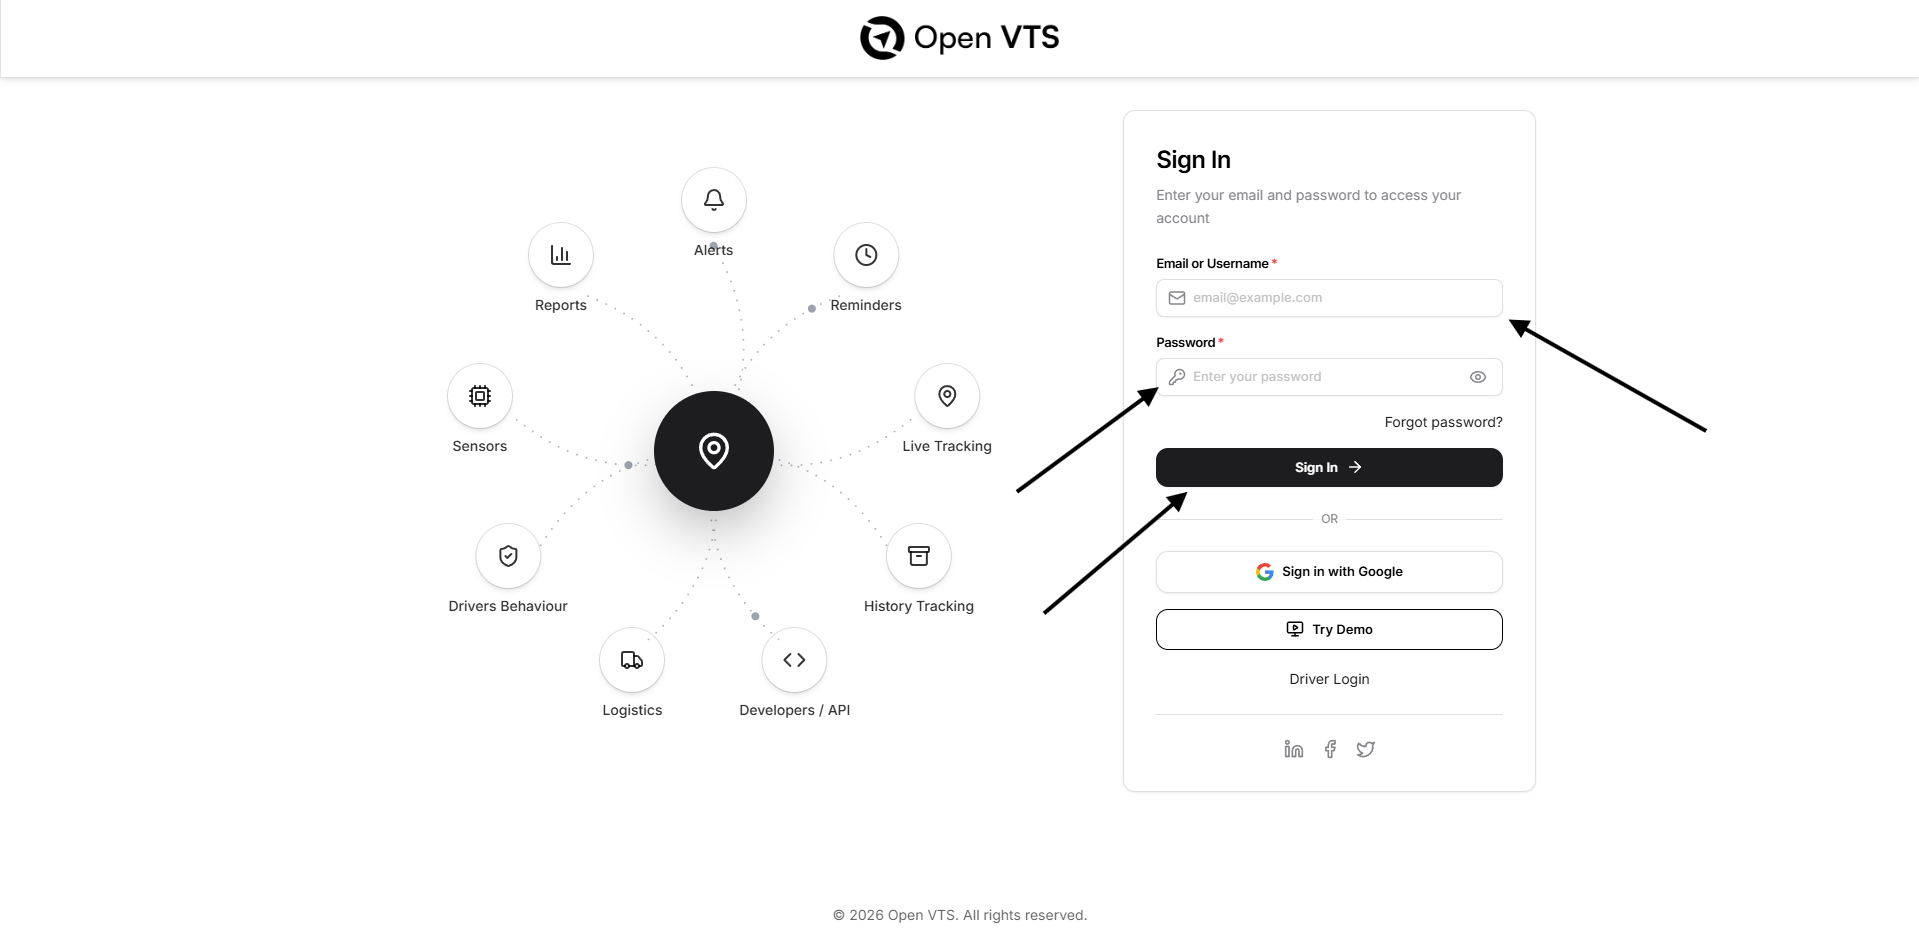
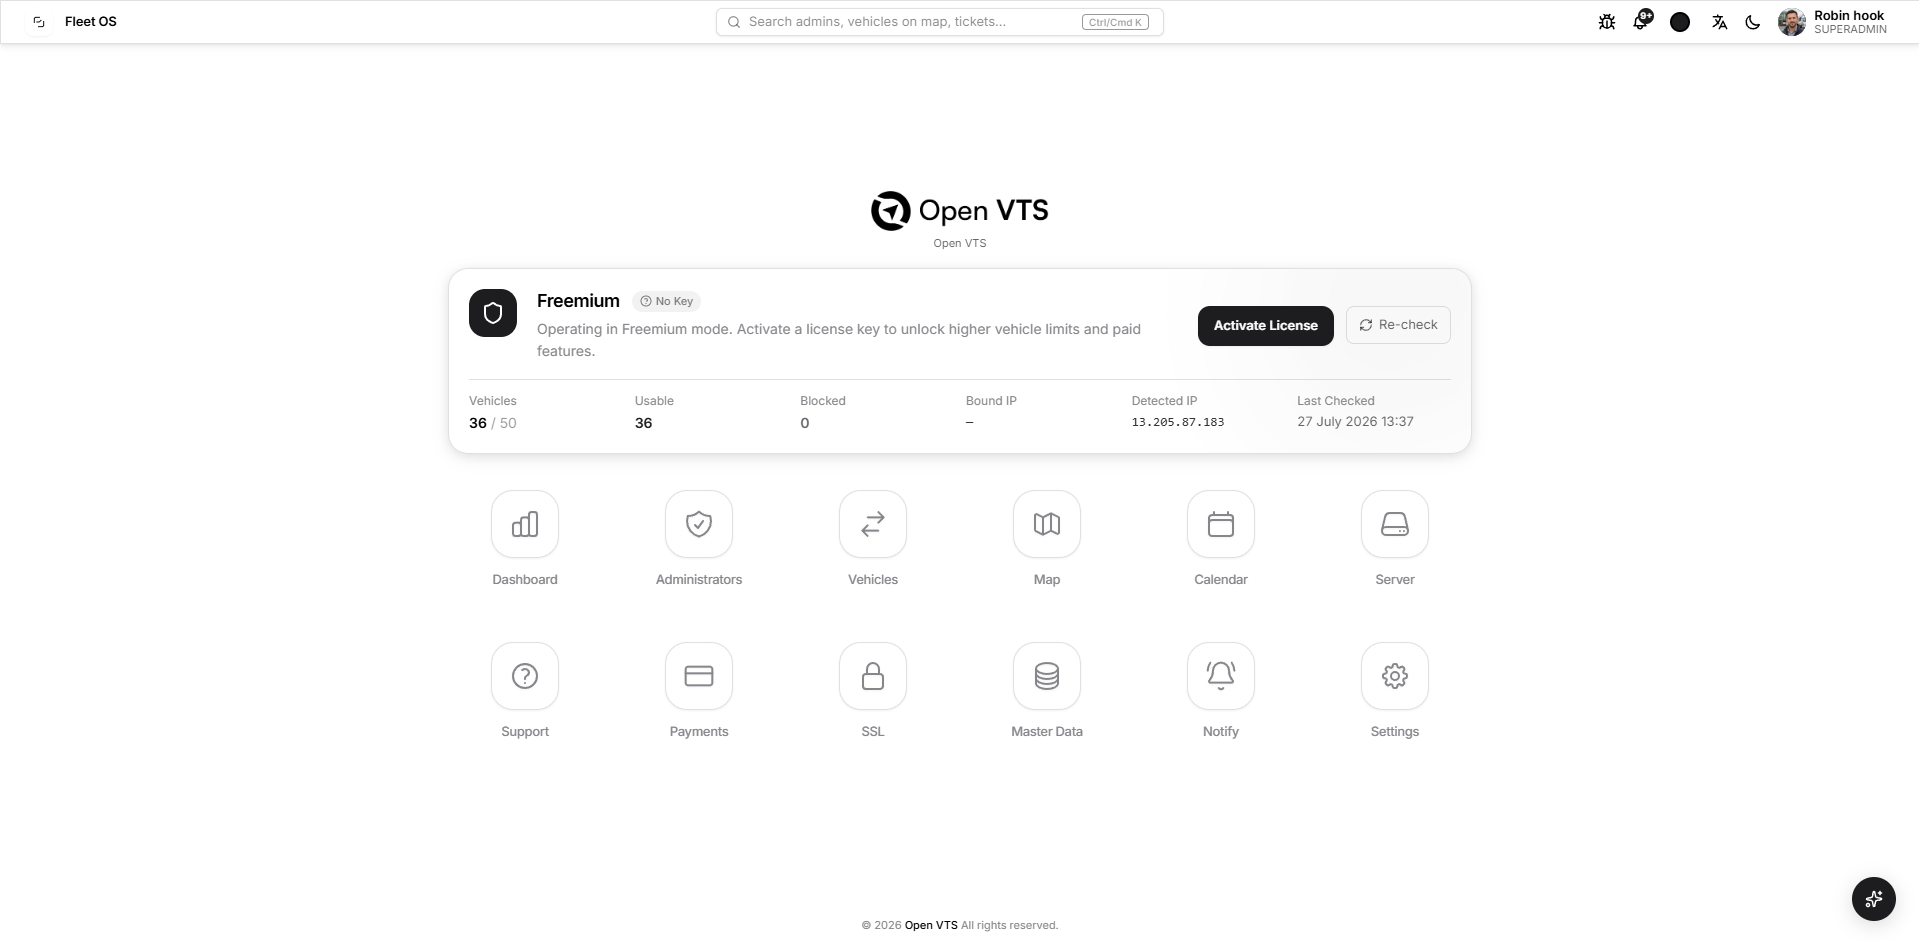
After successful authentication, the Superadmin homepage will open.
Other Login Options
The login page may also display:
Google Authentication
Google sign-in can be used after Google Authentication has been properly configured by the platform administrator.
Forgot Password
The password-reset option depends on a working email and SMTP configuration.
Driver Login
Drivers use the separate Driver Login option and their assigned driver credentials.
These options are not required for the first Superadmin sign-in.
Verify the Installation
The installation is complete when:
- The Open VTS Setup Manager opens
- Dependencies install successfully
- The frontend service is running
- The backend service is running
- The listener service is running
- The registration page opens using the server IP
- The Superadmin registration completes
- The login page opens
- The new username and password work
- The Superadmin homepage loads successfully
Common Problems
The Open VTS website does not open
Check that:
- Frontend, backend, and listener services are running
- The EC2 instance is running
- Port 80 is open
- The correct public IP address is being used
- Nginx started successfully
- Windows Firewall is not blocking access
The installer does not start
Confirm that:
- The ZIP file was fully extracted
- You are using a Windows Administrator account
- The installer was downloaded from the official website
- Antivirus or Windows security did not quarantine the installer
Dependency installation fails
Check:
- Internet connectivity
- Available disk space
- Administrator permission
- Windows updates
- Whether another installation process is running
Restart the Setup Manager as administrator and try again.
A service does not start
Start the services in this order:
- Frontend
- Backend
- Listener
Review the status or error message shown in the Setup Manager before trying again.
The registration page does not appear
Wait briefly after starting all services, then refresh the page.
Confirm that you are entering only the server IP address and not an internal service port.
Registration does not complete
Check that:
- All required fields are completed
- The email format is valid
- The username is acceptable
- The password meets the required rules
- Country, state, and city selections are complete
- The backend service is running
Login fails after registration
Use the exact username and password created during registration.
Check for:
- Extra spaces
- Incorrect letter case
- Keyboard layout differences
- Caps Lock
Security Notes
- Store the Superadmin credentials securely.
- Do not share the Superadmin account with general users.
- Create separate Admin and User accounts for daily operations.
- Configure a domain and SSL before public production use.
- Keep PostgreSQL, Redis, backend, and internal service ports private.
- Download Open VTS only from an official source.
- Keep the Windows Server updated and protected.