
User Landmarks Studio
Learn how to use Landmarks Studio in the Open VTS User Panel to manage geofences, points of interest, and routes, including import and export workflows.
Last updated August 19, 2026
User Landmarks Studio
Landmarks Studio is the User Panel workspace for managing location-based landmarks in Open VTS.
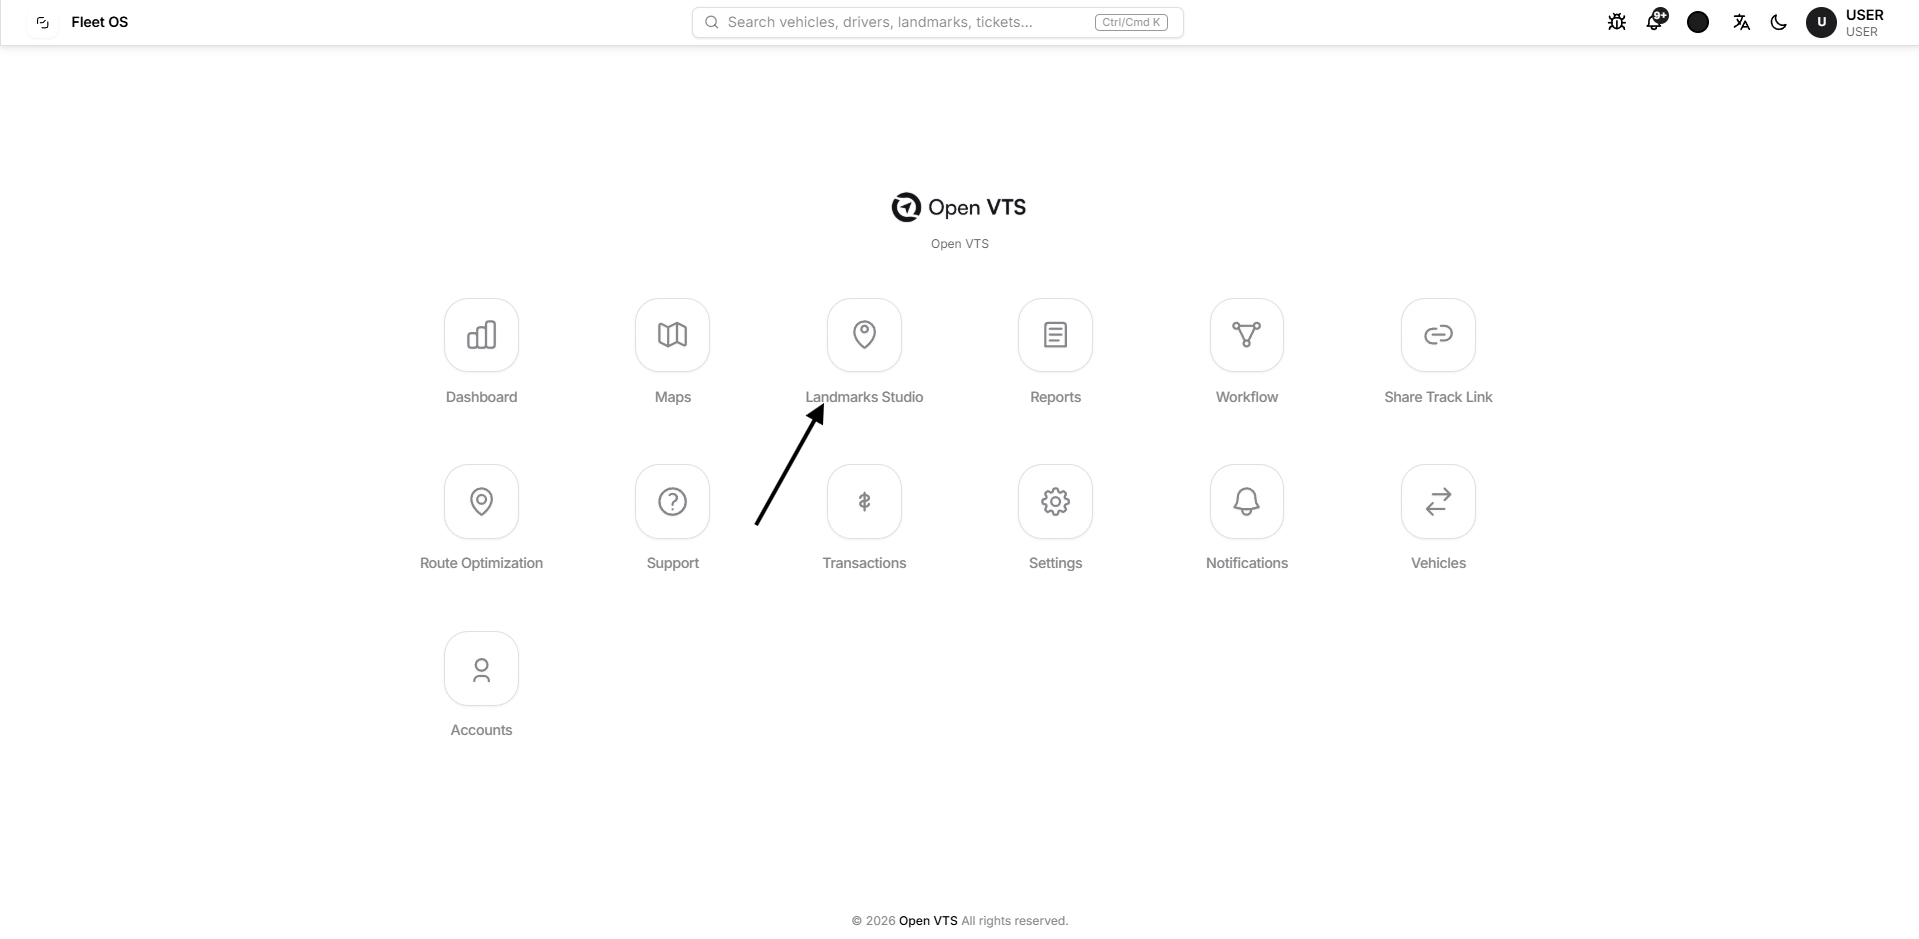
From this page, you can create and manage three types of landmarks:
- Geofences
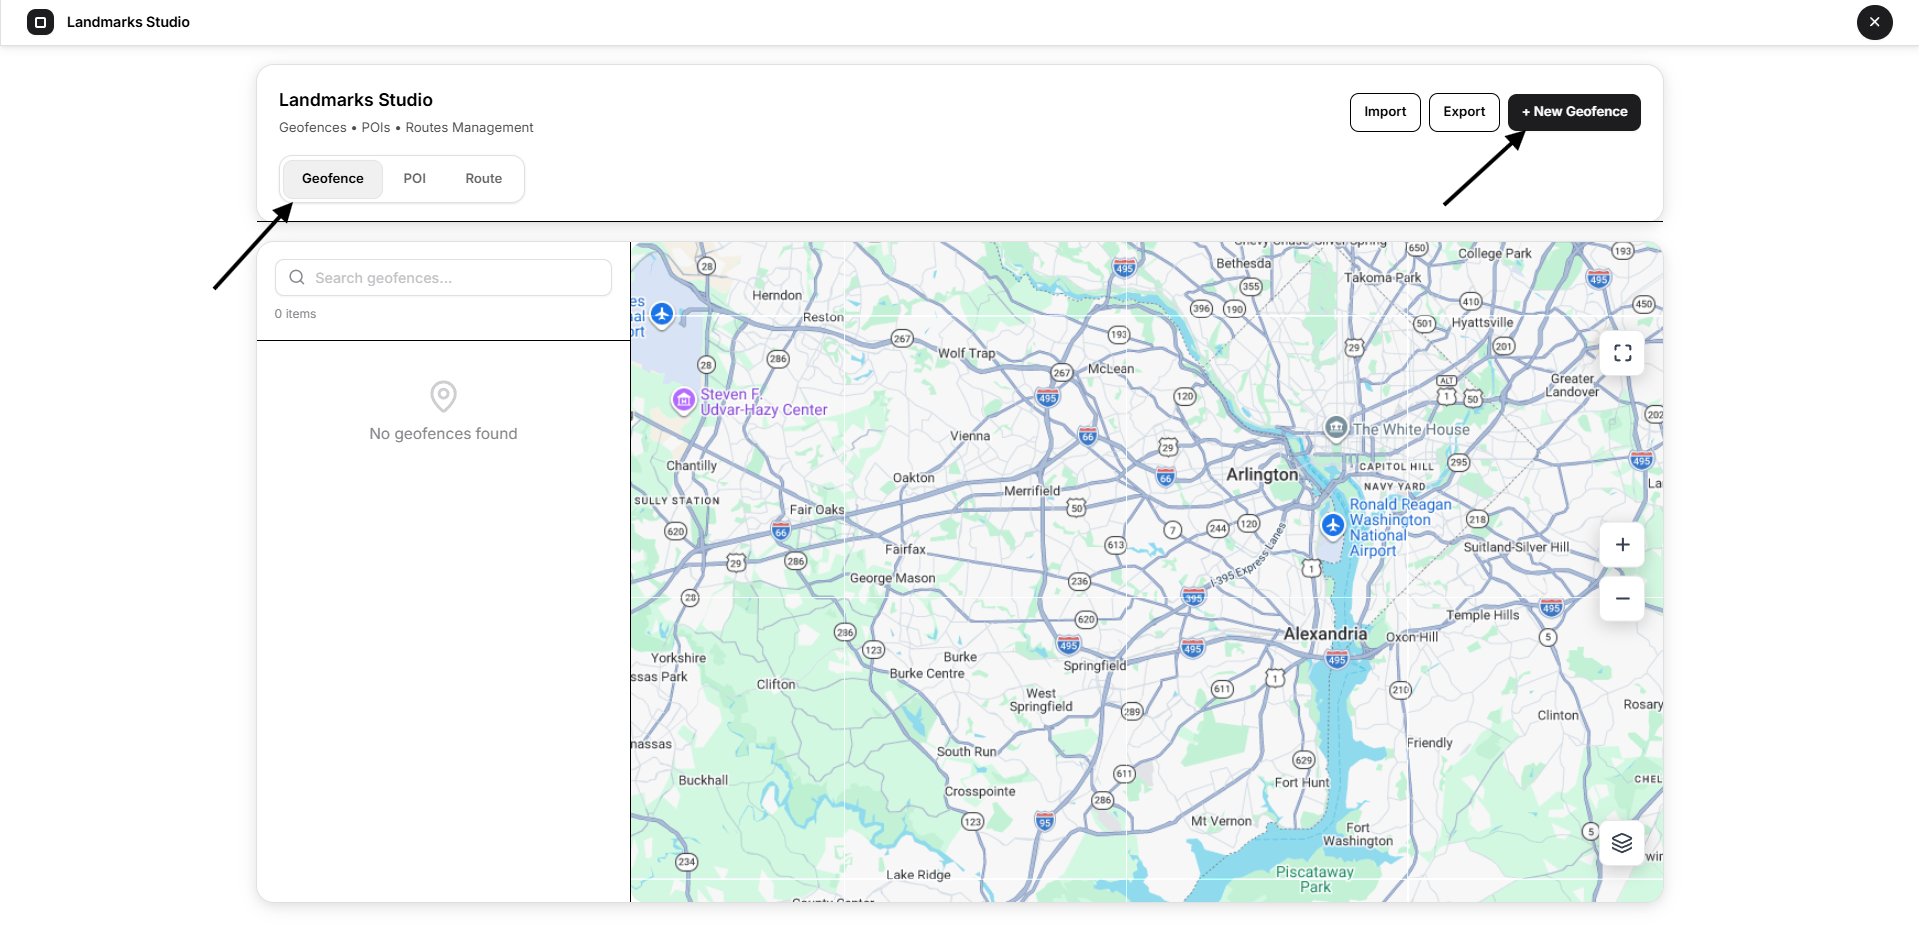
- POIs
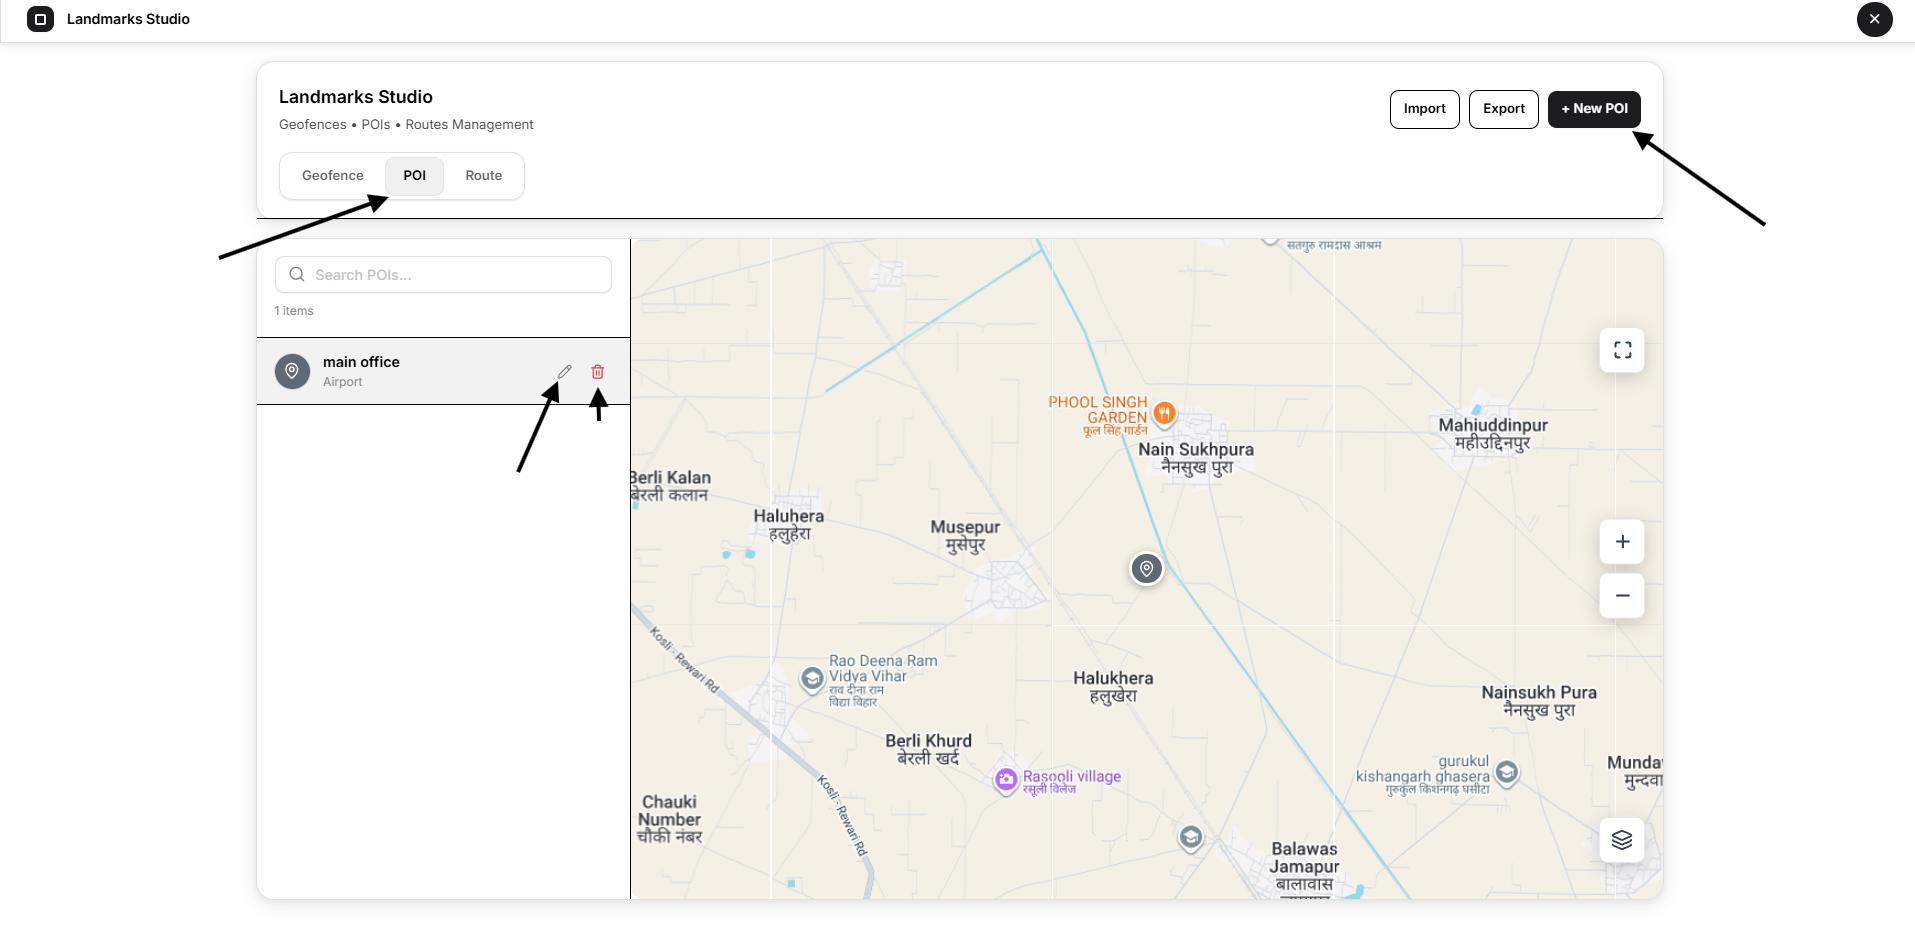
- Routes
These landmarks help organize locations, define areas, and build route paths that can be used elsewhere in the platform.
What You Can Do on This Page
On the Landmarks Studio page, you can:
- Switch between Geofence, POI, and Route
- Search existing landmarks in the active tab
- View landmarks on the map
- Create new geofences, POIs, and routes
- Edit existing landmarks
- Delete landmarks
- Import landmarks from CSV
- Export landmarks as KML
A User can only work with the landmarks available to their own account and permissions.
Understanding the Page
The page is divided into four main parts.
Header Area
The header shows the page title Landmarks Studio and the available actions for the current tab.
Shared actions include:
- Import
- Export
The primary create button changes by tab:
- + New Geofence
- + New POI
- + New Route
Landmark Tabs
The page uses three tabs:
- Geofence
- POI
- Route
Each tab has its own list and creation workflow.
Left Panel
The left side contains:
- a search field
- item count
- the list of saved landmarks for the selected tab
If no records exist, the tab shows an empty state such as No POIs found or No routes found.
Map Area
The right side shows the map for viewing and working with landmarks.
The map can show saved shapes, points, or routes depending on the selected tab.
How to Use the Page
A typical workflow is:
- Open Landmarks Studio from the User Home page.
- Select the required tab: Geofence, POI, or Route.
- Use the list to find an existing landmark or create a new one.
- Draw or place the landmark on the map.
- Enter its properties.
- Save the landmark.
- Edit, delete, import, or export landmarks as needed.
Features and Controls
Shared Page Controls
Import
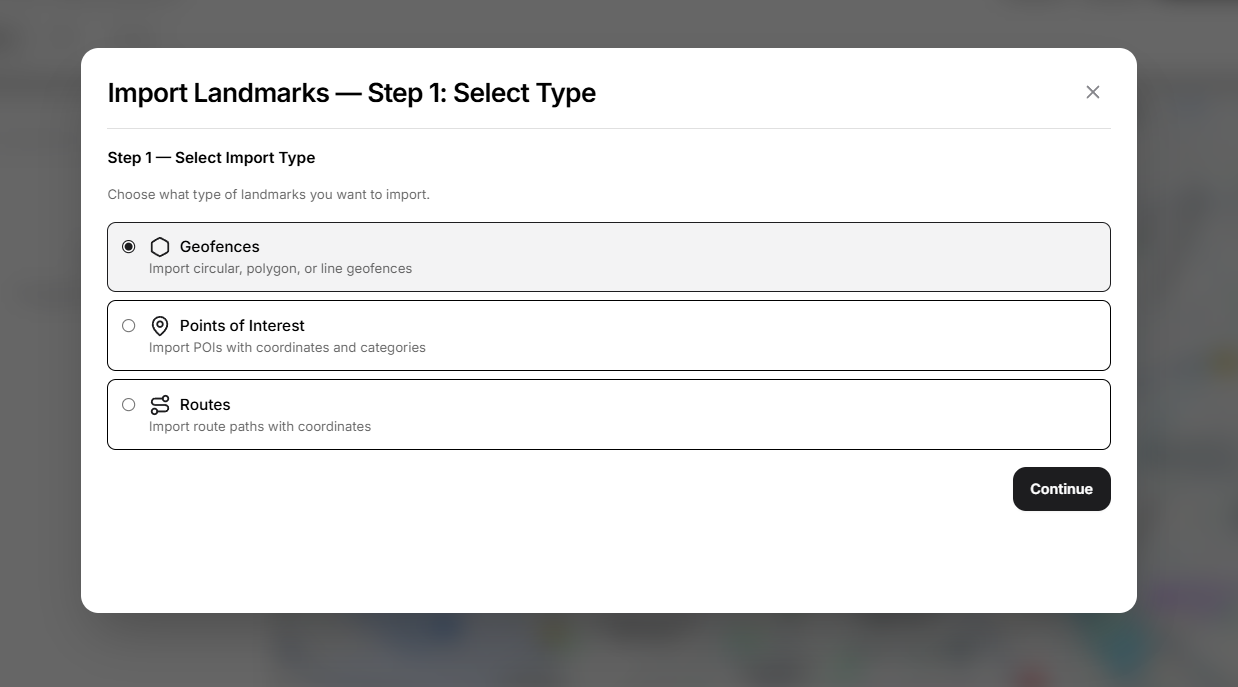
Select Import to open the bulk import wizard.
The same wizard is used for:
- Geofences
- Points of Interest
- Routes
Export
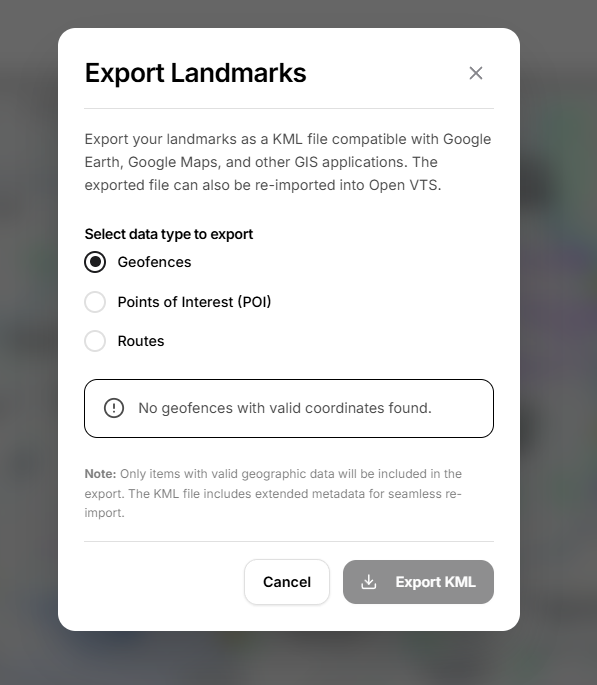
Select Export to export landmarks as a KML file.
The export dialog lets you choose which type to export:
- Geofences
- Points of Interest (POI)
- Routes
It also shows how many valid records are ready for export.
Only items with valid geographic data are included in the export.
Search
Each tab provides its own search field:
- Search geofences...
- Search POIs...
- Search routes...
Use the search field to quickly find landmarks in the current tab.
List Row Actions
Where records exist, each row can provide actions such as:
- Edit
- Delete
Selecting a record also highlights it on the map.
Map Controls
The map interface includes the common controls visible in this page, including:
- Normal / Satellite map style switch
- zoom controls
- fullscreen
- layer control
- drawing tools when creating or editing landmarks
- location search inside the map editor
The exact drawing tools shown depend on the type of landmark being created or edited.
Geofence
The Geofence tab is used to create and manage map areas or boundaries.
A geofence can be created as different geometry types, depending on what you need to mark on the map.
Geofence List
On the main Geofence tab, the left panel shows the saved geofence records.
A row can display:
- the geofence name
- its type or size summary
- edit action
- delete action
Selecting a geofence shows it on the map.
Create a New Geofence
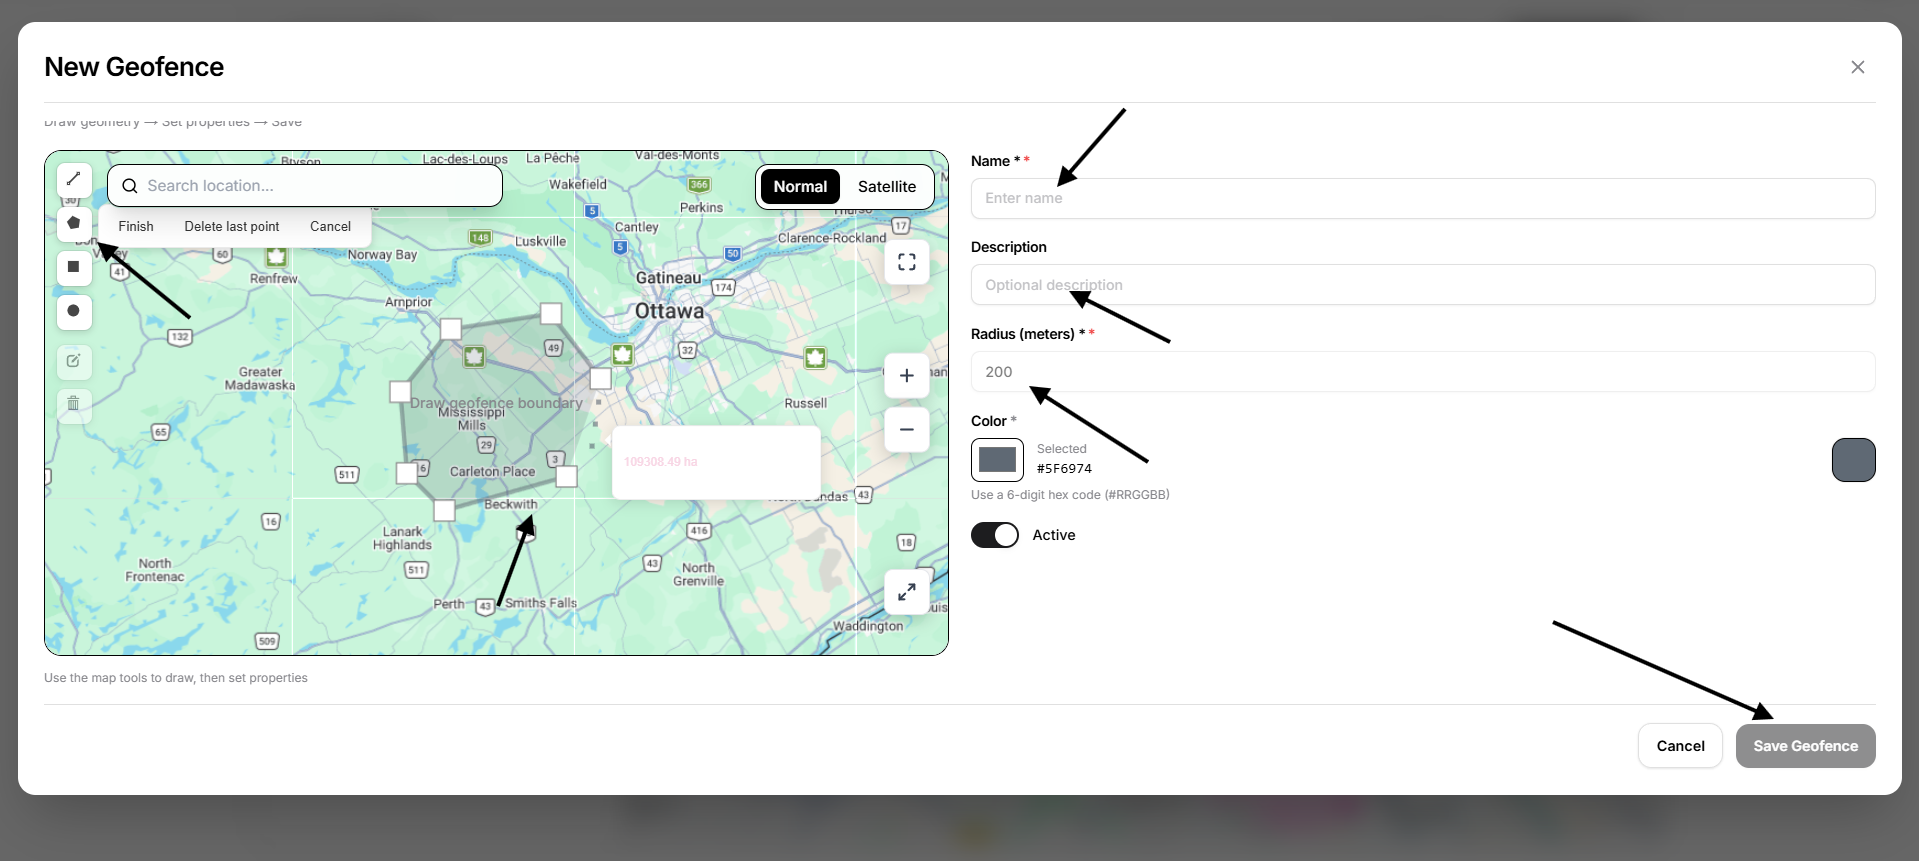
Select + New Geofence to open the geofence editor.
The New Geofence screen includes:
- map and drawing tools
- Name
- Description
- geometry-specific fields
- Color
- Active
- Cancel
- Save Geofence
Geofence Geometry Types
The current workflow supports multiple geometry types.
Circle Geofence
A circle geofence is drawn on the map and uses a Radius (meters) field.
Polygon Geofence
A polygon geofence is created by drawing boundary points on the map.
During polygon drawing, the editor provides:
- Finish
- Delete last point
- Cancel
After the polygon is completed, the drawn shape remains visible and can be saved.
Rectangle Geofence
A rectangle can also be drawn on the map as an area boundary.
[Add Screenshot: New Geofence screen showing a rectangular geofence]
Line Geofence
A line geofence is created as a path and uses Tolerance (meters) instead of radius.
This is useful when the landmark represents a road or corridor rather than an area.
Geofence Fields
Depending on the geometry type, the geofence form can include:
- Name — required
- Description
- Radius (meters) — for circle
- Tolerance (meters) — for line
- Color
- Active
Color
The Color field defines how the geofence is shown on the map.
The selected color value is displayed next to the color preview.
Active
Use Active to control whether the geofence should remain enabled.
Edit Geofence
Select the edit action for a saved geofence to open Edit Geofence.
The saved landmark opens with its current geometry and properties already loaded.
[Add Screenshot: Edit Geofence screen showing an existing line geofence with Tolerance, Color, and Save Changes]
Delete Geofence
Select the delete action to remove a geofence.
Open VTS shows a confirmation dialog before deletion.
[Add Screenshot: Delete Geofence confirmation dialog]
Deleting a geofence cannot be undone.
POI
The POI tab is used to create and manage Points of Interest.
A POI is a single map location represented by a point marker.
Create a New POI
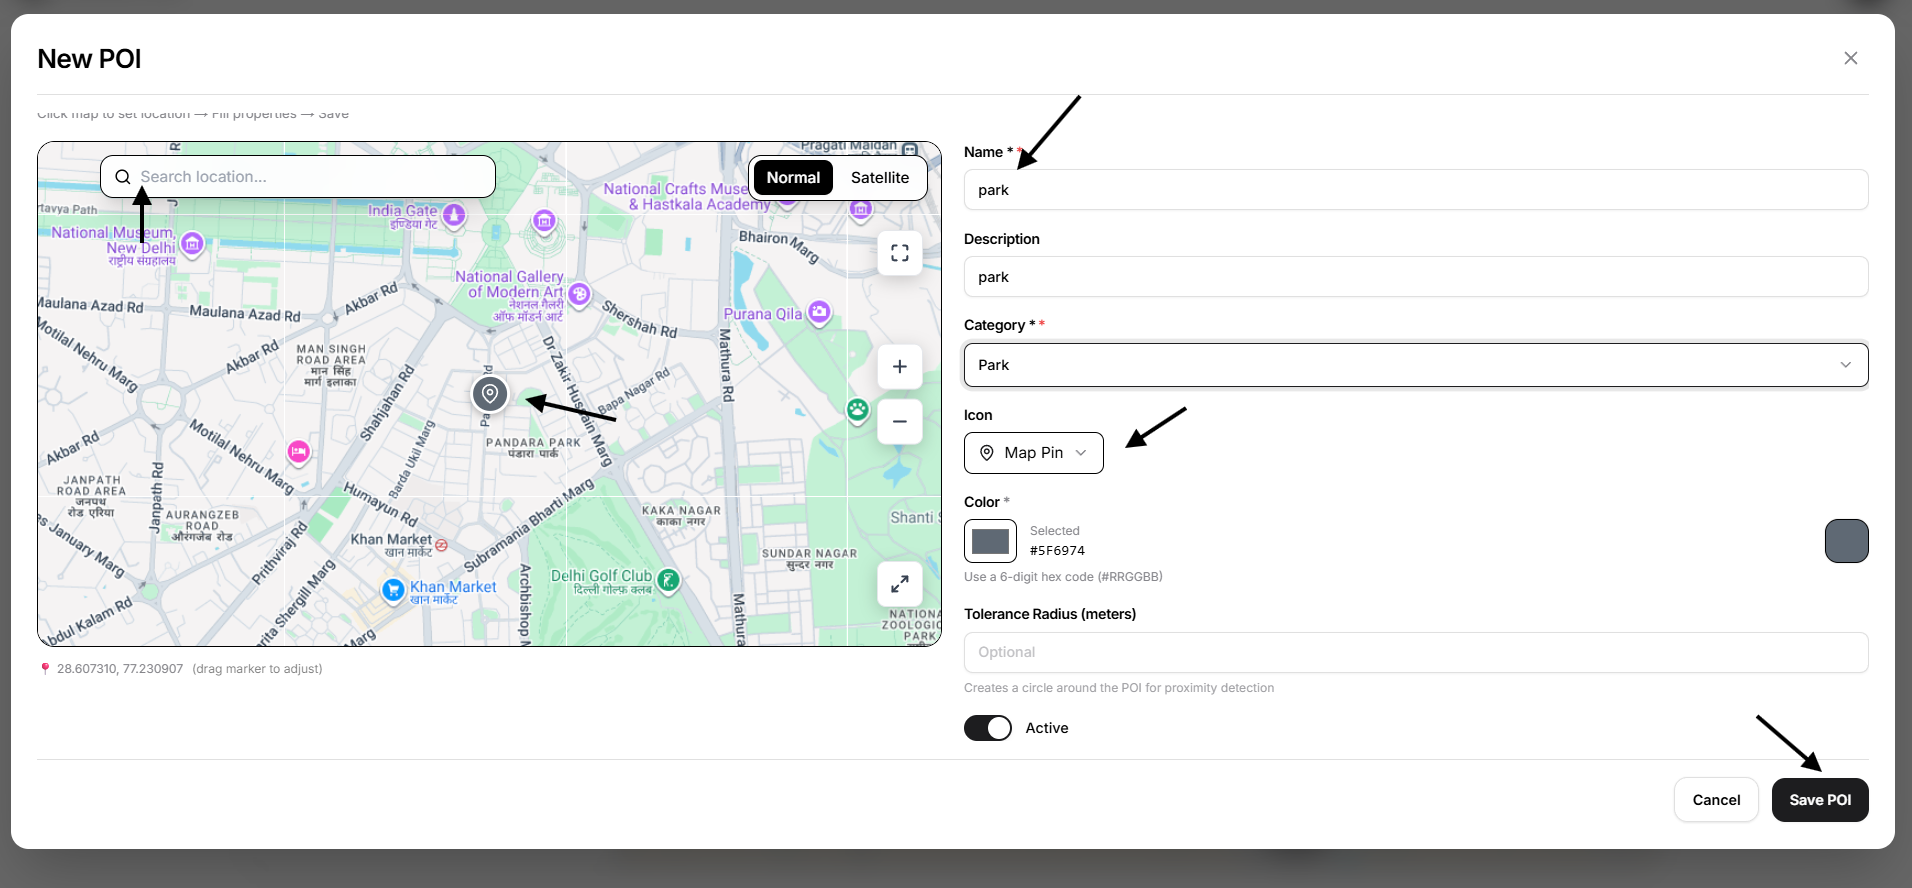
Select + New POI to open the POI editor.
The New POI screen includes:
- map area
- location search
- point placement on the map
- Name
- Description
- Category
- Icon
- Color
- Tolerance Radius (meters)
- Active
- Cancel
- Save POI
To create a POI, click the map to place its location.
Once placed, the point marker appears on the map and the coordinates are shown below the map. The marker can be dragged to adjust the position before saving.
POI Fields
Name
Name is required and identifies the POI.
Description
Use Description for additional information about the place.
Category
Use Category to classify the POI.
Icon
Use Icon to choose the symbol used for the POI marker.
Color
Color controls the visual marker color used for the POI.
Tolerance Radius (meters)
This field is optional.
When entered, it creates a circular proximity area around the POI.
Active
Use Active to keep the POI enabled.
Edit POI
Select the edit action for a saved POI to open Edit POI.
The saved location, coordinates, and properties are loaded back into the editor.
Delete POI
Saved POIs can also be deleted from the list using the delete action. Open VTS uses a confirmation step before the POI is removed.
Route
The Route tab is used to create and manage route paths.
A route can be created in two ways:
- by searching for a Source and Destination
- by manually drawing the route path on the map
Create a New Route
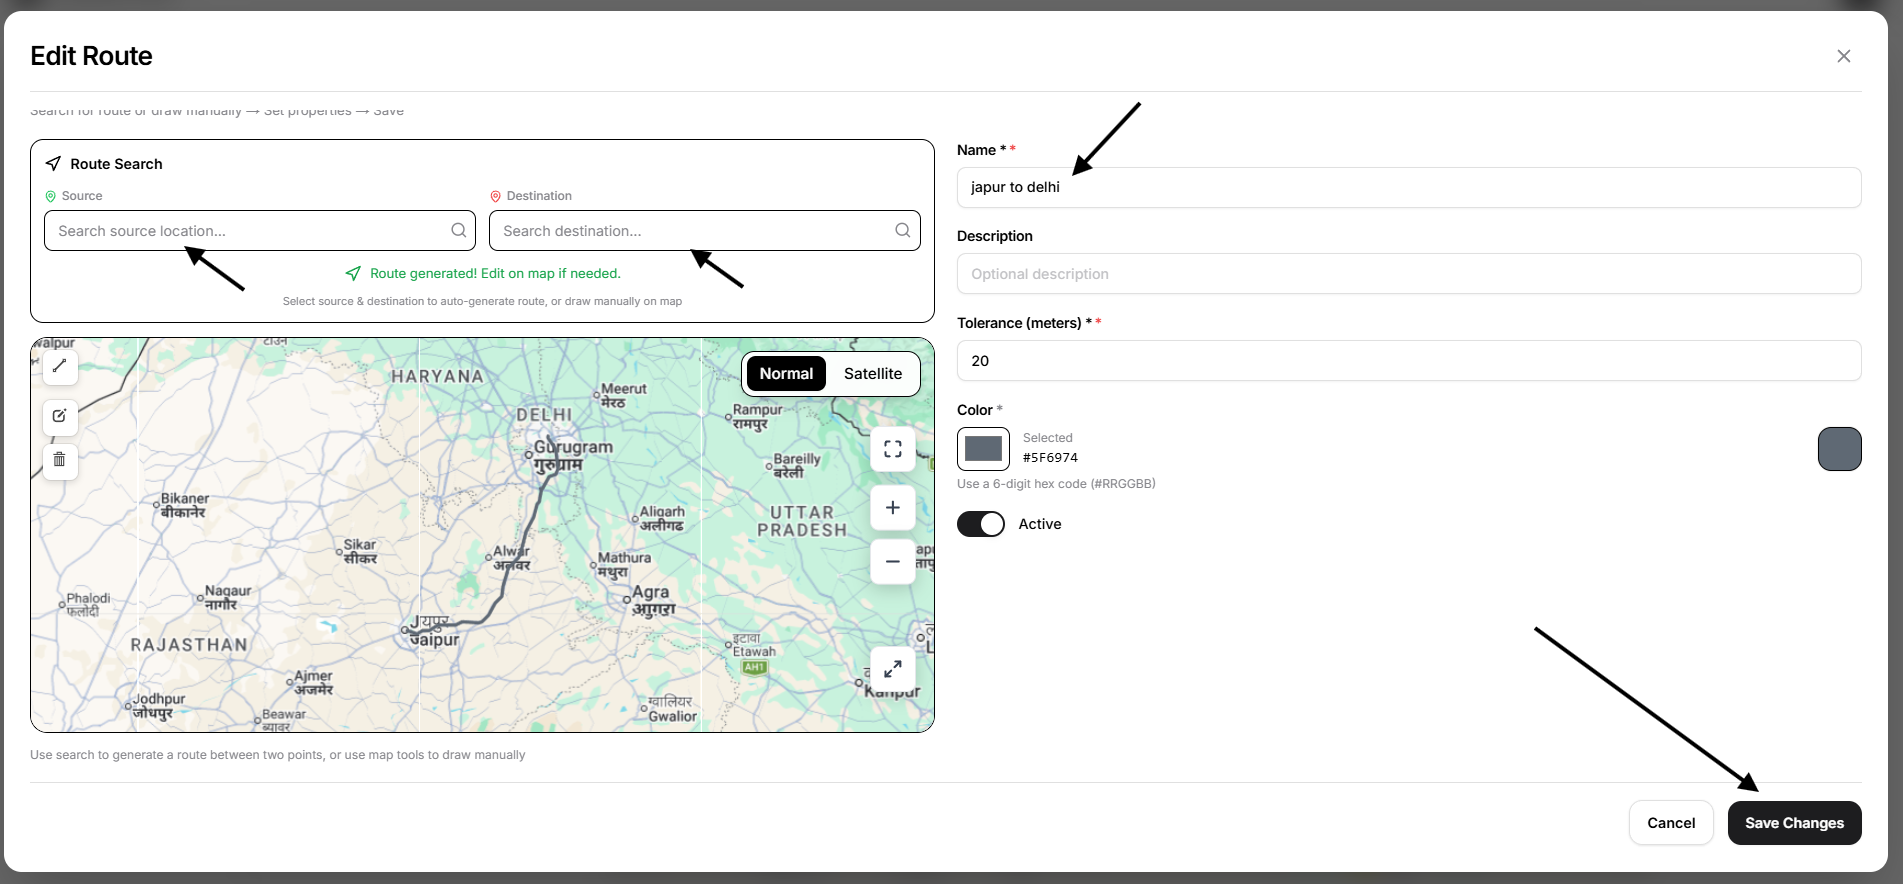
Select + New Route to open the route editor.
The New Route screen includes:
- Route Search
- Source
- Destination
- map and route tools
- Name
- Description
- Tolerance (meters)
- Color
- Active
- Cancel
- Save Route
Route Search
Enter a Source and Destination to generate a route automatically.
Once both locations are selected, Open VTS generates the route and displays it on the map.
The screen also shows a message confirming that the route has been generated and can still be adjusted on the map if needed.
Manual Route Drawing
Instead of search-based generation, you can also draw the route manually on the map.
This is useful when the route must follow a custom path.
Route Fields
The route form includes:
- Name — required
- Description
- Tolerance (meters) — required
- Color
- Active
Tolerance (meters)
This value defines the route tolerance area used around the saved route path.
Route List
When a route has been created, it appears in the Route tab list.
The row can show:
- route name
- route type summary
- tolerance summary
- edit action
- delete action
Selecting the route shows the route line on the map.
Edit Route
Select the edit action to open Edit Route.
The saved route and its properties are loaded for update.
Delete Route
Saved routes can be deleted from the Route list using the delete action. Open VTS uses the same delete-confirmation pattern before permanent removal.
Import Landmarks
Use Import when you want to add multiple landmarks in one workflow.
The import wizard is shared across Geofences, POIs, and Routes.
Step 1 — Select Type
In the first step, choose what you want to import:
- Geofences
- Points of Interest
- Routes
Then select Continue.
Step 2 — Upload or Paste CSV
The second step allows you to provide the import data.
You can:
- select Choose File to upload a CSV file
- drag and drop a CSV file
- paste CSV data directly into the text area
- select Download Sample CSV to get a sample file for the selected type
If a file has been selected or CSV content has been pasted, Open VTS shows the provided content before continuing.
Step 3 — Map Columns
In this step, map the uploaded CSV columns to the expected Open VTS fields.
The available mapping fields depend on the selected landmark type.
For the geofence example shown, available fields include landmark name, type, description, color, center coordinates, radius, polygon coordinates, line coordinates, and tolerance.
A preview table at the bottom shows the first rows so that you can confirm the mapping before continuing.
Step 4 — Validate
After mapping, Open VTS validates the data.
The validation screen shows:
- Total Rows
- Valid Rows
- Errors
- Warnings
- Back
- Re-validate
- Download validation report
- Start Import
When there are no blocking issues, the screen shows Validation passed.
Step 6 — Complete
After the import finishes, the completion screen shows the result summary, including total, successful, and failed rows.
It also provides:
- Download Failed Rows CSV
- Done
The same overall process applies to Geofences, POIs, and Routes.
Export Landmarks
Use Export when you want to download landmarks from Open VTS.
The export file format is KML, which can be used in Google Earth, Google Maps, and other compatible GIS tools.
To export:
- Select Export.
- Choose the data type:
- Geofences
- Points of Interest (POI)
- Routes
- Review the number of available records.
- Select Export KML.
The export includes landmark data intended to support reuse and later re-import where supported.
Additional Workflows
Create a Geofence
- Open the Geofence tab.
- Select + New Geofence.
- Draw the geofence on the map.
- Enter the required properties.
- Select Save Geofence.
Create a POI
- Open the POI tab.
- Select + New POI.
- Click the map to place the POI.
- Enter its details.
- Select Save POI.
Create a Route
- Open the Route tab.
- Select + New Route.
- Either:
- choose Source and Destination, or
- draw the route manually on the map
- Enter the route details.
- Select Save Route.
Edit a Landmark
- Find the landmark in the active tab list.
- Select Edit.
- Update the geometry, location, or properties.
- Save the changes.
Delete a Landmark
- Find the landmark in the active tab list.
- Select Delete.
- Confirm the deletion in the confirmation dialog.
Important Notes
Landmarks are managed separately in the three tabs: Geofence, POI, and Route.
The fields shown during creation or editing depend on the landmark type. For example:
- Radius applies to circle geofences
- Tolerance applies to line geofences and routes
- Tolerance Radius applies to POIs when a proximity area is needed
A landmark is not created until you save it.
Deleting a landmark is permanent and should be confirmed carefully.
During import, the CSV structure must match the expected landmark type and mapped fields.
Only records with valid geographic data are included in KML export.