
Admin Driver Management
The Drivers section allows administrators to create, manage, and organize driver accounts in Open VTS. Admins can update driver profiles, assign users, manage documents, change account status, reset passwords, and perform bulk driver operations from one place.
Last updated August 19, 2026
Driver Management
The Driver Management section allows administrators to create and manage driver accounts in Open VTS. From this section, administrators can review driver information, change account status, assign drivers to users, upload compliance documents, update passwords, export records, and create multiple drivers through CSV bulk upload.
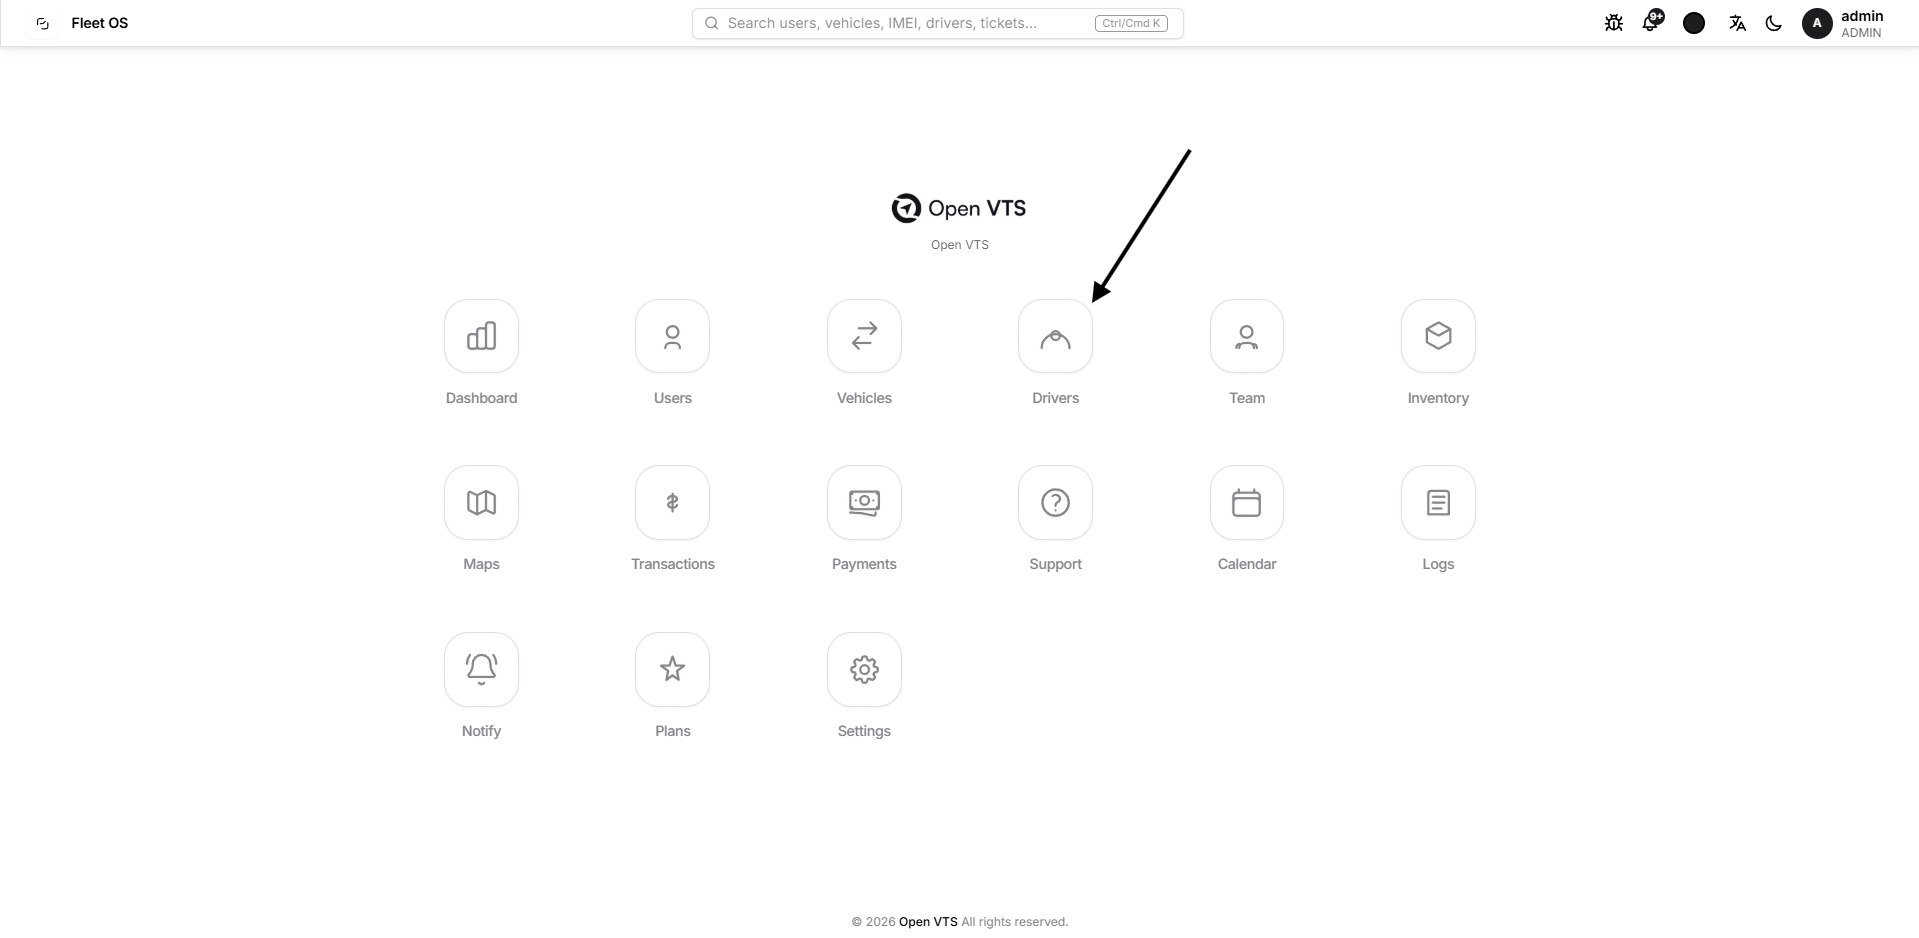
Driver List
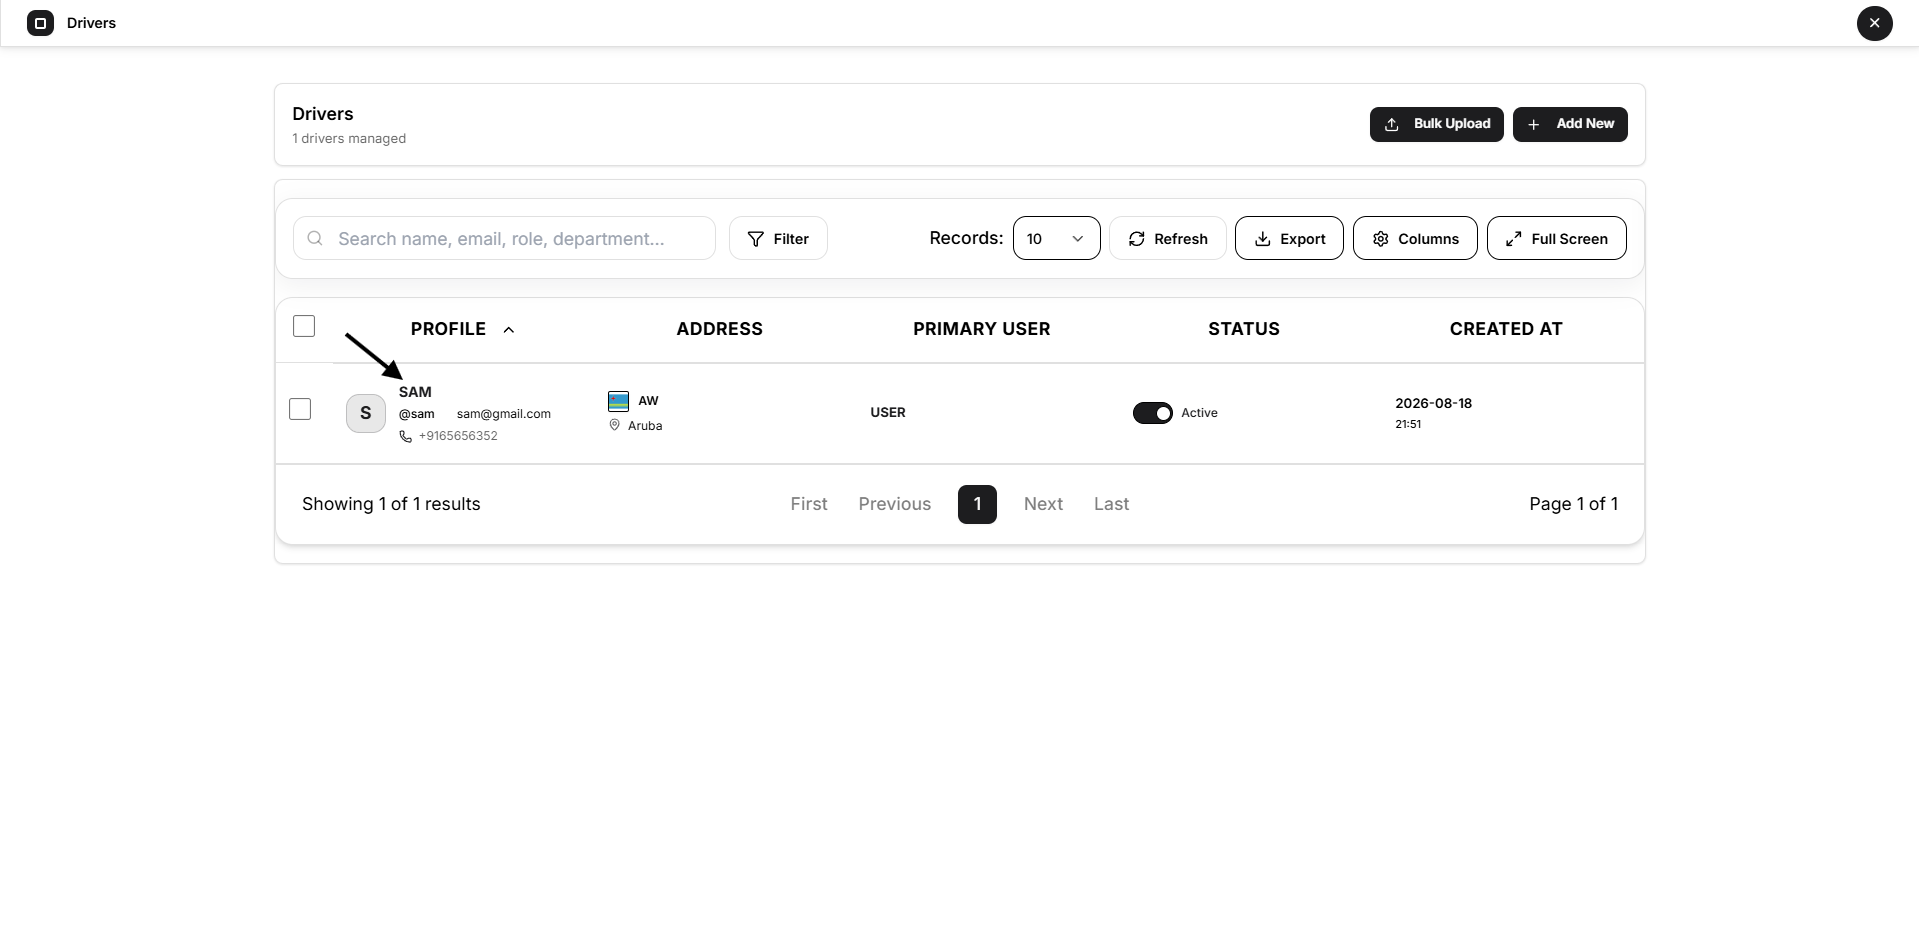
Open Admin Panel → Drivers to view all drivers managed under the administrator account.
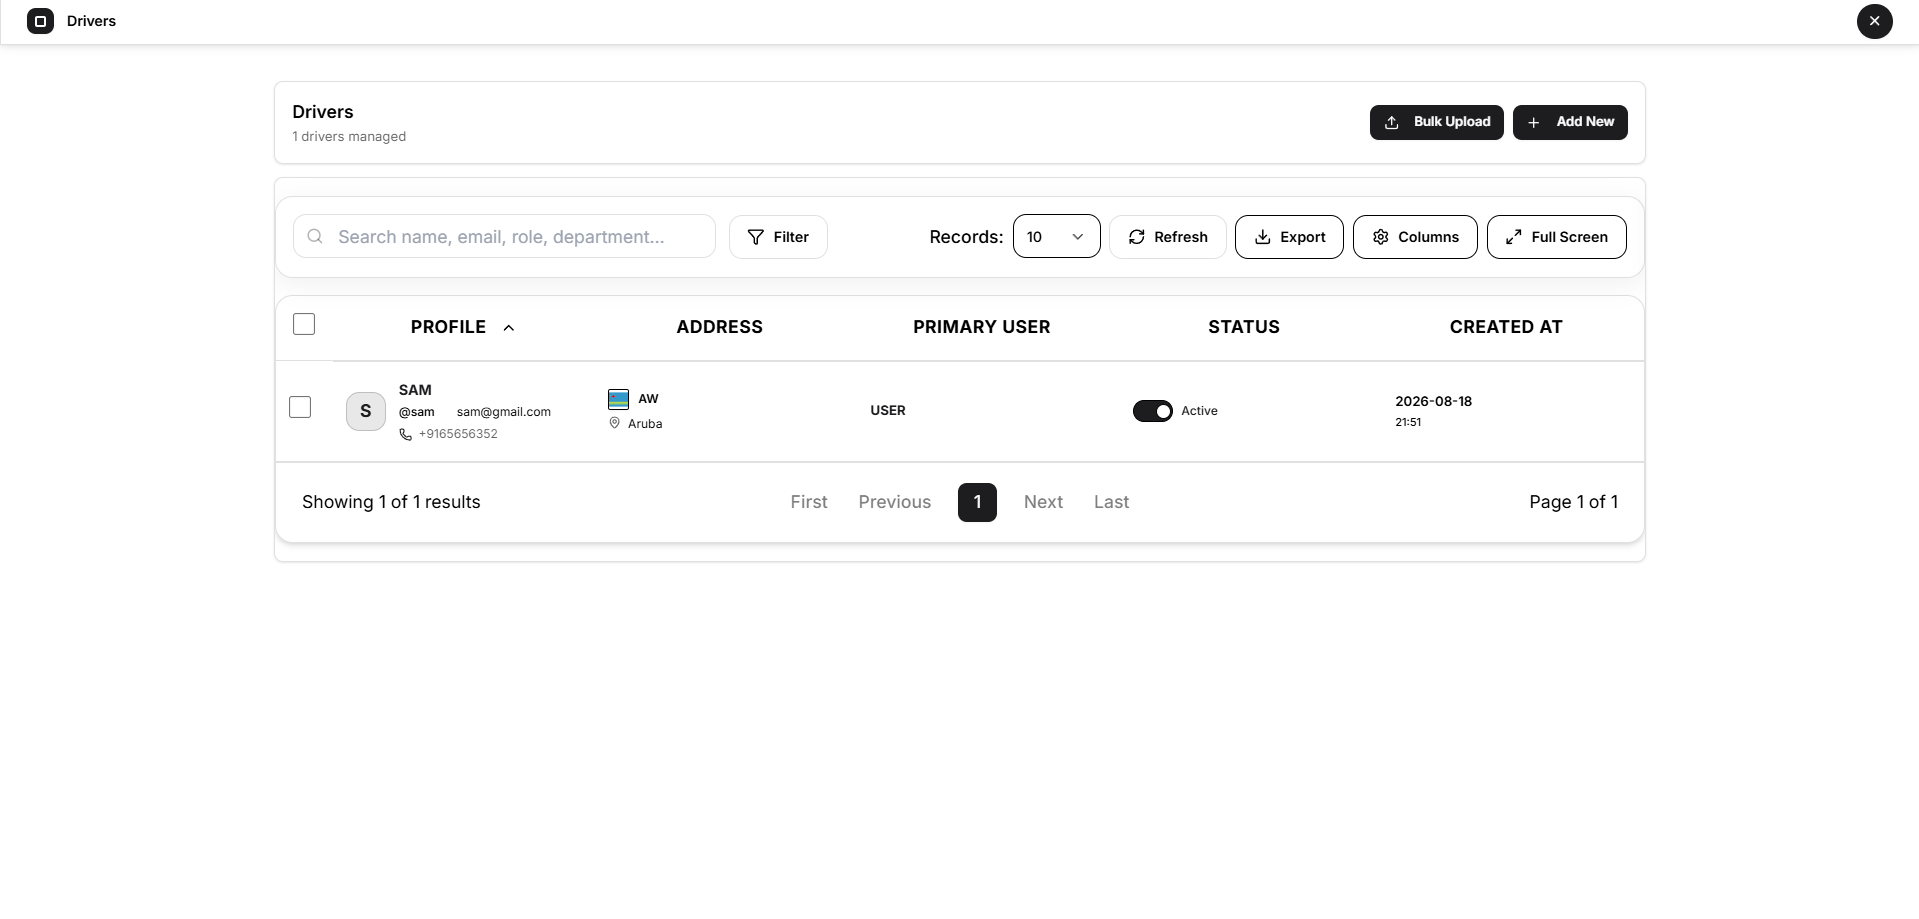
Each driver record displays:
- Driver name
- Username
- Email address
- Mobile number
- Country and address
- Primary user
- Account status
- Creation date
Select a driver’s name or profile row to open the complete driver profile.
Driver status
The Status column shows whether the driver account is currently:
- Active: The driver account is enabled.
- Inactive: The driver account is disabled.
Use the status toggle beside a driver to activate or deactivate the account.
Search and Filter Drivers
Use the search field to locate a driver using available profile information such as name, username, or email address.
Select Filter to open the dynamic filter panel.
Available filters include:
- Name
- Username
- Status
Select Apply to display matching drivers.
Select Clear all to remove the applied filters.
Suggested screenshot: Driver filter panel
Driver List Controls
The toolbar above the driver table provides the following controls:
Records
Select how many driver records should appear on each page.
Refresh
Reload the table and display the latest driver information.
Export
Download the driver list in one of the following formats:
- CSV
- XLSX
- JSON
- HTML
Columns
Choose which table columns are visible.
Full Screen
Expand the driver table for a larger working view.
Pagination
Use First, Previous, Next, Last, or a page number to move between result pages.
Add a New Driver
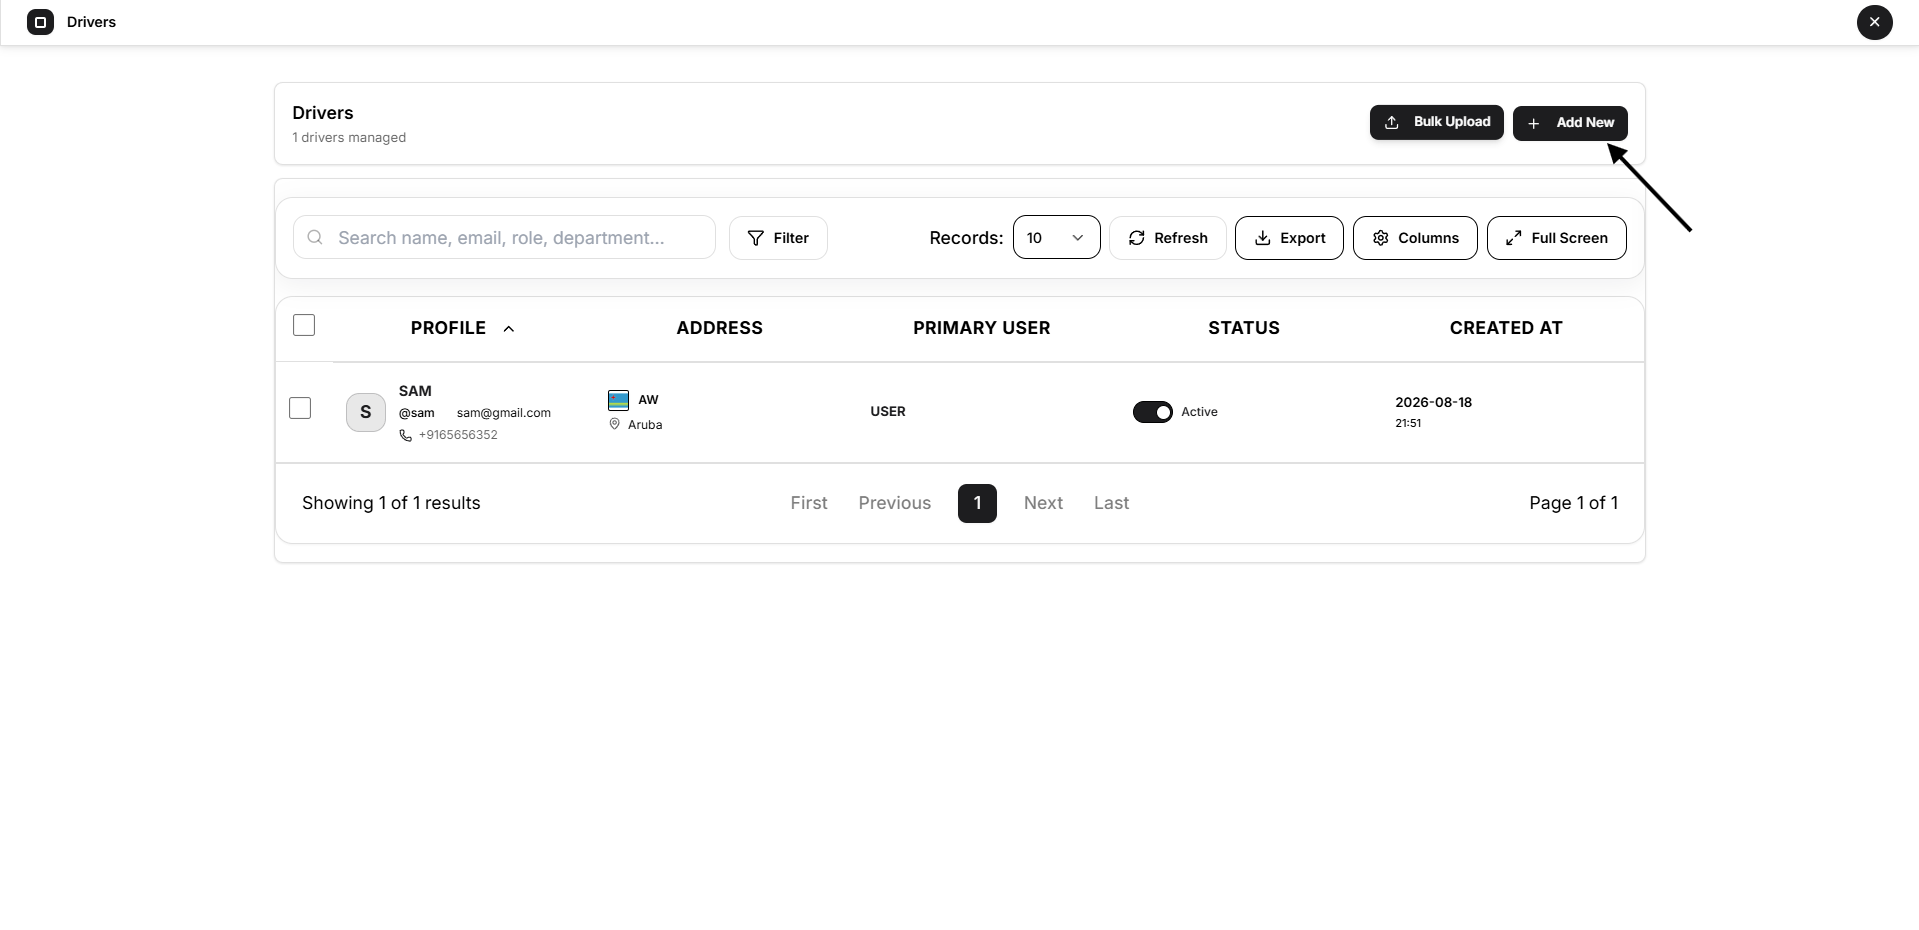
Select Add New from the top-right corner of the Driver Management page.
The Add New Driver form appears.
Driver information
Complete the following fields:
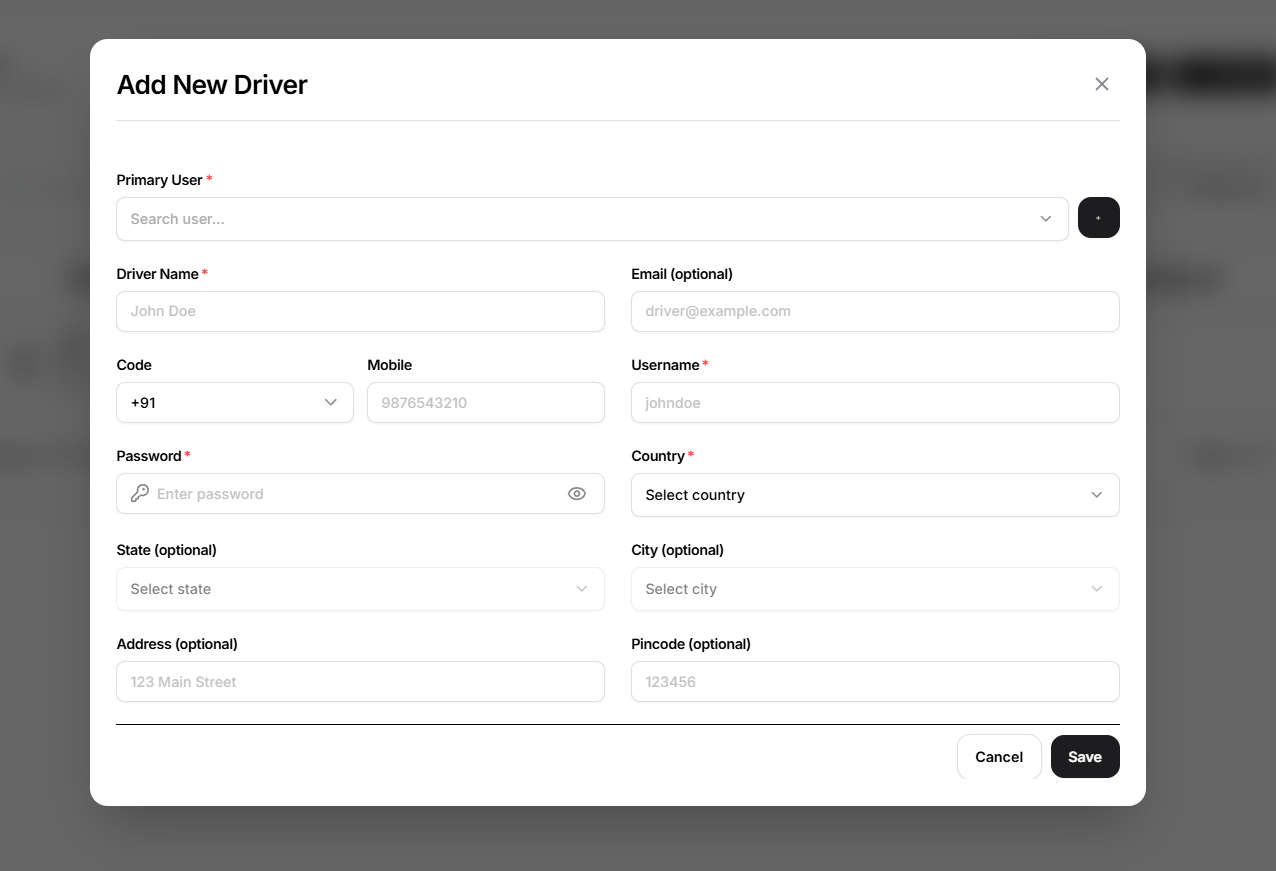
Primary User
Select the user who will initially be associated with the driver.
Driver Name
Enter the driver’s full name.
Enter the driver’s email address. This field is optional.
Code and Mobile
Select the country calling code and enter the driver’s mobile number.
Username
Create a unique username for the driver.
Password
Enter the initial password used by the driver to sign in.
Country
Select the driver’s country.
State
Select the driver’s state when applicable.
City
Select the driver’s city when applicable.
Address
Enter the driver’s street or local address.
Pincode
Enter the postal or ZIP code.
Select Save to create the driver.
A confirmation message appears after the driver is created successfully.
Suggested screenshot: Add New Driver form
Bulk Driver Actions
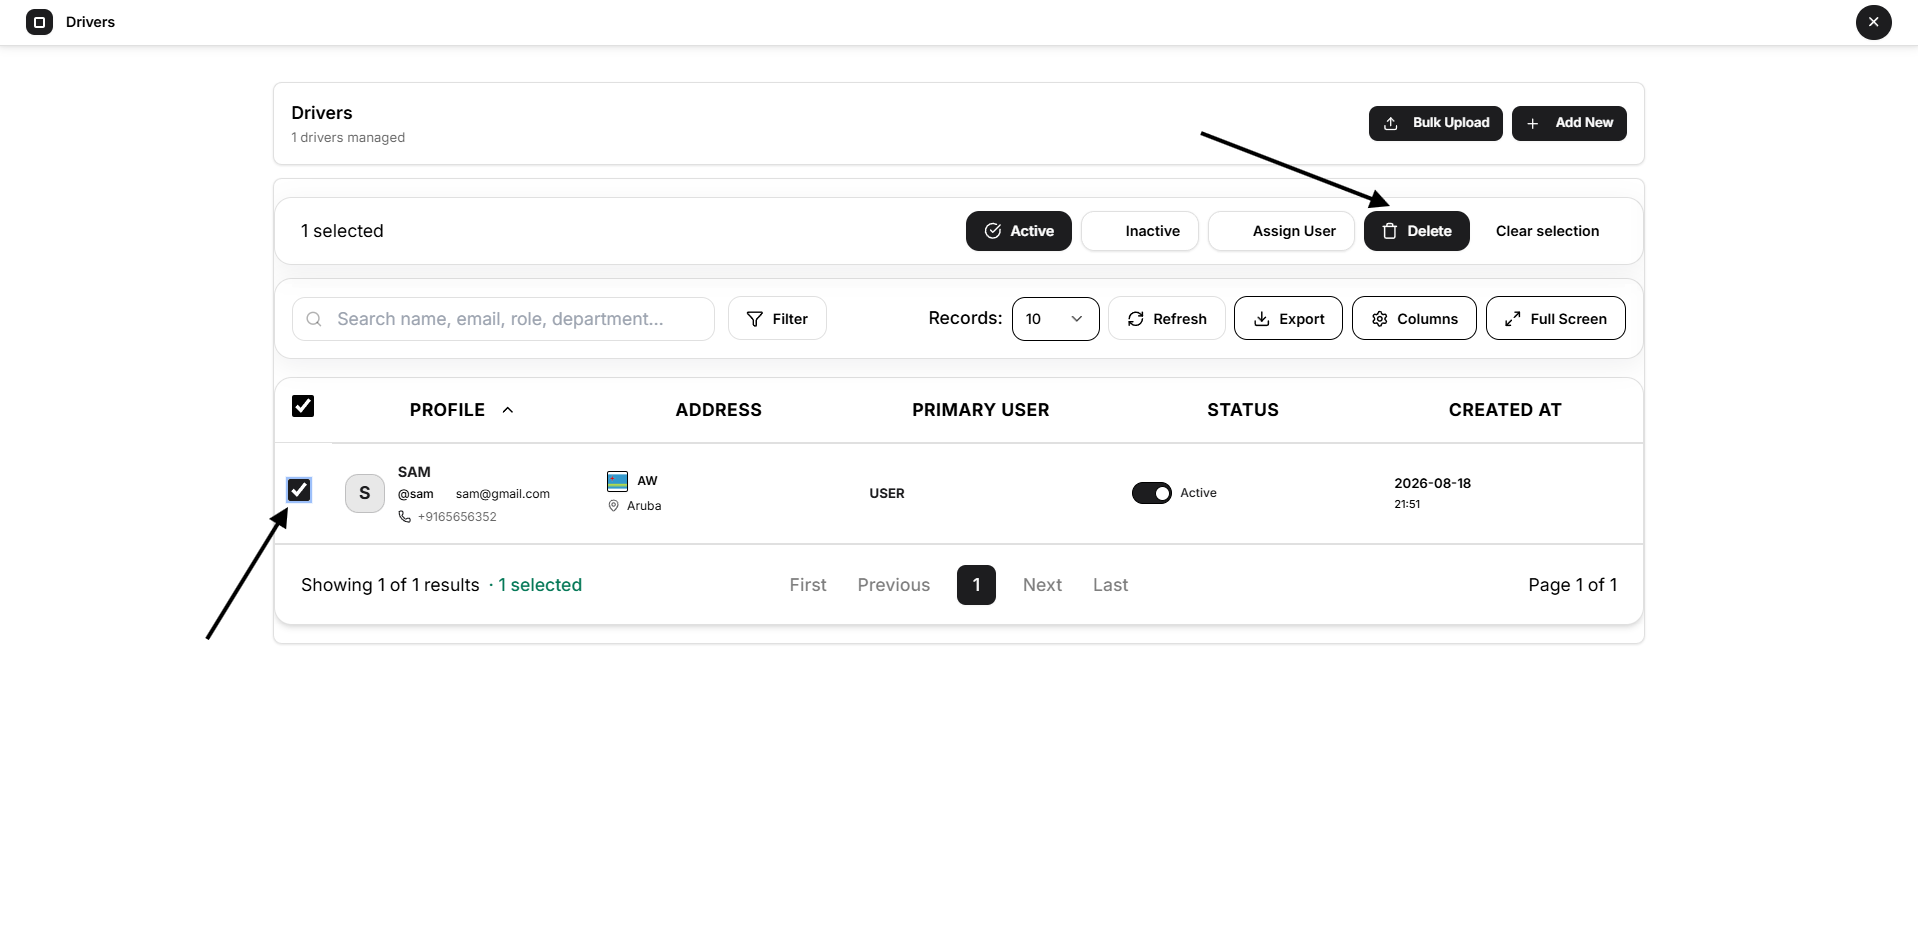
Select one or more drivers using the checkboxes in the driver list.
A bulk-action toolbar appears above the table.
Available bulk actions
Active
Activates all selected driver accounts.
Inactive
Deactivates all selected driver accounts.
Assign User
Associates the selected drivers with a user.
Delete
Permanently deletes the selected drivers.
A confirmation message appears before the selected driver accounts are removed.
Clear selection
Removes the current driver selections without changing any records.
Suggested screenshot: Bulk-action toolbar
Important: Deleting a driver permanently removes the account. Use the inactive status when the driver may need to be restored later.
Bulk Upload Drivers
The Bulk Upload feature allows administrators to create multiple driver accounts using a CSV file.
Select Bulk Upload from the Driver Management page.
The process contains five stages:
- Upload
- Map
- Validate
- Process
- Complete
Step 1: Upload or Paste CSV
Select the Primary User who will be associated with the imported drivers.
You can then:
- Drag and drop a CSV file
- Select Choose File
- Paste CSV content directly into the text area
- Select Download Sample CSV to obtain the required format
After adding the CSV data, select Parse & Continue.
Supported CSV fields
Required fields
- Name
- Mobile prefix
- Mobile number
- Username
- Password
- Country code
Optional fields
- State code
- City
- Address
- Pincode
Suggested screenshot: Driver Bulk Upload – Upload step
Step 2: Preview and Column Mapping
Open VTS detects the uploaded rows and displays a preview.
Map each CSV column to the corresponding driver field, including:
- Name
- Mobile prefix
- Mobile
- Username
- Password
- Country code
- State code
- City
- Address
- Pincode
Review the preview carefully and select Continue.
Select Back to return to the upload step.
Suggested screenshot: CSV preview and column mapping
Step 3: Validation
The system checks the imported data before creating the drivers.
The validation screen displays:
- Blocking errors
- Warnings
- Row number
- Column name
- Validation message
When validation passes, the message No issues found appears.
Select Continue to begin processing.
Suggested screenshot: Driver CSV validation
Step 4: Processing
During processing, Open VTS displays:
- Total processed records
- Processing percentage
- Successful records
- Failed records
- Pending records
- Live processing logs
- Individual row status
Do not close the page while the bulk upload is still processing.
Suggested screenshot: Driver bulk-upload processing
Step 5: Upload Completed
After processing, the completion page displays:
- Total records
- Successful records
- Failed records
- Driver name
- Username
- Mobile number
- Status
- Failure message, when applicable
Available actions include:
Download Failed Rows CSV
Downloads only the failed records so they can be corrected and uploaded again.
Go back to Drivers List
Returns to the Driver Management page.
Suggested screenshot: Driver bulk-upload completion
Driver Profile
Select a driver from the Driver Management list to open the Driver Detail View.
The driver profile contains the following sections:
- Profile
- Documents
- Users
The left navigation also includes Delete Account.
Profile
The Profile section displays the driver’s primary account and contact information.
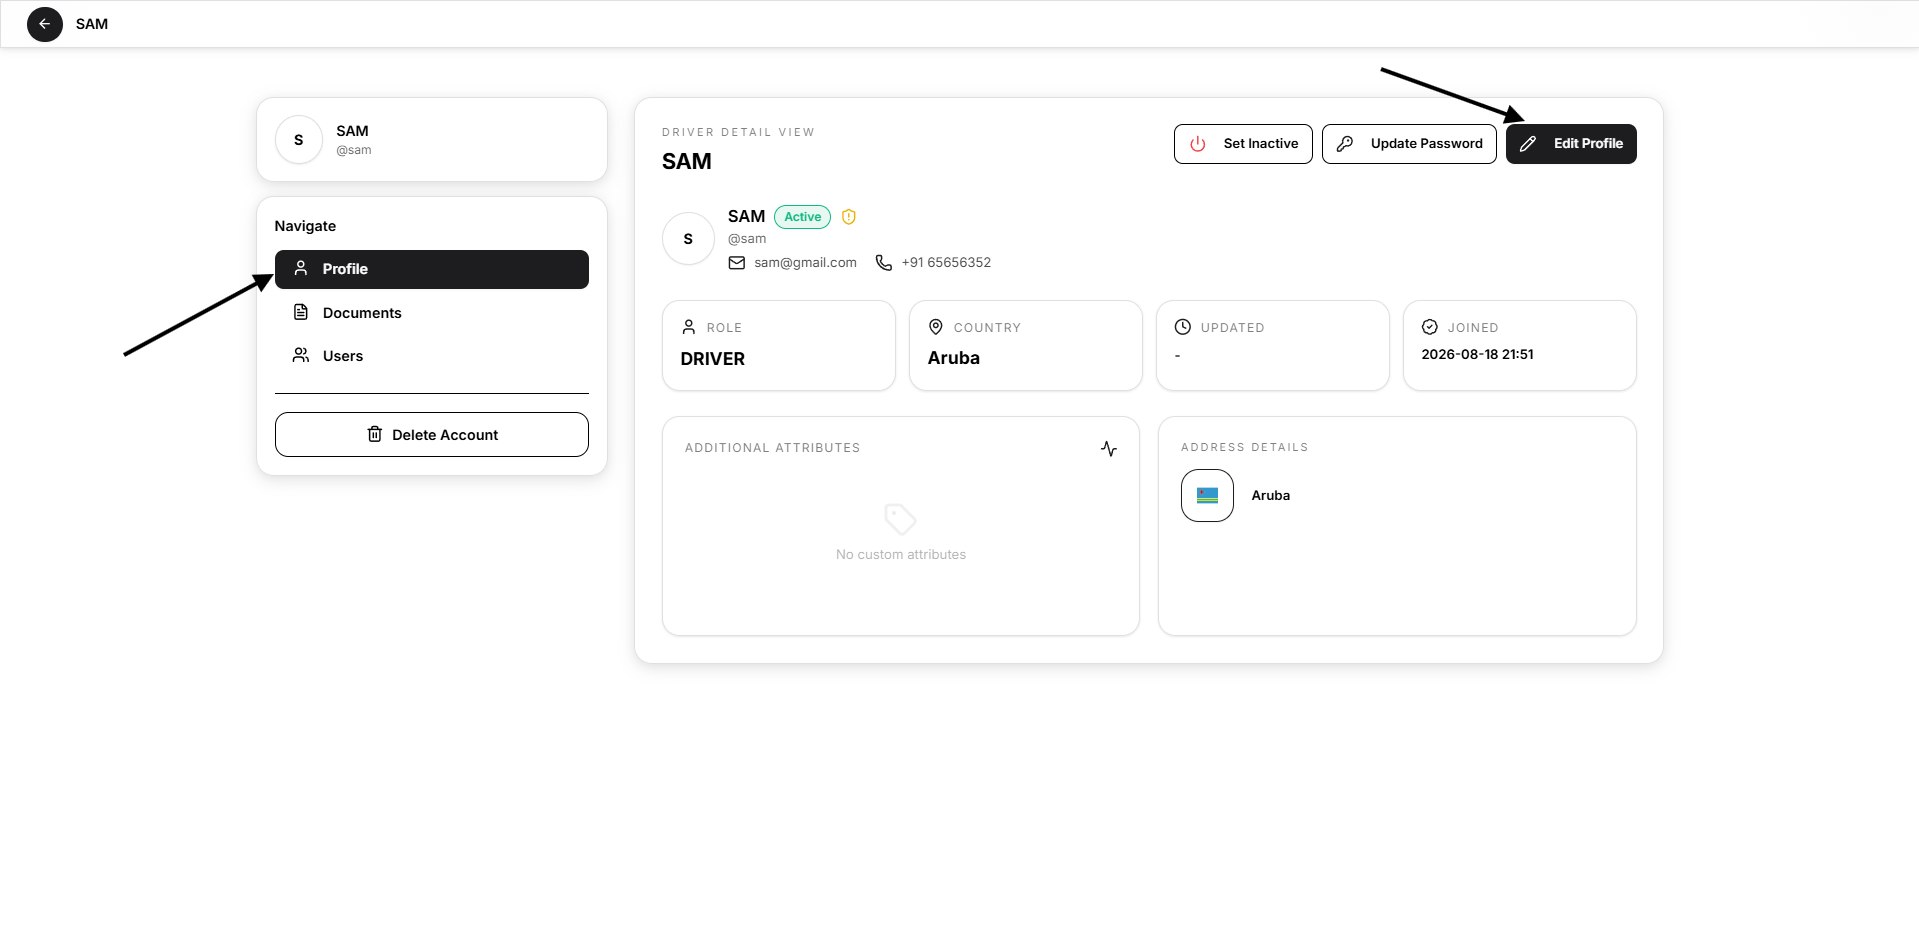
Information shown includes:
- Driver name
- Username
- Email address
- Mobile number
- Active or inactive status
- Role
- Country
- Last updated date
- Joined date
- Address
- Additional attributes
Available actions include:
- Set Active
- Set Inactive
- Update Password
- Edit Profile
Suggested screenshot: Driver profile overview
Edit Driver Profile
Select Edit Profile from the driver profile page.
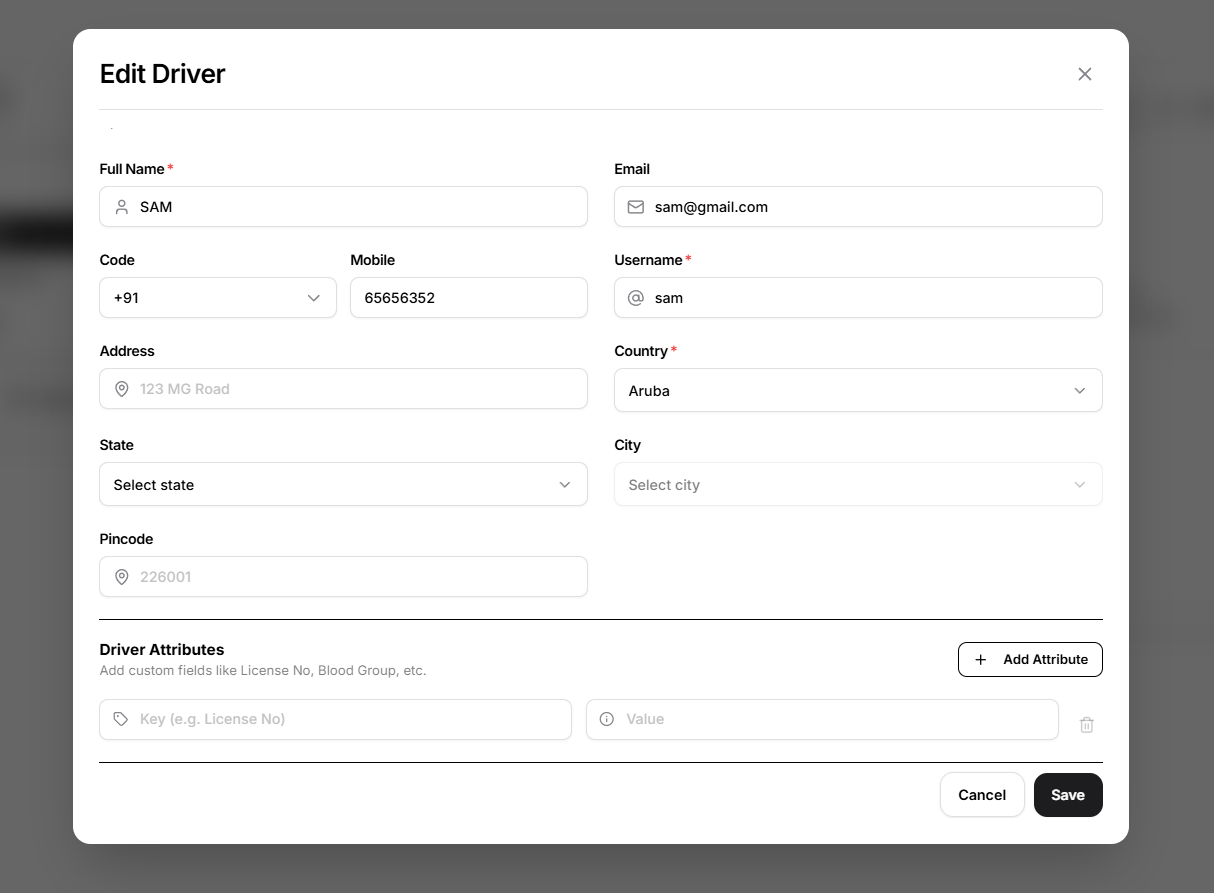
The administrator can update:
- Full name
- Country code
- Mobile number
- Username
- Address
- Country
- State
- City
- Pincode
Select Save to apply the changes.
Select Cancel to close the form without saving.
Driver Attributes
The Driver Attributes section allows additional driver-specific information to be stored.
Examples include:
- Driving licence number
- Blood group
- Employee ID
- Driver category
- Internal reference number
Select Add Attribute, then enter:
- Key: The attribute name
- Value: The related information
Multiple custom attributes can be added when required.
Suggested screenshot: Edit Driver form with attributes
Update Driver Password
Select Update Password from the driver profile.
Complete the following fields:
New Password
Enter the driver’s new password.
Confirm Password
Enter the same password again for confirmation.
Use the eye icon to show or hide the entered password.
Select Save to update the password.
Suggested screenshot: Update Driver Password dialog
Activate or Deactivate a Driver
A driver’s account status can be changed from either the Driver Management list or the driver profile.
Deactivate a driver
Select Set Inactive to disable the driver account.
The driver record and related information remain stored, but the account becomes inactive.
Activate a driver
Select Set Active to restore the driver account.
A confirmation message appears after the status is updated.
Driver Documents
Open Documents from the driver profile to manage driver verification and compliance documents.
The document section displays:
- Document title
- Document type
- Expiry date
- Tags
- Verification status
- Uploaded file
- Updated date
- Available actions
Suggested screenshot: Driver Documents page
Add a Driver Document
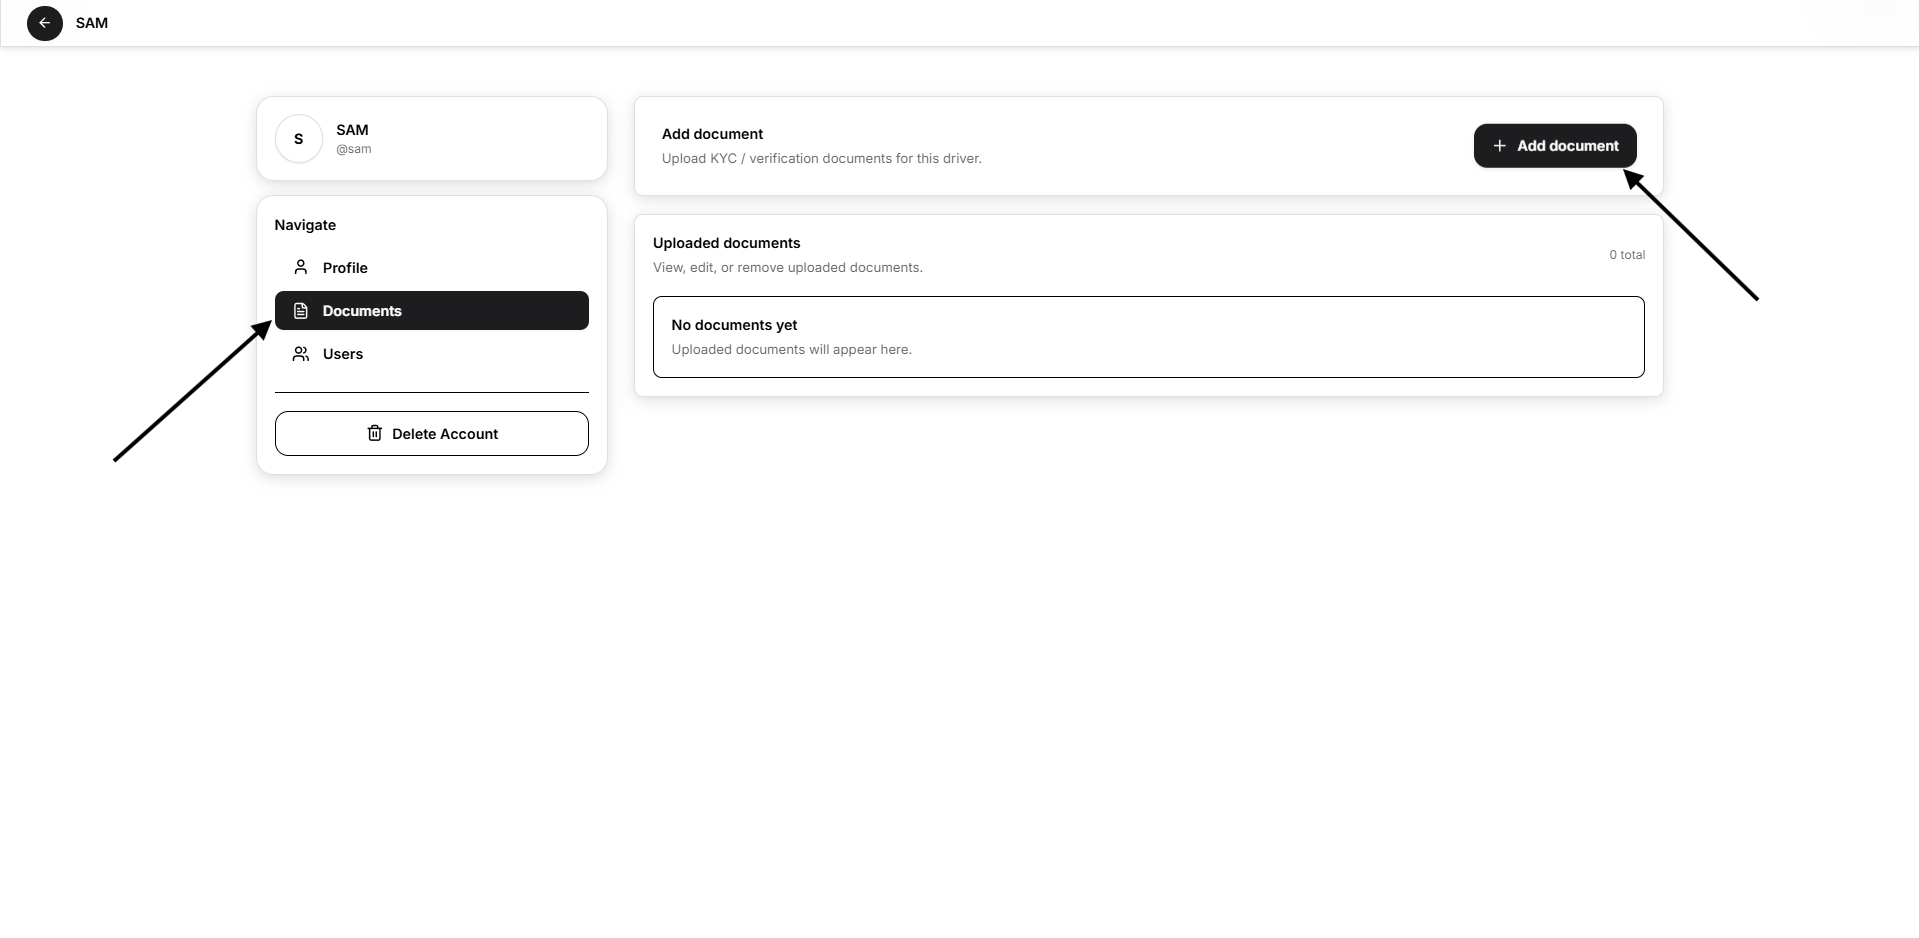
Select Add document.
Complete the following fields:
Document Type
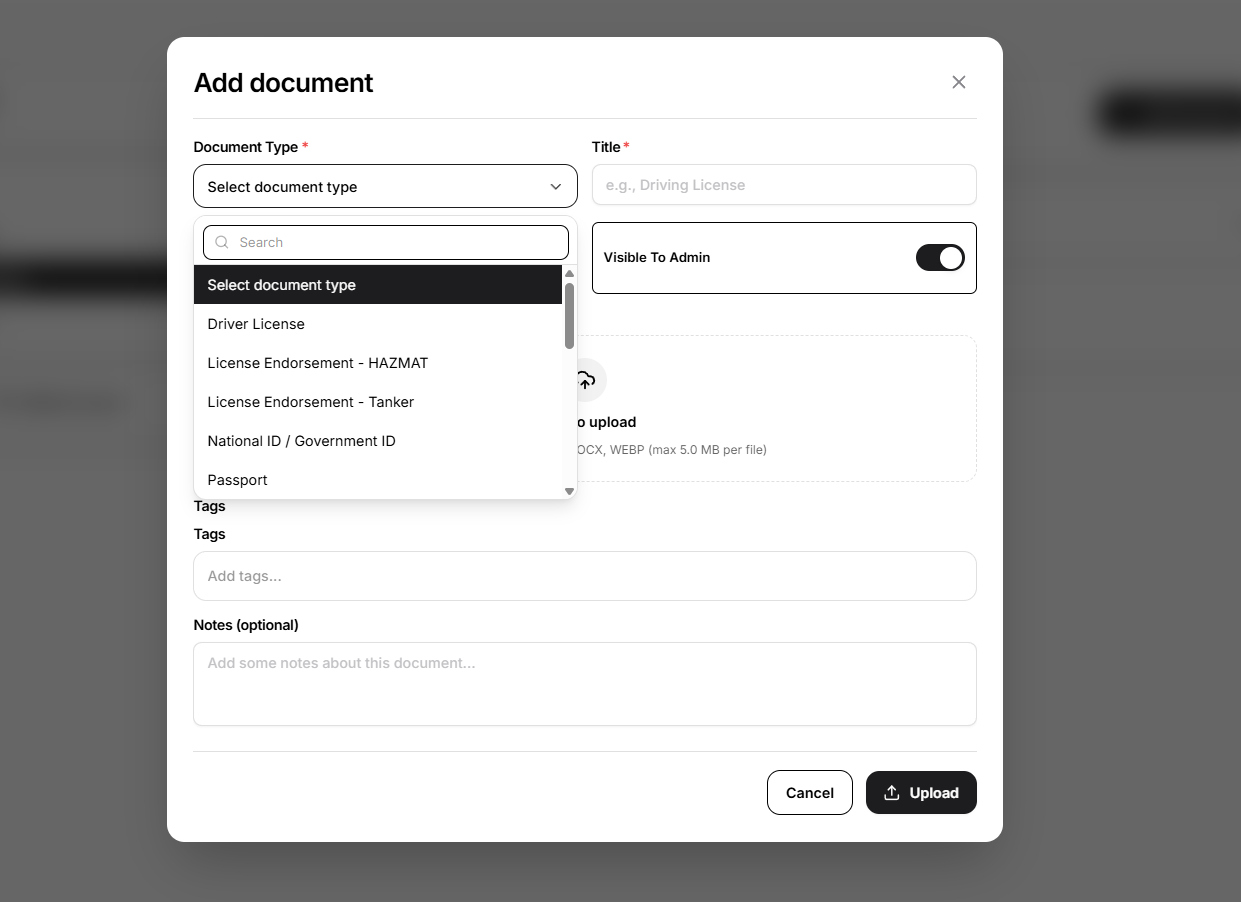
Select the document category.
Available document types may include:
- Driver License
- License Endorsement – HAZMAT
- License Endorsement – Tanker
- National ID or Government ID
- Passport
Title
Enter a clear title for the document.
Expiry Date
Select the document expiry date when applicable.
Visible to Admin
Enable this option when the document should be visible to administrators.
File
Upload the document from the device.
Supported file formats include:
- JPG
- JPEG
- PNG
- DOC
- DOCX
- WEBP
The maximum supported file size shown in the form is 5 MB per file.
Tags
Add searchable labels to help categorize the document.
Notes
Enter any additional information about the document.
Select Upload to save the document.
Suggested screenshot: Add Driver Document form
Manage Driver Documents
Open the three-dot action menu beside a document.
Available actions include:
View
Opens the uploaded document.
Edit
Updates the document information, including:
- Document type
- Title
- Expiry date
- Visibility
- File
- Tags
- Notes
Select Save Changes after editing.
Delete
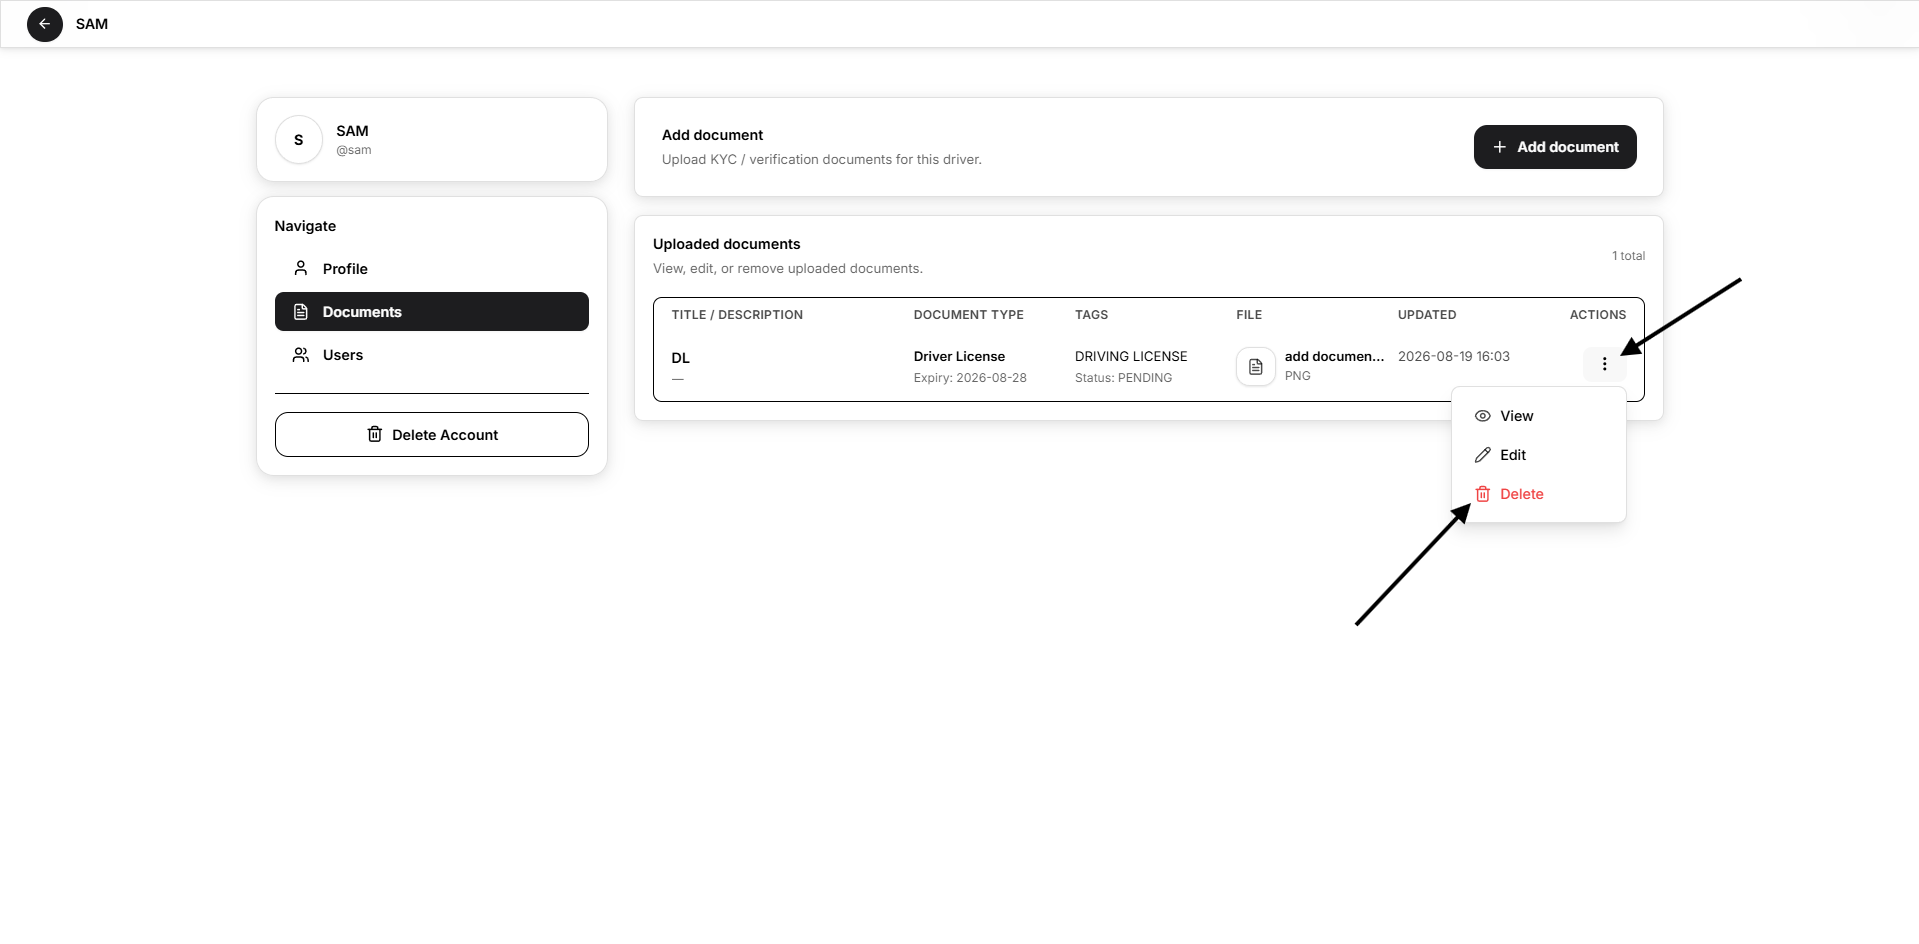
Permanently removes the document from the driver profile.
A confirmation message appears after successful deletion.
Associated Users
Open Users from the driver profile to manage users associated with the driver.
Associated users may access the driver’s available details and performance information according to their permissions.
The page displays:
- Total linked users
- User name
- Email address
- Mobile number
- Unassign action
Suggested screenshot: Associated Users page
Assign a User to a Driver
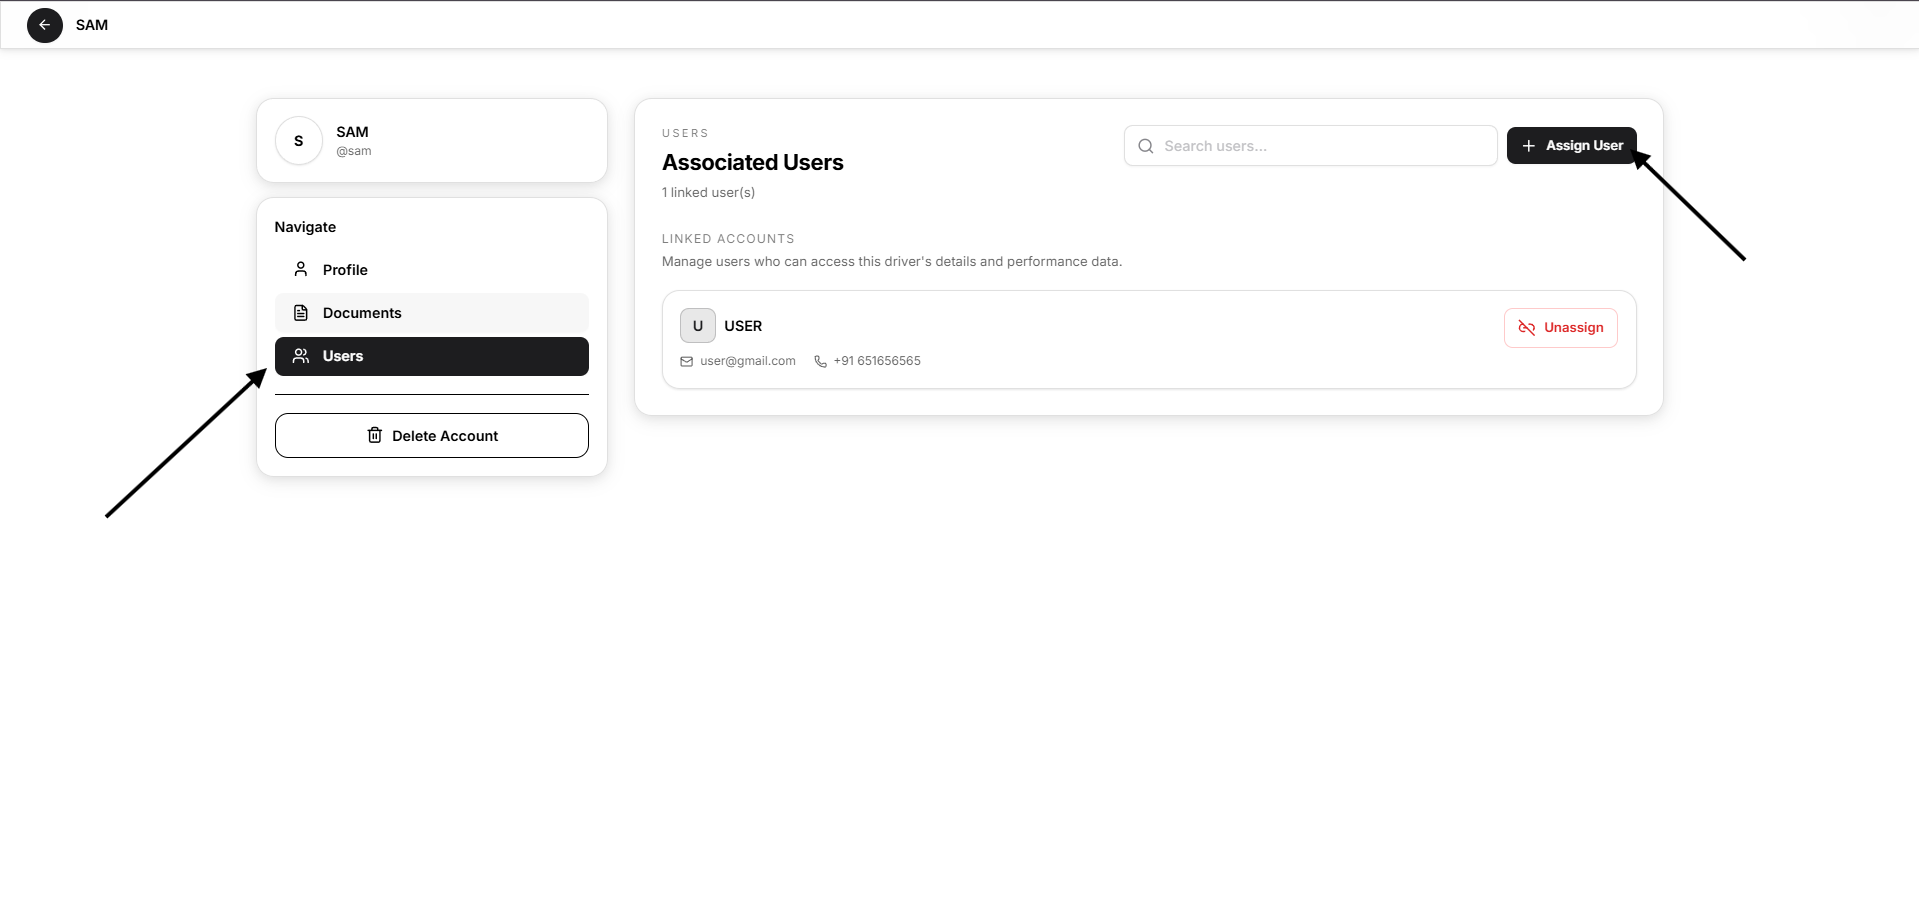
Select Assign User.
The Assign User dialog displays users who are available to be linked with the driver.
- Search or browse the available users.
- Select a user.
- Select Assign.
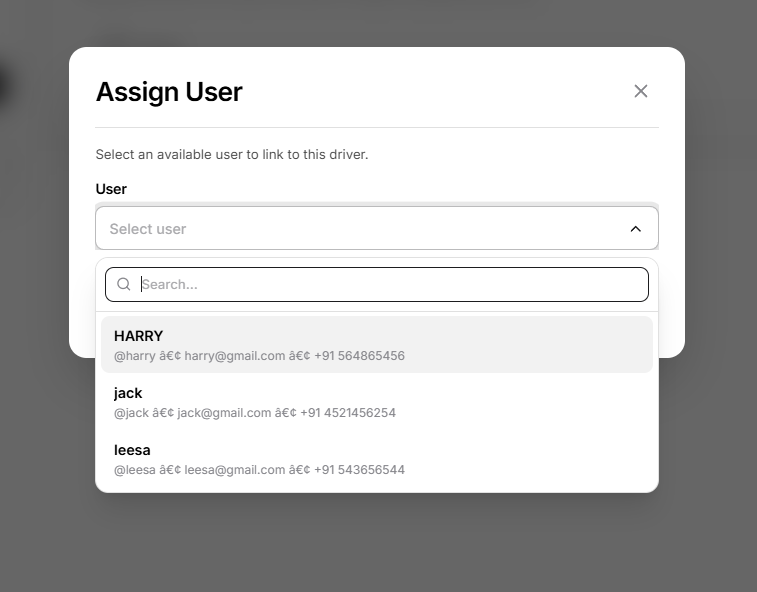
The selected user appears in the Associated Users list.
A confirmation message appears after the driver is linked successfully.
Suggested screenshot: Assign User dialog
Unassign a User
Select Unassign beside an associated user.
The relationship between the driver and user is removed.
The driver account and user account are not deleted.
A confirmation message appears after the user is unlinked successfully.
Delete a Driver
Select Delete Account from the driver profile.
A confirmation dialog appears with the message that the driver will be permanently deleted.
Select:
- Cancel to keep the driver account
- Delete to permanently remove the driver
After successful deletion, Open VTS returns to the Driver Management page and displays a confirmation message.
Suggested screenshot: Delete Driver confirmation
Warning: Driver deletion cannot be undone. Deactivate the account instead when historical or compliance information may still be required.