
System Configuration Settings
Configure localization preferences, application-wide behaviour, payment gateway credentials, data retention, and user-facing legal policies in Open VTS.
Last updated August 19, 2026
Superadmin System Settings
The System Settings section controls how Open VTS appears and behaves across the platform.
Following setting are covered saparately
- Profile settings
- White lable
- API config-Firebase Cloud Messaging
- API config-Meta WhatsApp Business
- API config-Reverse Geocoding
- API config-Google Auth SSO
- API config-Open Router
- SMTP
Following Settings are covered in this page
- Localization Settings
- Application Settings
- Payment Gateway
- Update User Policy
These settings apply at the platform level and should be managed only by an authorized Superadmin.
1. Localization Settings
Go to:
Settings → Localization Settings
Localization Settings control the language, date and time presentation, measurement units, theme, timezone, and default map location used across Open VTS.
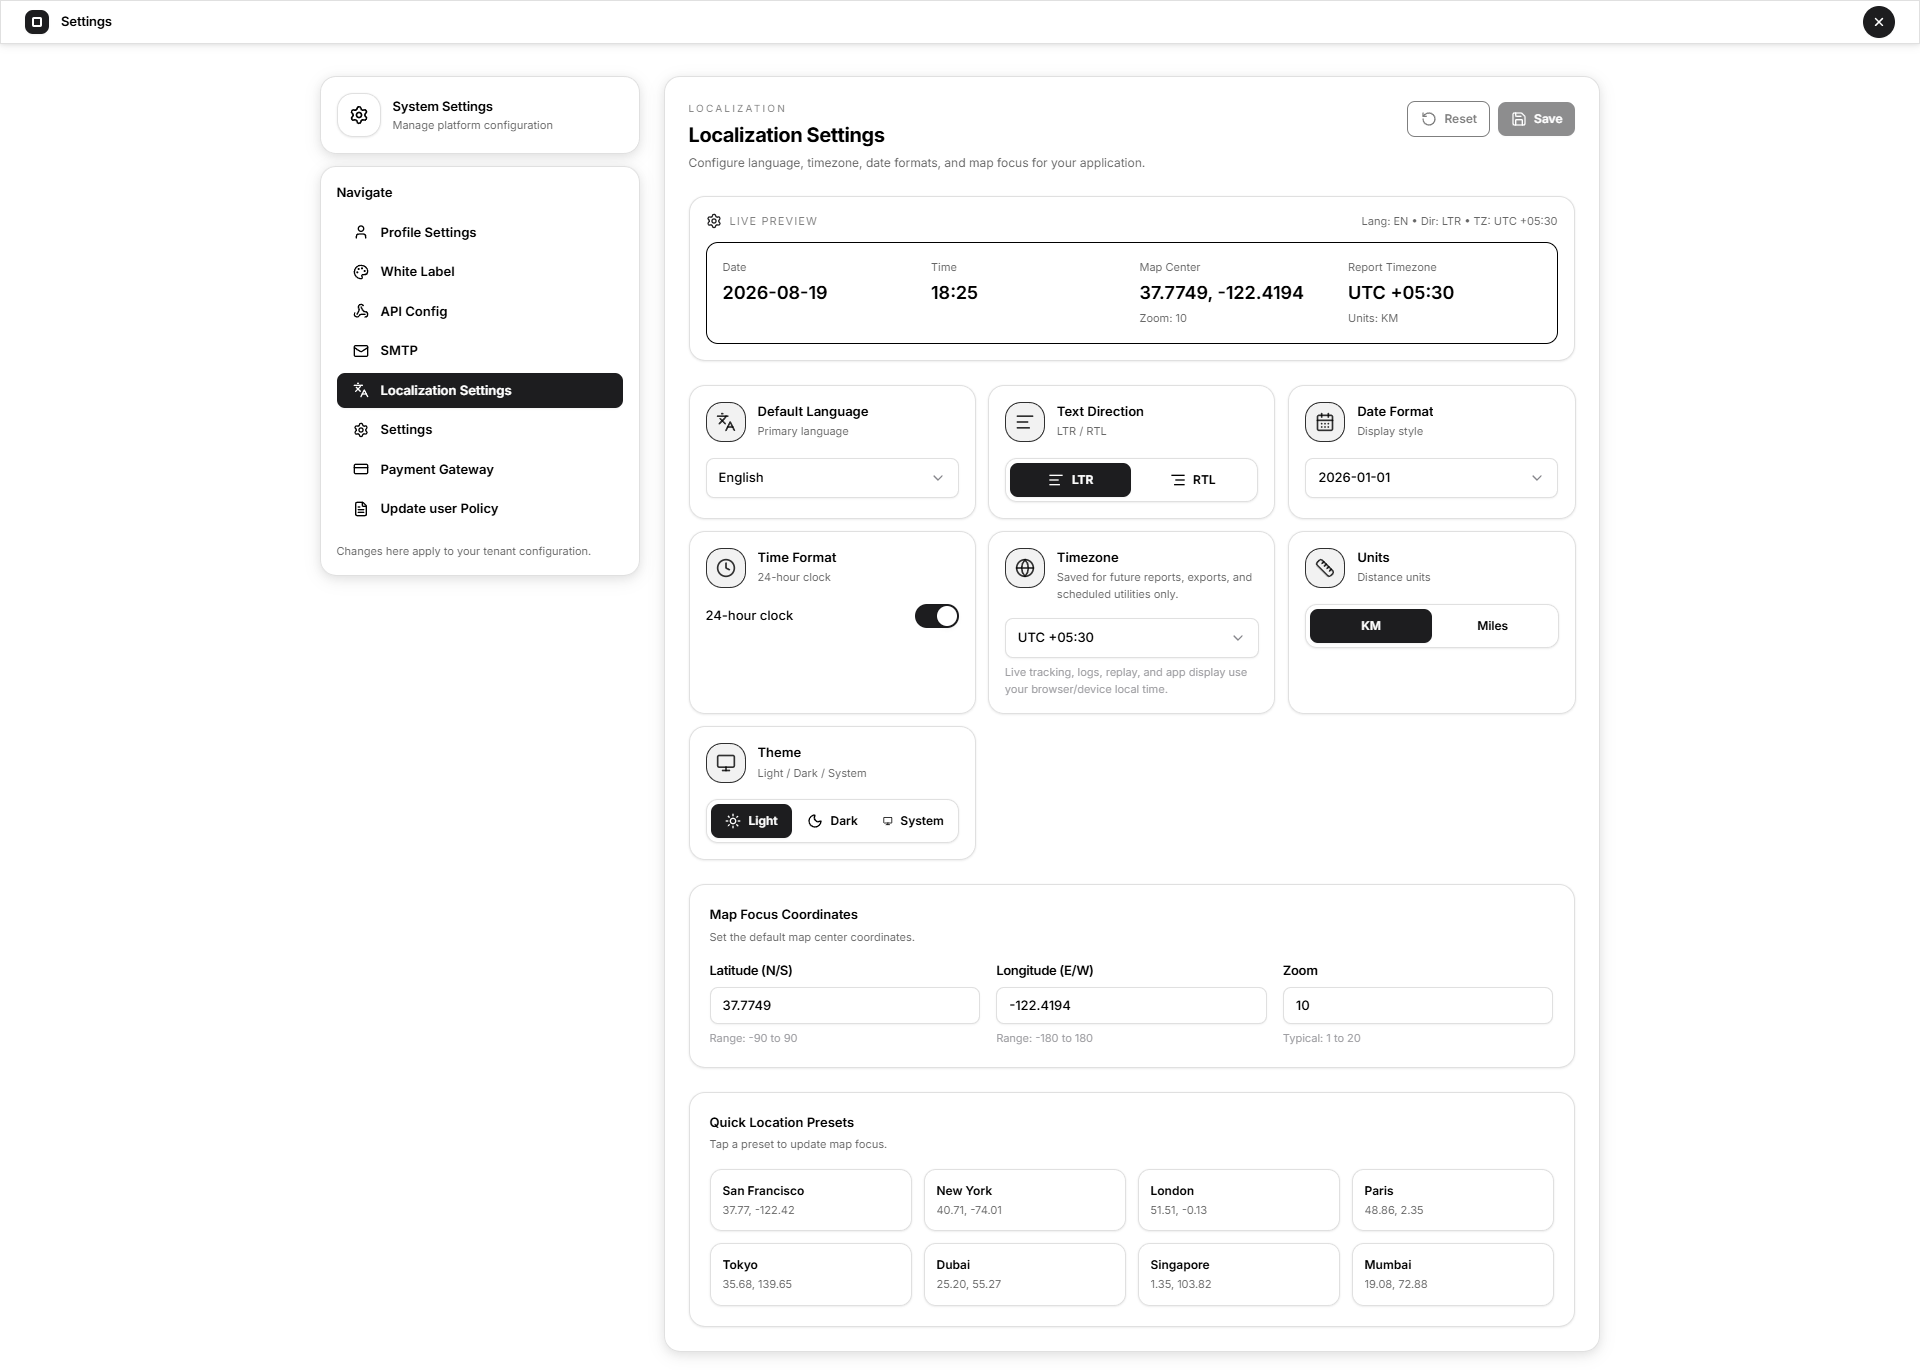
Live Preview
The Live Preview shows how the current settings will appear before they are saved.
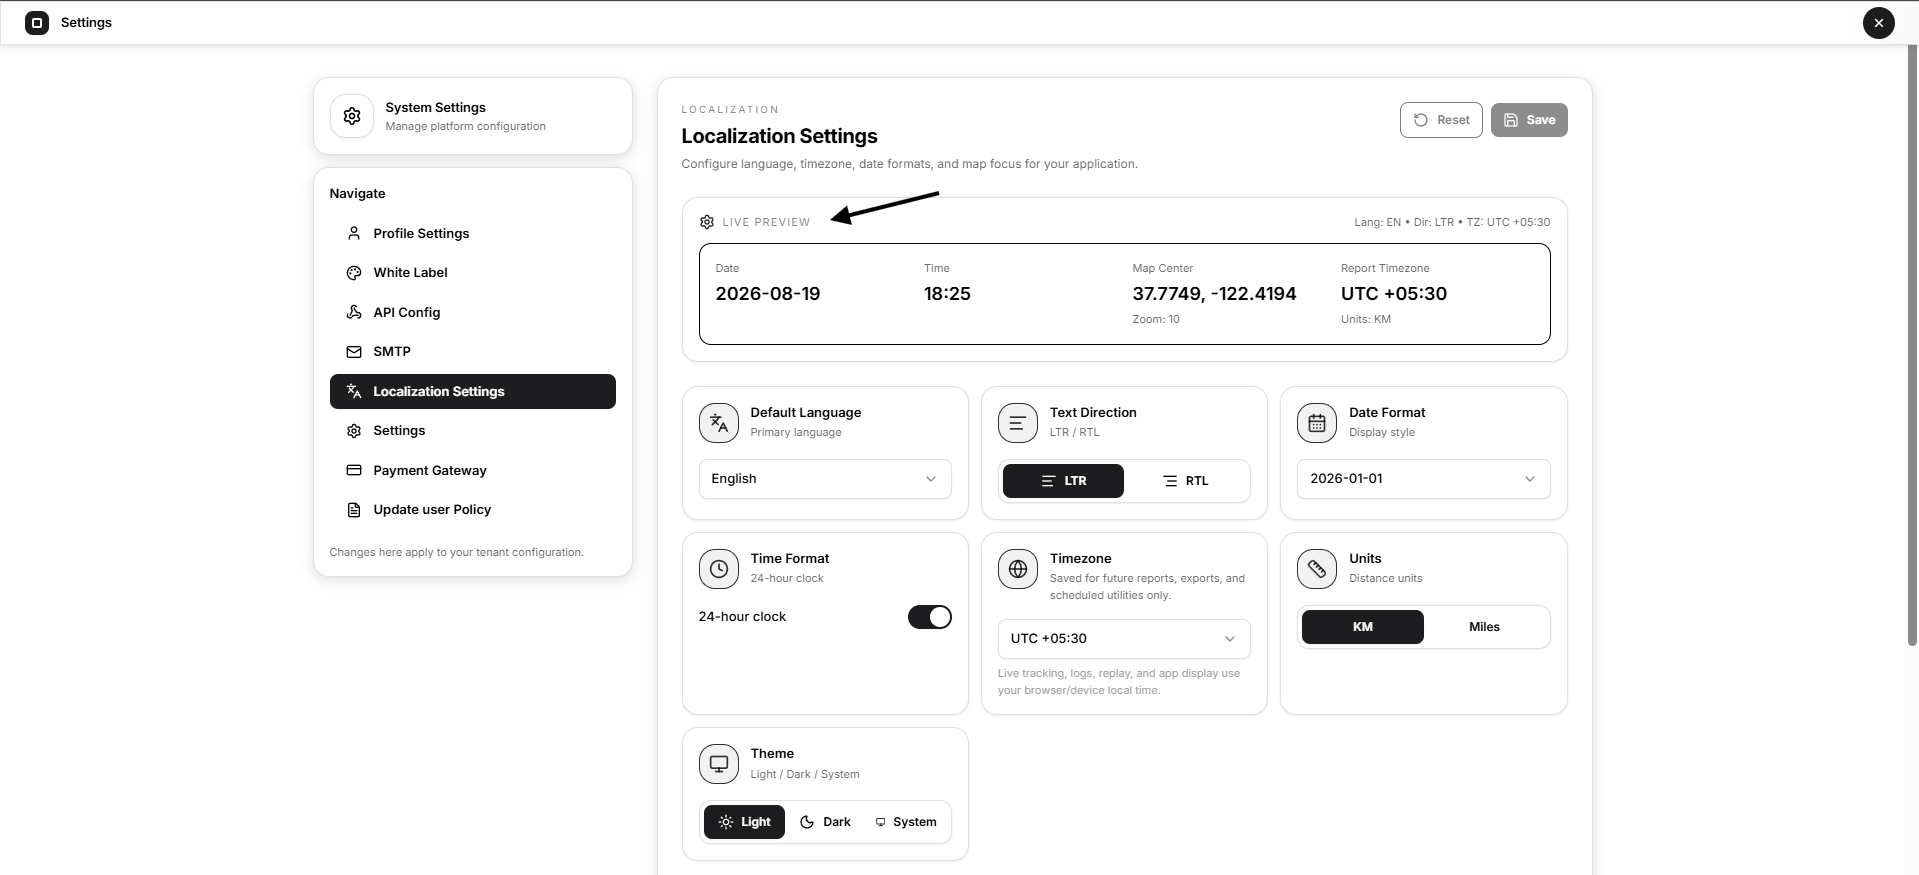
It displays:
- Date
- Time
- Default map centre
- Report timezone
- Distance units
- Current language and text direction
Use the preview to confirm that the configuration is correct.
Default Language
Select the primary language used by the platform.
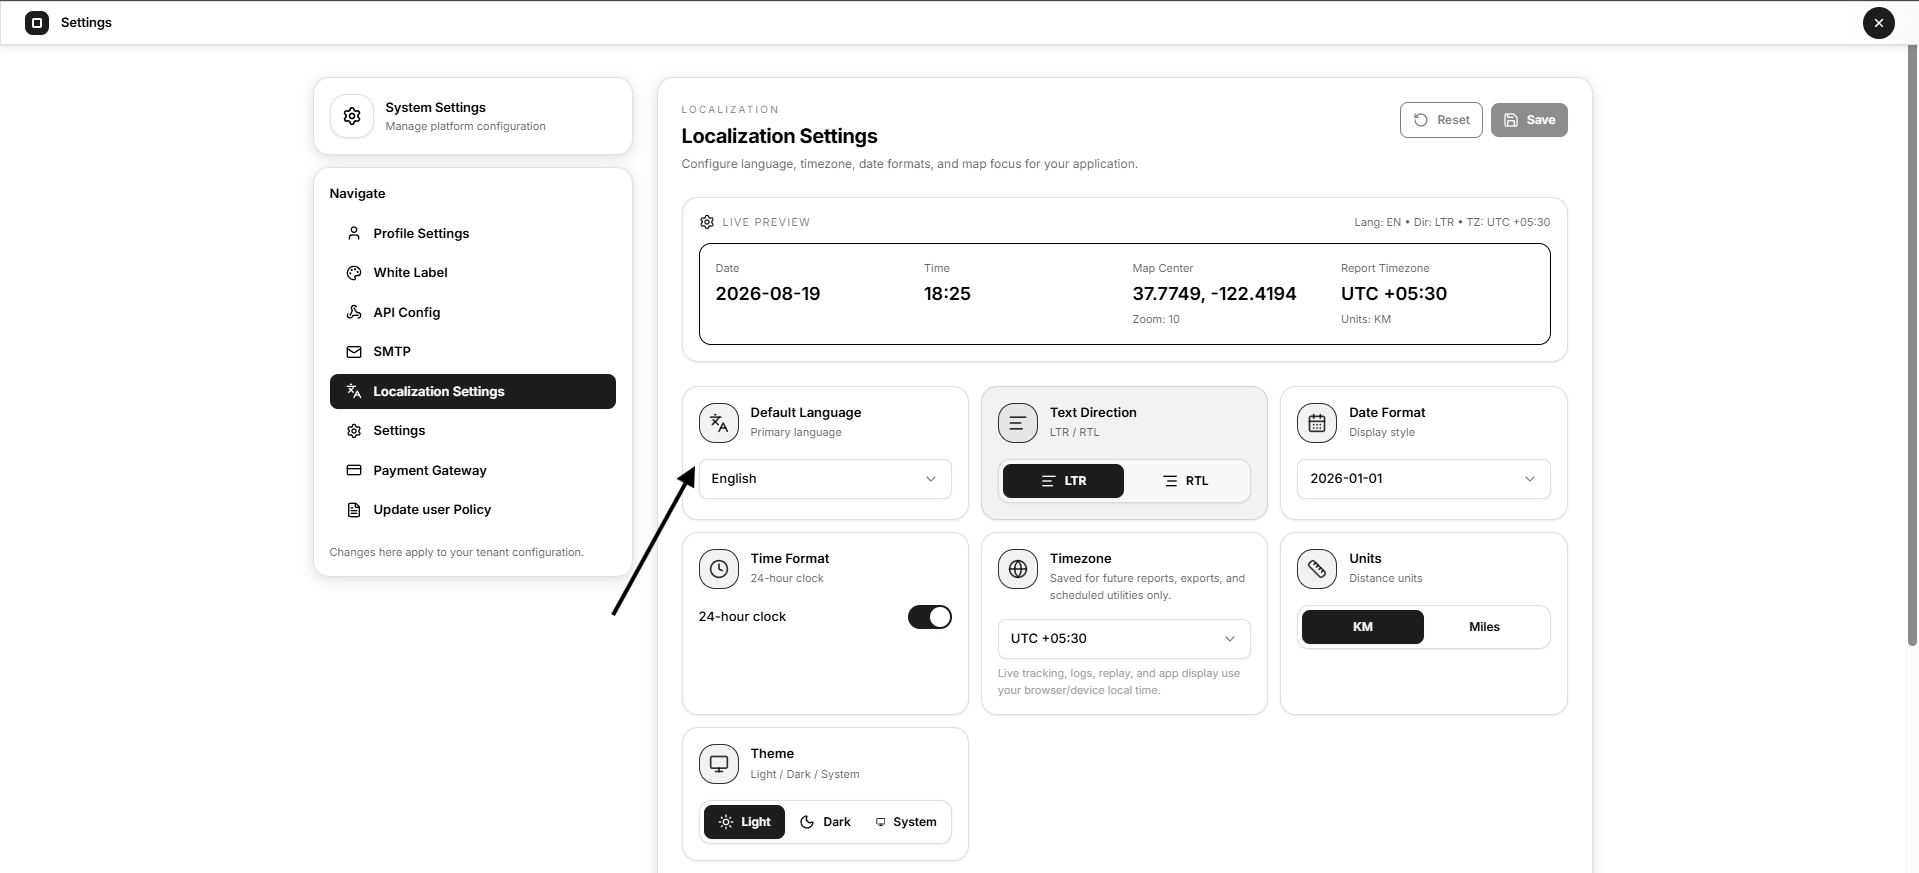
Changing this setting updates the default interface language where translations are available.
Text Direction
Choose how text is displayed:
- LTR: Left to right
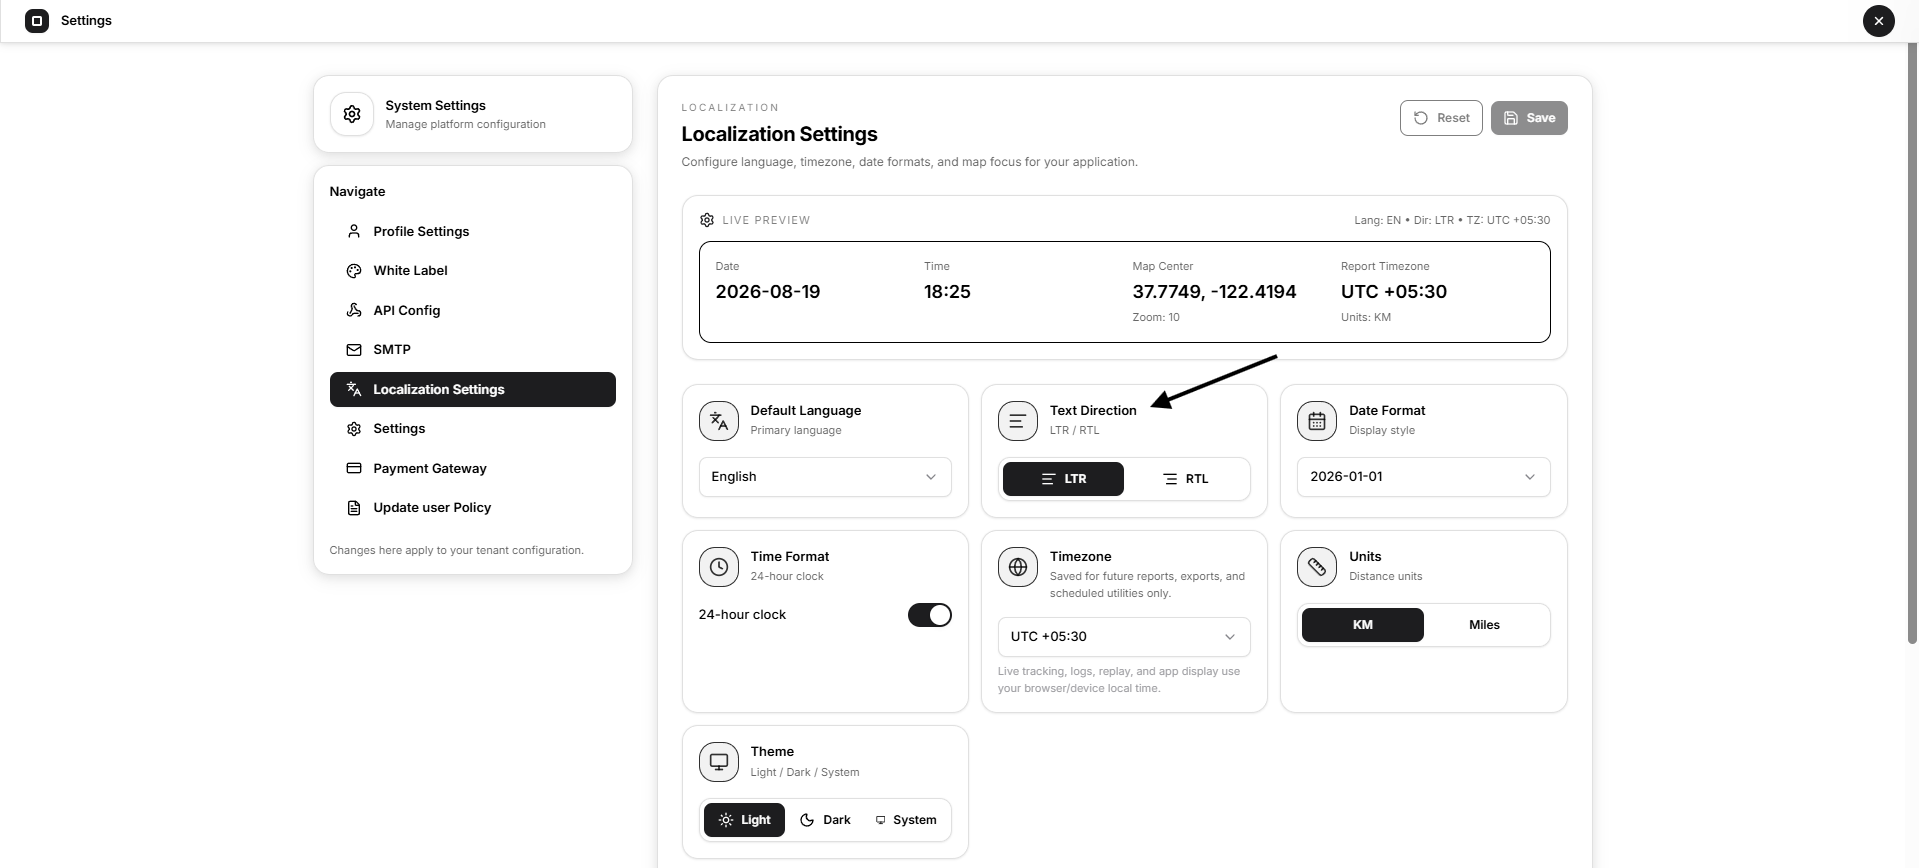
- RTL: Right to left
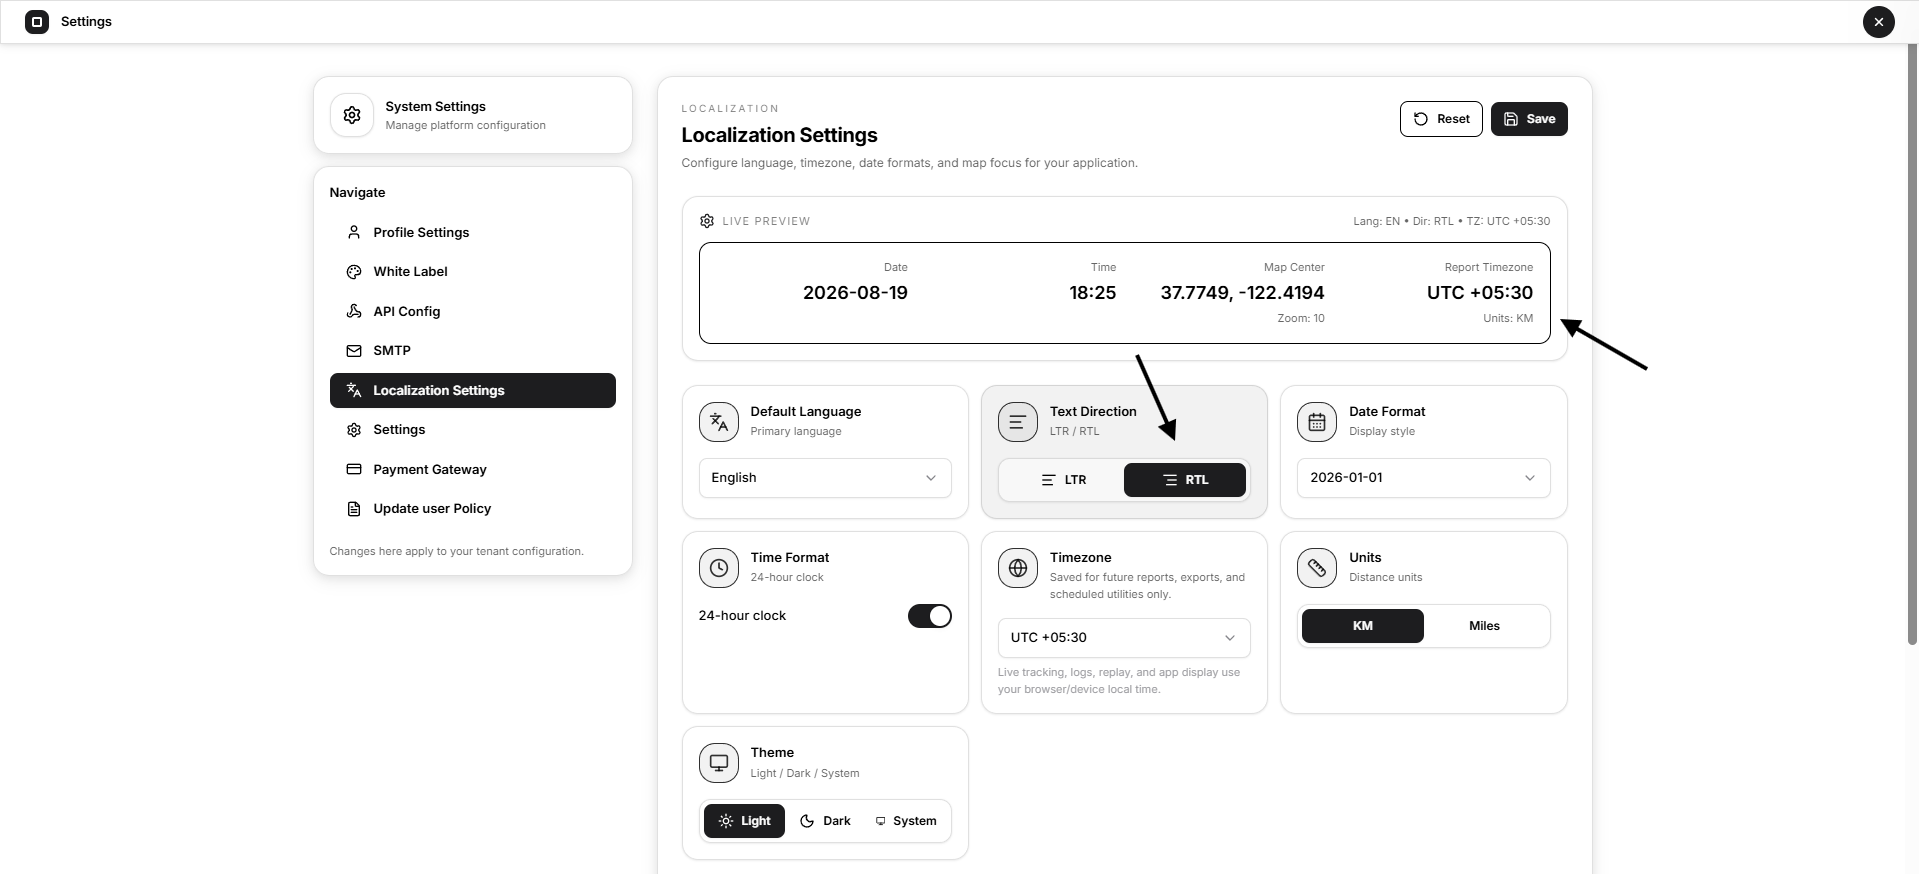
Use RTL for languages that are written from right to left.
Date Format
Select the preferred date display format.
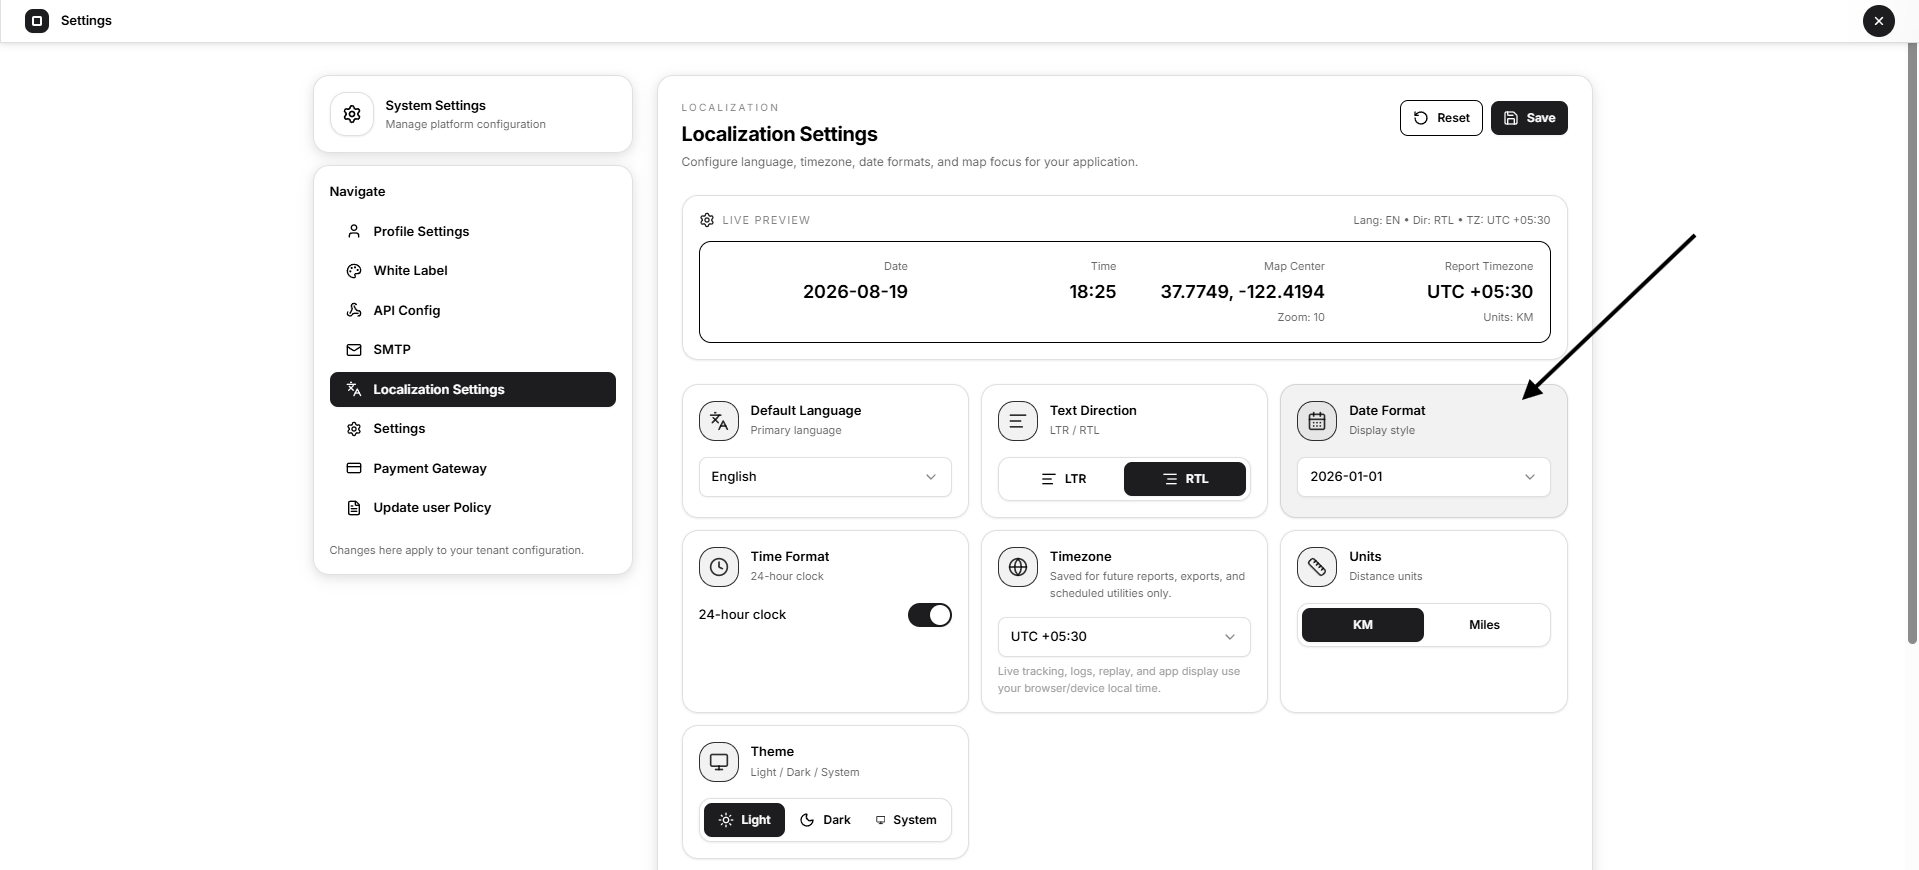
For example:
- 01 January 2026
- 2026-01-01
- 01/01/2026
The selected format is used where dates are displayed throughout the platform.
Time Format
Use the 24-hour clock toggle to choose between:
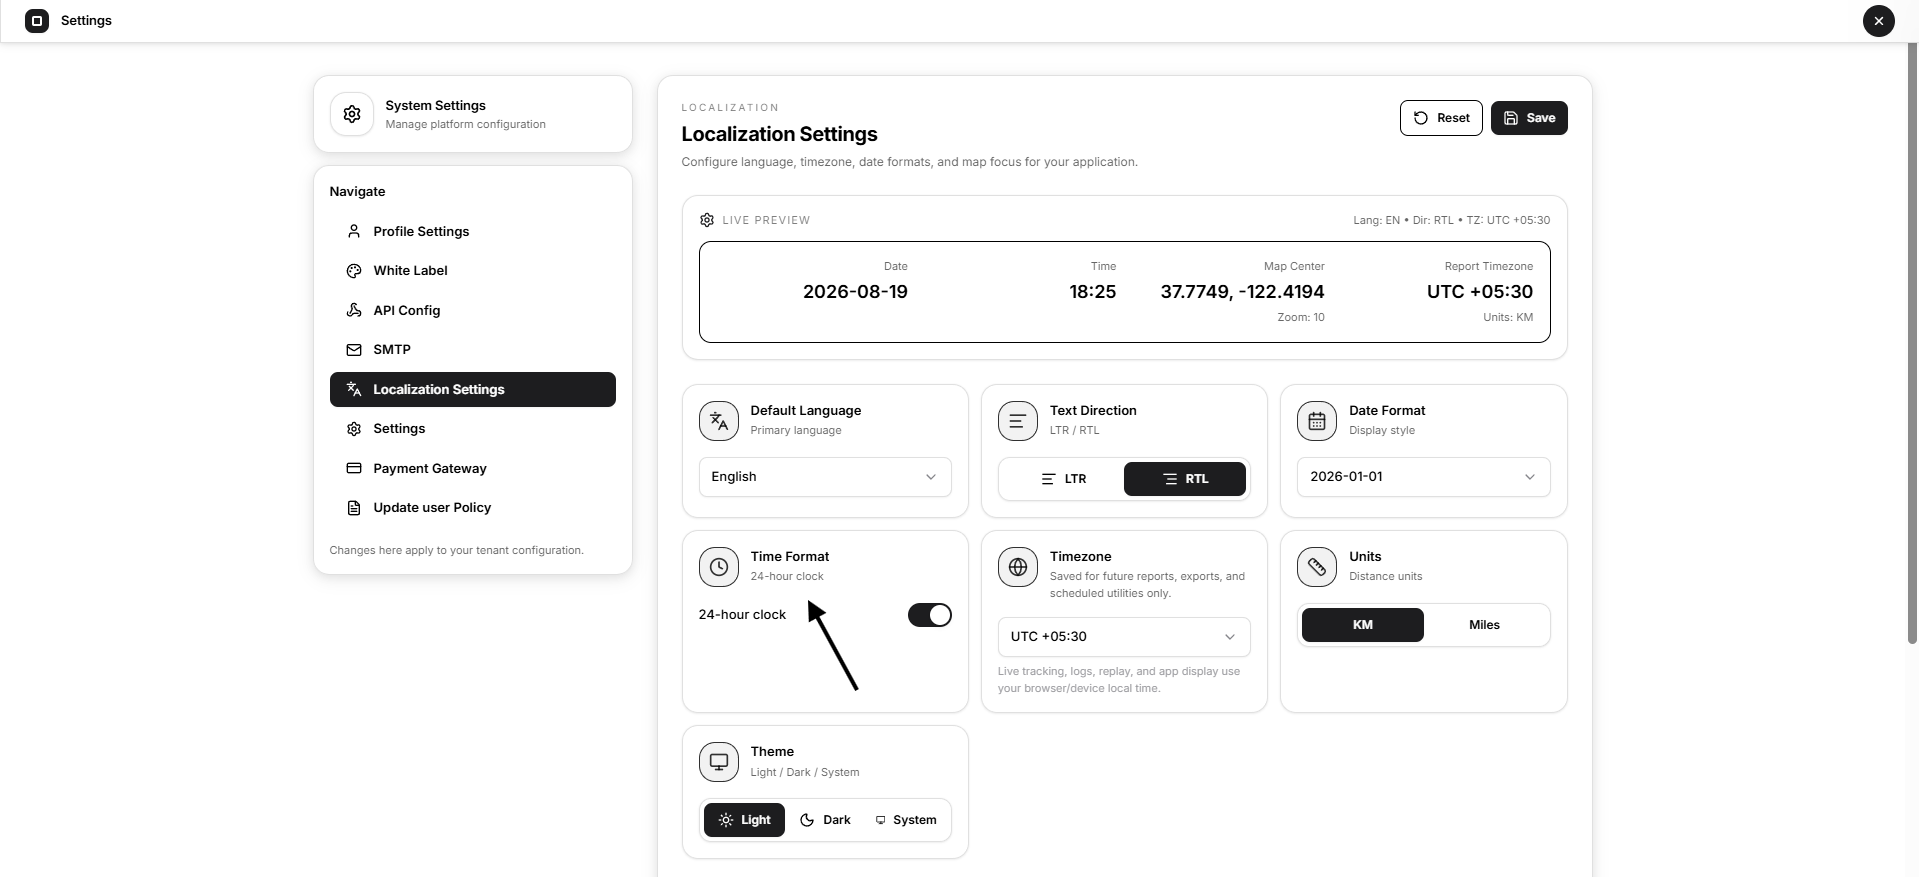
- 24-hour time, such as 18:30
- 12-hour time, such as 6:30 PM
Timezone
Select the timezone used for:
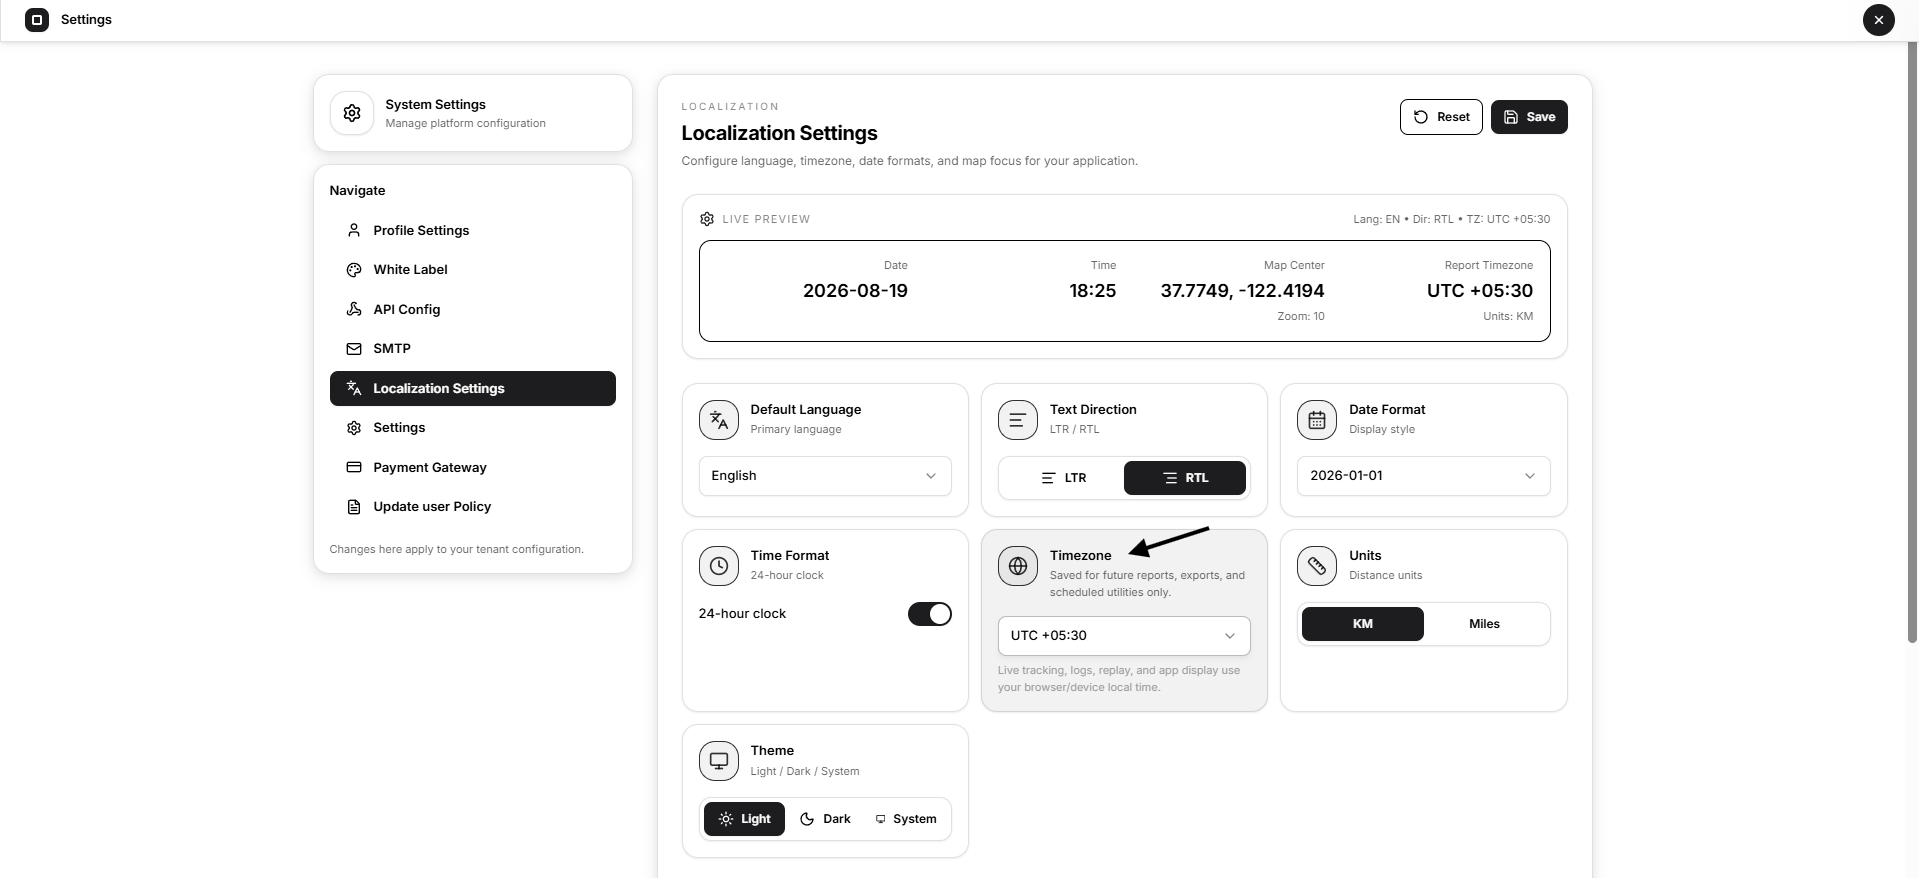
- Reports
- Data exports
- Scheduled platform utilities
Live tracking, logs, replay, and other real-time interface elements may continue to use the browser or device’s local time.
Distance Units
Choose the measurement unit used across the platform:
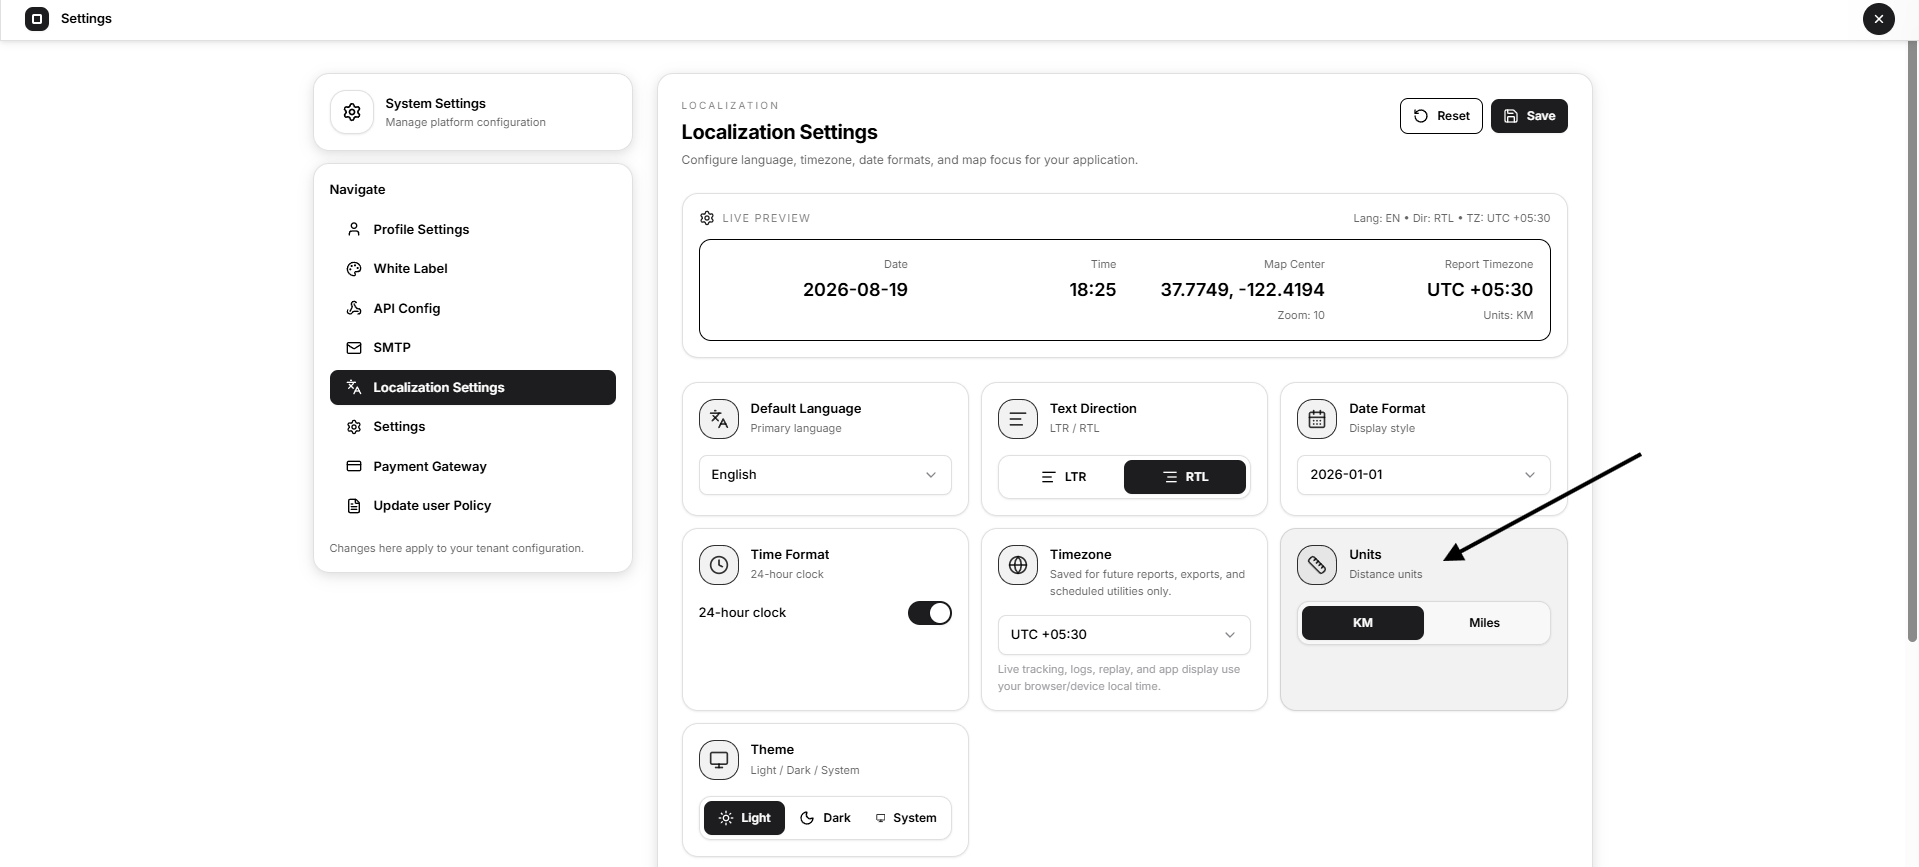
- KM
- Miles
This setting affects distance and speed values displayed in maps, reports, histories, and other relevant sections.
Theme
Select the default appearance:
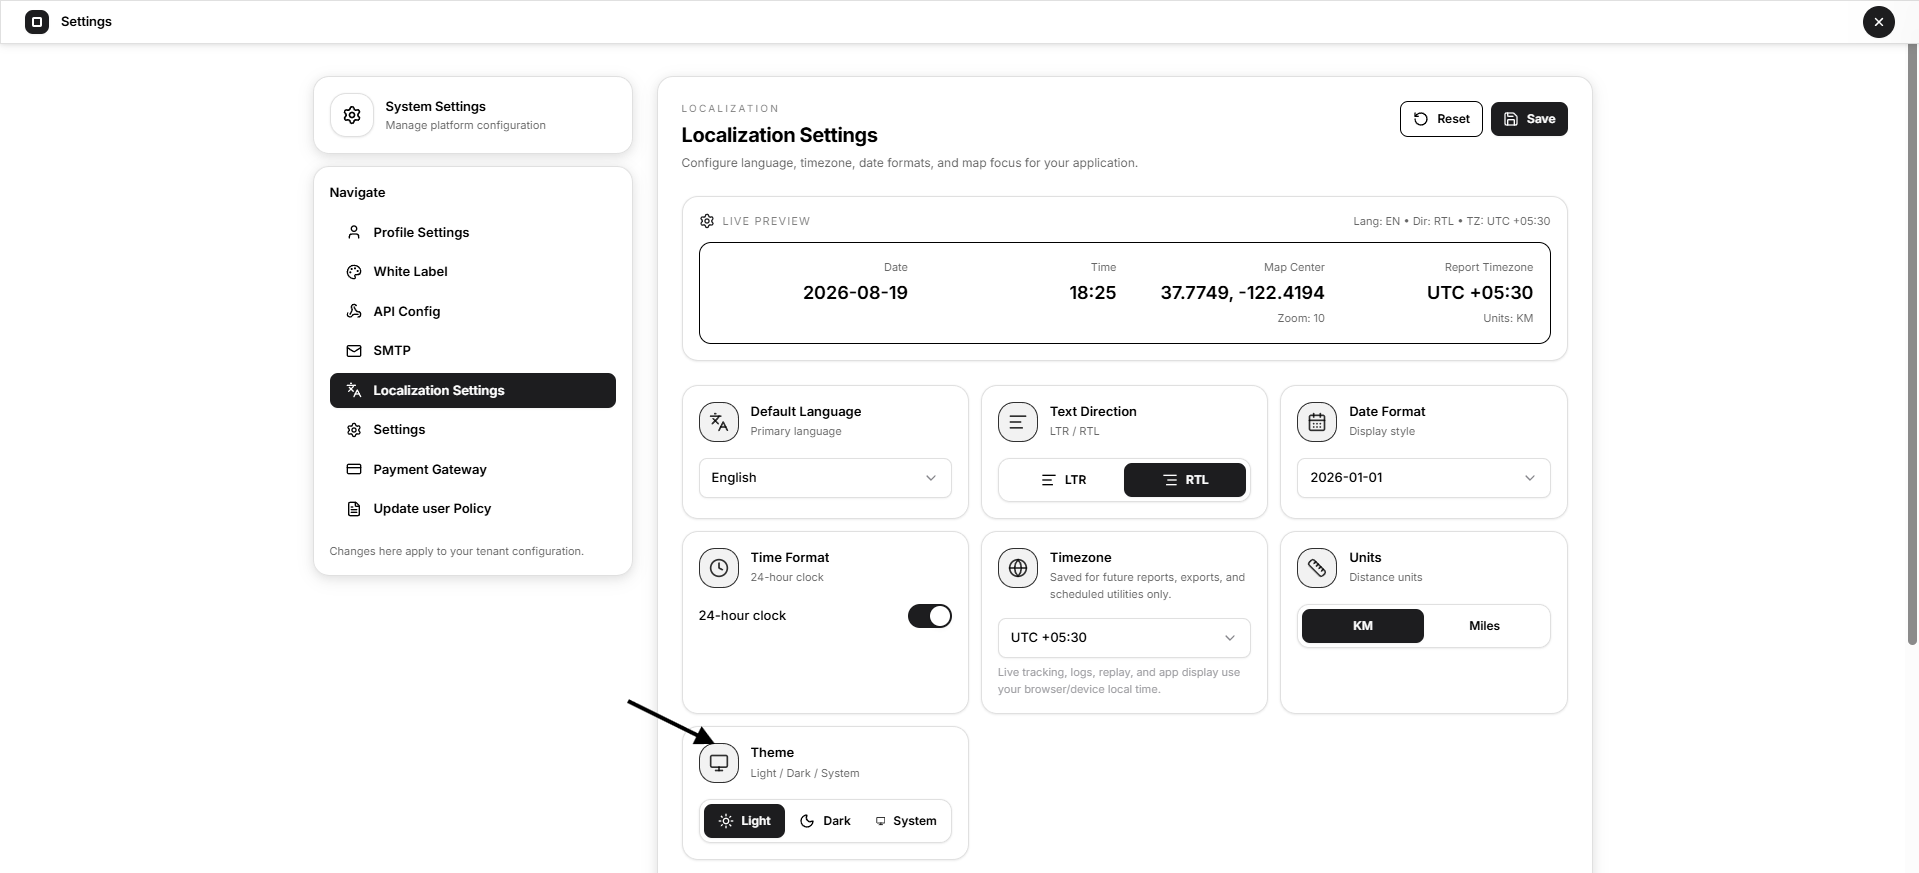
- Light
- Dark
- System
The System option follows the appearance setting of the user’s device or browser.
Map Focus Coordinates
Set the default location displayed when the map opens.
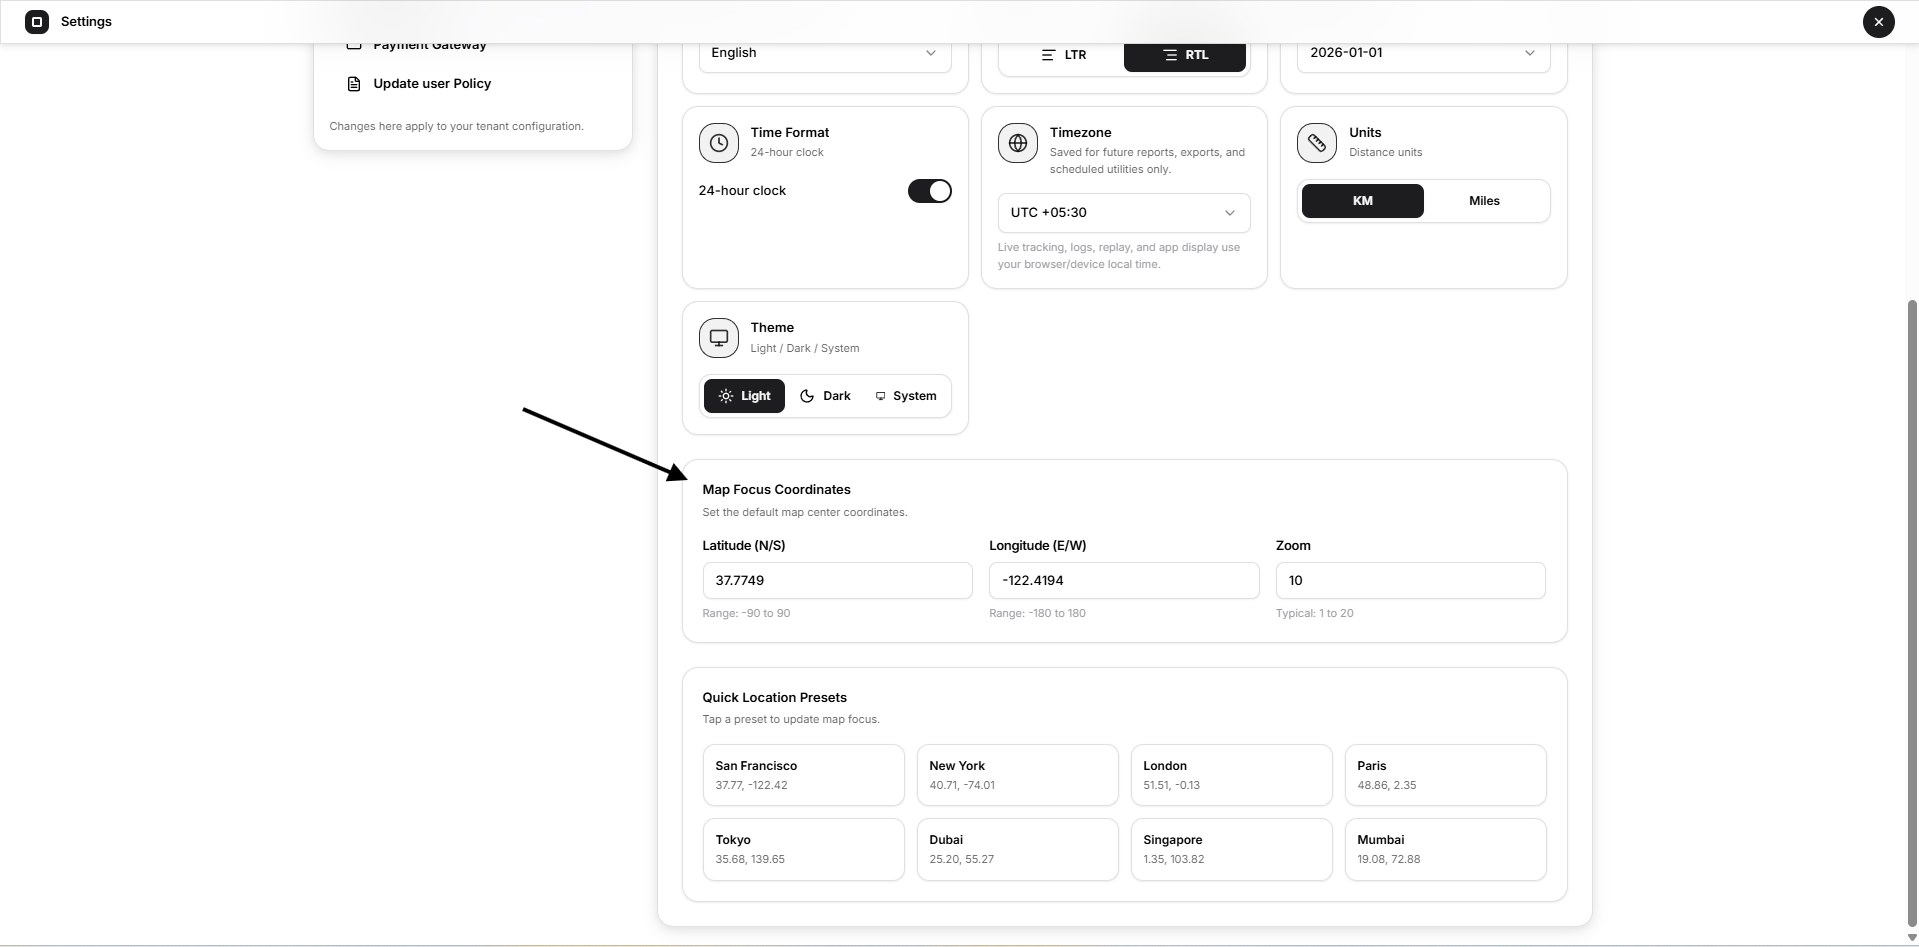
Enter:
- Latitude
- Longitude
- Zoom level
The zoom level controls how closely the map is focused on the selected location.
A lower zoom value shows a larger area, while a higher value shows a more detailed local view.
Quick Location Presets
Open VTS provides predefined locations such as:
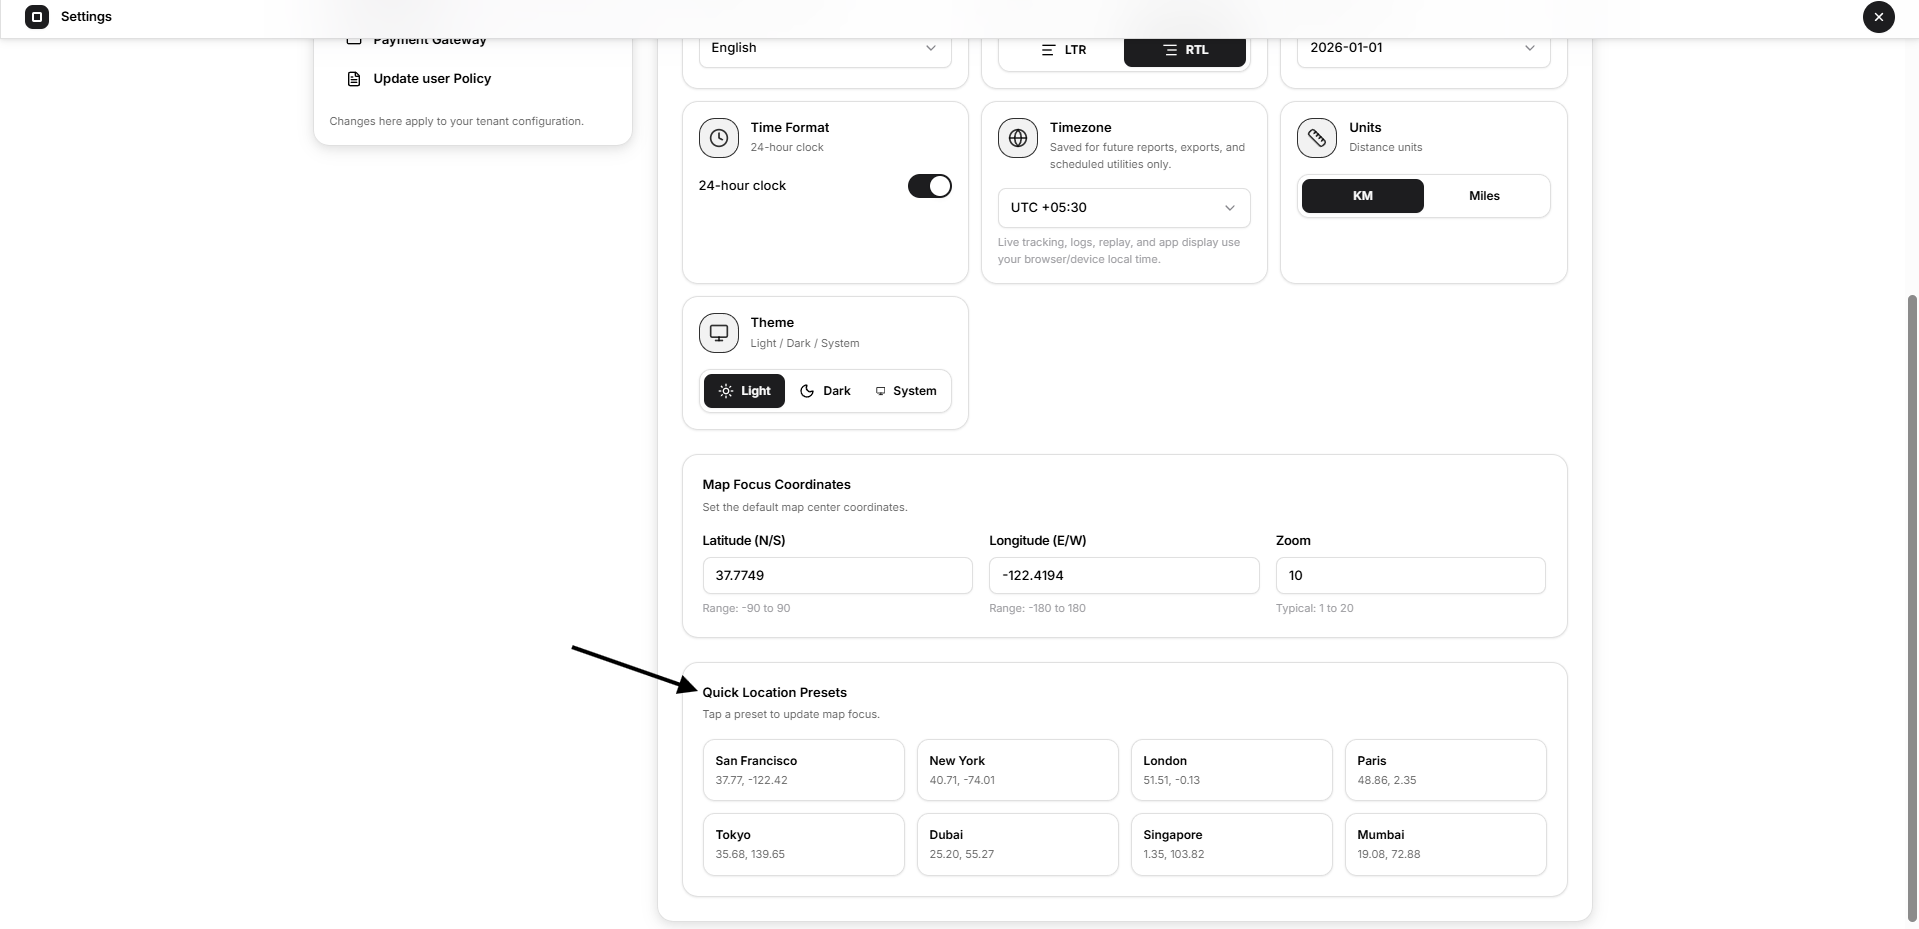
- San Francisco
- New York
- London
- Paris
- Tokyo
- Dubai
- Singapore
- Mumbai
Select a preset to automatically fill the map focus coordinates.
You can then adjust the latitude, longitude, or zoom manually.
Save or Reset Localization Settings
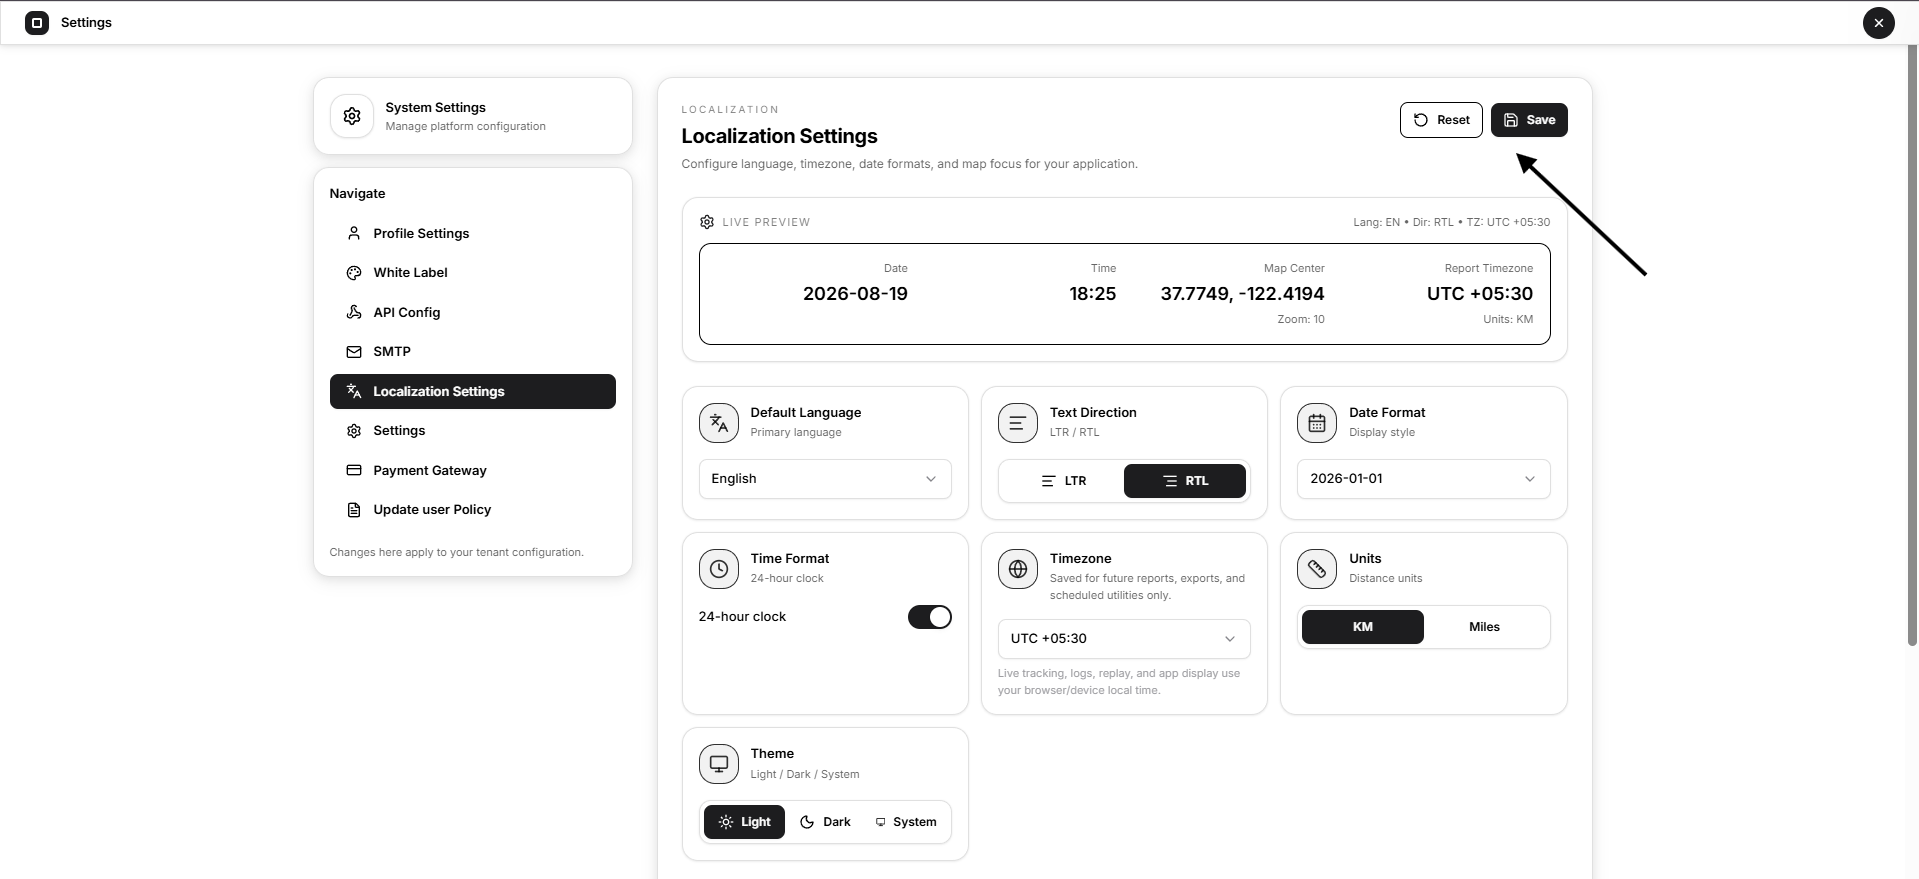
Select Save to apply the changes.
Select Reset to return the fields to their previously saved values.
2. Application Settings
Go to:
Settings → Settings
The Application Settings page controls platform-wide behaviour, signup access, reverse geocoding precision, database backup retention, and operational-data cleanup.
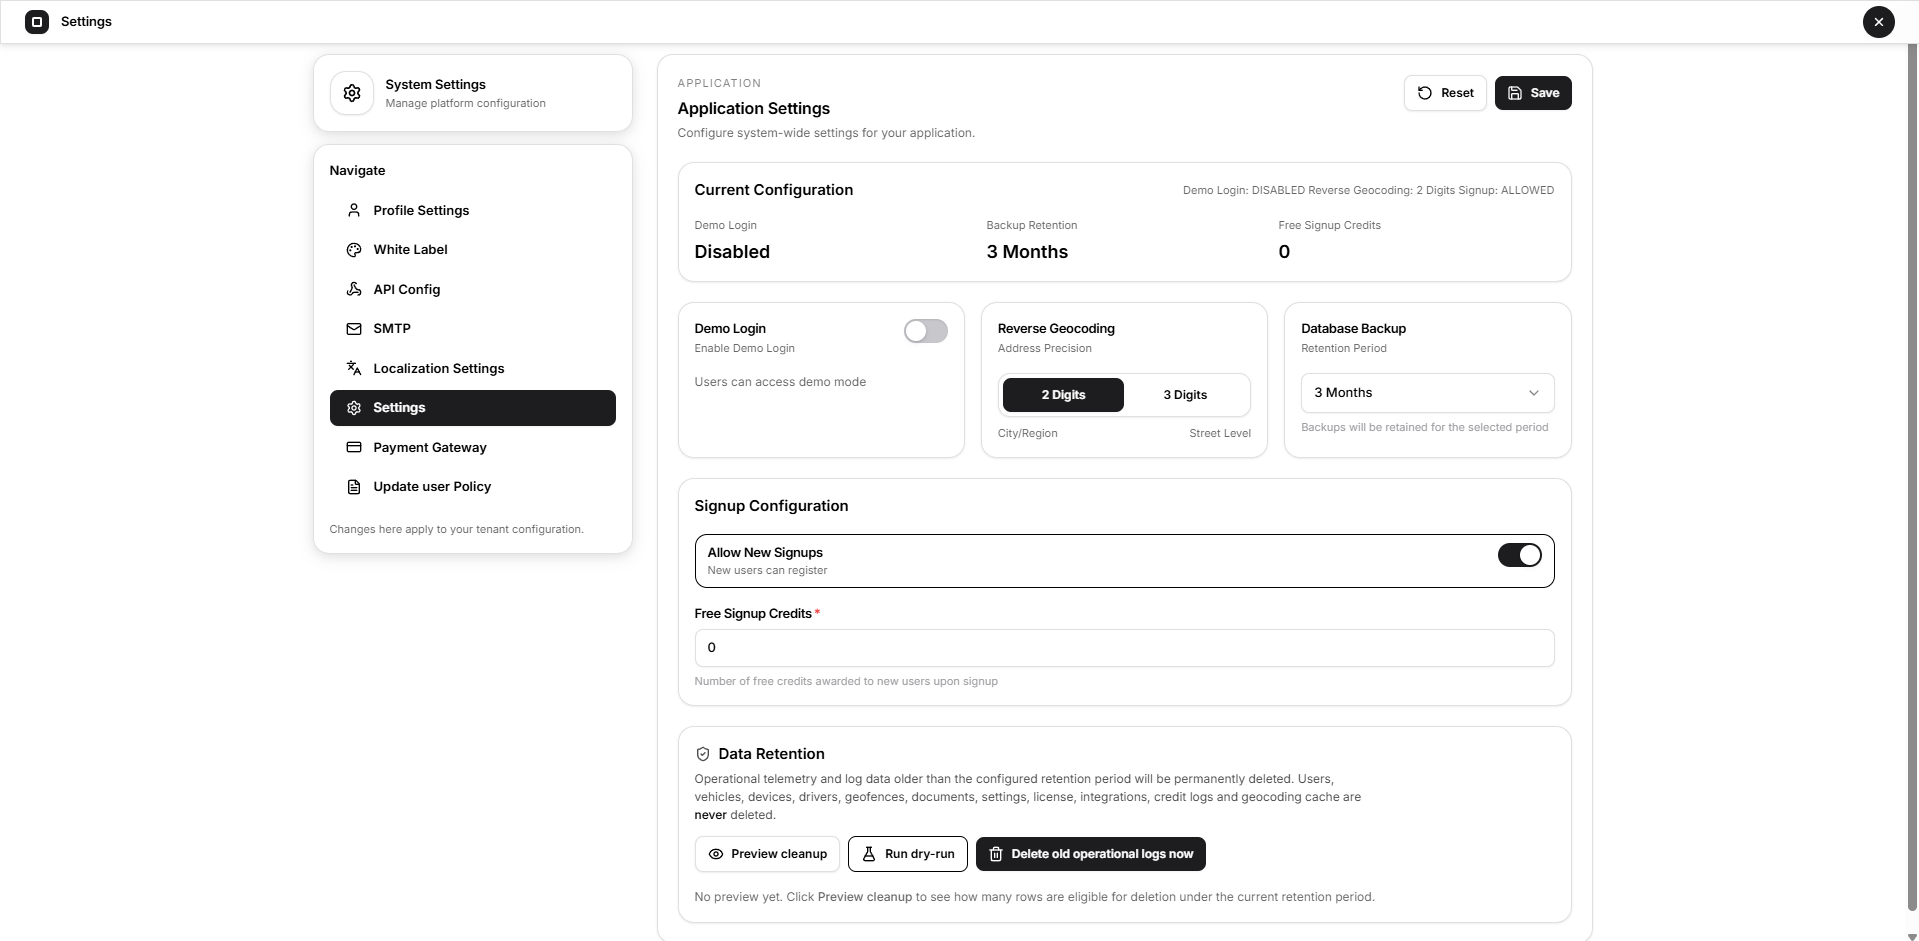
Current Configuration
The Current Configuration panel provides a summary of important settings, including:
- Demo Login status
- Backup retention period
- Free signup credits
- Reverse geocoding precision
- Signup availability
This summary helps the Superadmin review the active configuration quickly.
Demo Login
Use the Demo Login toggle to enable or disable demo access.
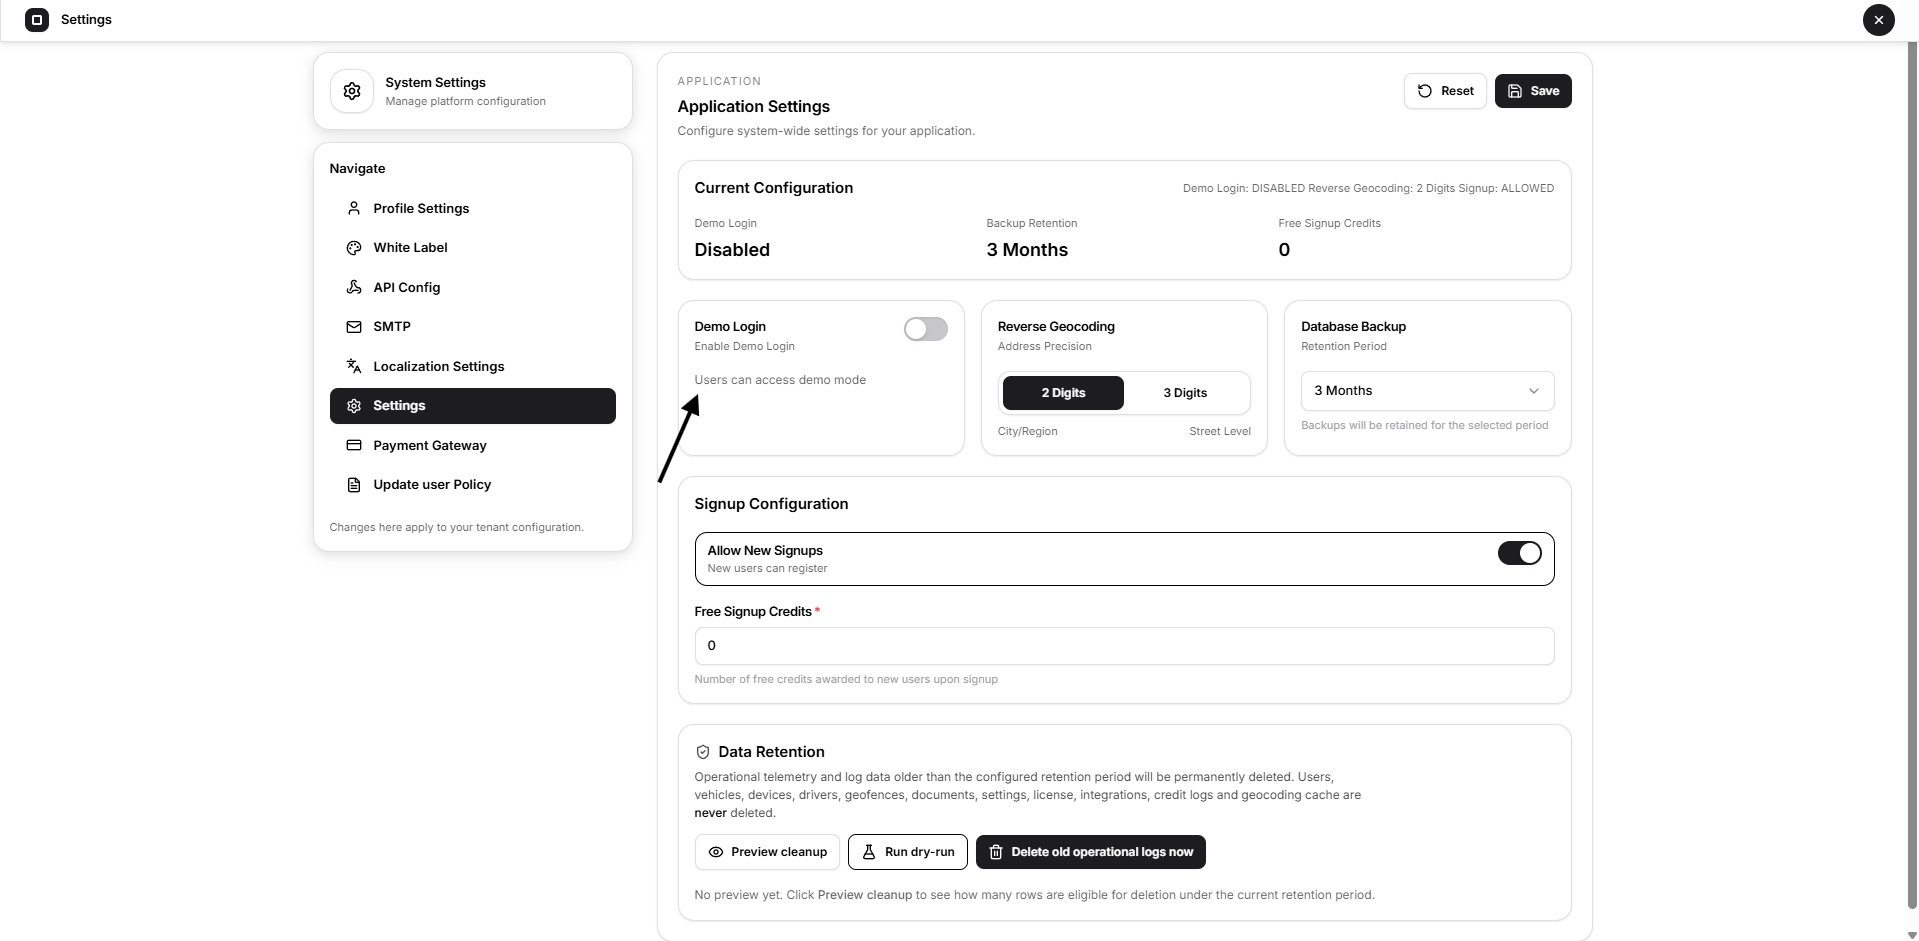
When enabled, users may access the available demo environment without using a standard production account.
Disable this option when demo access is not required.
Reverse Geocoding Precision
Reverse geocoding converts vehicle coordinates into readable addresses.
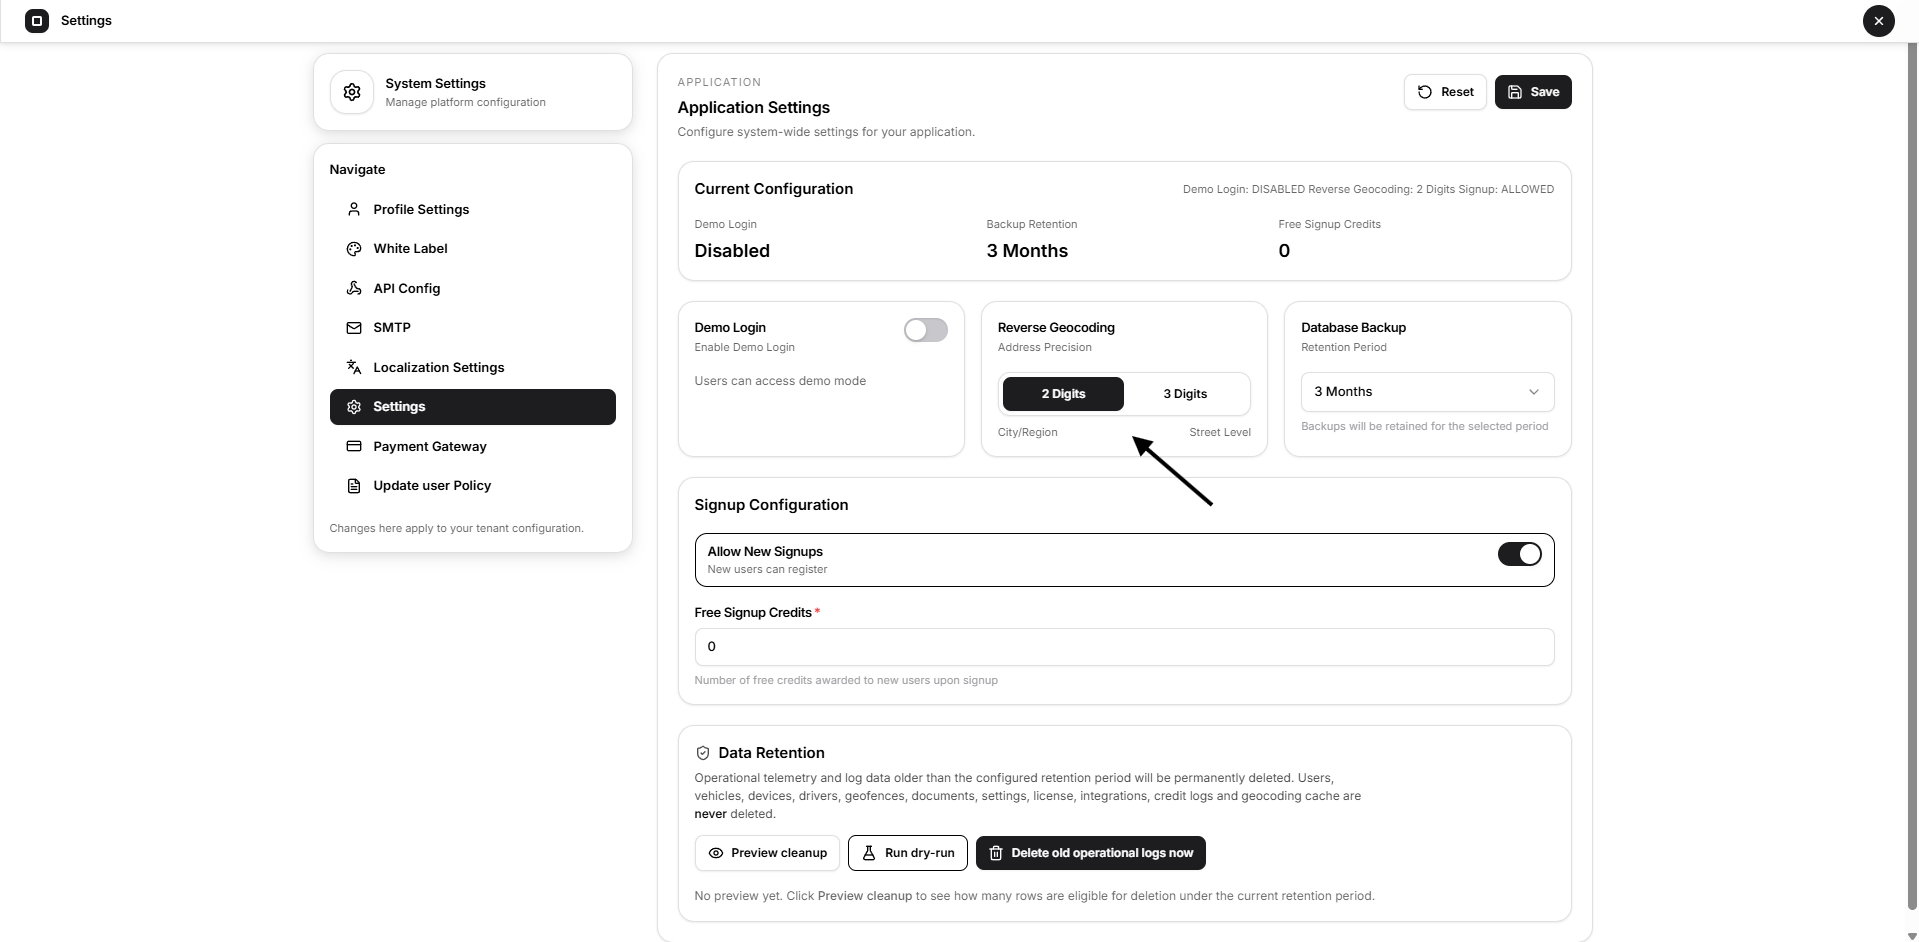
Select the required precision:
- 2 Digits: General city or regional address
- 3 Digits: More detailed street-level address
Higher precision may produce more detailed location results but can also increase geocoding usage.
Database Backup Retention
Select how long system backups should be retained.
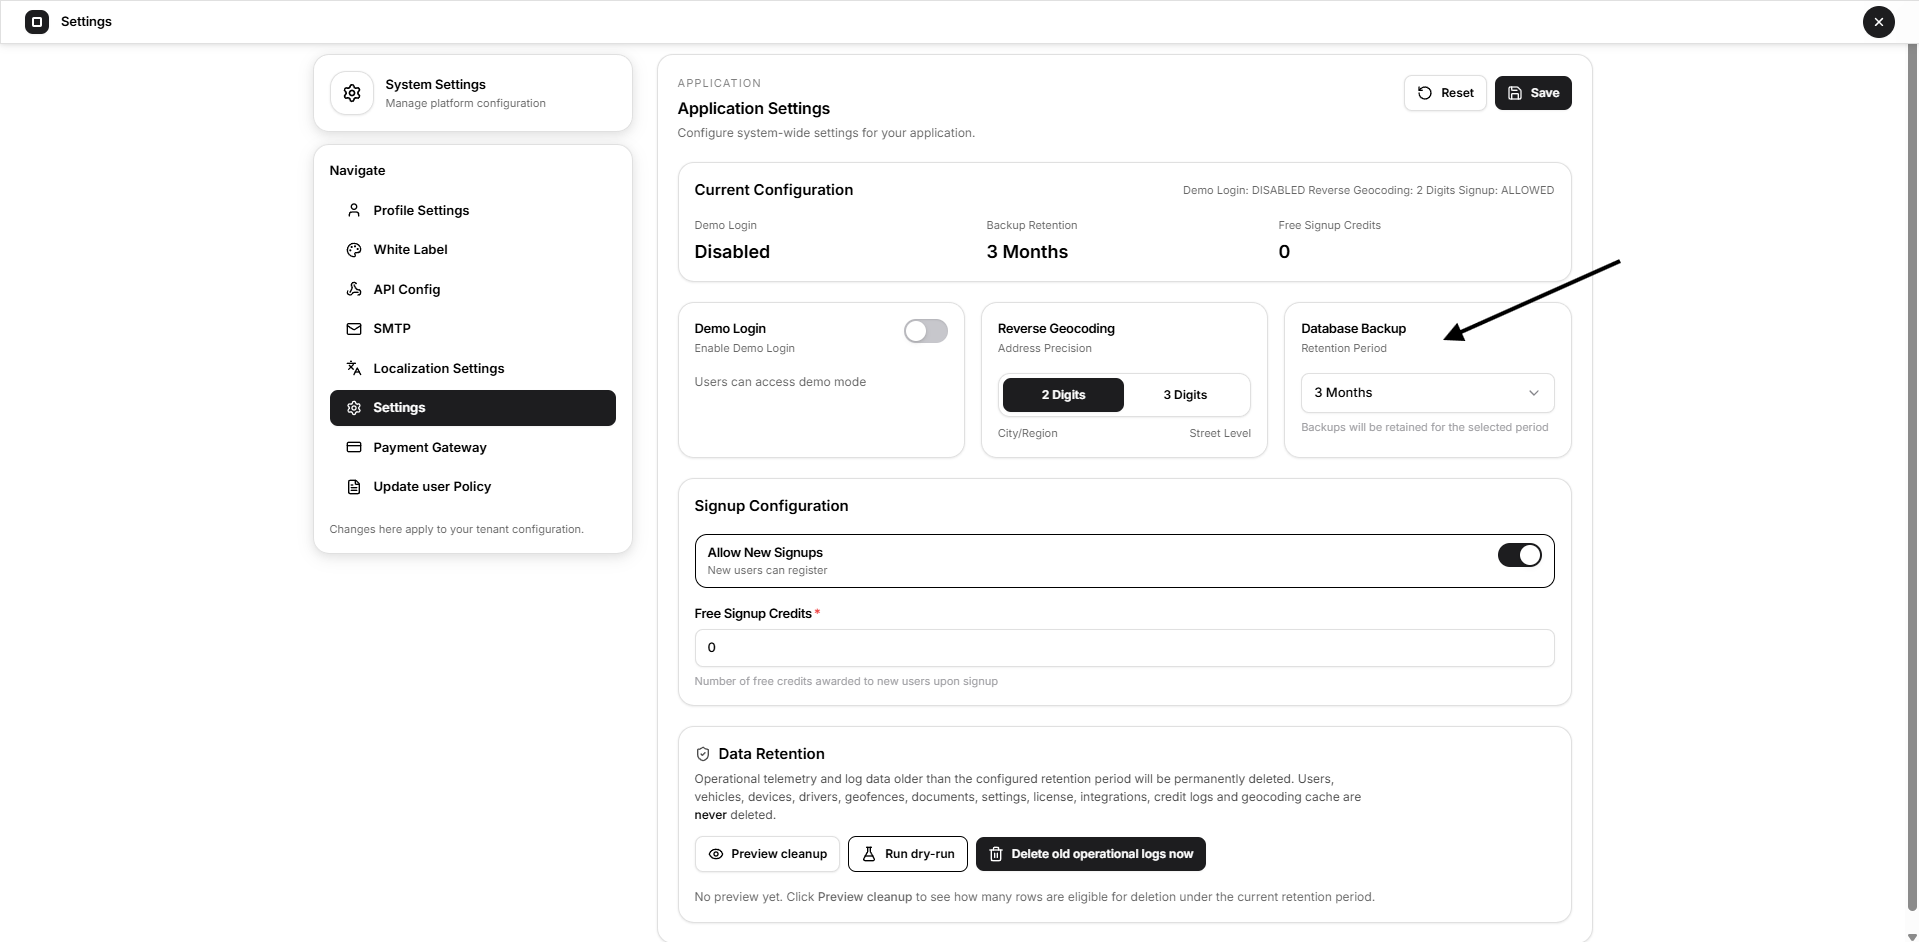
Available periods may include:
- 1 month
- 3 months
- 6 months
- 1 year
- Multiple-year periods
Choose a duration based on your operational, storage, and compliance requirements.
Older backups may be removed after the selected retention period.
Signup Configuration
The Signup Configuration section controls whether new users can register on the platform.
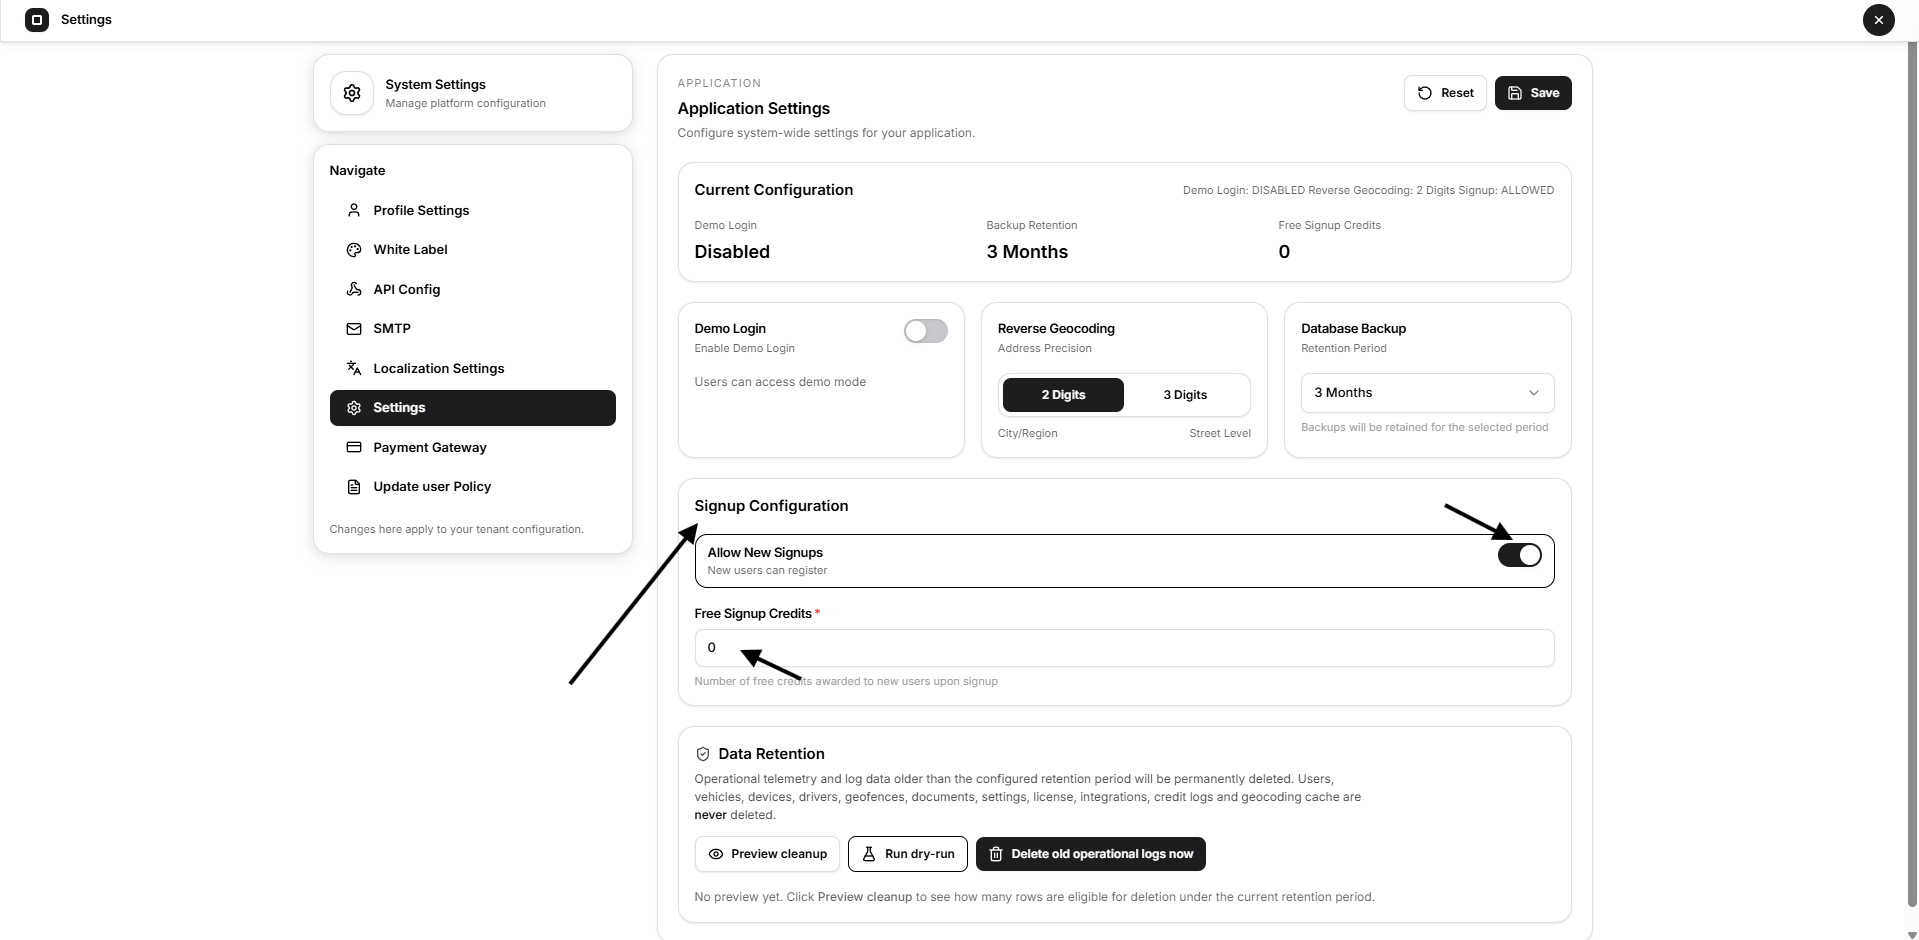
Allow New Signups
Enable this option when public or permitted self-registration should be available.
Disable it when accounts should be created only by authorized platform administrators.
Free Signup Credits
Enter the number of credits automatically assigned to a new account after registration.
Example: Set this value to 50 when each newly registered account should begin with 50 credits.
Review this value carefully before enabling public signup.
Data Retention
The Data Retention section allows the Superadmin to identify and remove old operational telemetry and log records.
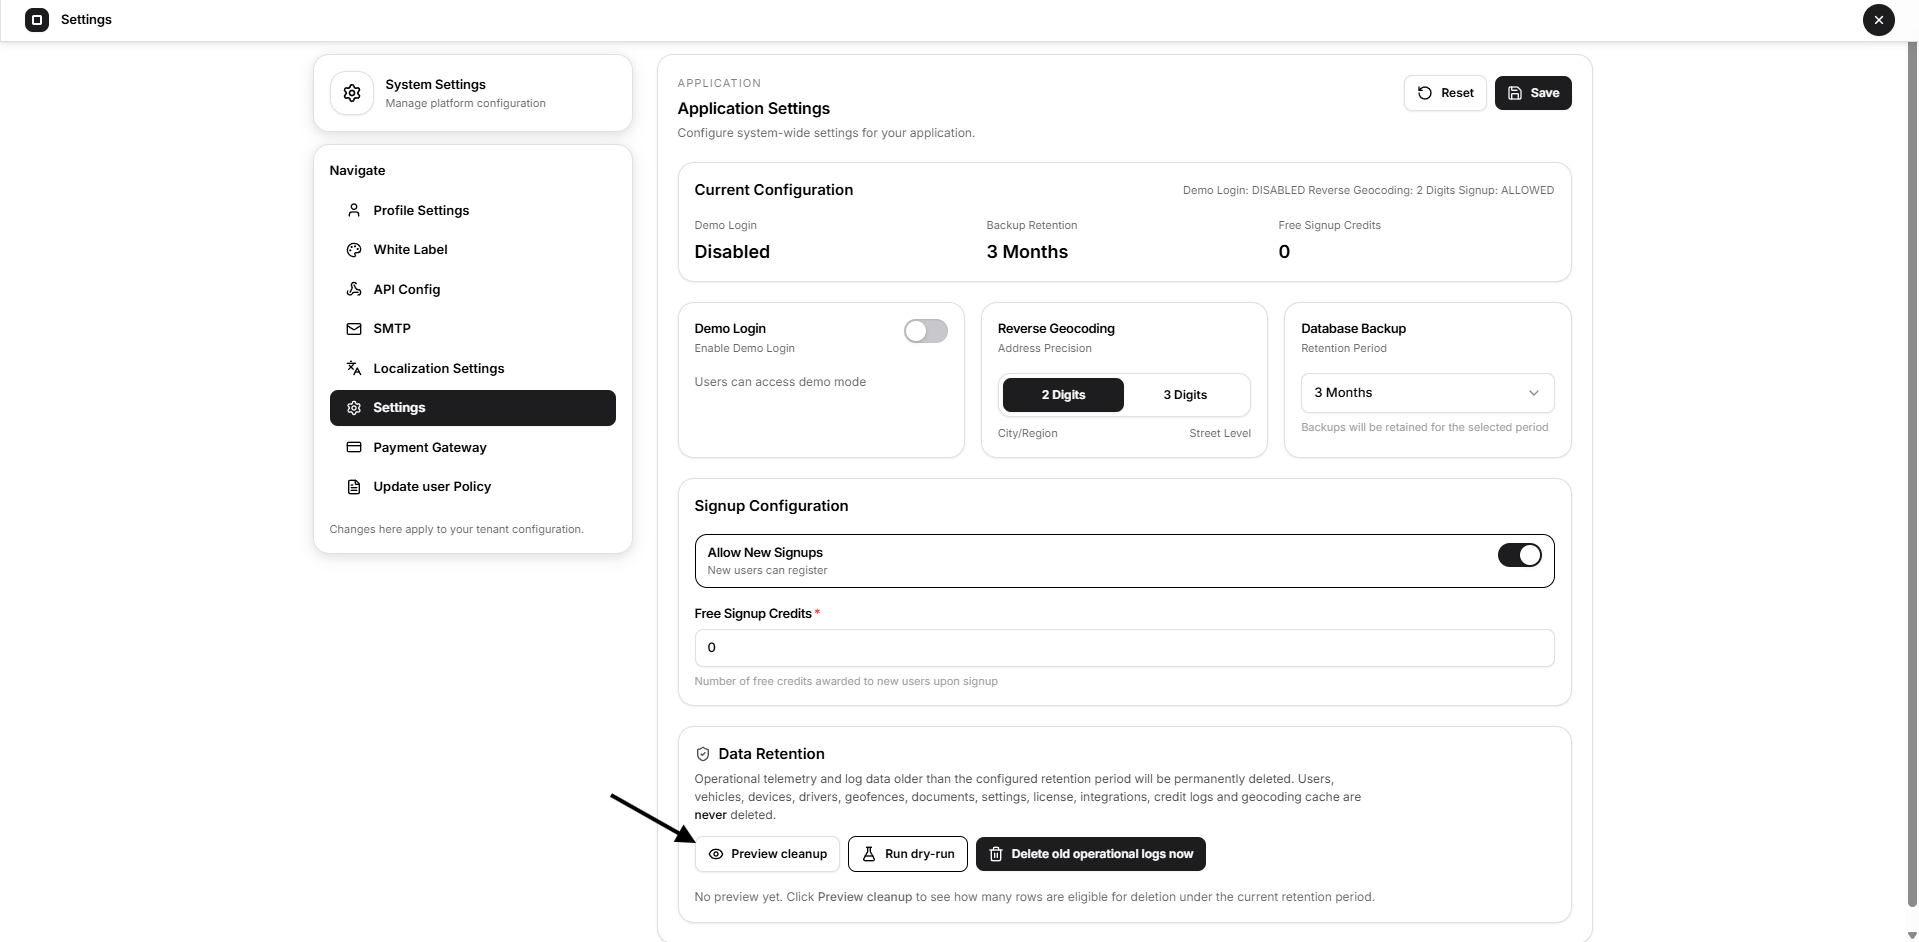
Data older than the configured retention period may become eligible for permanent deletion.
Core records such as users, vehicles, devices, drivers, documents, settings, licences, integrations, and credit history are not included in the operational-log cleanup described on this page.
Preview Cleanup
Select Preview cleanup to calculate how many records are eligible for deletion.
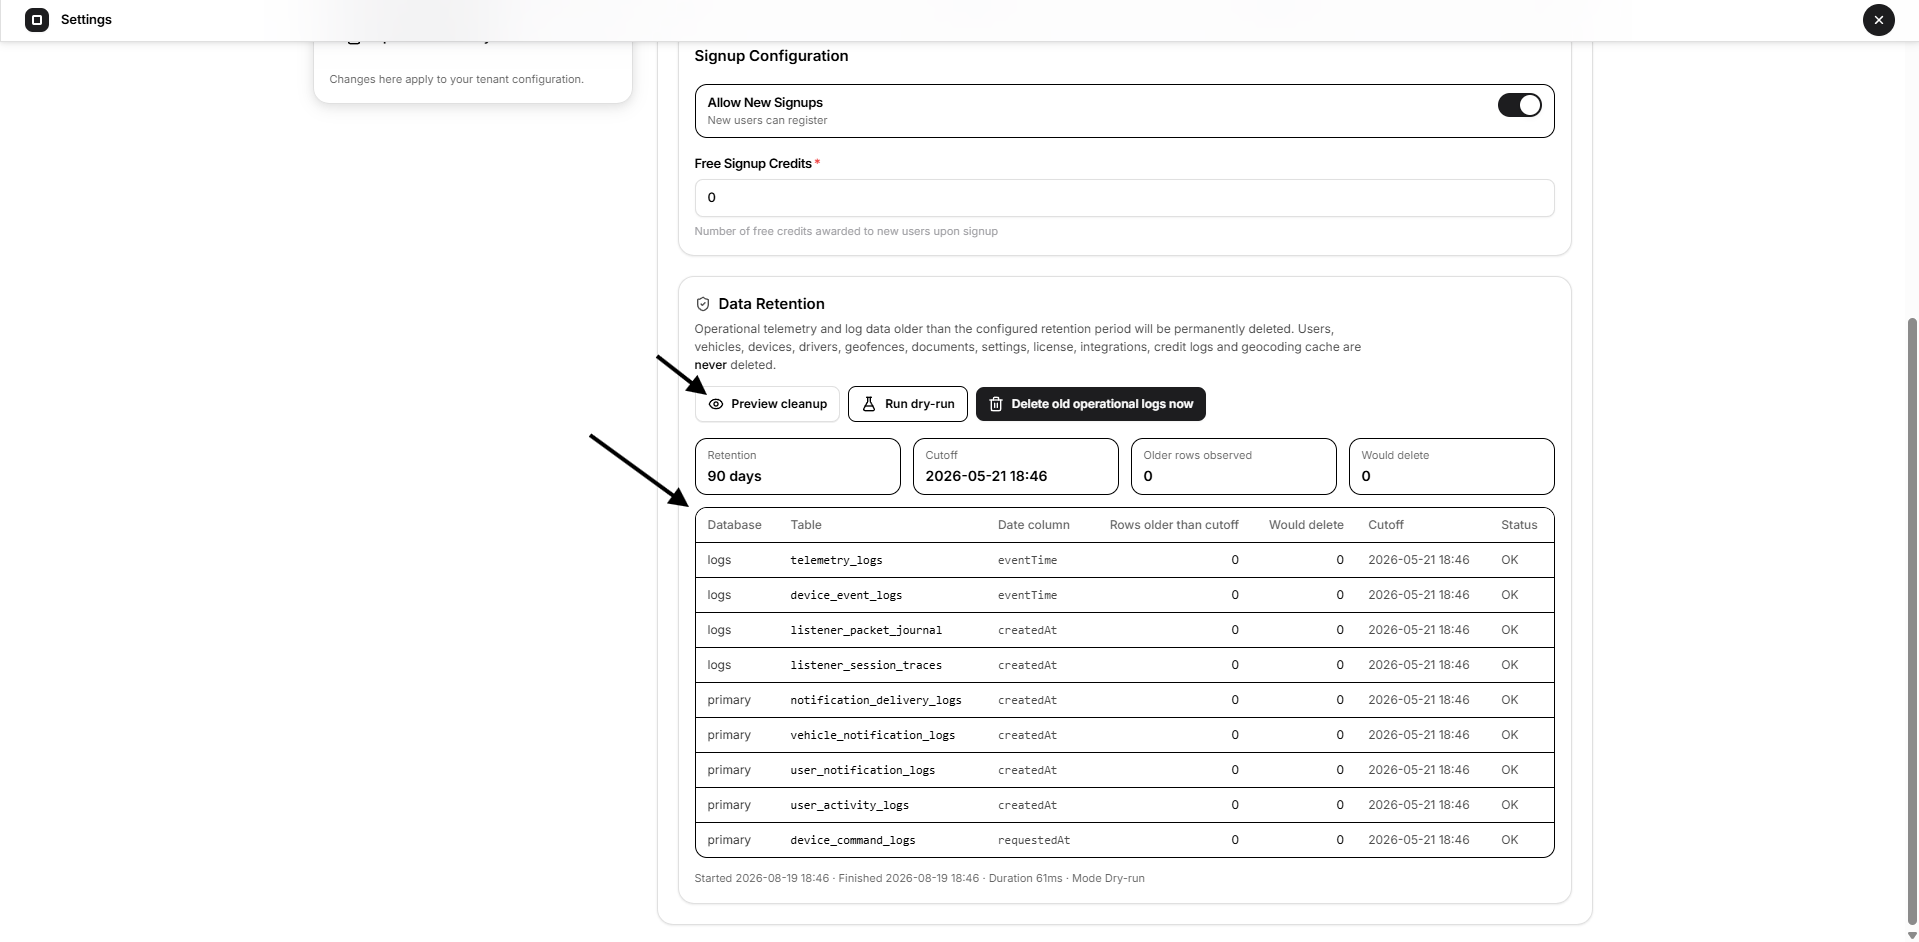
This does not delete any data.
Always run a preview before starting a cleanup.
Run Dry-Run
Select Run dry-run to simulate the cleanup process.
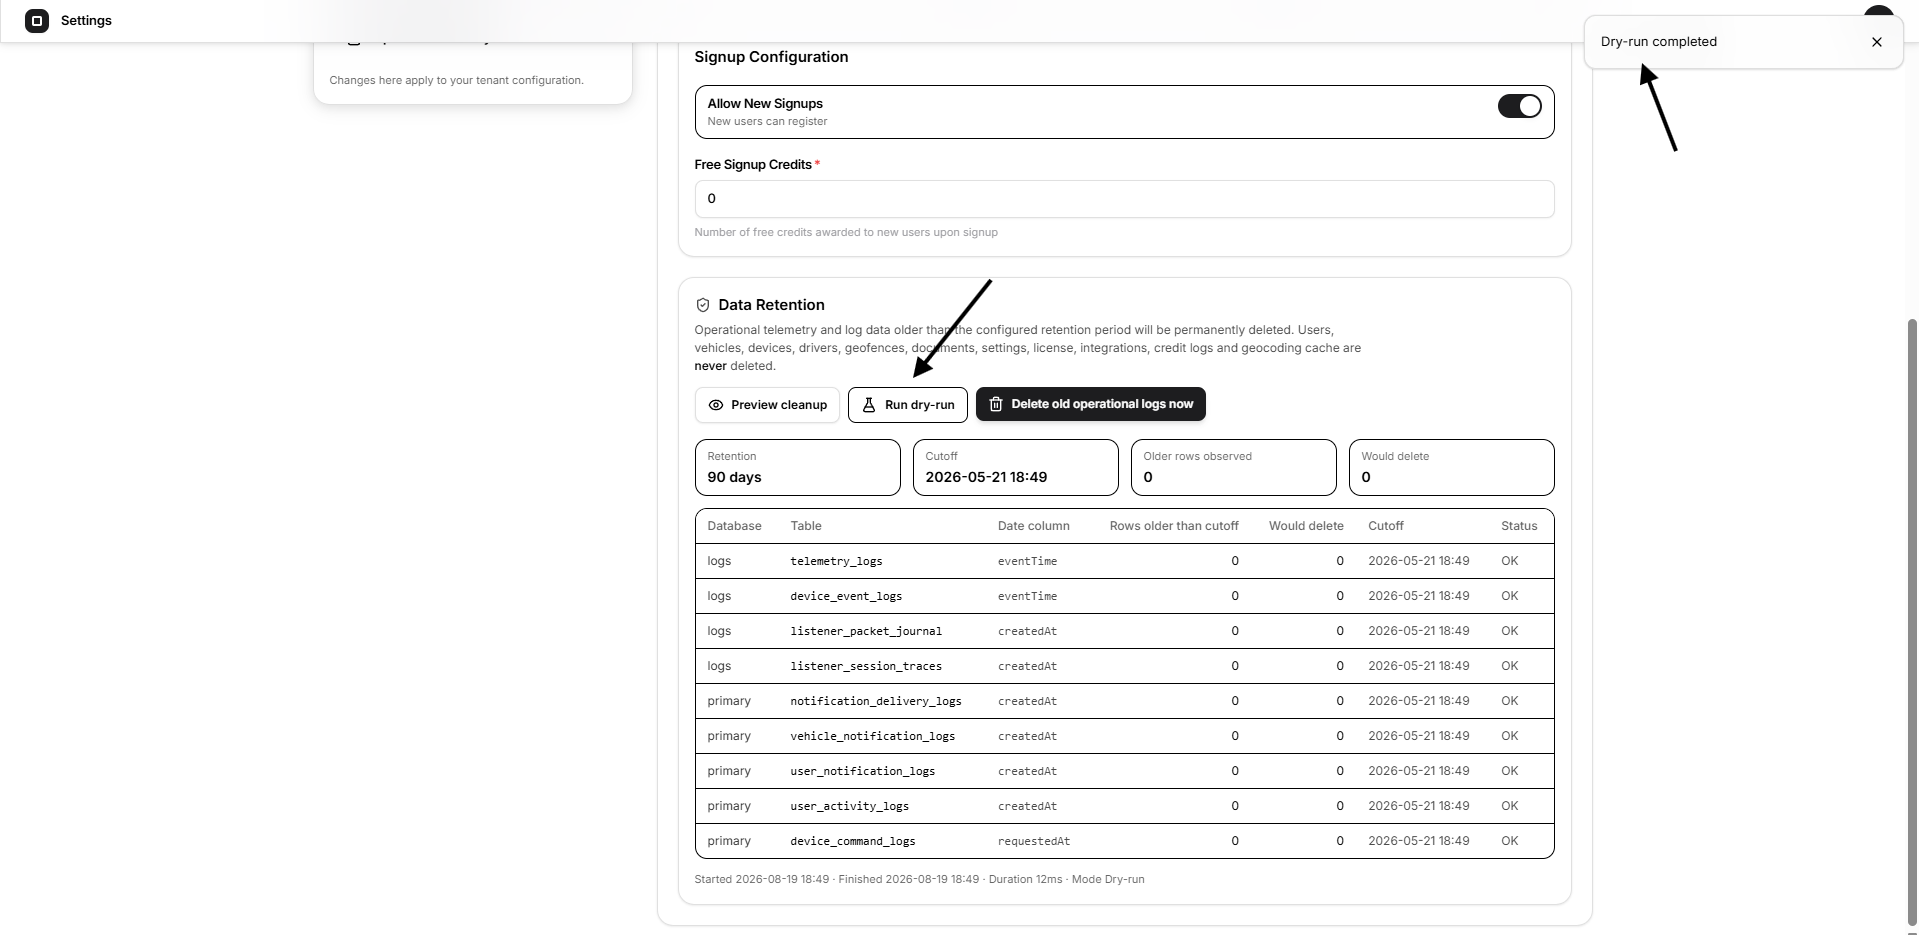
A dry run helps confirm what would be removed without performing the actual deletion.
Delete Old Operational Logs Now
Select this option only when the preview and dry run have been reviewed.
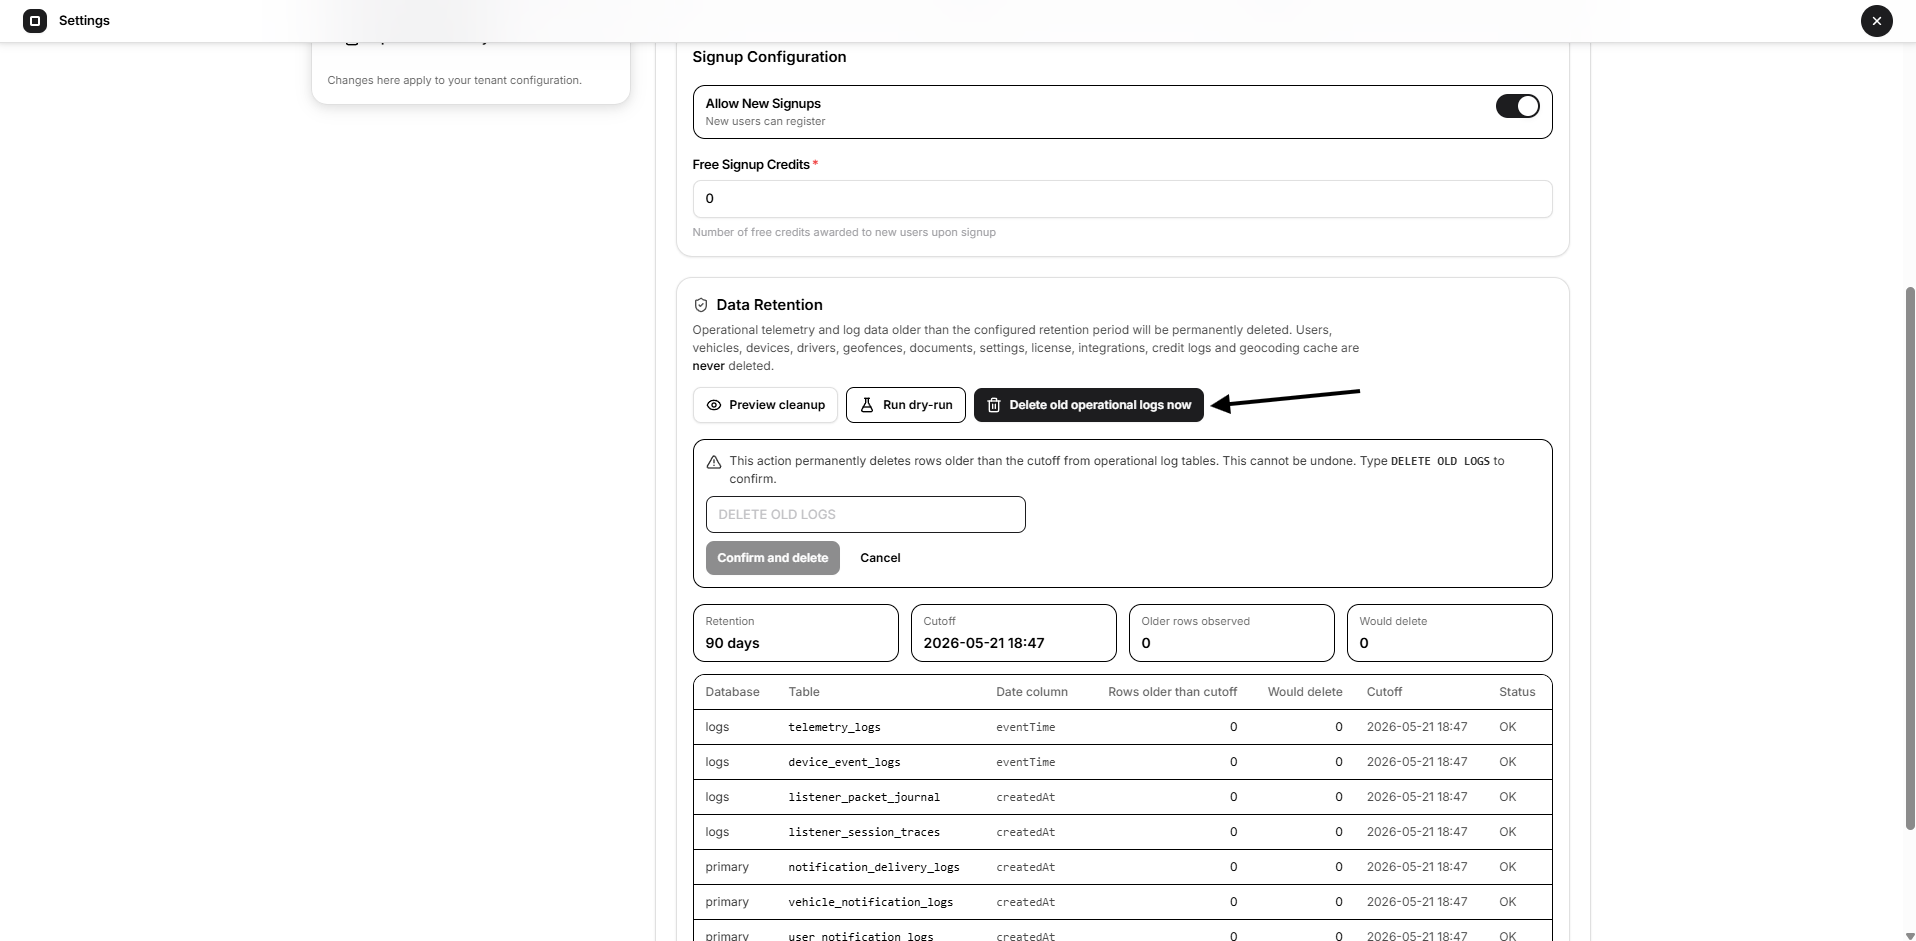
This action permanently deletes eligible operational telemetry and log data.
Important: Permanent deletion cannot be undone. Confirm that required backups are available before proceeding.
Save or Reset Application Settings
Select Save to apply the configuration.
Select Reset to discard unsaved changes and restore the previously saved values.
3. Payment Gateway
Go to:
Settings → Payment Gateway
The Payment Gateway page is used to enable a supported payment provider and store its required credentials.
The complete payment-provider onboarding and webhook setup depends on the selected gateway. This section explains only what must be entered in Open VTS.
Select a Gateway
Open the Gateway dropdown and select the required payment provider.
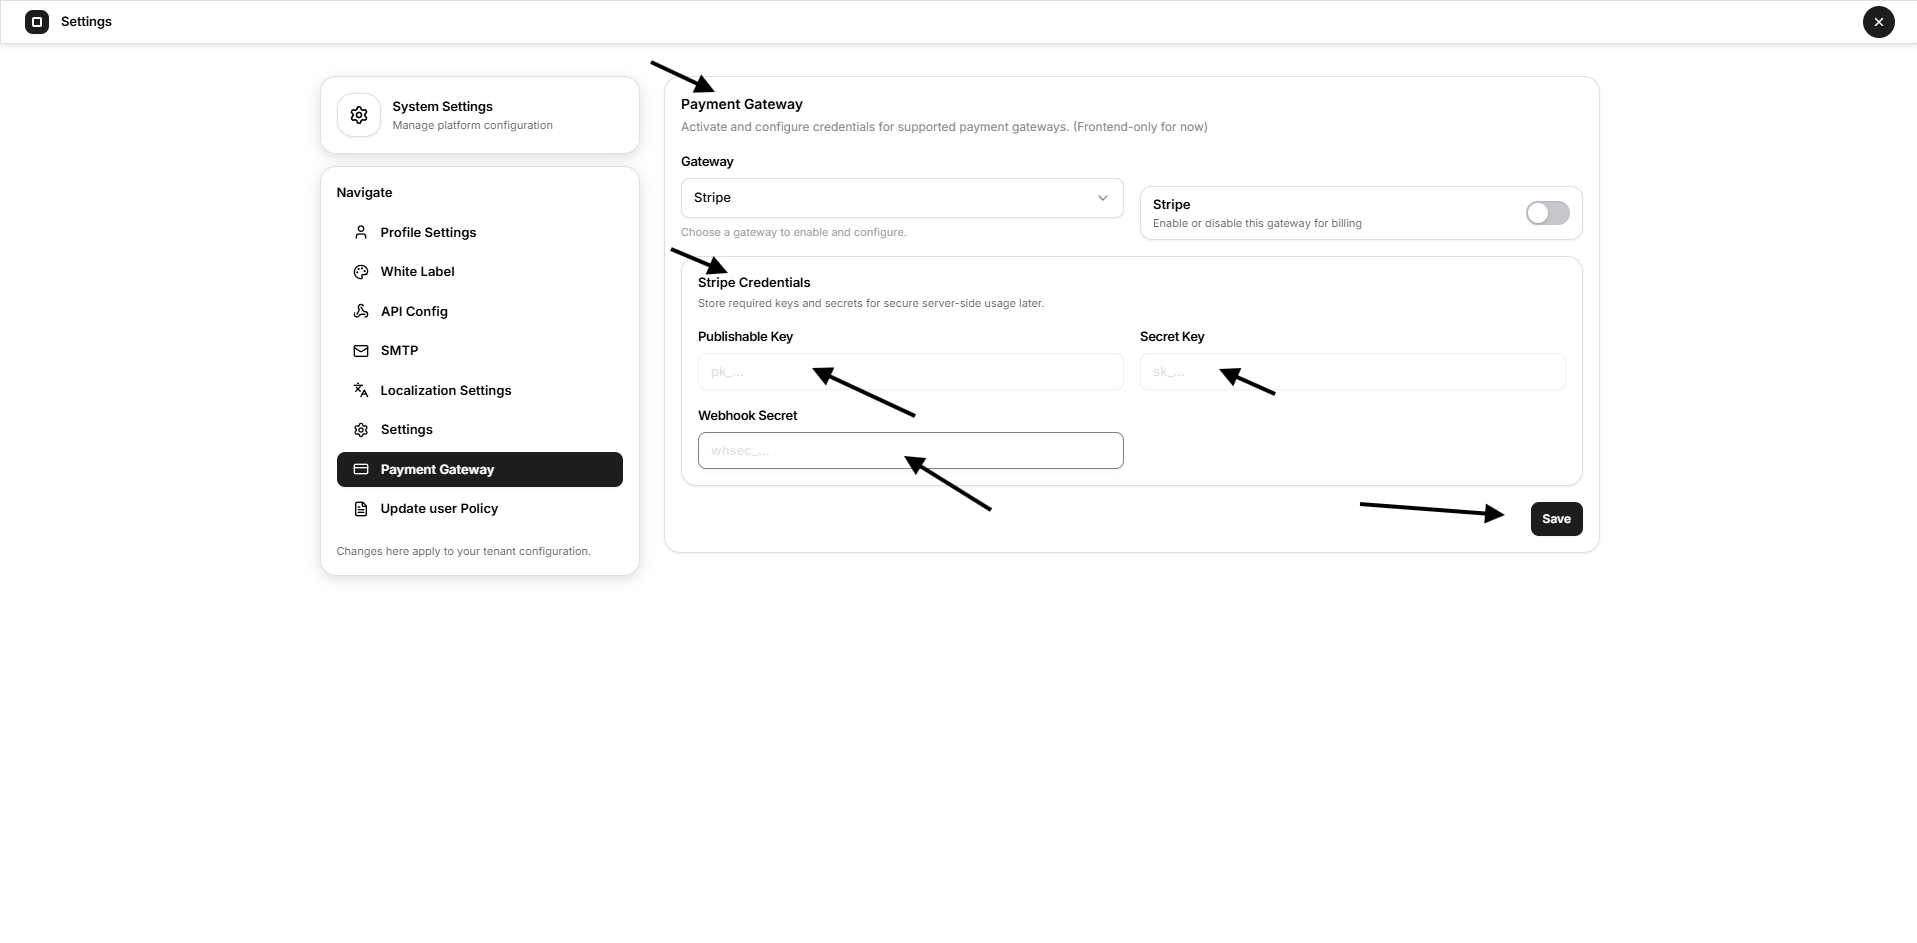
The available fields will appear according to the selected provider.
Enable the Gateway
Turn on the gateway toggle when the configuration is ready to be used.
Keep it disabled while credentials are incomplete or still being tested.
Enter Gateway Credentials
For a provider such as Stripe, Open VTS may request:
Publishable Key
The public key used by the application interface to initialize payment-related functions.
Secret Key
The private server-side key used to authorize secure payment operations.
Never display or share this key publicly.
Webhook Secret
The signing secret used to verify that webhook events were sent by the payment provider.
Obtain all credentials directly from the selected payment provider’s dashboard.
Save the Payment Gateway
After entering the required credentials:
- Recheck the selected gateway.
- Confirm that the keys belong to the correct account.
- Confirm whether test or live credentials are being used.
- Enable the gateway when appropriate.
- Select Save.
Important: Do not expose secret keys or webhook secrets in screenshots, documentation, emails, or support tickets.
The full payment setup may also require configuration inside the provider’s own dashboard, including account verification, currencies, payment methods, callback URLs, and webhooks.
4. Update User Policy
Go to:
Settings → Update User Policy
The User Policy Management page allows the Superadmin to create and maintain the legal agreements displayed to platform users.
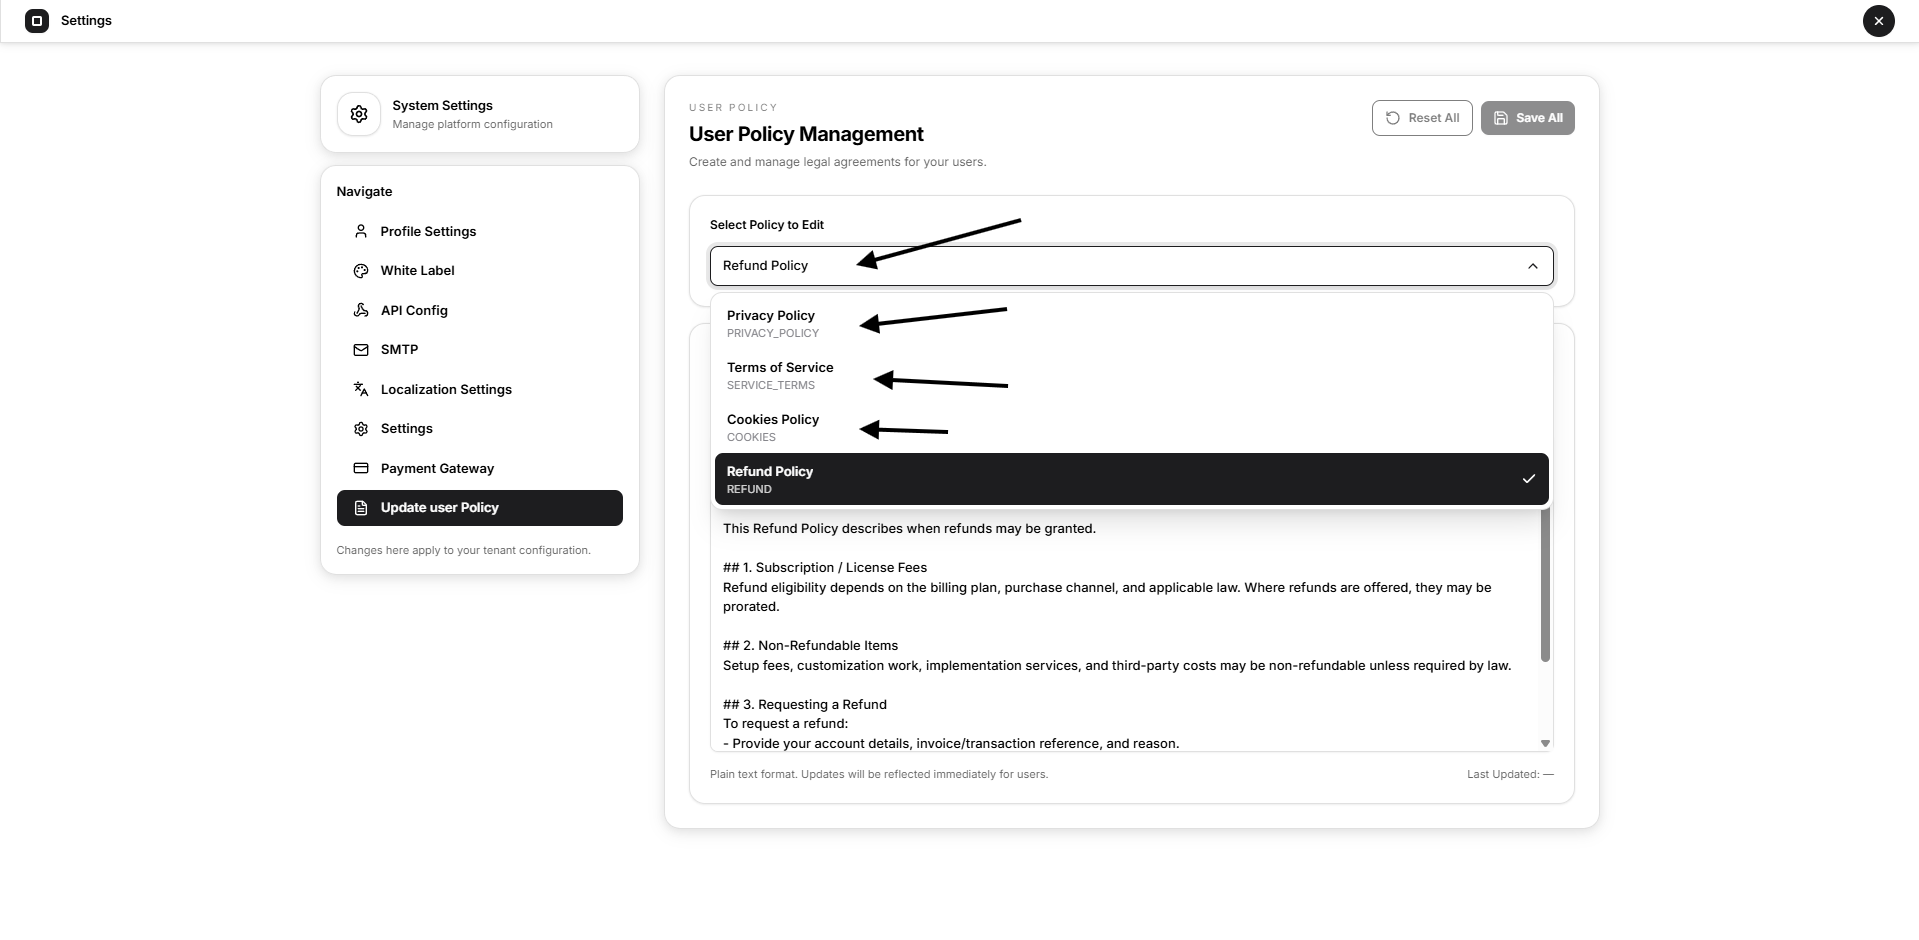
Available Policies
Select the policy that needs to be reviewed or updated:
- Privacy Policy
- Terms of Service
- Cookies Policy
- Refund Policy
Each policy is managed separately.
Edit a Policy
To update a policy:
- Open Select Policy to Edit.
- Choose the required policy.
- Review the existing content.
- Edit the text in the policy editor.
- Select Save All.
The updated content becomes available to users after it is saved.
Use clear headings and readable paragraphs when writing policy content.
Reset Policy Changes
Select Reset All to discard unsaved changes and restore the previously saved policy content.
Policy Content Recommendations
Each policy should match the actual operation of your business.
Avoid using generic or incomplete placeholder text.
The policies should clearly explain matters such as:
- What user information is collected
- How information is used and protected
- User responsibilities
- Service limitations
- Billing and refund conditions
- Cookie usage
- Account suspension or termination
- Applicable contact information
Legal policies can create contractual and regulatory obligations. Have the final text reviewed by a qualified legal professional before publishing it.
Recommended Configuration Order
For a new Open VTS installation, configure these sections in the following order:
- Set the default language, timezone, units, and map location.
- Configure signup access and free signup credits.
- Select backup and operational-data retention periods.
- Review the cleanup preview before deleting any operational records.
- Enter payment gateway credentials when payment processing is required.
- Review and publish all user policies.
- Test the platform after saving the settings.
Final Checklist
Confirm that:
- The correct language and text direction are selected
- Date and time formats are correct
- The reporting timezone is configured
- KM or Miles is selected
- The default map location is correct
- Demo Login is enabled only when needed
- Reverse geocoding precision is appropriate
- Backup retention has been selected
- New signup access is configured correctly
- Free signup credits have been reviewed
- Cleanup preview and dry run are completed before deletion
- Payment keys are stored securely
- User policies contain final business-specific content
- All changes have been saved