
Prepare a Windows Server on AWS
Create and prepare an AWS Windows Server for Open VTS by selecting the correct hardware, configuring storage and firewall rules, assigning a static Elastic IP, connecting through Remote Desktop.
Last updated July 27, 2026
Prepare a Windows Server on AWS
This guide explains how to create and prepare a Windows Server on Amazon Web Services for installing Open VTS.
You will:
- Create a Windows EC2 server
- Configure storage and network access
- Assign a permanent public IP address
- Connect to the server using Remote Desktop
This tutorial uses AWS EC2. You may use another cloud or dedicated-server provider if it meets the Open VTS system requirements.
Before You Begin
You need:
- An active AWS account
- Windows Administrator access on your local computer
- A stable internet connection
- A safe folder for storing the AWS private key
- A server configuration selected according to the Open VTS requirements
For testing or up to approximately 50 vehicles, use at least:
- 2 vCPU
- 4 GB RAM
- 100 GB SSD
For small production use, we recommend:
- 4 vCPU
- 8 GB RAM
- 100 GB SSD or more
Step 1: Sign In to AWS
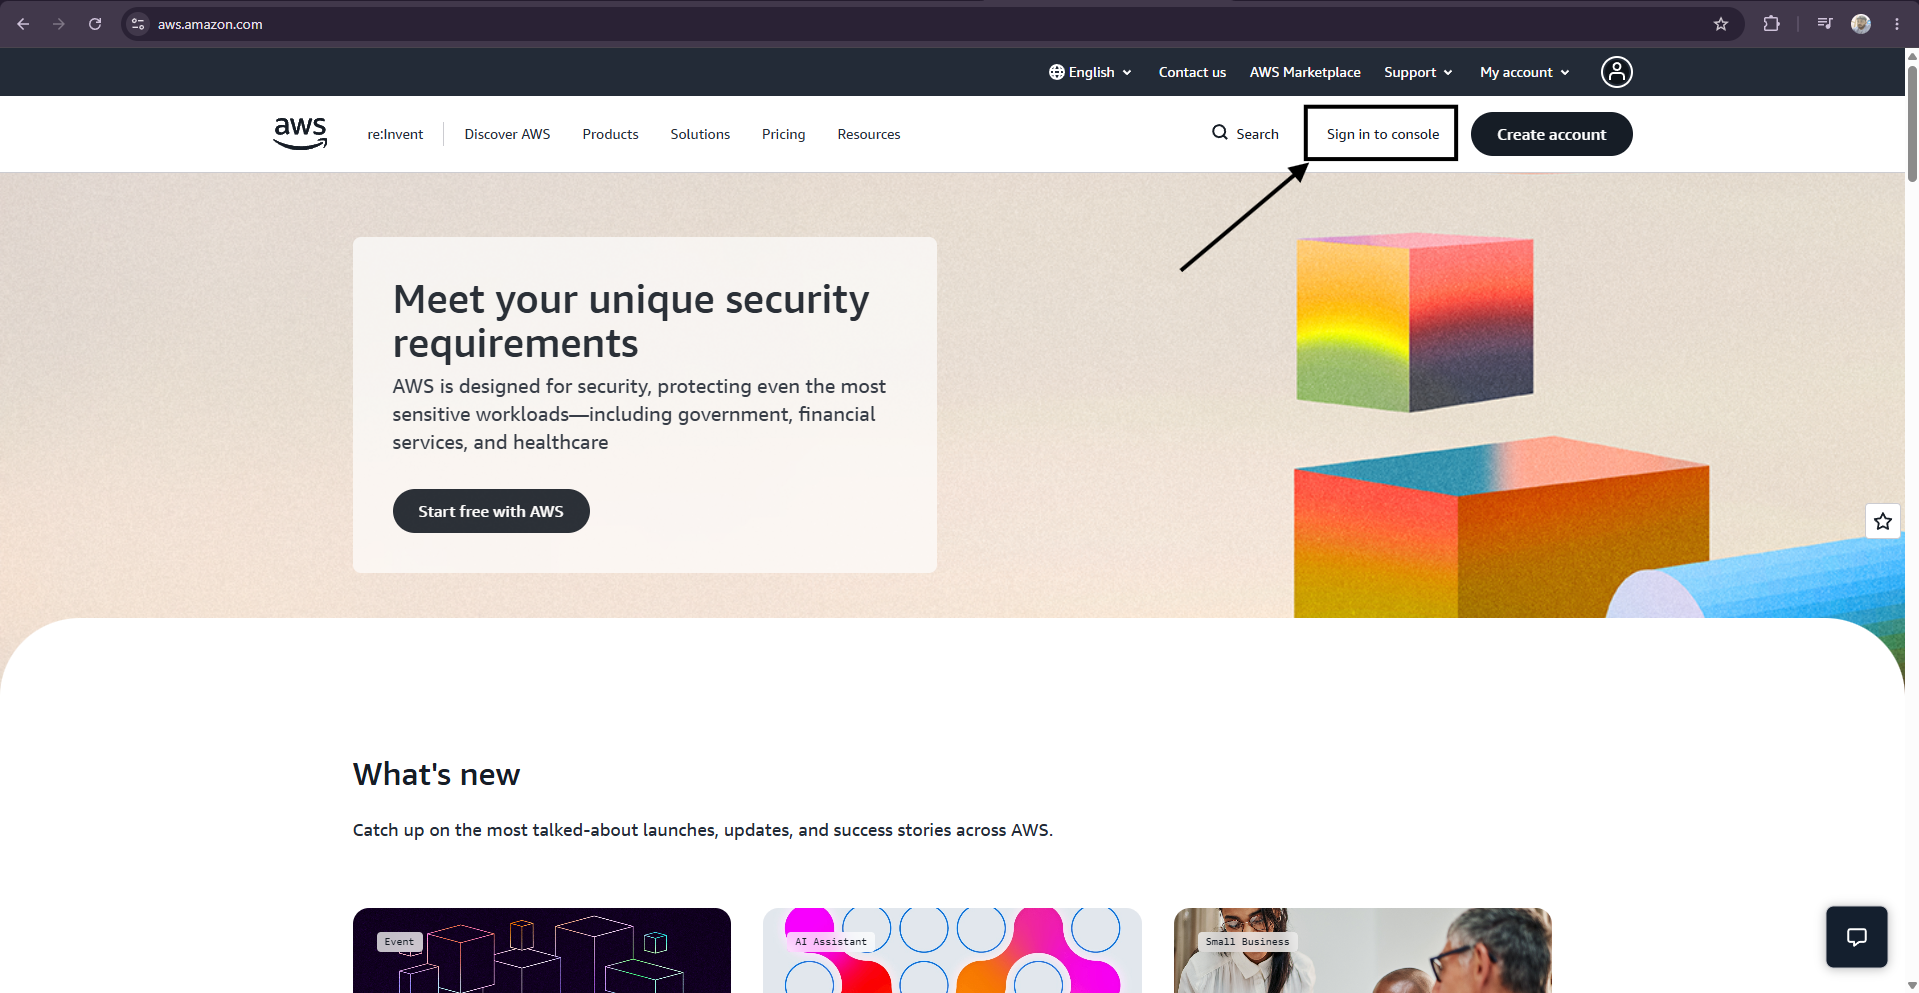
Open the AWS website and select Sign in to the Console.
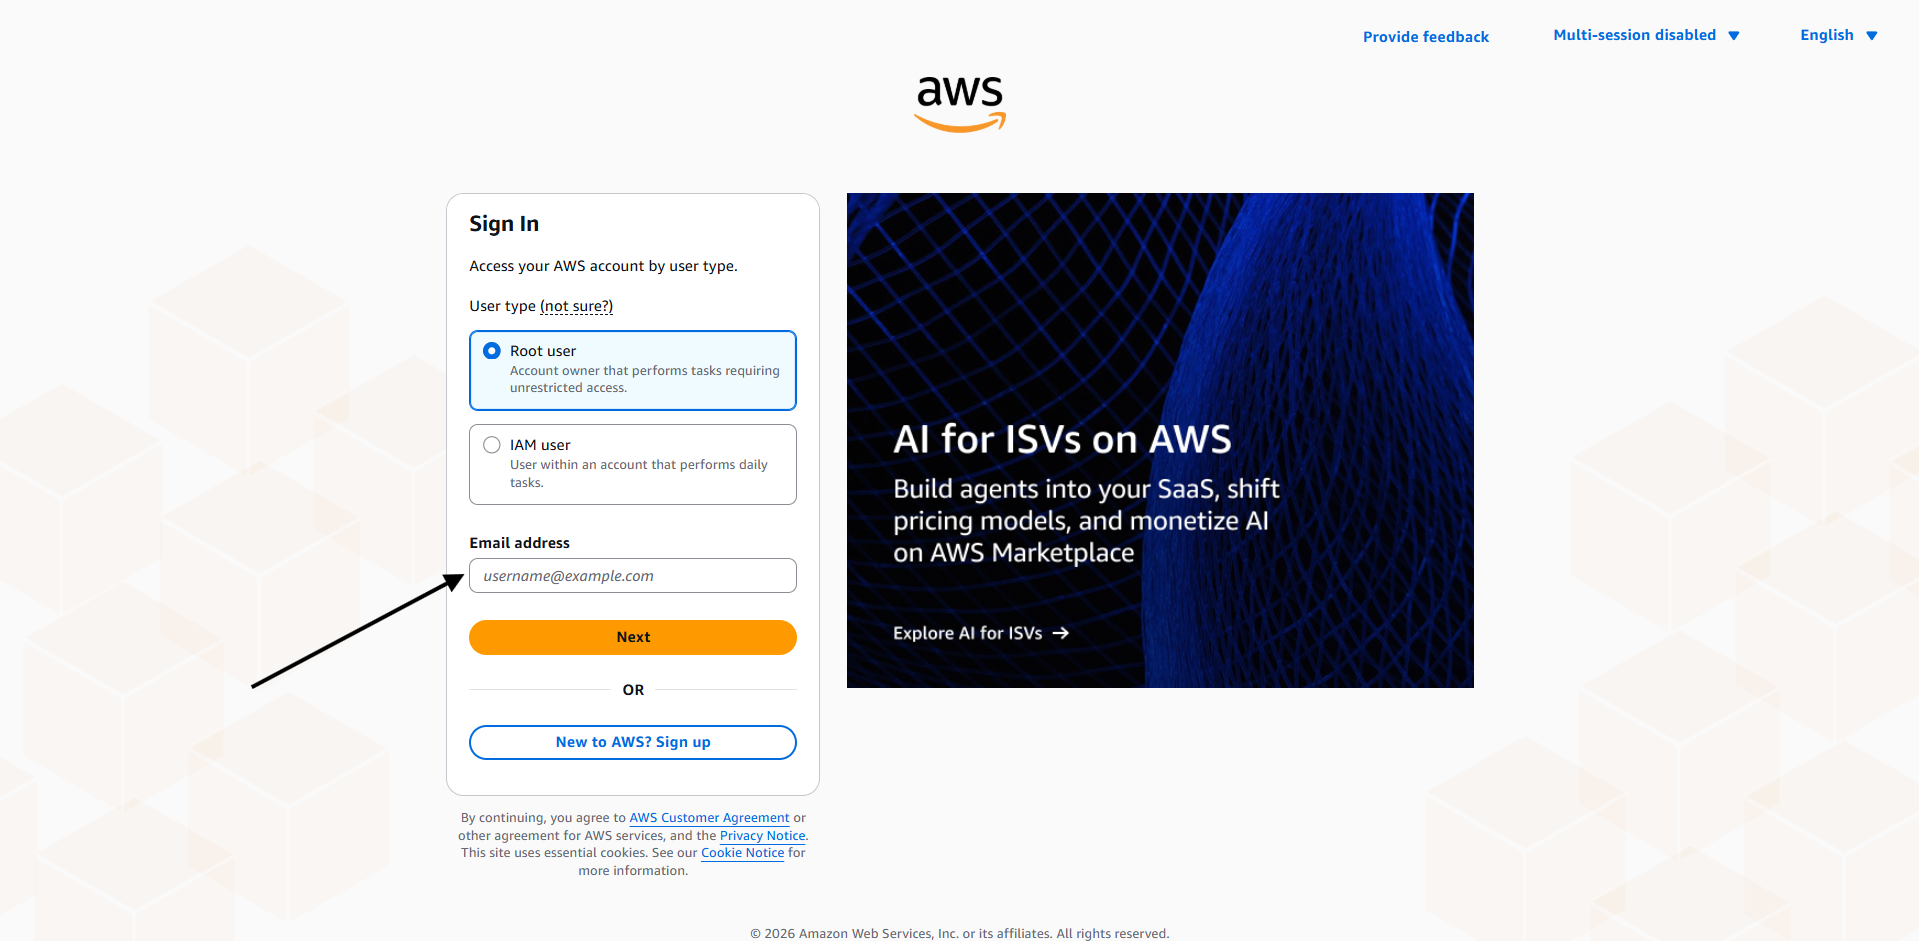
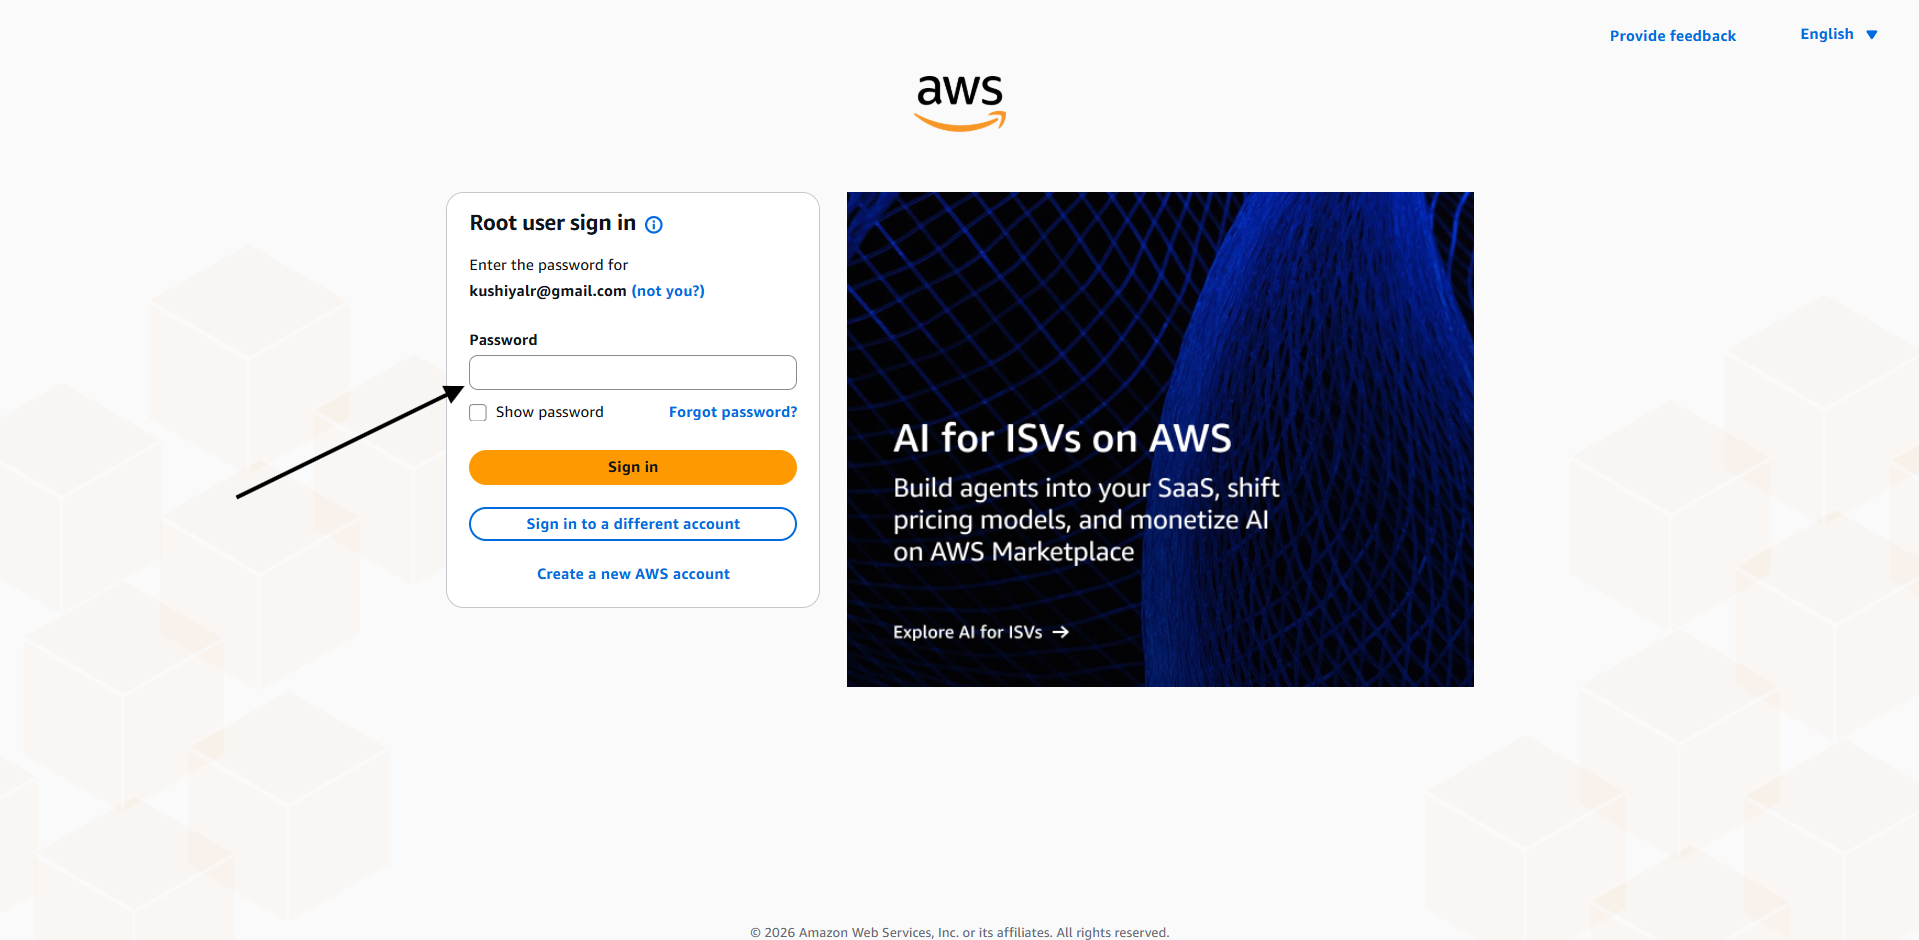
Enter your AWS account email address or account ID, followed by your password.
After signing in, the AWS Management Console will open.
Step 2: Open Amazon EC2
From the AWS Console, search for and open EC2.
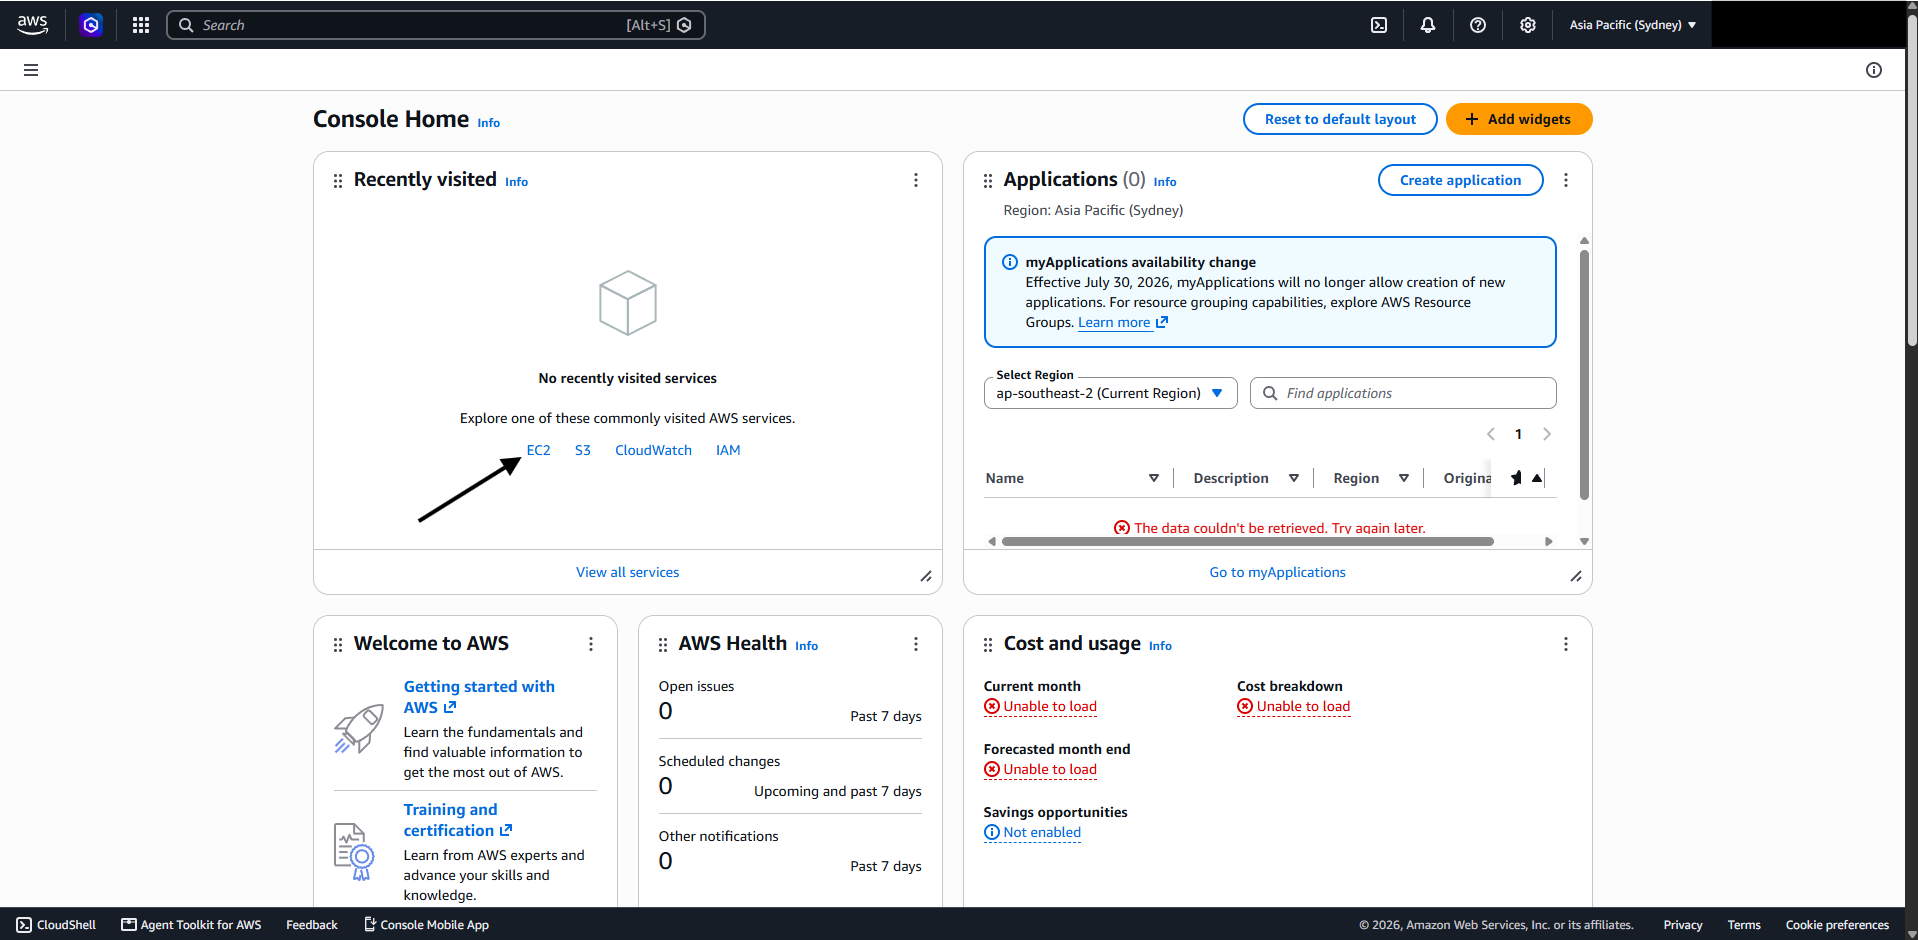
Amazon EC2 is the AWS service used to create and manage virtual servers.
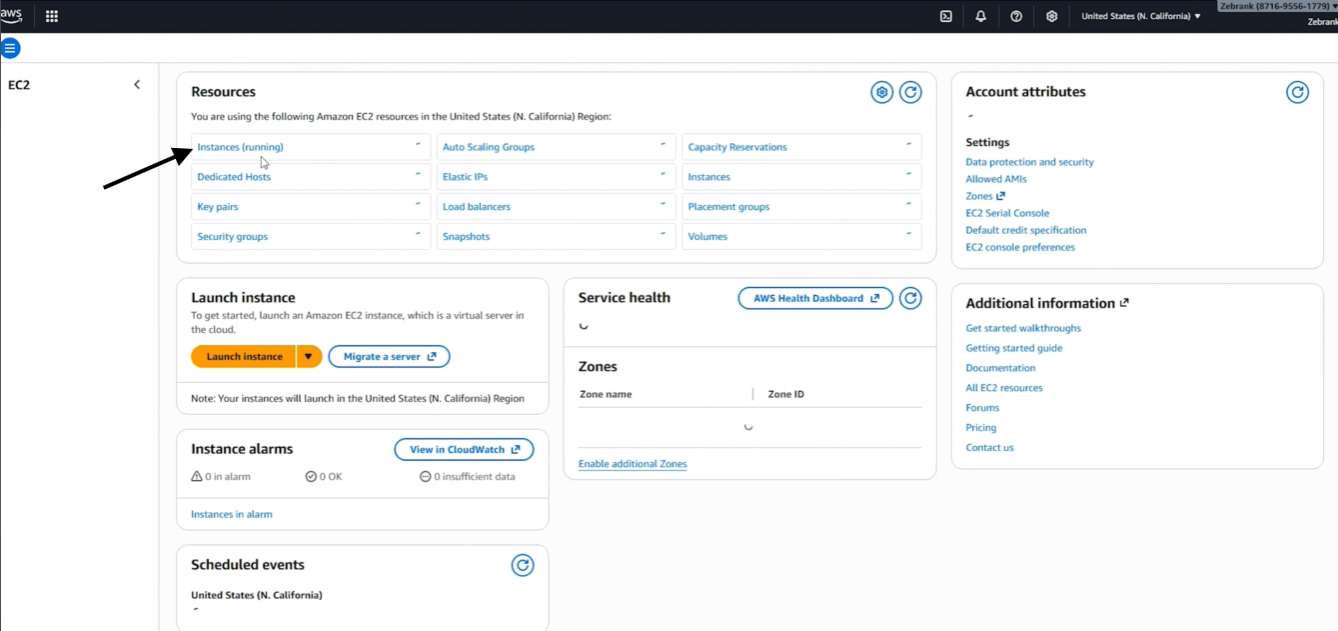
From the EC2 dashboard, select Instances.
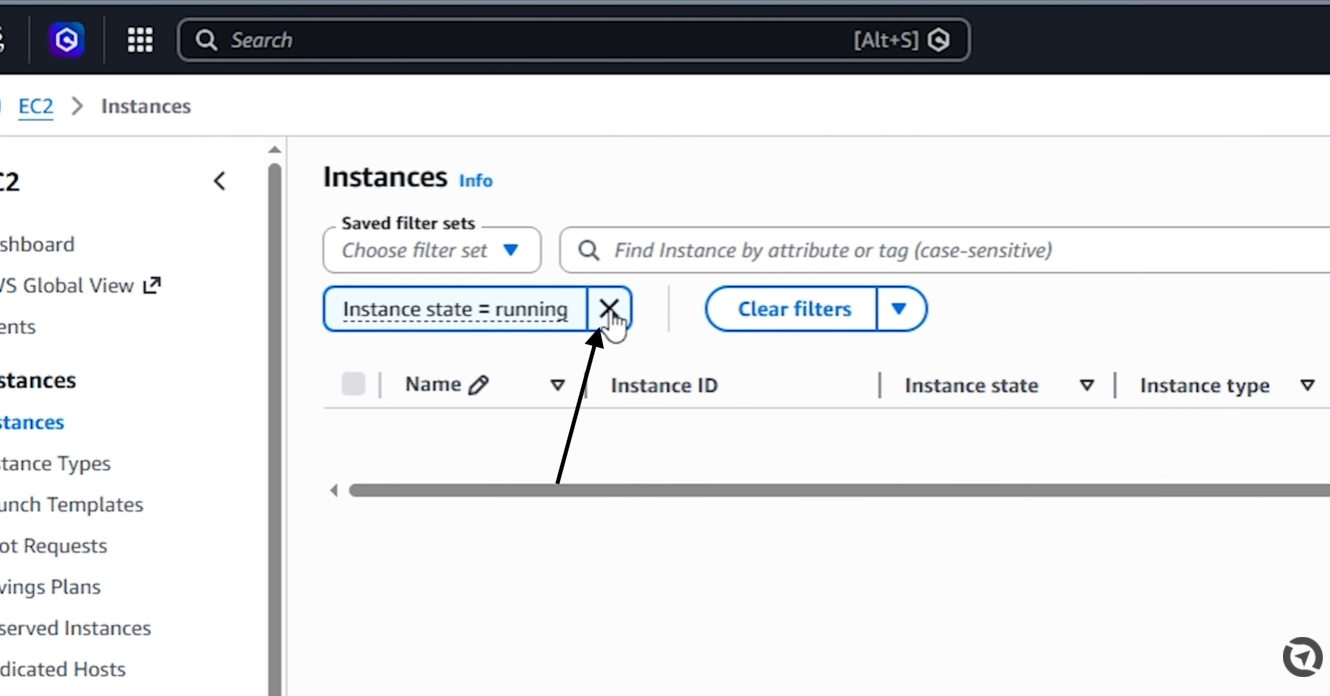
If a filter such as Instance state = Running is active, remove it so all instances are visible.
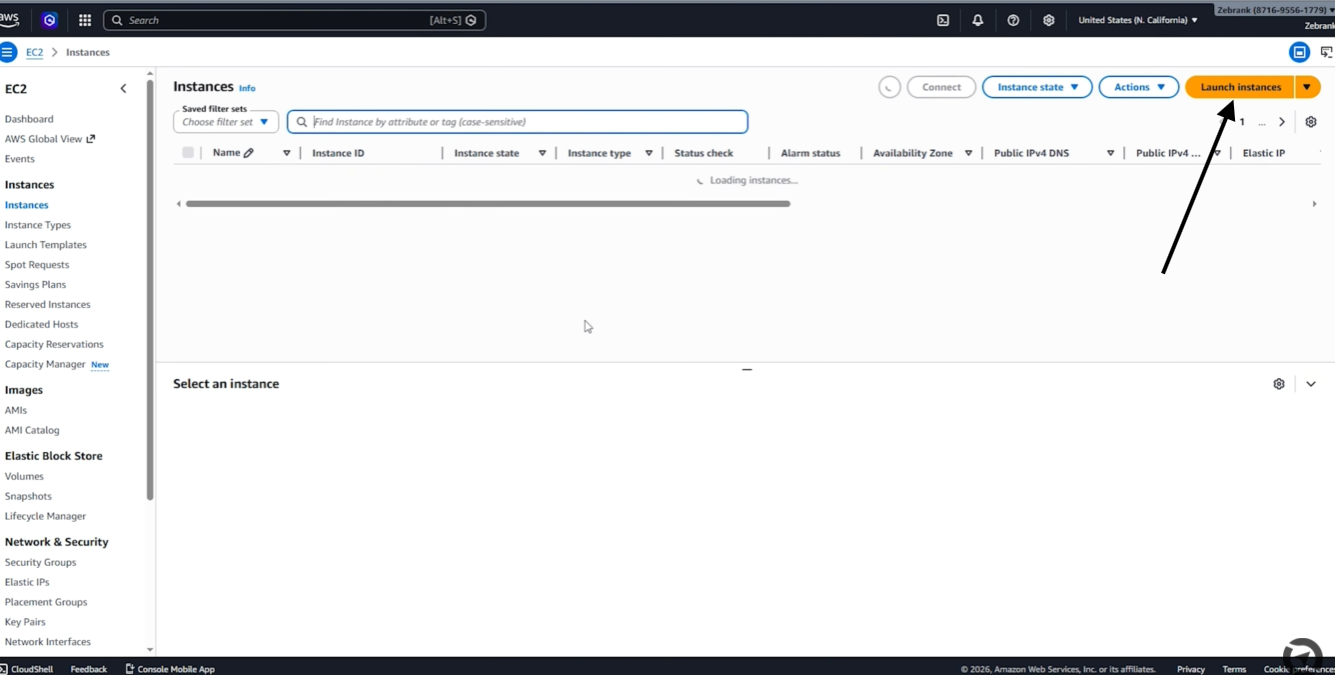
Select Launch instances.
Step 3: Enter the Server Name
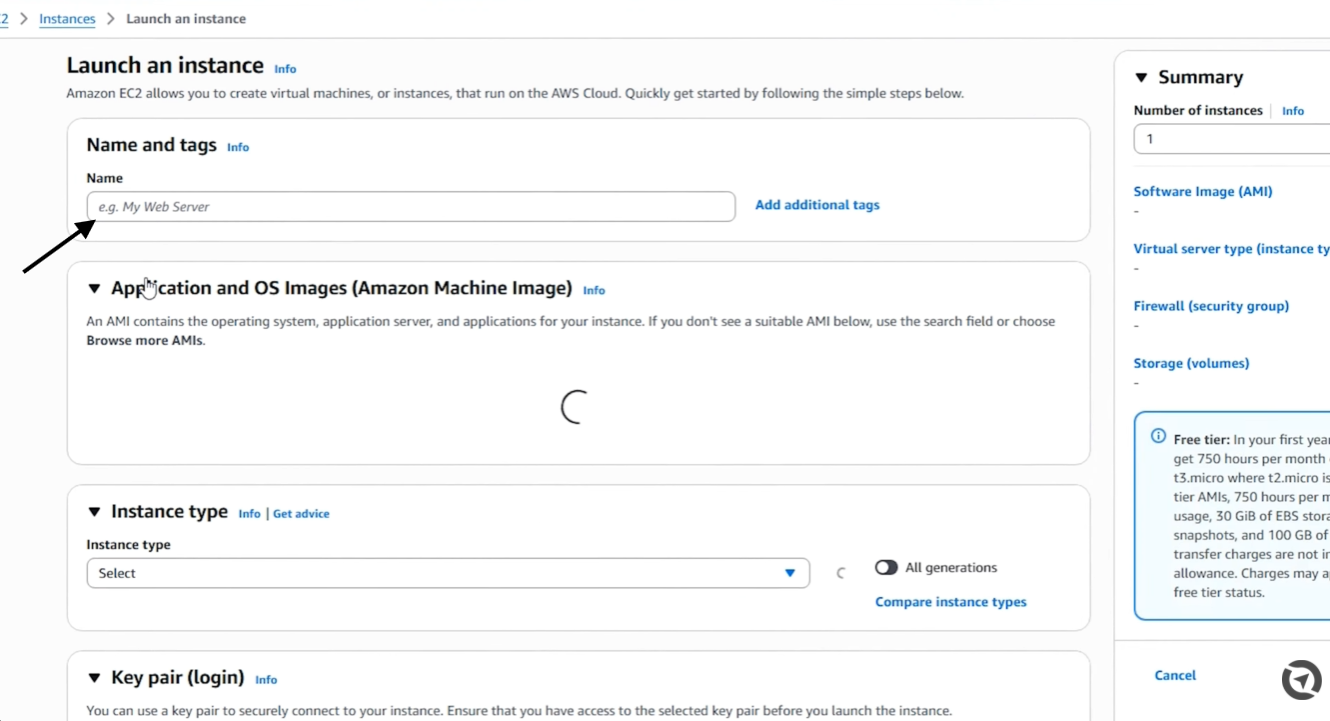
Under Name and tags, enter a clear name for the server.
Example:
Open-VTS-Production
A clear name makes the server easier to identify when your AWS account contains multiple instances.
Step 4: Select the Windows Operating System
Under Application and OS Images, select Windows.
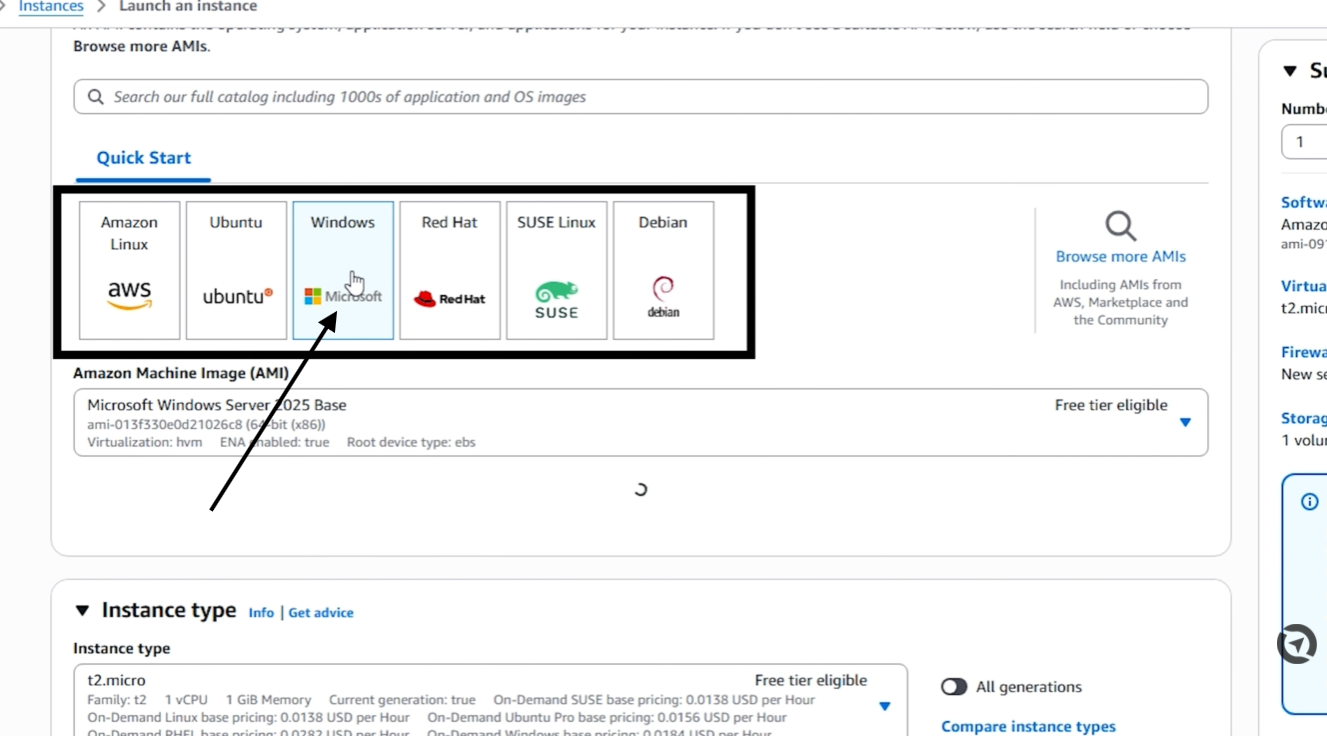
Choose a 64-bit Windows Server Base image supported by Open VTS:
- Windows Server 2019
- Windows Server 2022
- Windows Server 2025
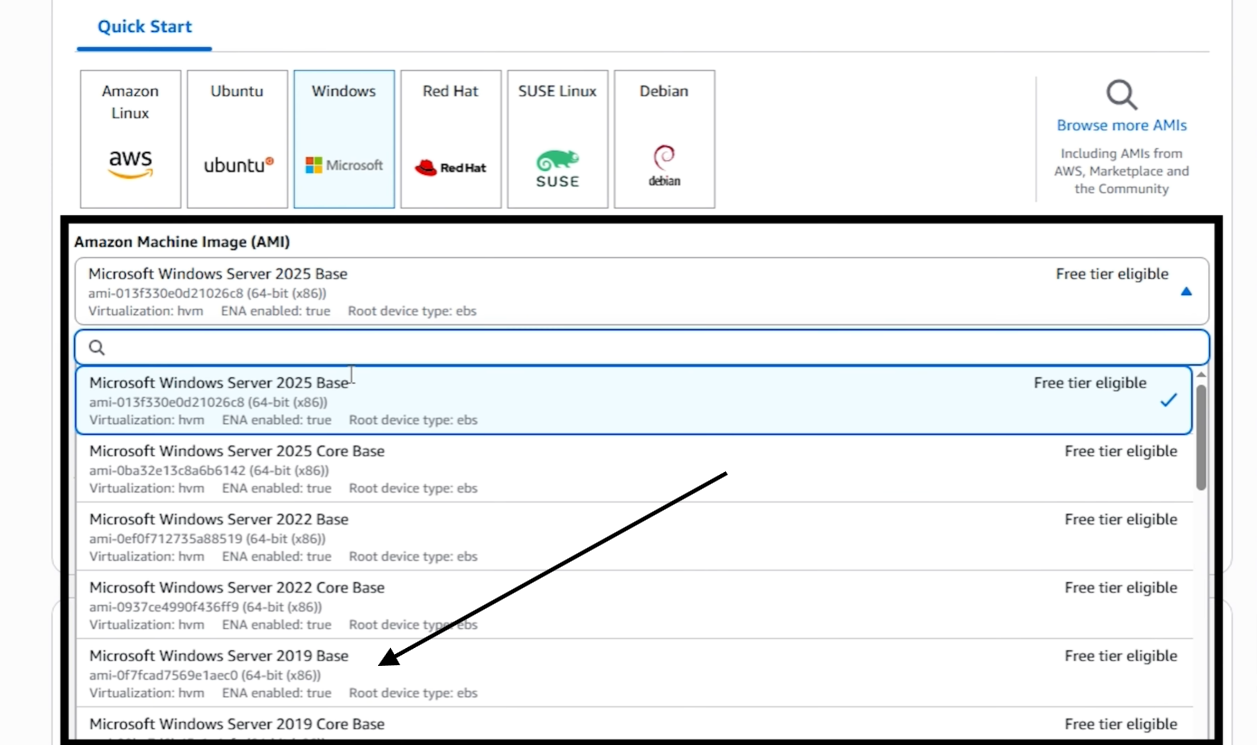
Use the standard Windows Server Base image unless you have a specific reason to choose another edition.
You do not need a Windows image that includes Microsoft SQL Server because Open VTS installs PostgreSQL automatically.
An Amazon Machine Image, or AMI, is the template AWS uses to create the server with the selected operating system.
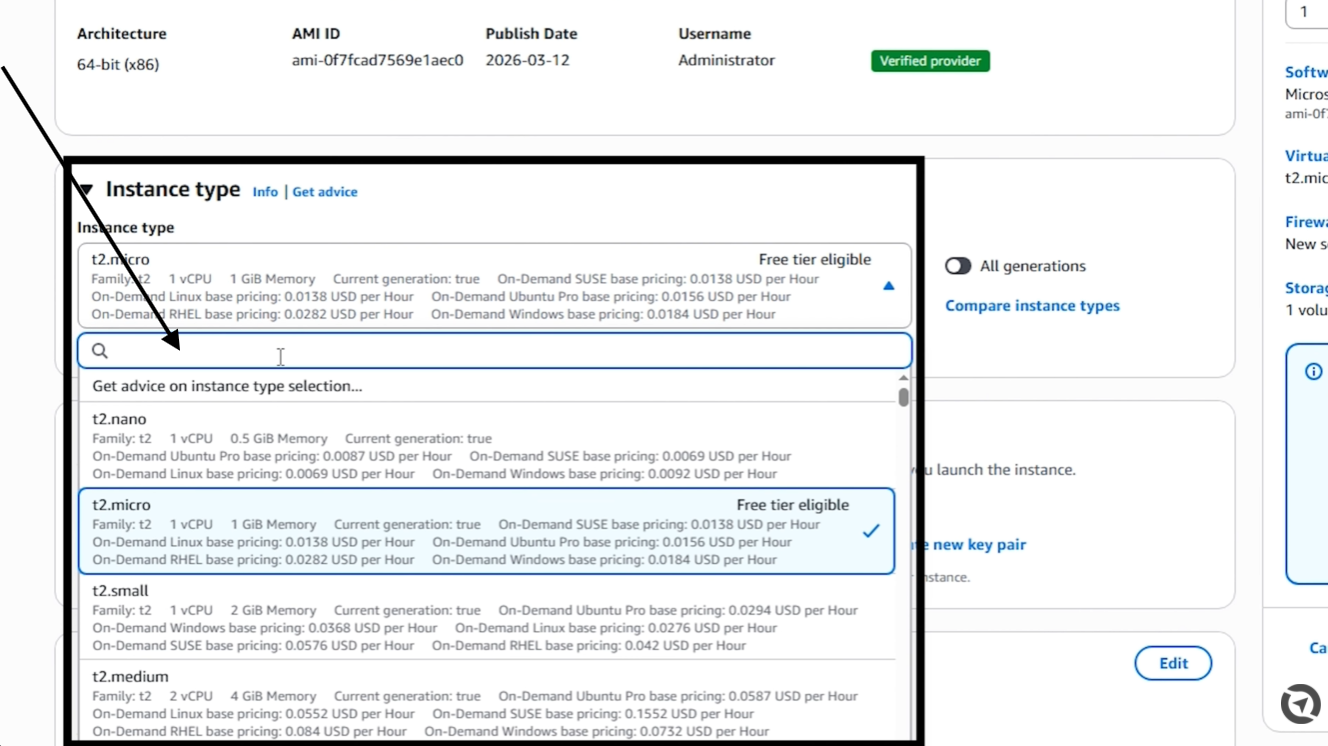
Step 5: Choose the Instance Type
Select an instance type that provides the required CPU and RAM.
Use the Open VTS System Requirements page to choose the correct server size.
Here t3 large is selected
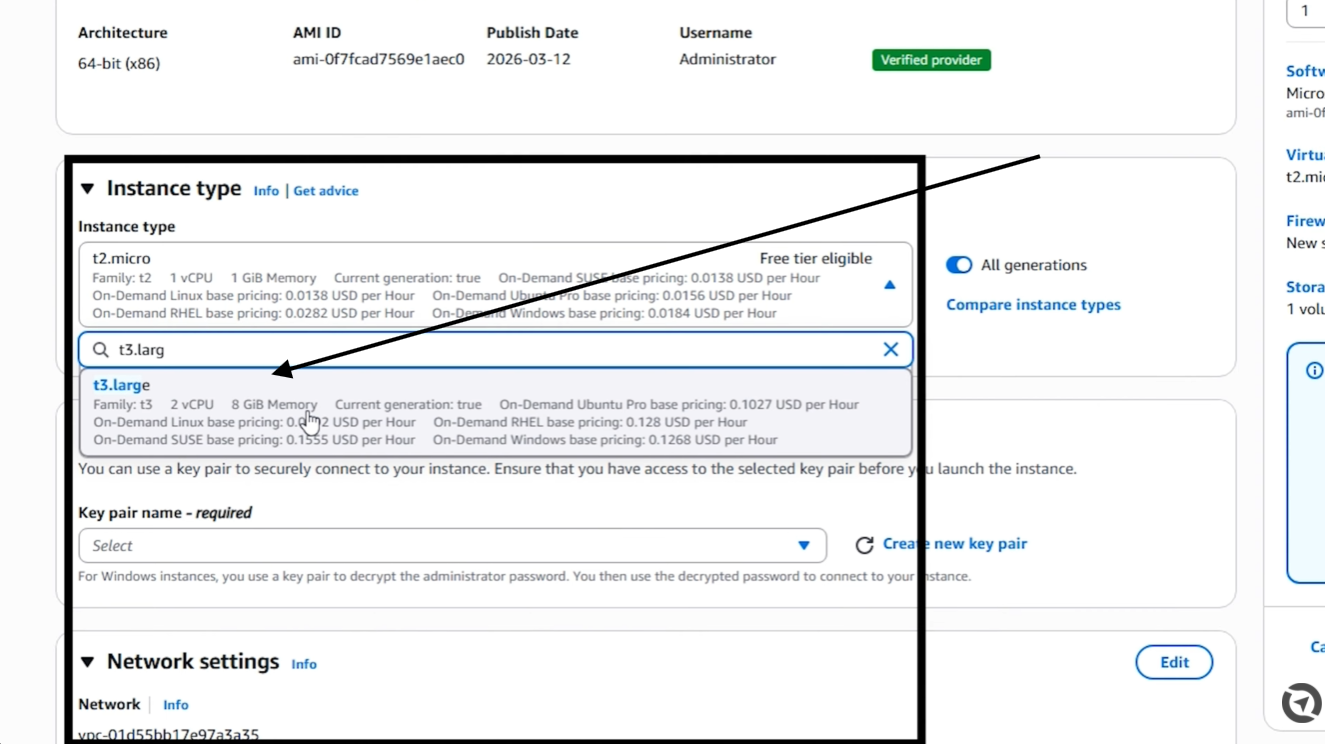
AWS instance-type names may differ by region and generation. Confirm the displayed CPU and memory instead of relying only on the instance-type name.
Step 6: Create and Save the Key Pair
Under Key pair, select Create new key pair.
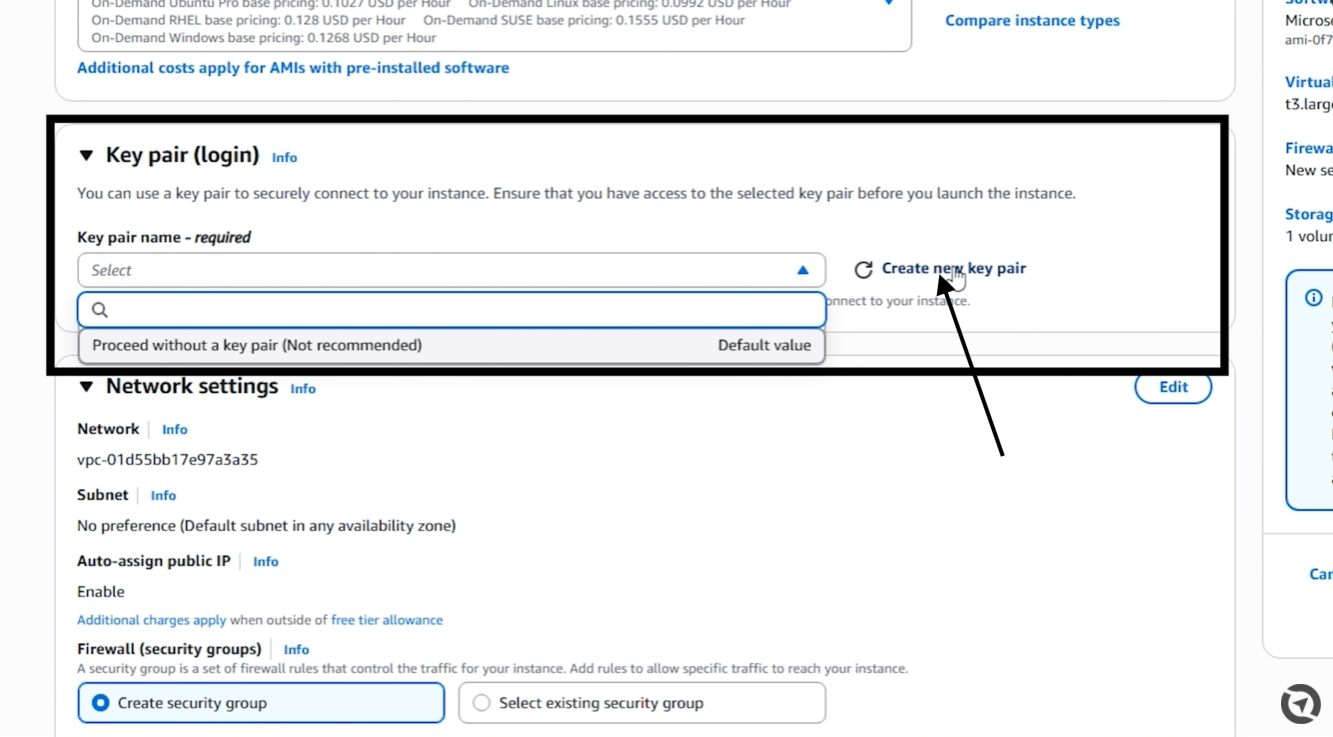
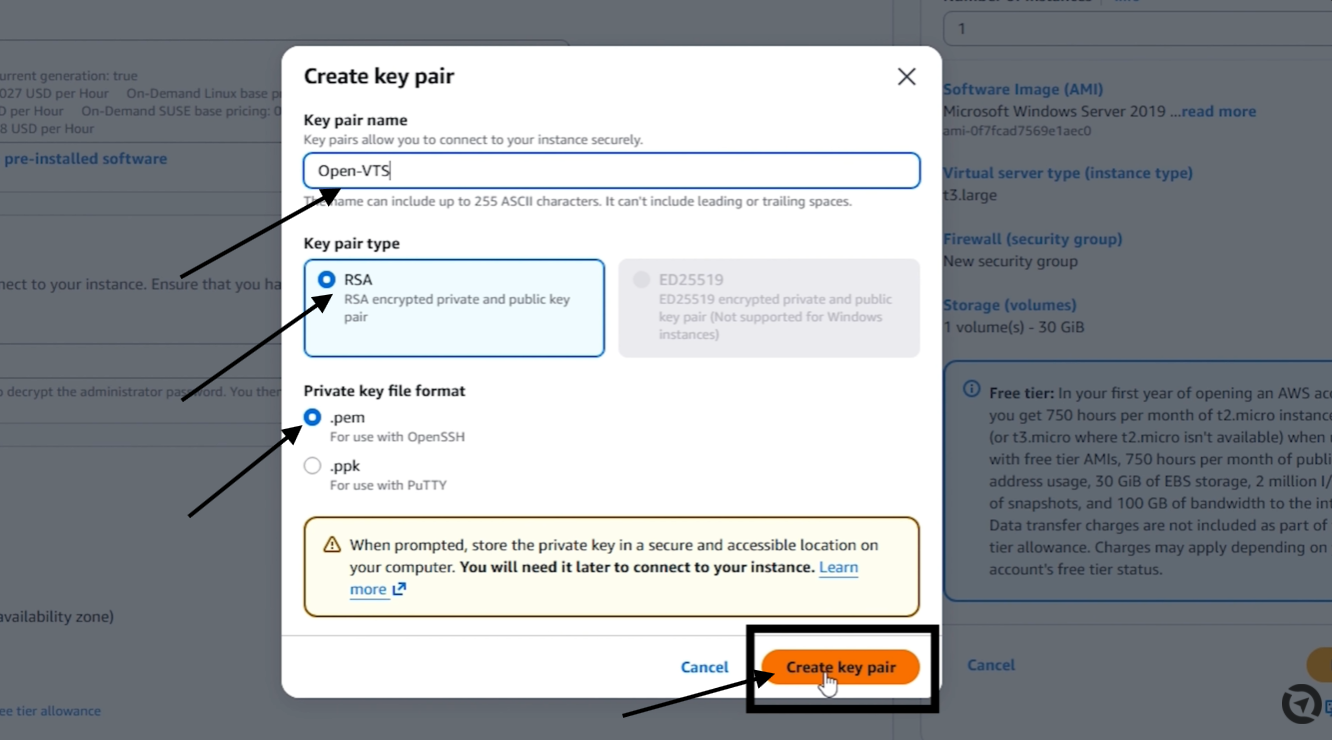
Enter a clear name, such as:
open-vts-server-key
For a Windows instance, select:
- Key pair type: RSA
- Private key format: .pem
Select Create key pair.
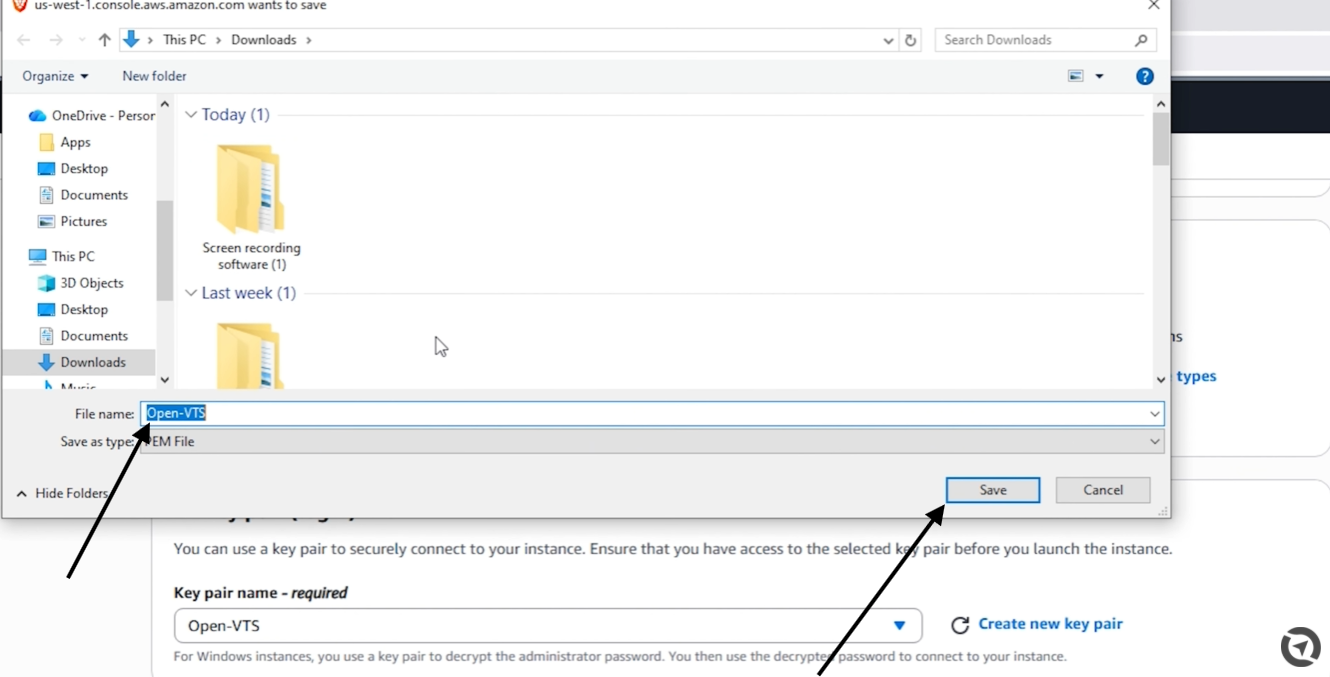
The private-key file will download to your computer. Store it in a secure location and do not share it.
AWS uses this private key to decrypt the initial Windows Administrator password. AWS does not keep a downloadable copy of the private key, so losing it can make future access recovery more difficult.
Step 7: Configure Storage
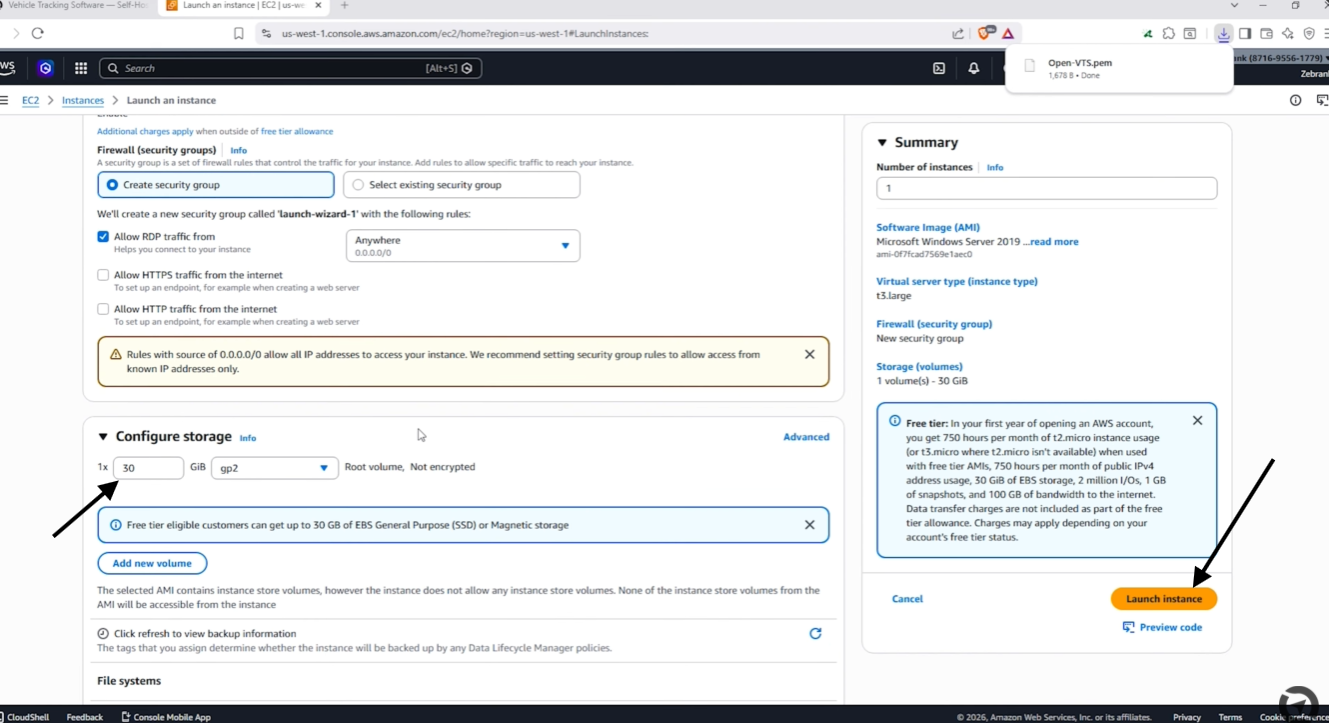
Under Configure storage, set the main disk to at least:
100 GB
Use an SSD-backed volume such as gp3.
Increase the storage when you expect:
- More vehicles
- Frequent device reporting
- Longer telemetry retention
- More reports, logs, or uploaded documents
- Local database backups
Review the instance summary.
Confirm:
- Correct server name
- Supported Windows Server AMI
- Correct CPU and RAM
- Correct key pair
- At least 100 GB SSD storage
Select Launch instance.
After AWS creates the instance, open the instance details and wait until:
- Instance state: Running
- Status checks: Passed
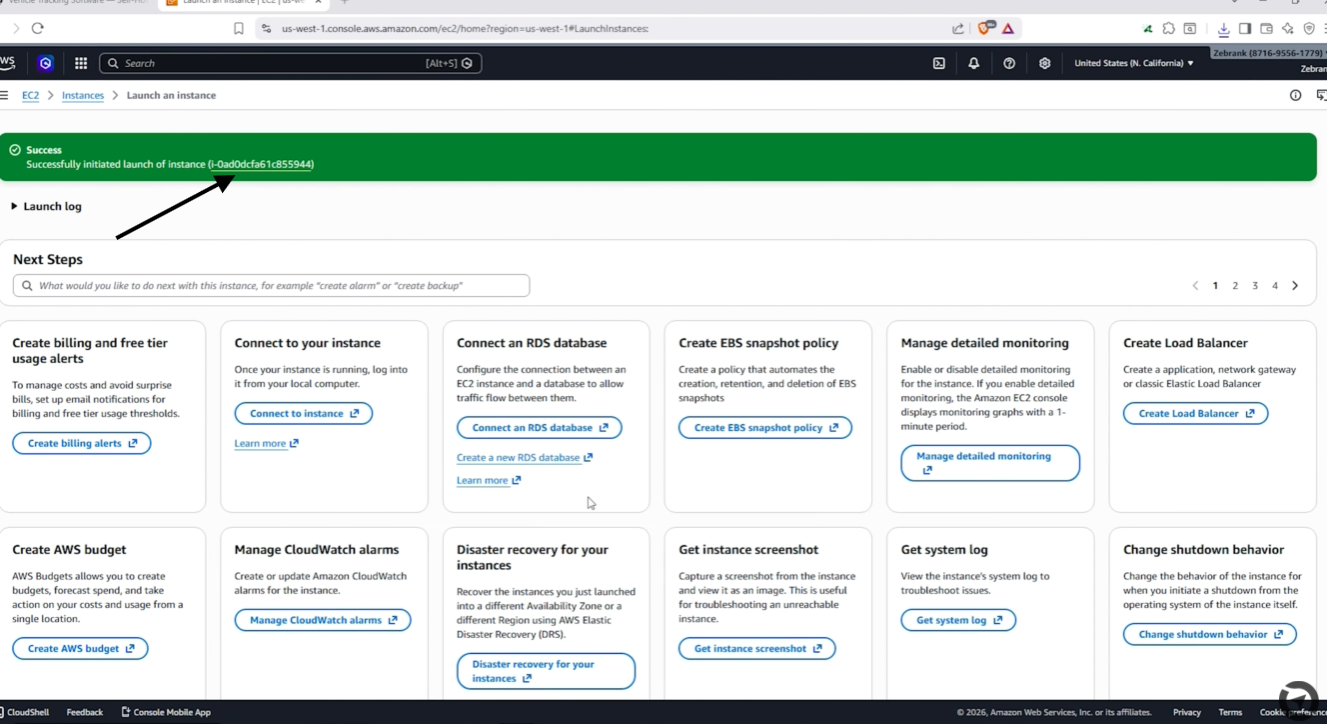
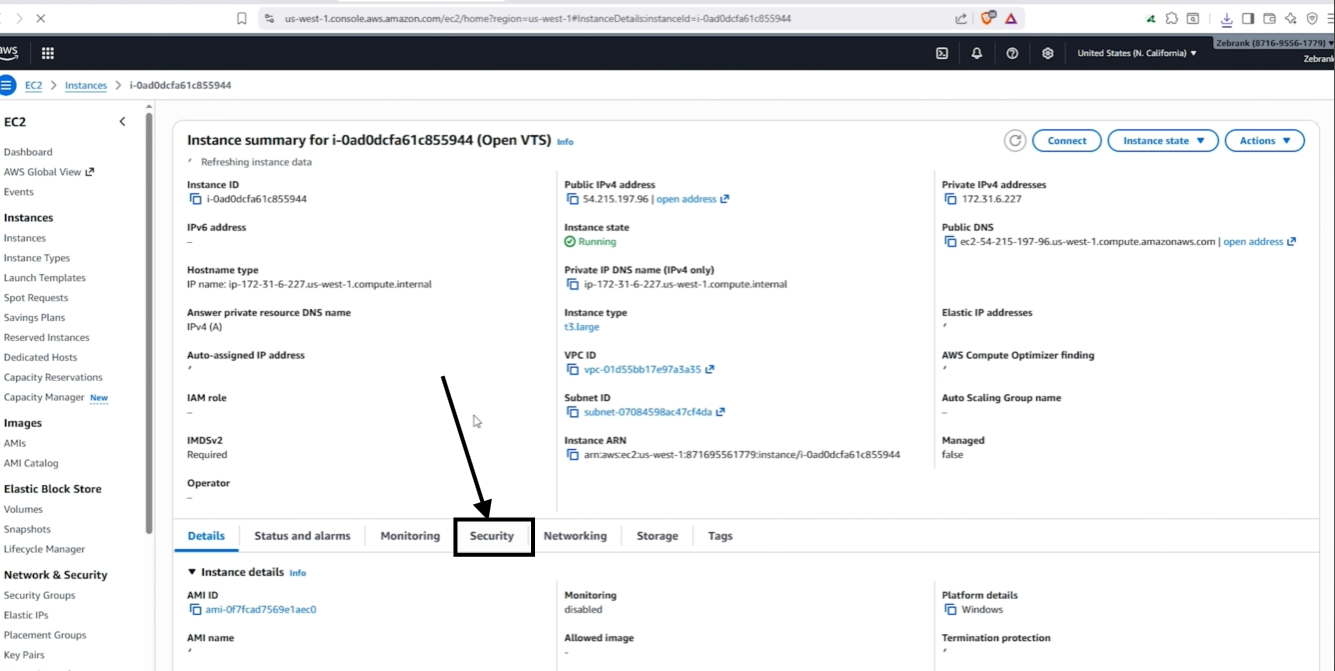
Step 9: Configure the Security Group
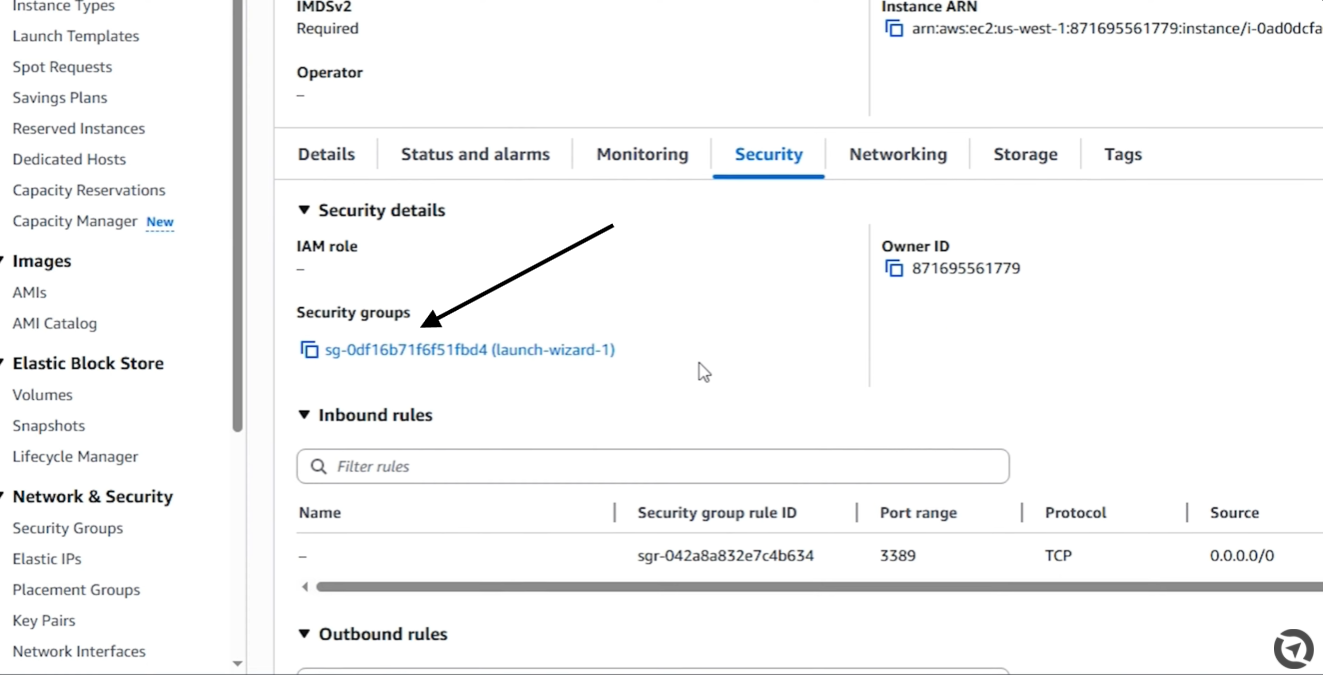
Open the EC2 instance and select the Security tab.
Open the attached security group,
then select Edit inbound rules.
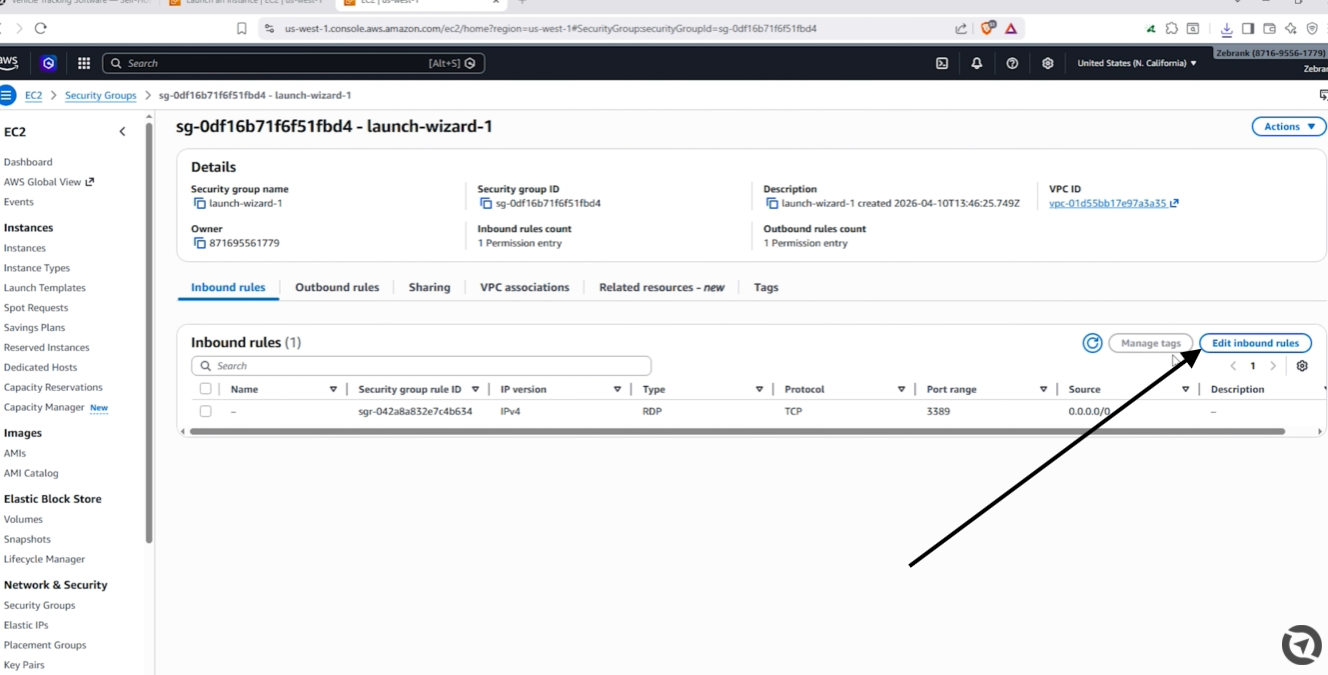
A security group acts as a virtual firewall and controls which incoming connections can reach the server.
| Type | Port | Source |
|---|---|---|
| RDP | 3389 | My IP or trusted administrator IP |
| HTTP | 80 | |
| HTTPS | 443 | |
| PORT RANGE | 7500-75800 |
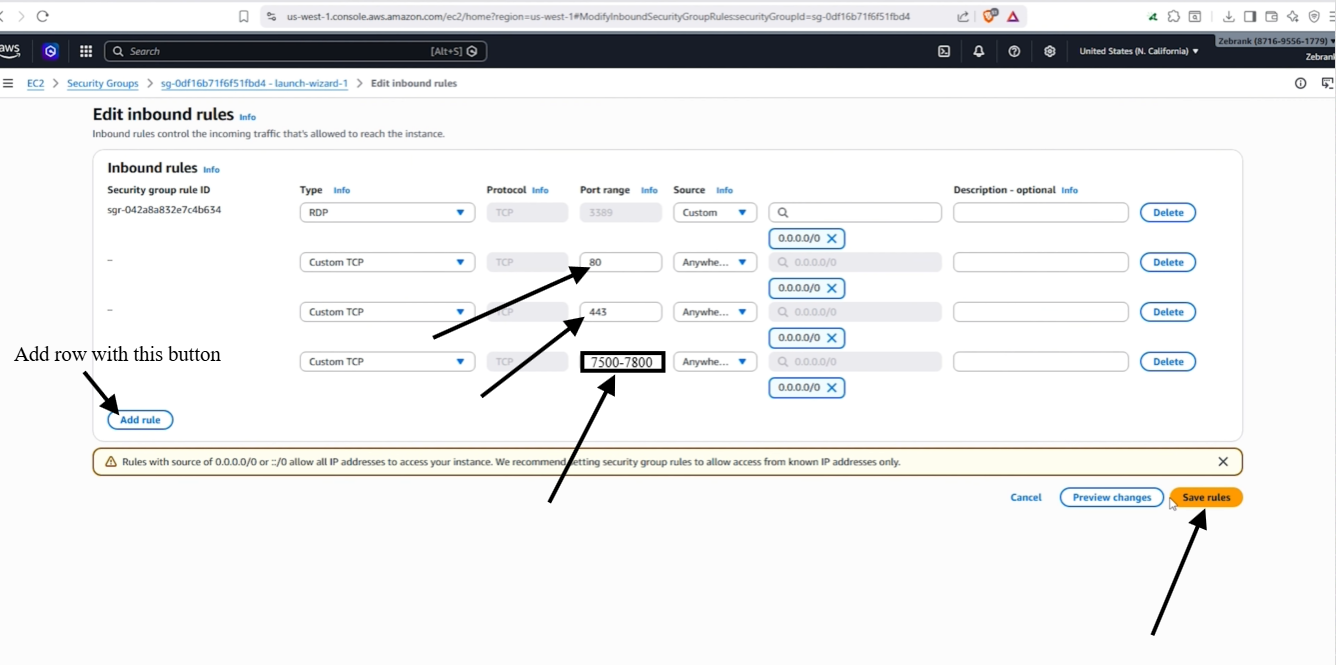
Important GPS port rule
Open only the port required by the GPS protocol you will use.
For example, if your devices use GT06 and the configured Open VTS port is 7510, open only port 7510.
Do not open the complete port range 7500–7800 unless an Open VTS technical guide specifically requires it for your deployment.
Do not expose internal application services such as:
- PostgreSQL
- Redis
- Backend API
- Frontend service
- Listener diagnostic API
AWS recommends restricting RDP access to specific trusted IP ranges and avoiding unnecessarily large open port ranges.
Select Save rules.
Step 8: Assign an Elastic IP Address
A permanent public IP address is required so GPS devices can continue sending data to the same server address.
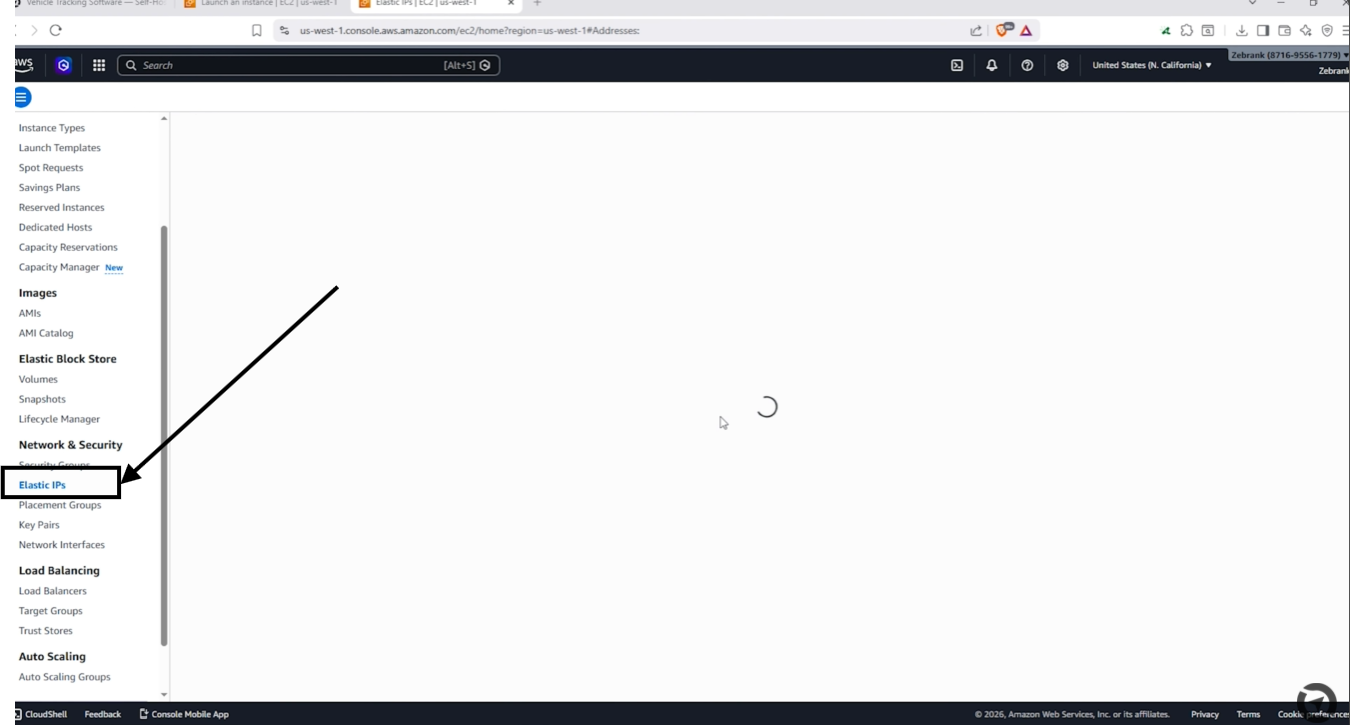
From the EC2 navigation menu, open Elastic IPs.
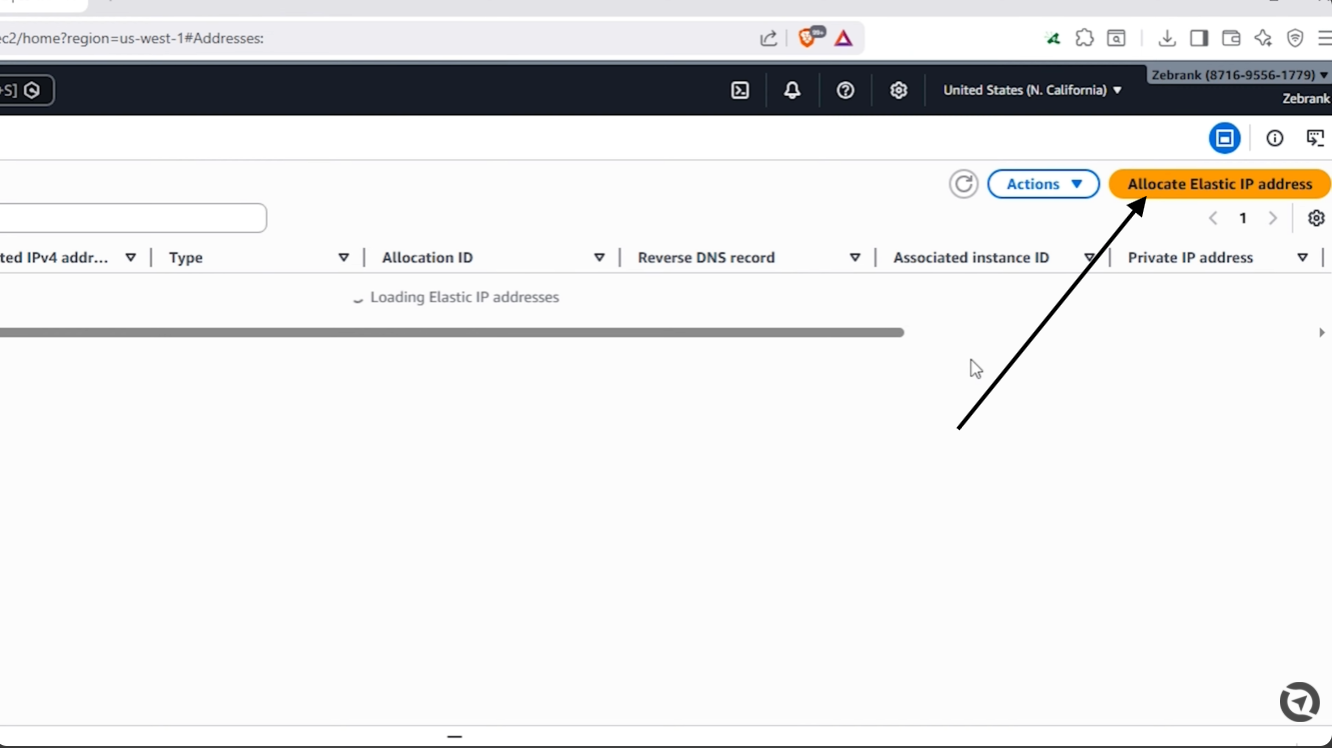
Select Allocate Elastic IP address.
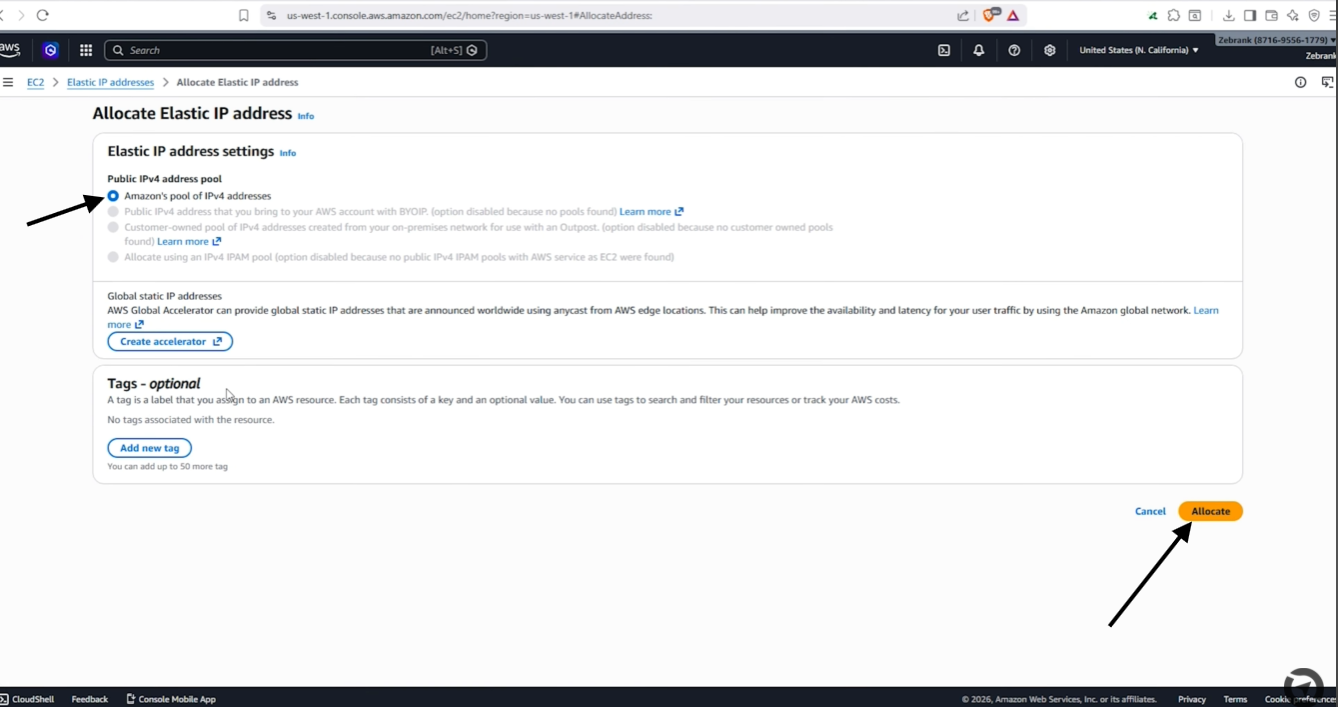
Now select Allocate.
After the address is created:
Give it a clear name.
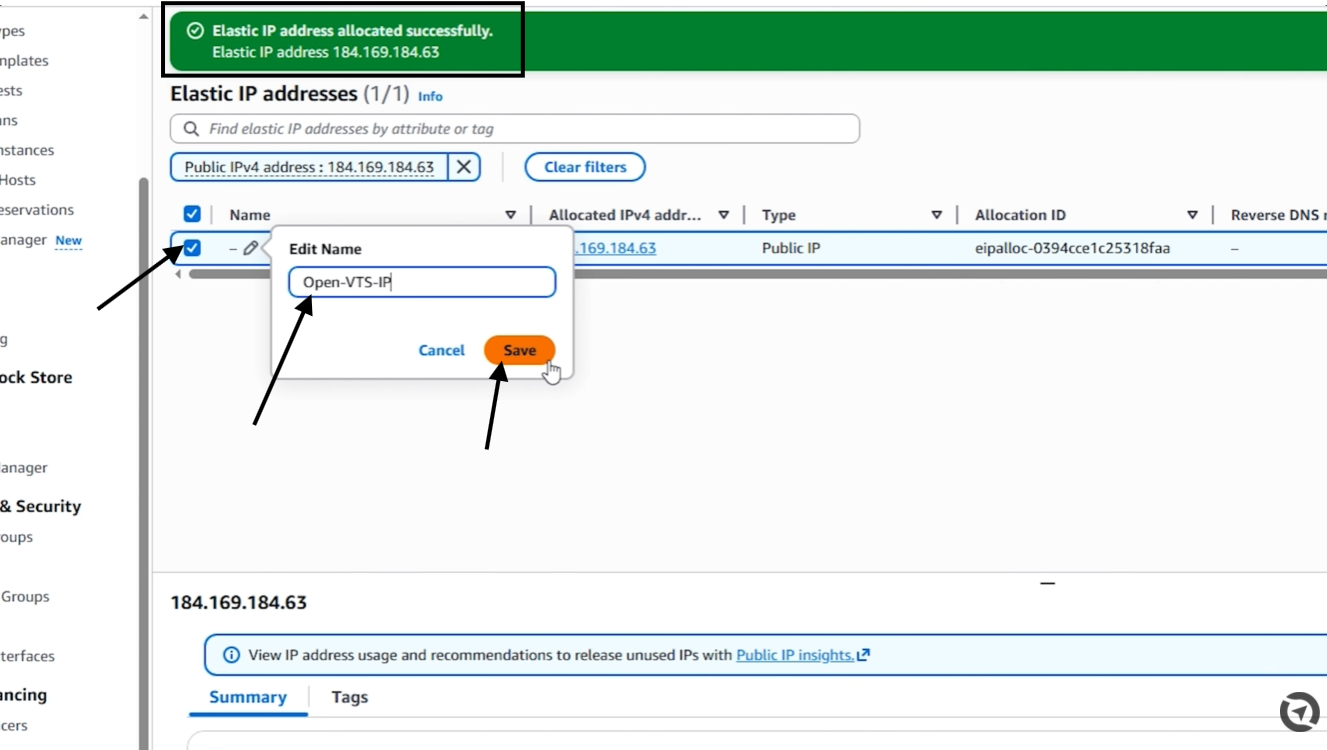
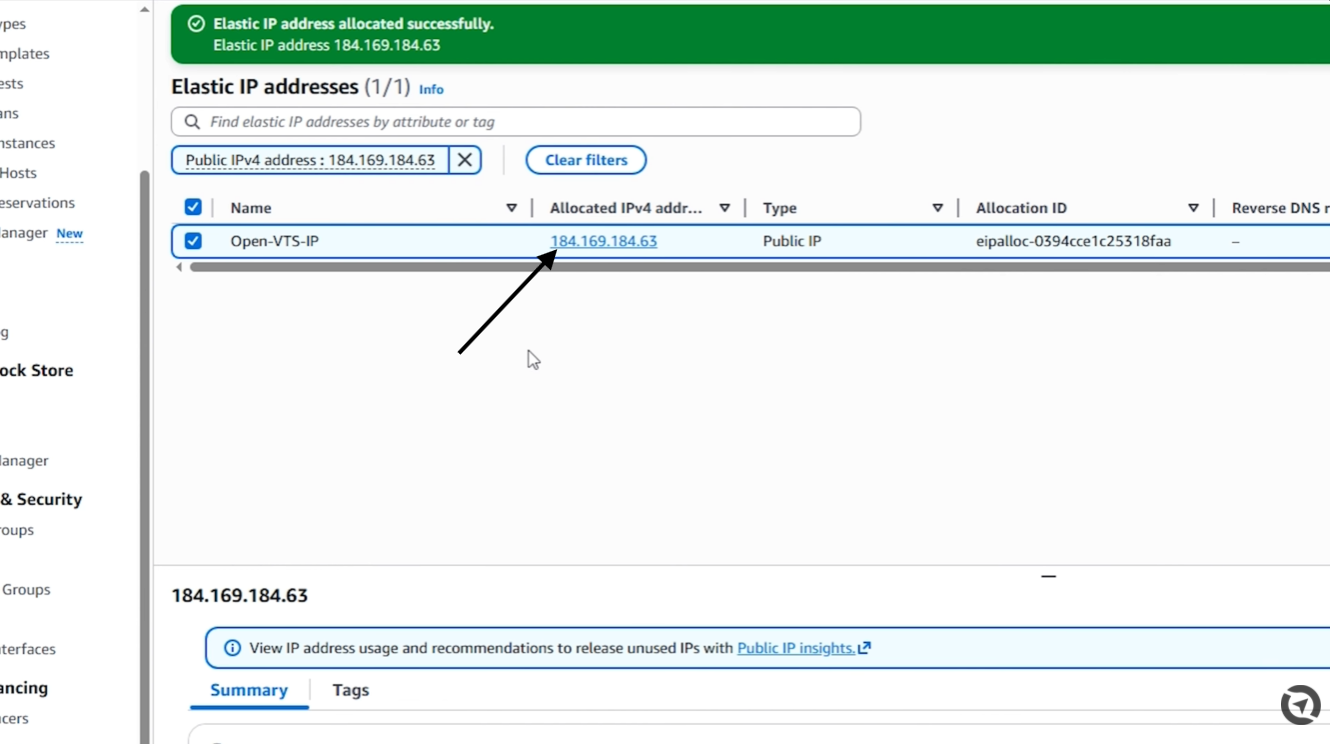
Select the Elastic IP.
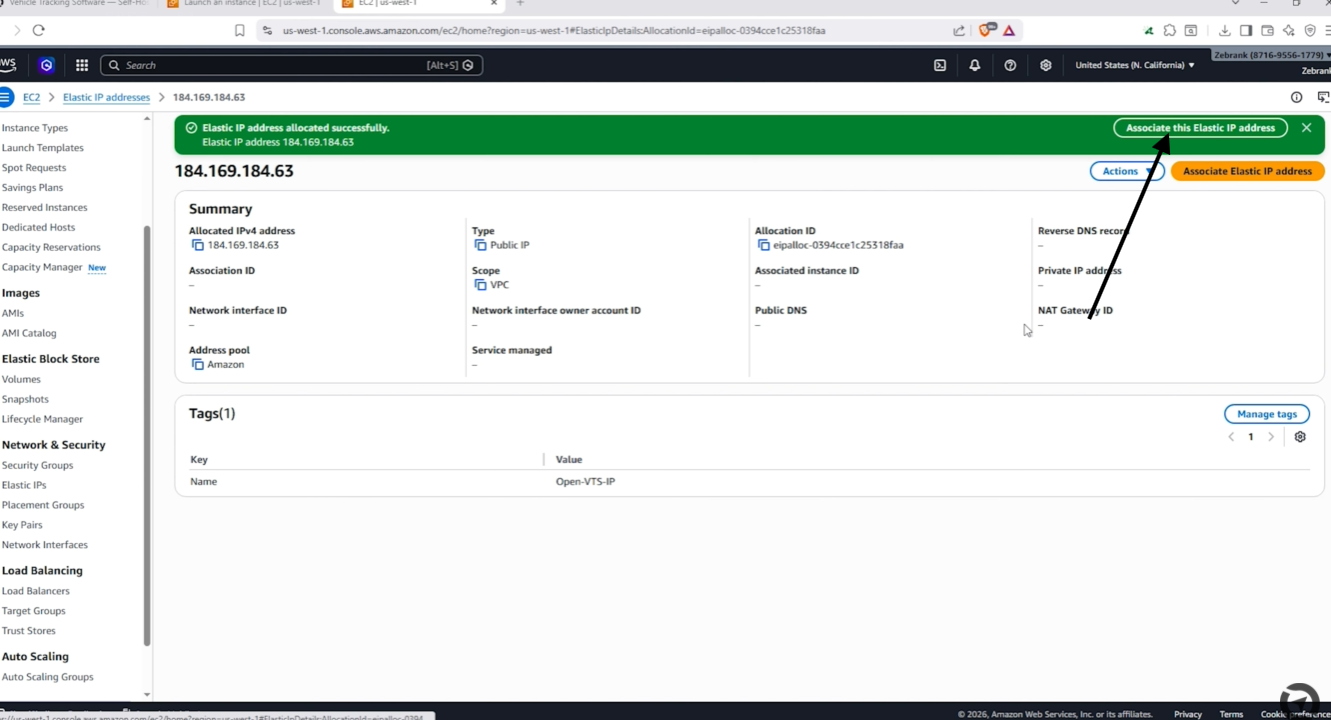
Choose Associate Elastic IP address.
Select your instance.
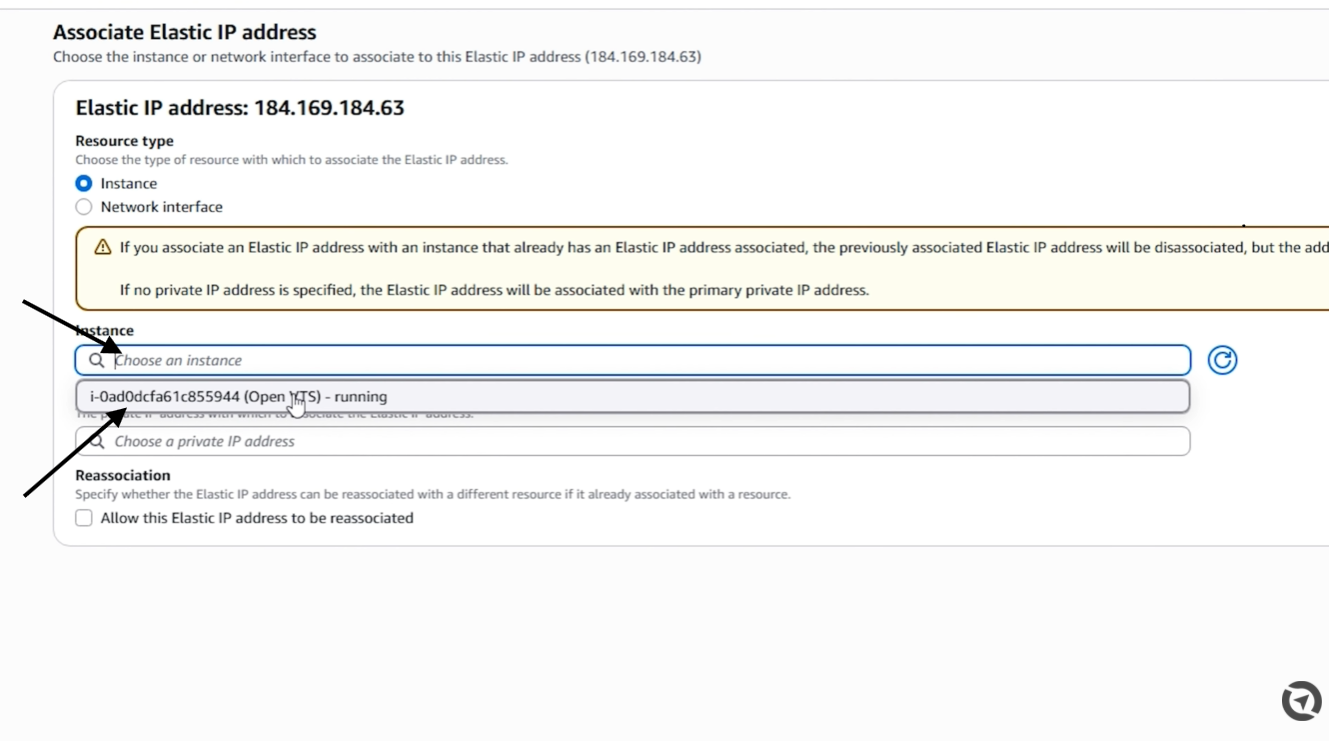
Select Associate.
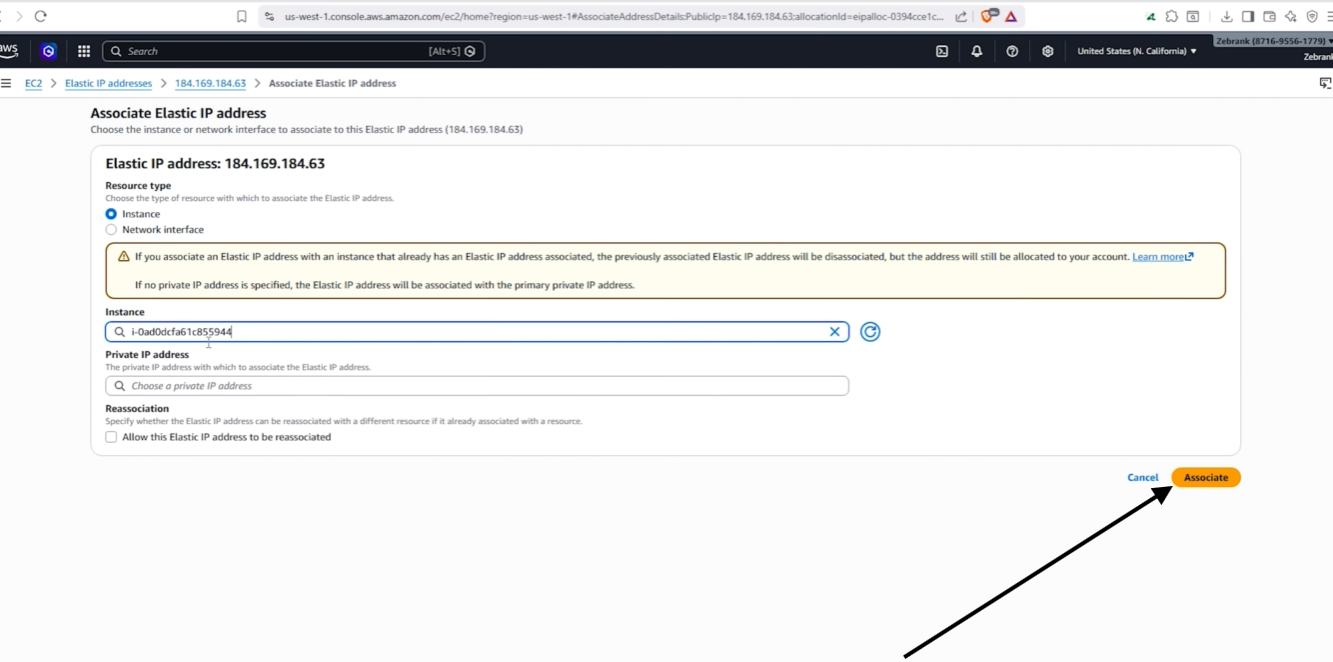
The Elastic IP is now linked to the Windows Server.
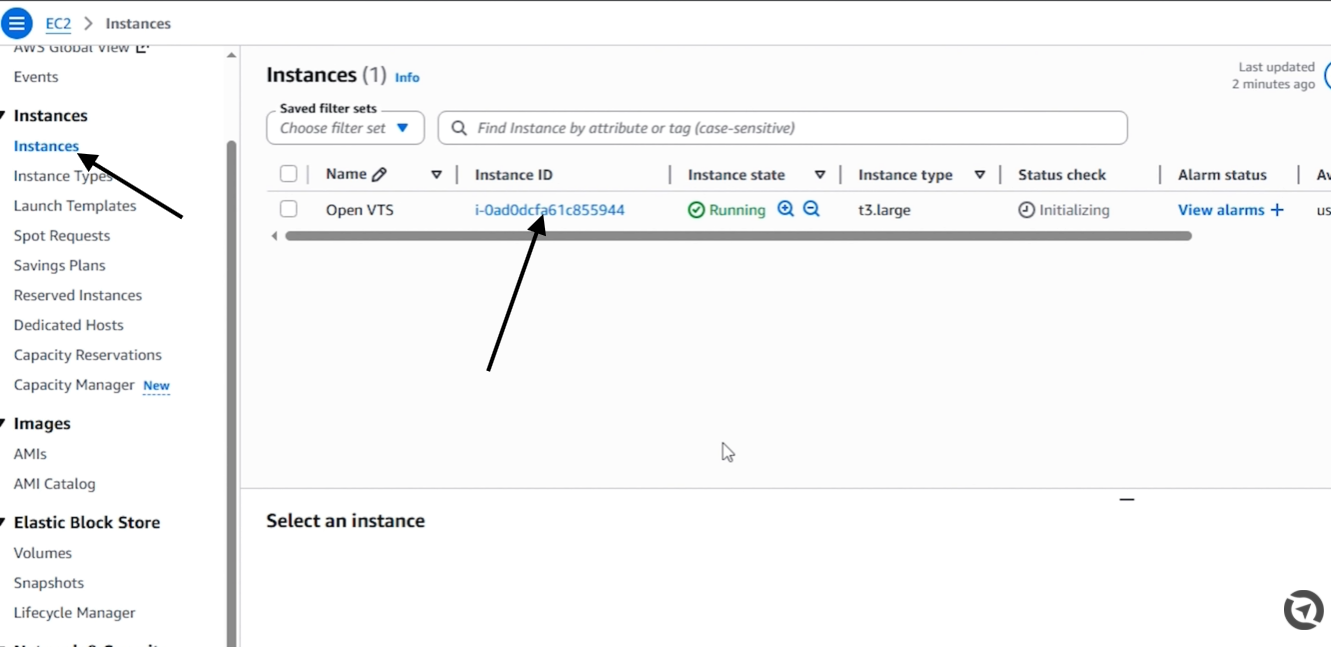
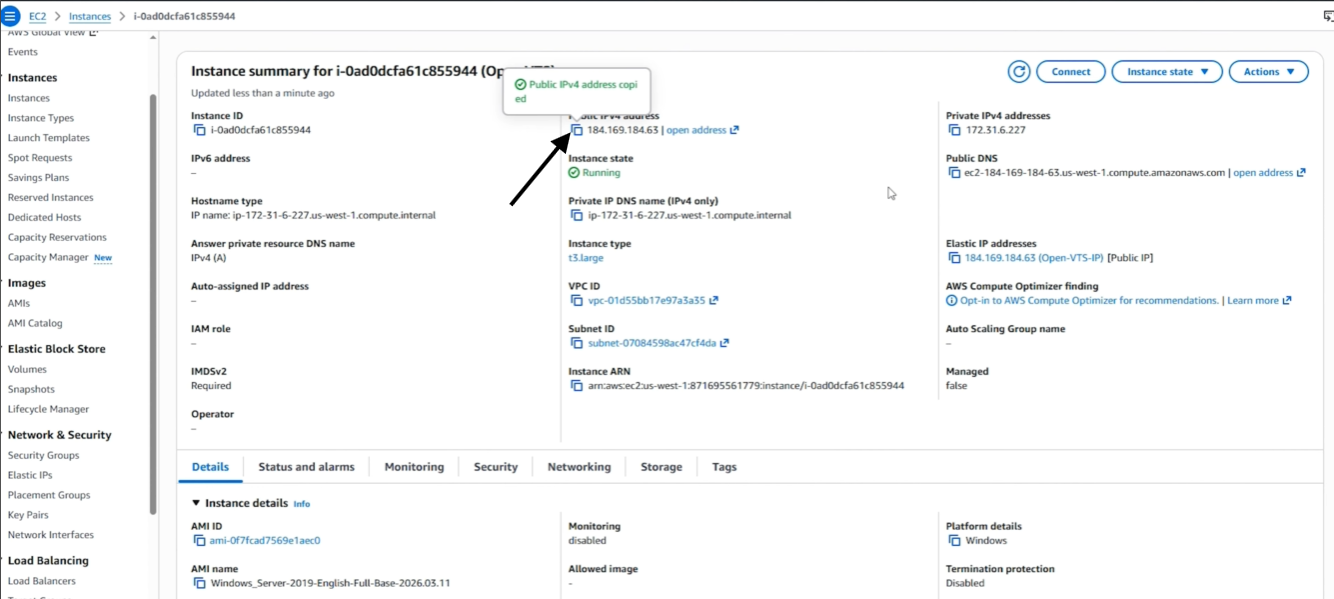
Copy the public IPv4 address and store it safely. You will use it for:
- Remote Desktop
- Open VTS web access
- GPS device configuration
- DNS configuration
Step 10: Retrieve the Windows Password
Return to EC2 → Instances and select the Open VTS server.
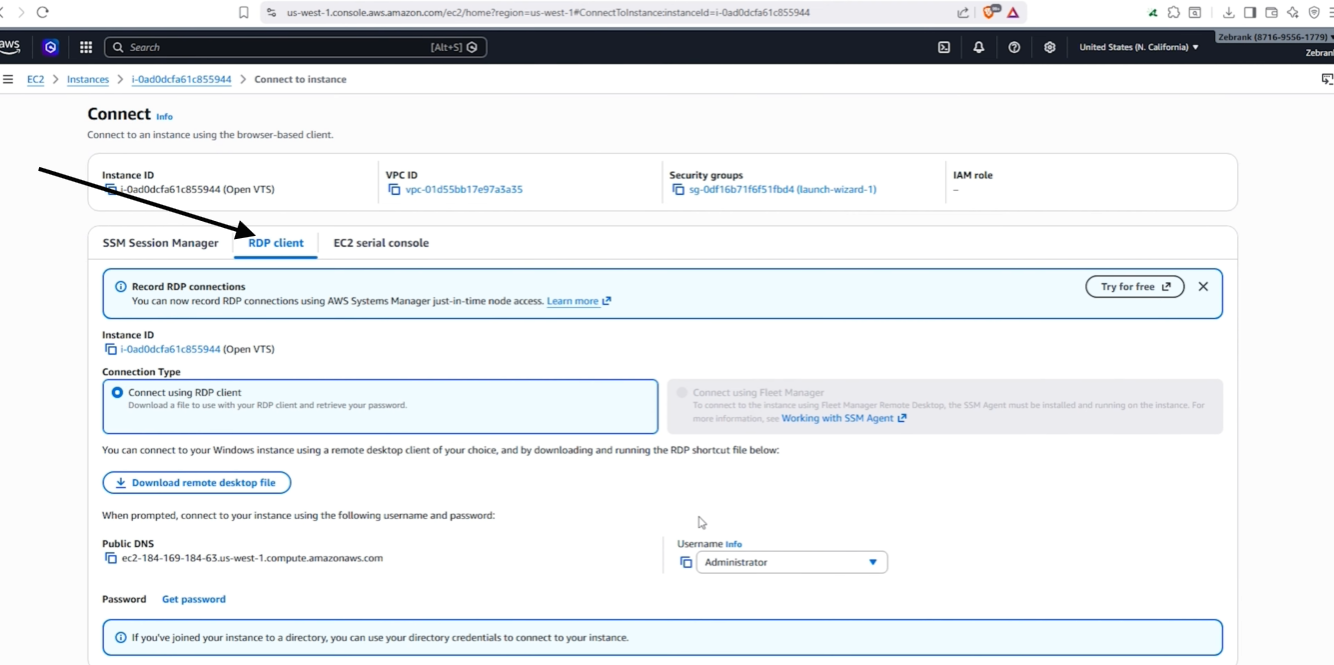
Select Connect, then open the RDP client tab.
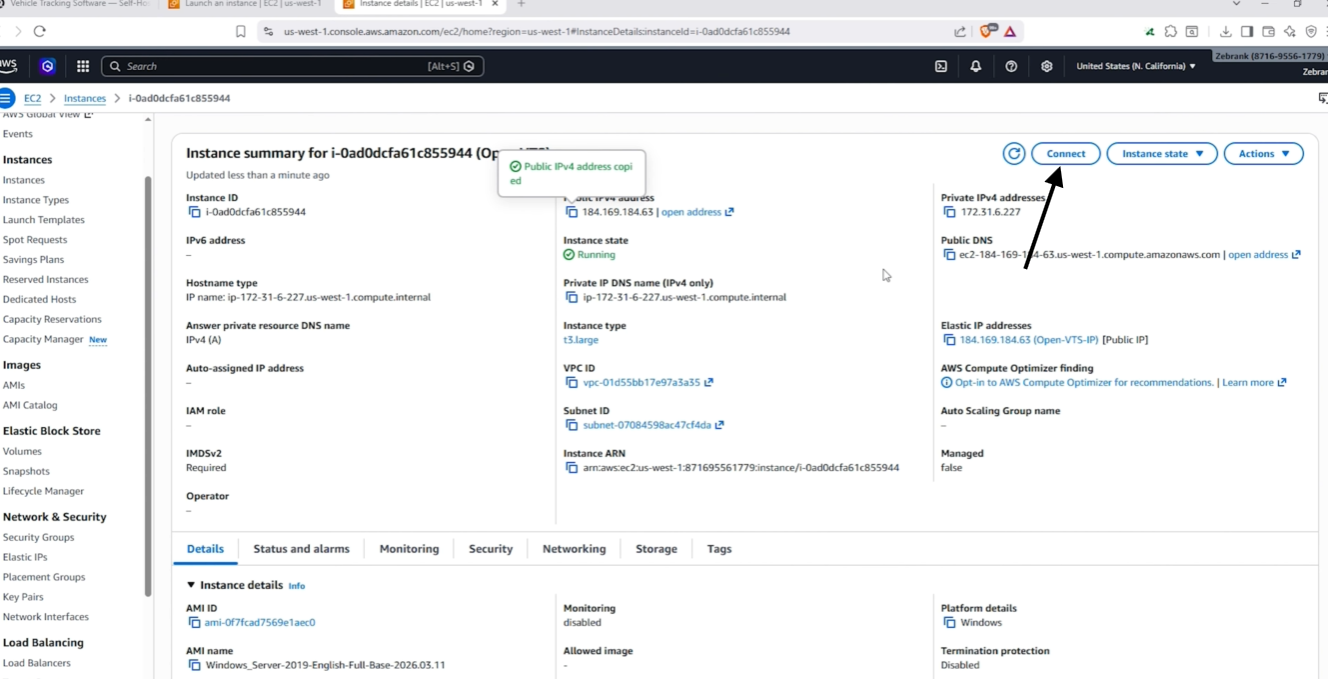
Select RDP client
On your local Windows computer:
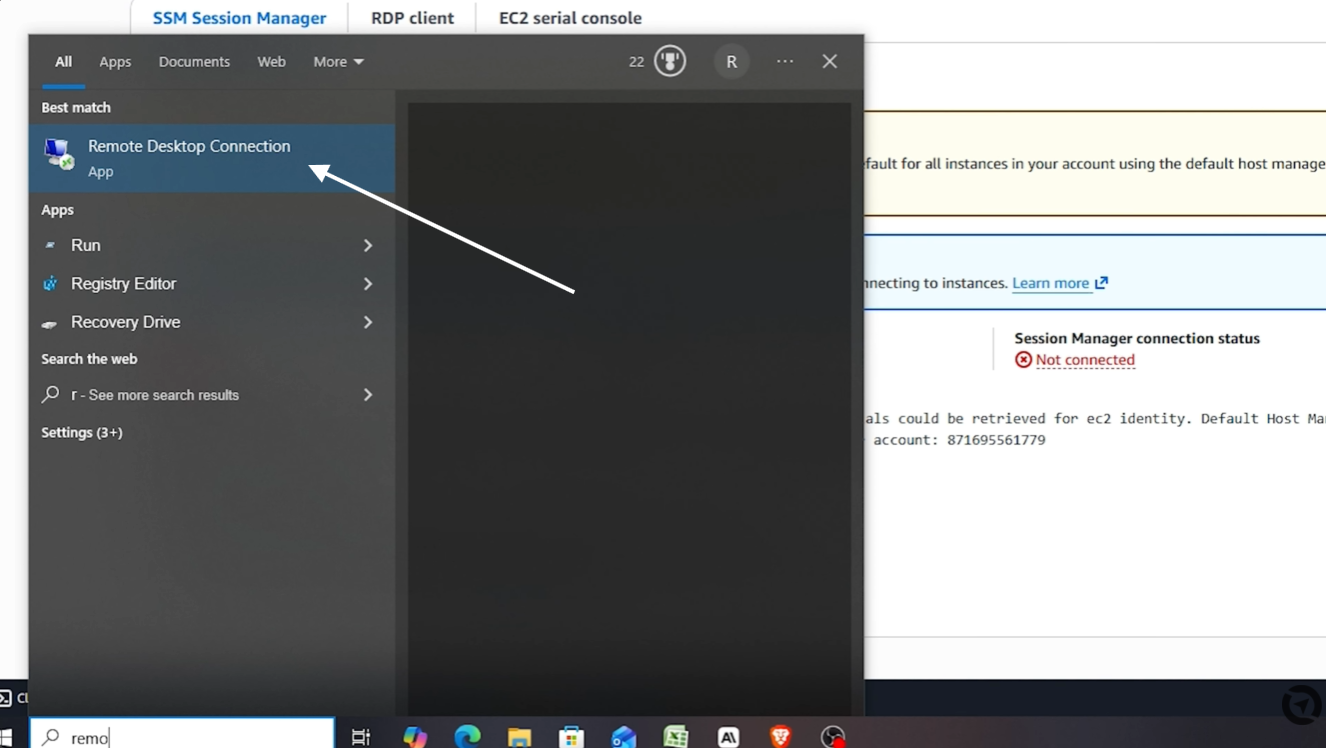
Open Windows Search.
Search for Remote Desktop Connection or RDC.
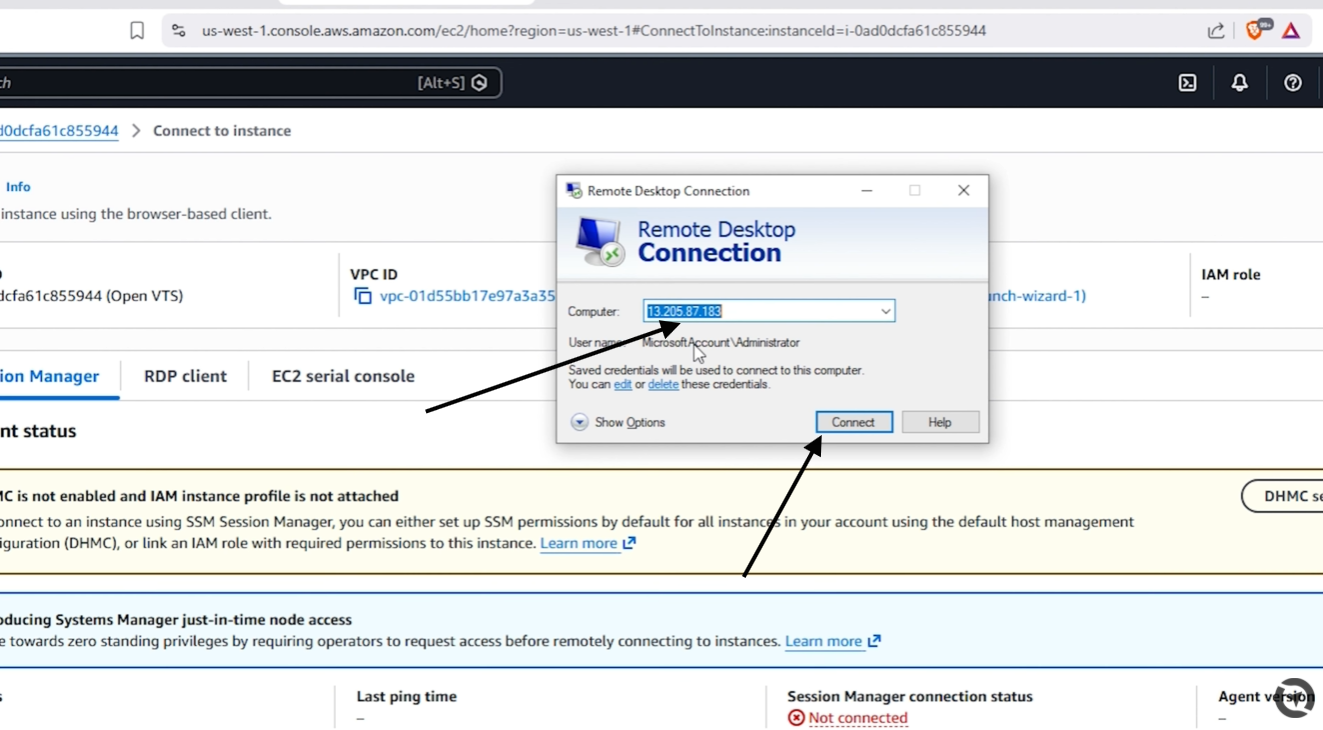
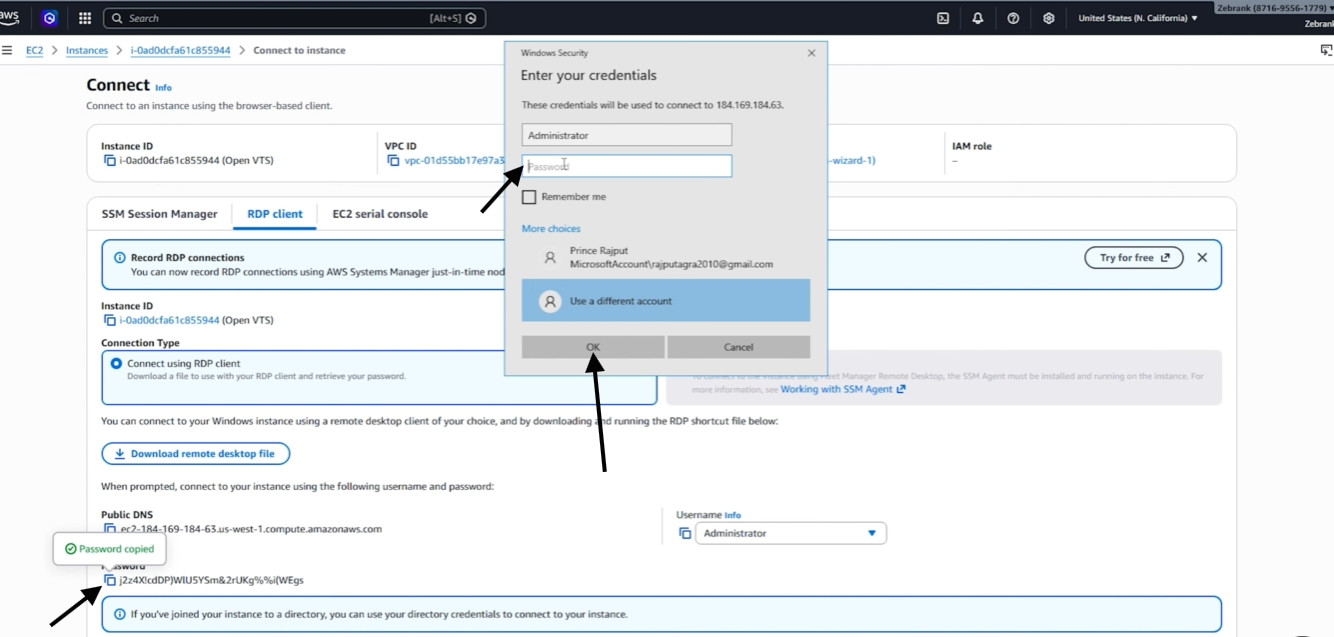
Now paste the Public IP copied
Here click more choices
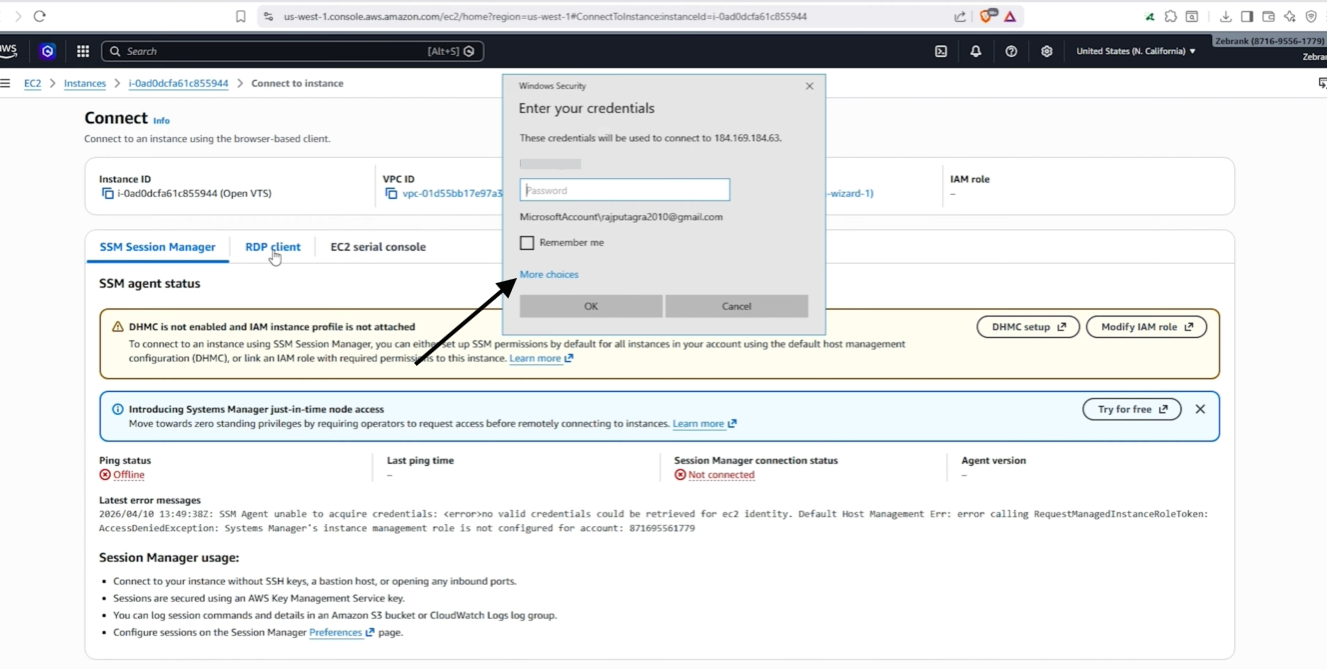
Now choose "Use different account"
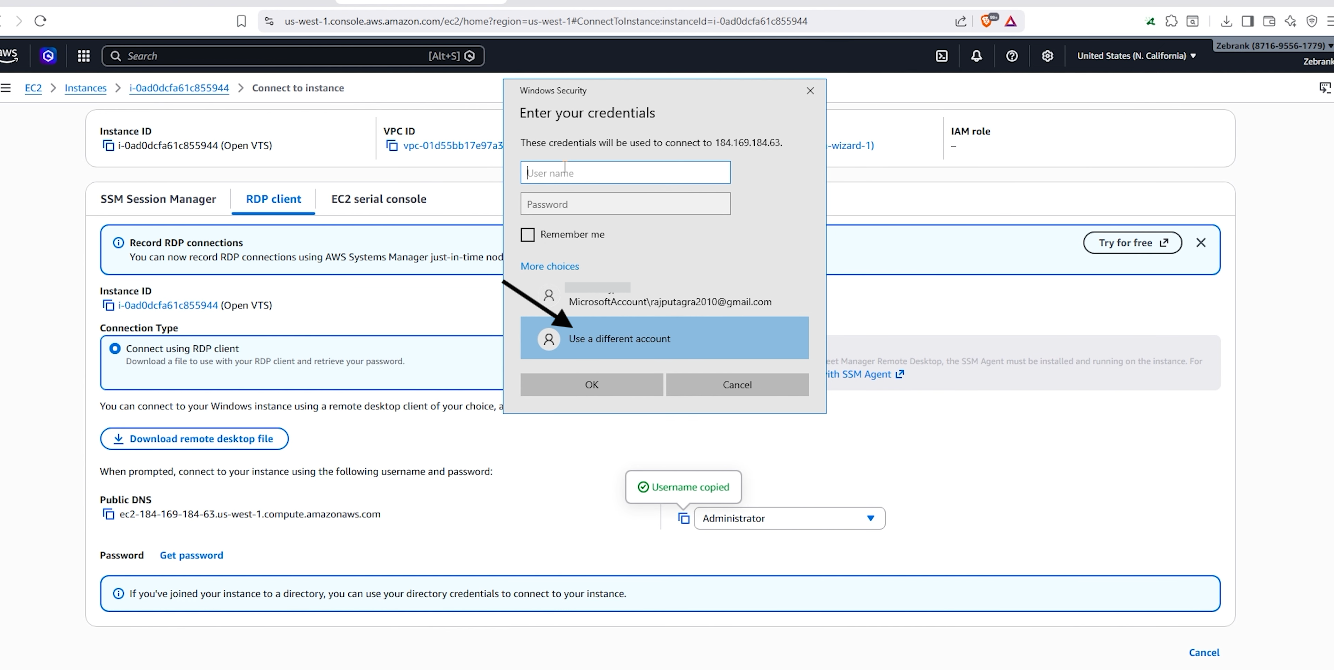
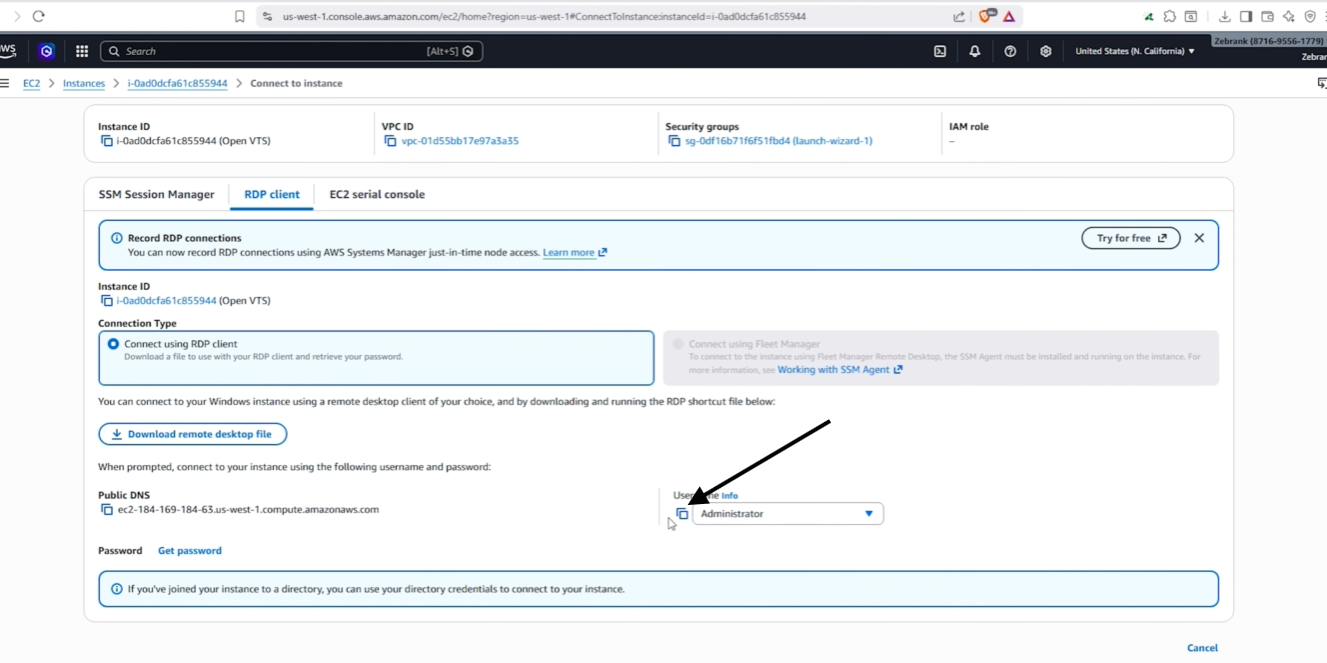
Now keep remote desktop as it is go to the application and copy the user name
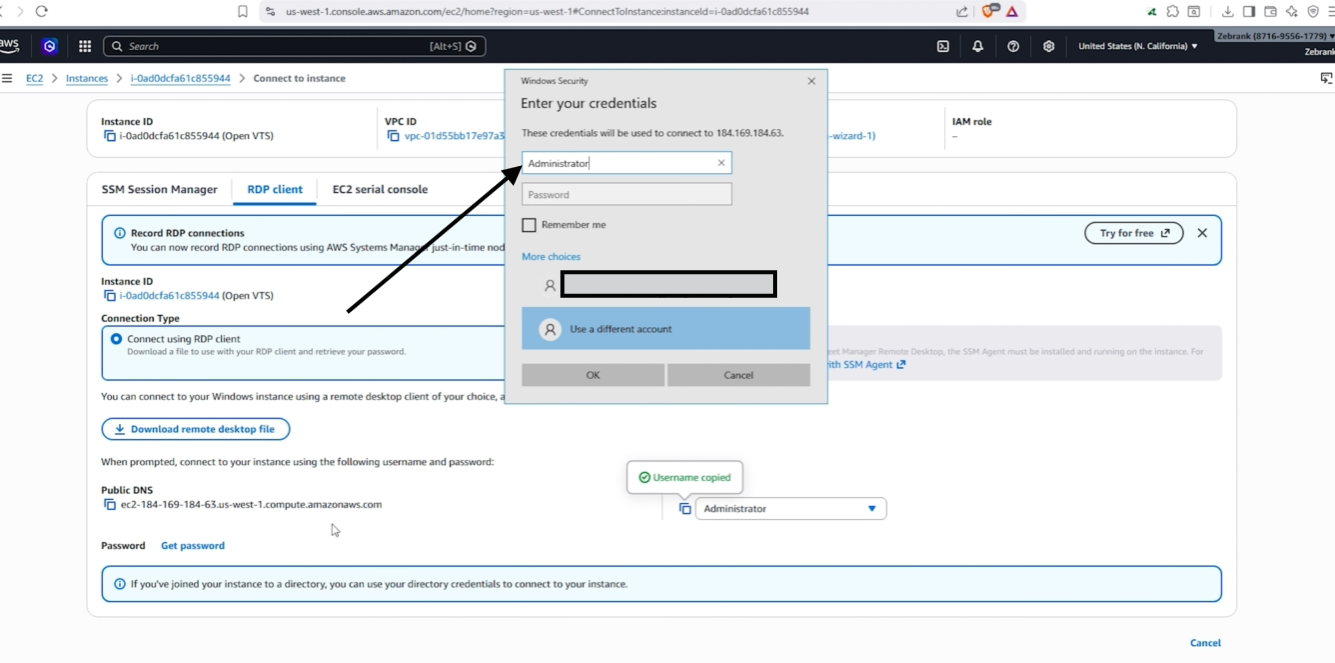
Paste the username in username field
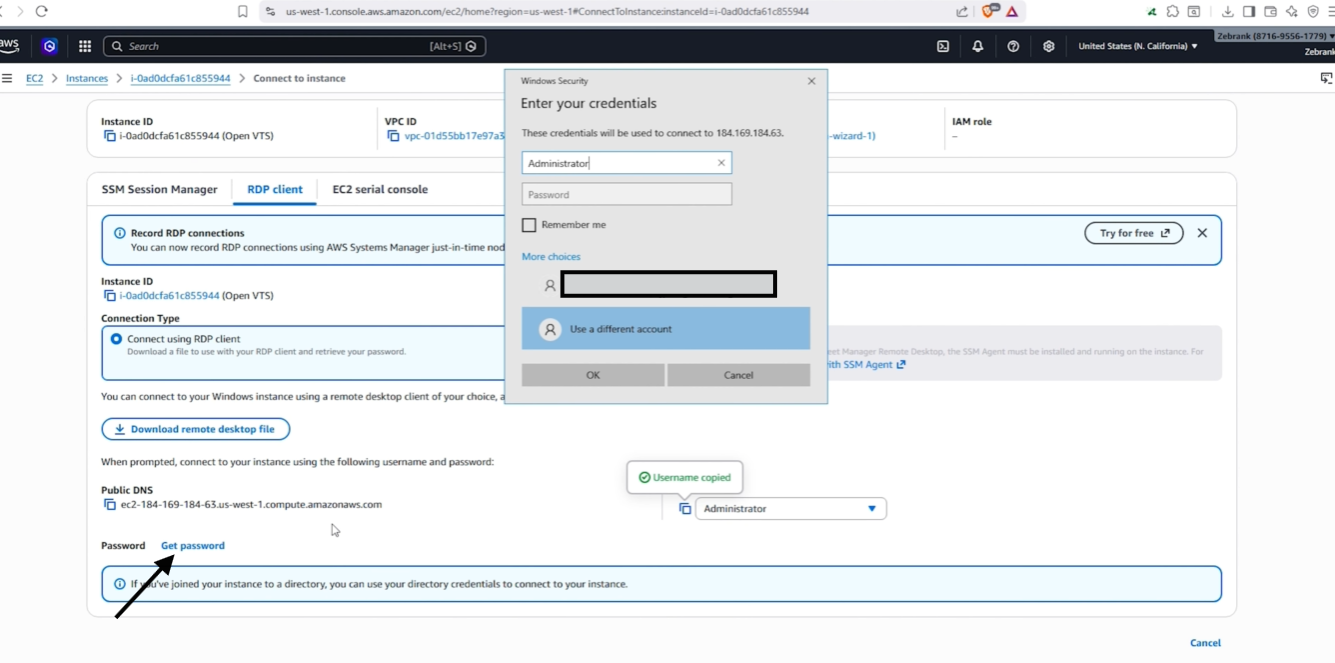
Now go to application and click get password
Upload the .pem private-key file created earlier, then select Decrypt password.
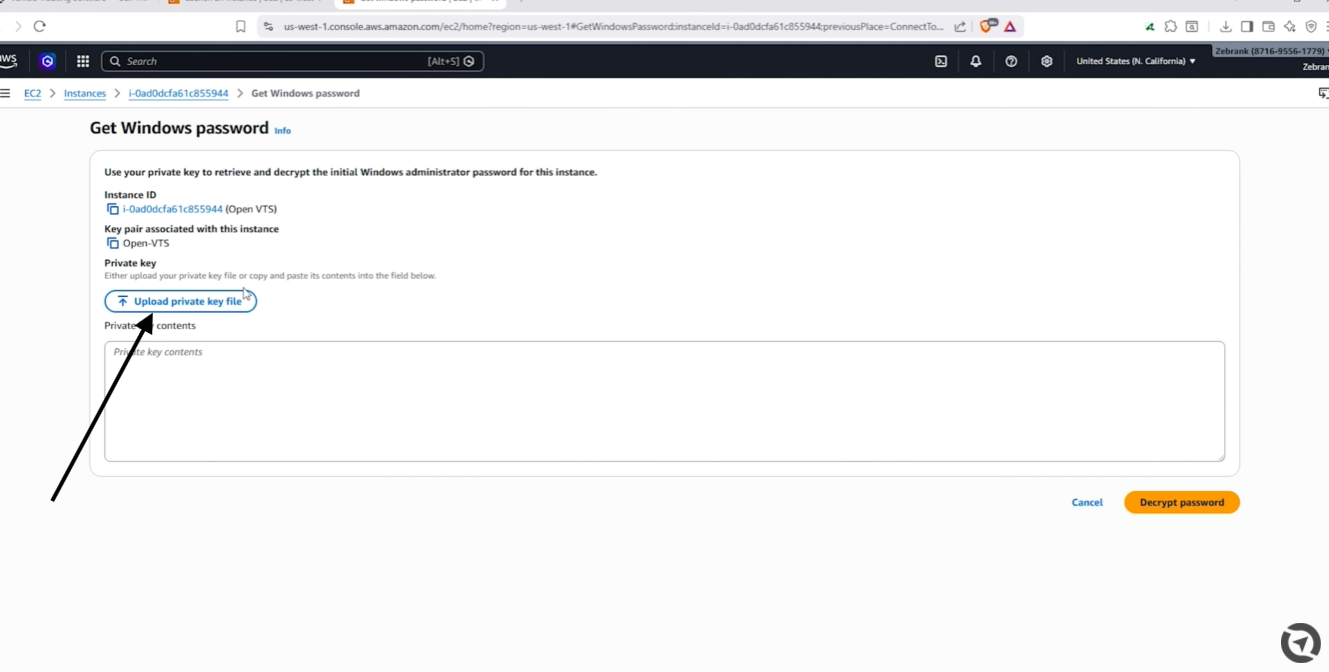
Click decrypted password
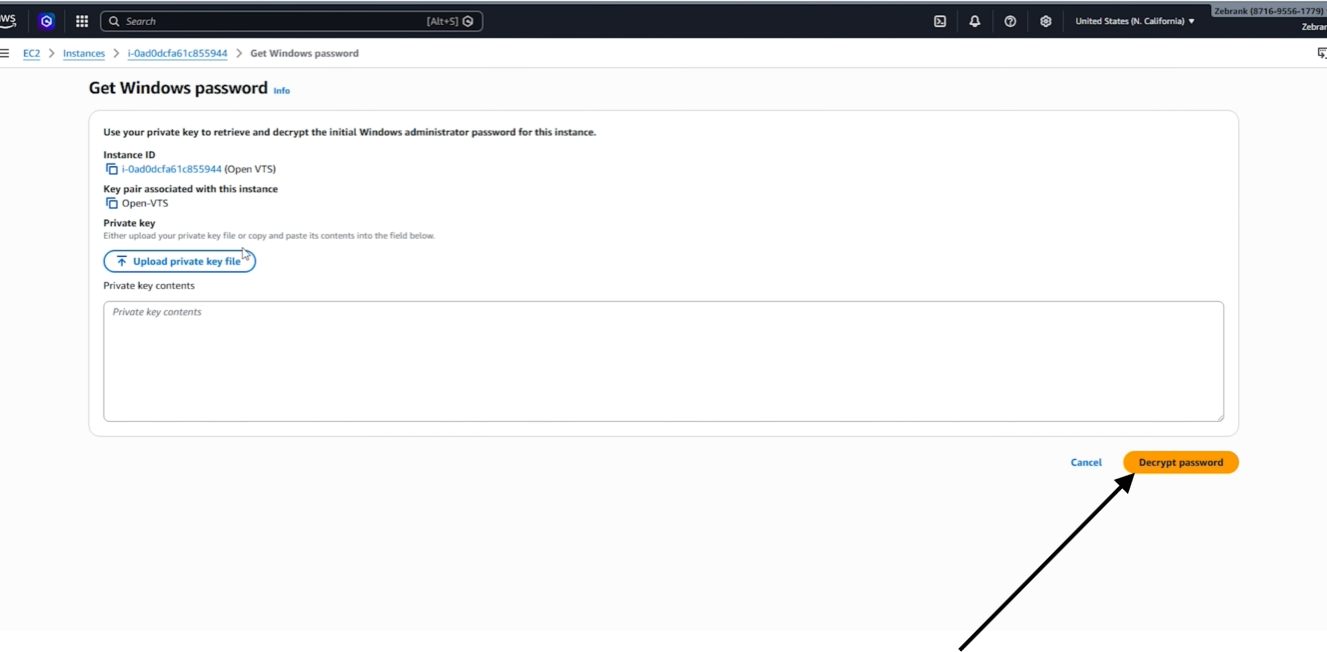
The password may take a few minutes to become available after the instance is first launched.
Copy the decrypted password and paste in password field check the remember me box and then click ok
The Windows Server desktop will open.
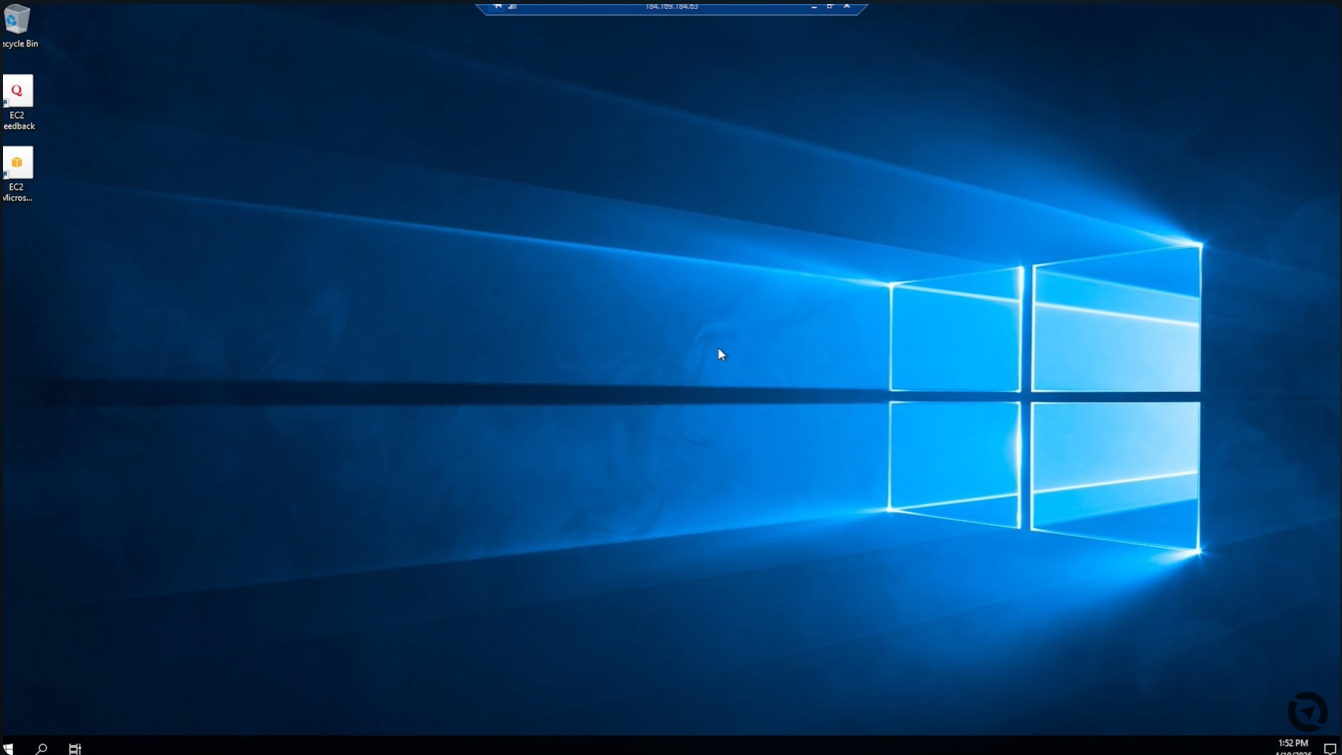
Download or install any browser on the server now to install the Open VTS.Verify the Server Is Ready
Before continuing, confirm:
- The EC2 instance is running
- AWS status checks have passed
- A supported 64-bit Windows Server is installed
- The server has sufficient CPU and RAM
- At least 100 GB SSD storage is configured
- An Elastic IP is associated
- Remote Desktop is working
- Port 80 is open
- Port 443 is open
- Port range should be 7500-7800
- Only the required GPS protocol port is open
- RDP access is restricted to trusted IP addresses
- The private-key file is stored securely
- A supported browser is installed
Your Windows Server is now ready for Open VTS installation.
Common Problems
The Windows password is not available
Wait a few minutes after launching the instance, then try Get password again.
Remote Desktop cannot connect
Check that:
- The instance is running
- The Elastic IP is associated
- Port 3389 is allowed
- The RDP rule includes your current public IP
- Windows status checks have passed
The private-key file is missing
AWS does not allow the same private key to be downloaded again. Keep the original file securely stored. Recovery may require additional AWS administration steps.
The server IP changed
Confirm that the Elastic IP is still associated with the correct EC2 instance.
Next Step
Continue to Install Open VTS on Windows to download and install Open VTS on the prepared server.