
Route Optimization
Route Optimization helps a User build a multi-stop journey, arrange its start and end points, and optimize the order of the stops. Points can be added from existing landmarks, directly from the map, by latitude and longitude, or in bulk, and the optimized result can be saved as a Route in Open VTS
Last updated August 19, 2026
Route Optimization
Route Optimization provides a workspace for planning a journey through multiple locations and finding an improved order for those stops.
You first add the locations that the route needs to visit. You can then choose the starting point, ending point, or make the journey a round trip. Open VTS uses those points to calculate the route and, when you select Optimize, evaluates their order to produce an optimized route.
The page combines the point list, interactive map, and route analysis in one workspace so you can prepare and review the route before saving it.
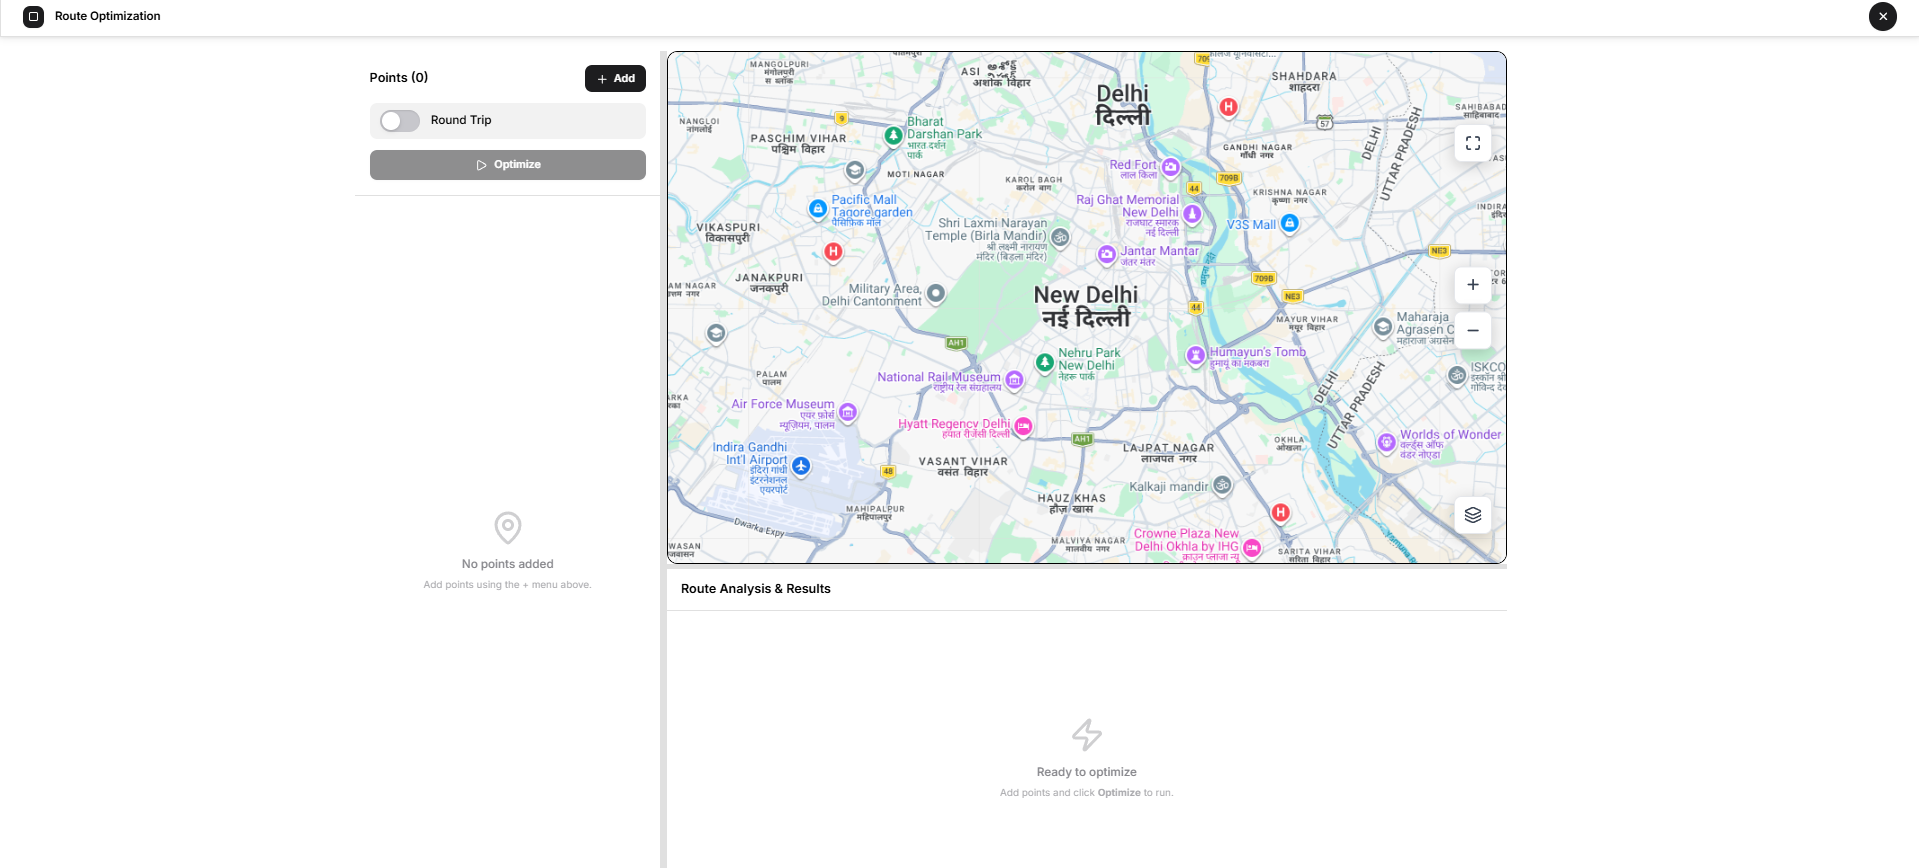
What You Can Do on This Page
From Route Optimization, you can:
- Add multiple route points
- Add points from existing landmarks
- Add a location directly from the map
- Enter latitude and longitude manually
- Add multiple points from CSV-formatted data
- Reorder points manually
- Choose the route's start and end points
- Create a round trip
- Edit or remove individual points
- Adjust points directly on the map
- Optimize the order of the route
- Review the original and optimized route
- Open or copy the optimized route for Google Maps
- Download or copy optimization results
- Save the optimized result as an Open VTS Route
Understanding the Page
The Route Optimization workspace is divided into three main areas.
Points Panel
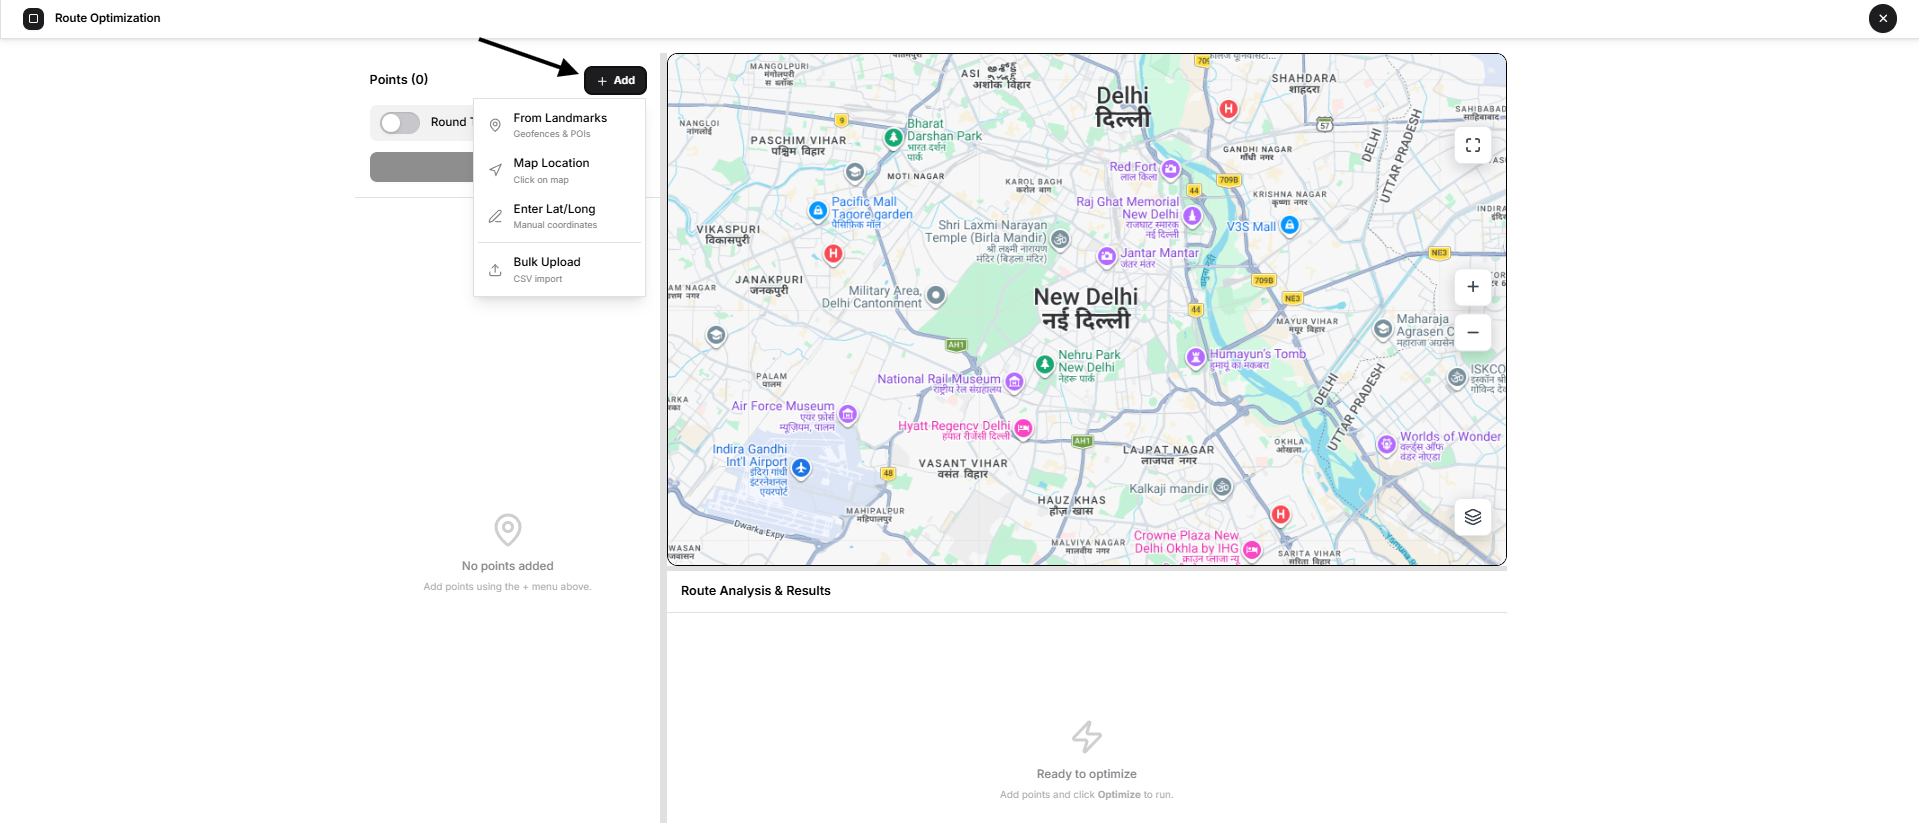
The left panel contains all locations included in the route.
It also provides:
- + Add
- Round Trip
- Optimize
- start and end controls
- point editing and deletion
- drag-to-reorder
- Clear All Points
The number beside Points updates according to how many locations have been added.
Map
The map displays your route points and the driving path between them.
Once points are added, numbered markers make the route order easy to understand. The starting point is identified separately from the ending point, while intermediate stops remain numbered waypoints.
Route Analysis & Results
The lower section displays the optimization result after Optimize is run.
Before optimization, it displays Ready to optimize.
Adding Route Points
Select + Add to choose how you want to add a location.
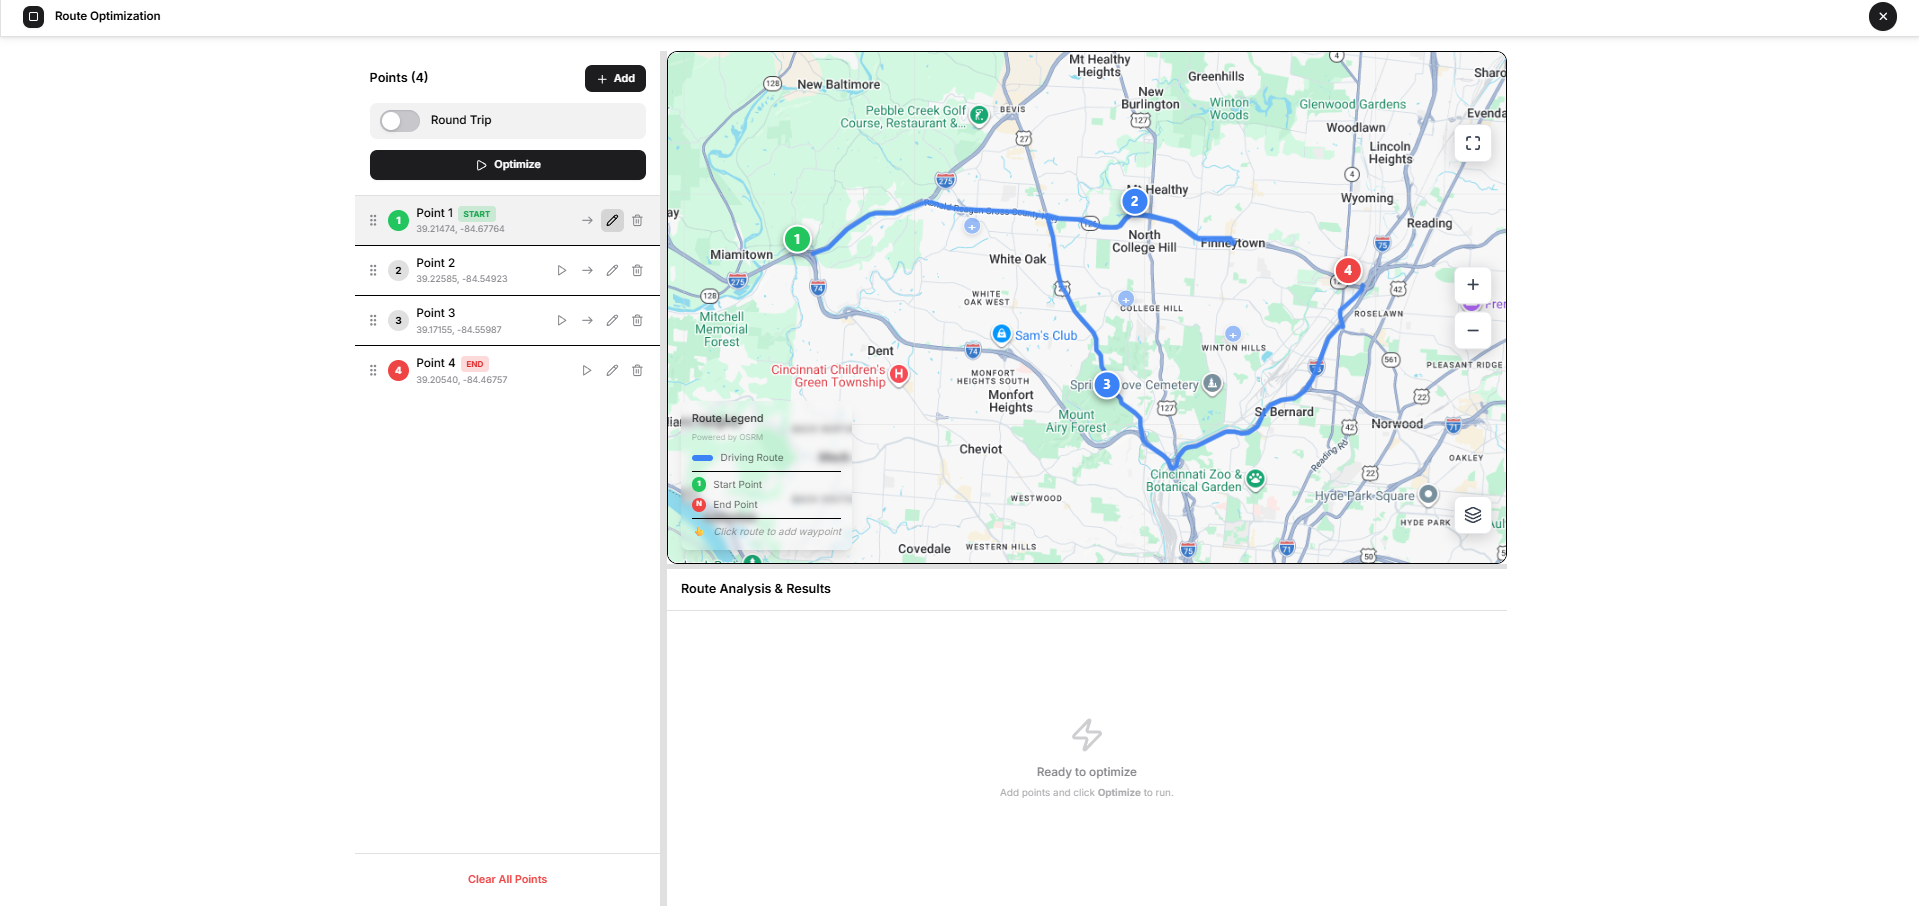
The current page provides four methods.
From Landmarks
Select From Landmarks to use locations that already exist in Open VTS.
This option works with available Geofences and POIs.
Select the required landmarks and add them to the route. Open VTS converts the selected landmark into a route point that can then be used with the other stops.
A landmark already added to the route is not offered again as a new duplicate selection.
Map Location
Select Map Location when you want to choose a location visually.
The map enters point-selection mode. Click the required position on the map.
Open VTS then opens Add Point with:
- Name
- selected Coordinates
- Cancel
- Add
Enter a useful name and select Add.
Enter Lat/Long
Select Enter Lat/Long when you already know the coordinates.
Enter:
- point Name
- Latitude
- Longitude
Then add the point to the route.
Latitude and longitude must contain valid geographic coordinates.
Bulk Upload
Use Bulk Upload when several points need to be entered together.
The bulk workflow accepts CSV-formatted point data using:
name, latitude, longitude
Open VTS checks the supplied rows and identifies invalid coordinate values before the valid points are added.
Working With Added Points
After points are added, they appear in the left panel and on the map.
Each list item shows:
- point number
- point name
- latitude and longitude
- start or end status where applicable
- point actions
Reorder Points
Use the drag handle at the beginning of a row to move a point up or down.
This changes the current manual order of the journey.
If the route has already been optimized, changing the points or their order clears the previous optimization result so the route can be calculated again.
Set the Start Point
Use the Set as Start action on a point when that location should be the beginning of the journey.
The selected point is marked START.
Set the End Point
When Round Trip is off, use Set as End to choose where the journey should finish.
The selected point is marked END.
Edit a Point
Select the edit action to change the point's:
- name
- latitude
- longitude
Saving the change updates the point and clears any previous optimization result.
Delete a Point
Select the delete action to remove an individual point from the route.
Clear All Points
Select Clear All Points when you want to remove the complete current point list and start again.
Open VTS asks for confirmation before clearing the list.
Round Trip
Turn on Round Trip when the journey should return to its starting location.
When Round Trip is enabled, a separate ending point is not required because the route finishes back at the start.
Leave Round Trip off when the journey should begin at one location and finish at another.
Changing this setting clears the current optimization result so that it can be recalculated using the new route configuration.
Working With the Map
The map provides a visual representation of the route as points are added.
It includes the common map controls for zooming, fullscreen view, and map layers.
When two or more points are present, the map displays the driving route and a Route Legend.
The route markers identify:
- Start Point
- intermediate waypoints
- End Point
You can also adjust an existing point by dragging its marker on the map. Moving a point changes its coordinates and clears the previous optimization result.
The route itself also supports adding an additional waypoint from the route path where needed.
Map Location Mode
When Map Location is selected from the Add menu, click on the map to choose the new point.
This point-adding interaction is available in the supported 2D map view.
Optimizing the Route
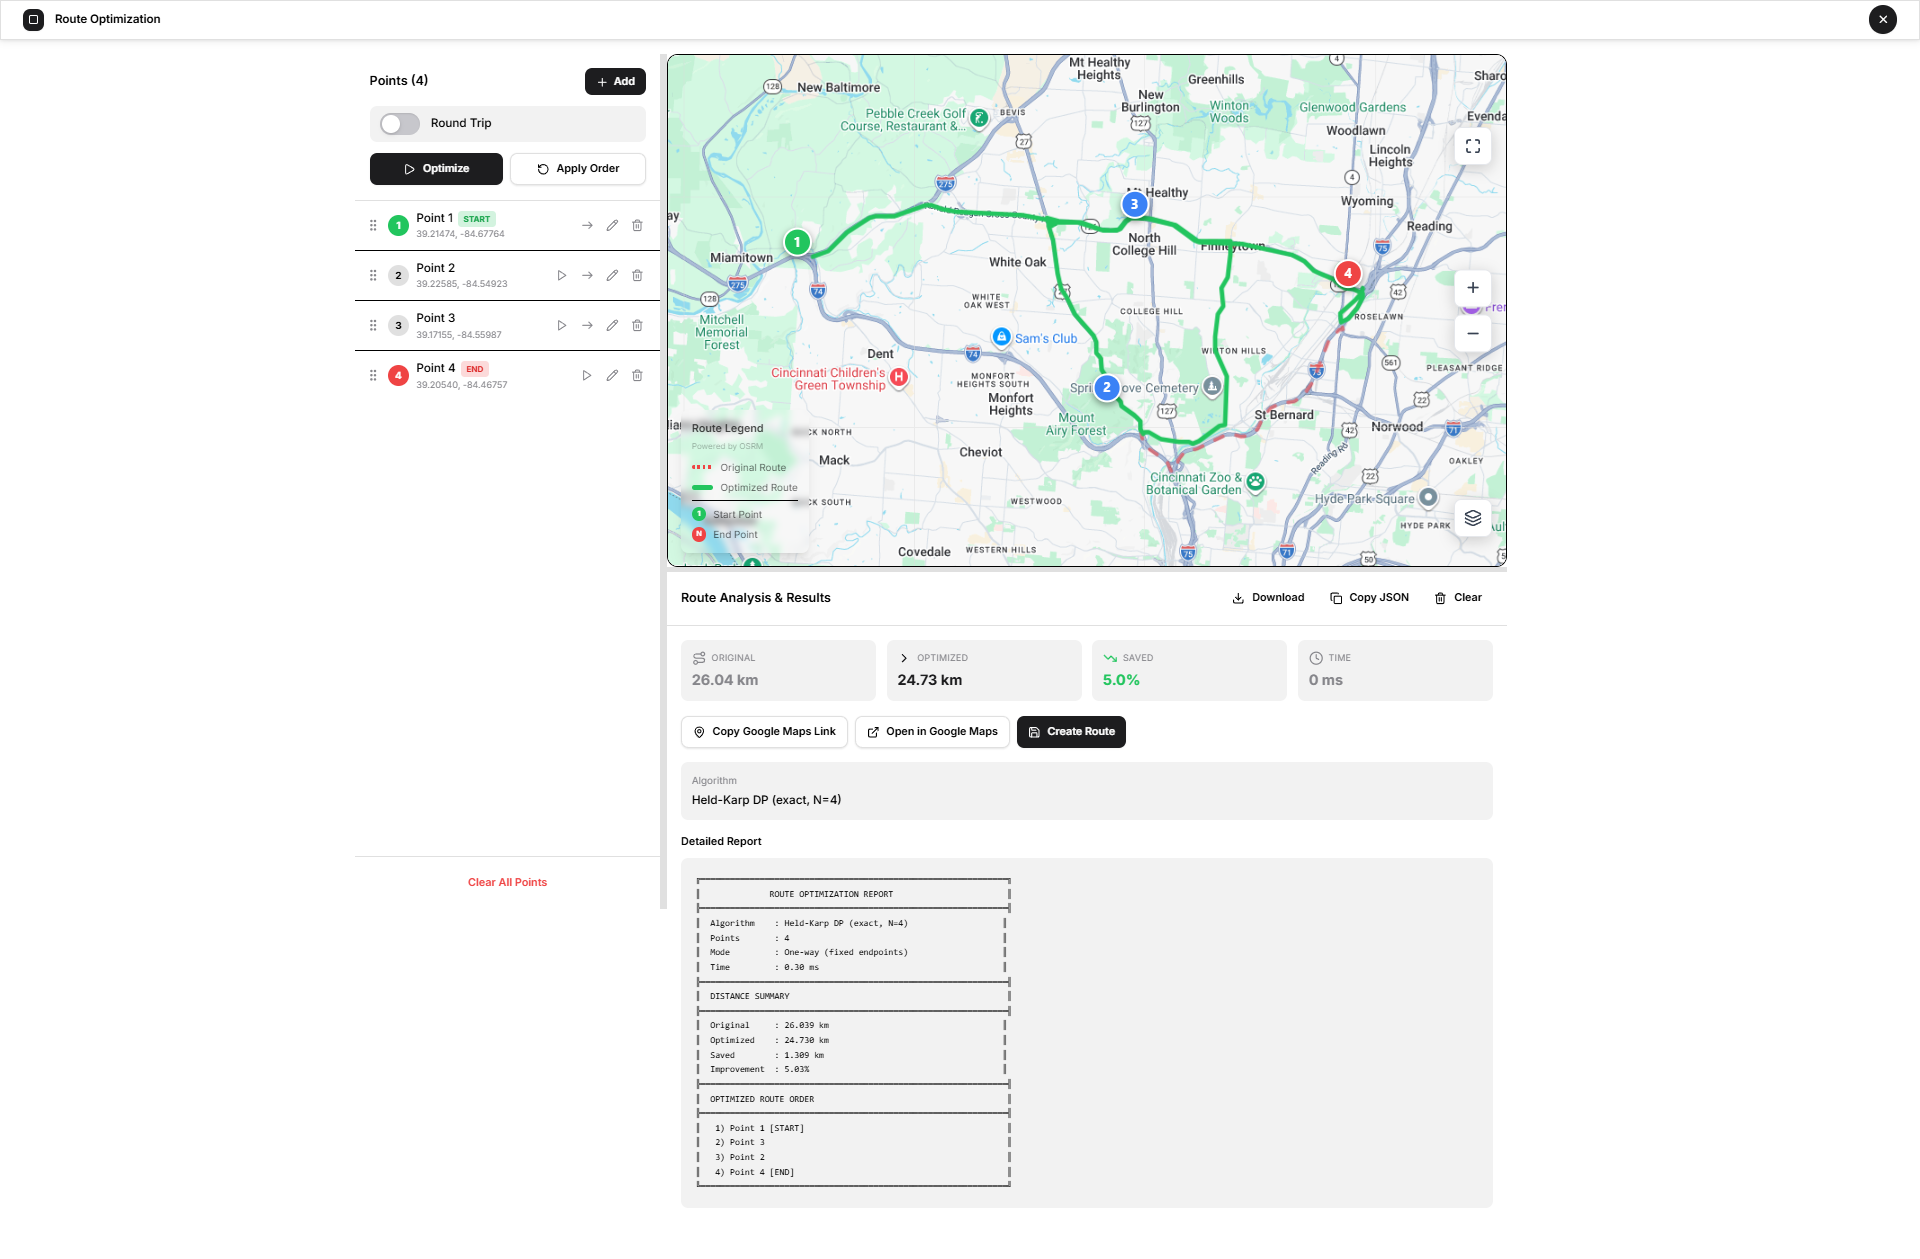
After at least two points have been added, Optimize becomes available.
Select Optimize to calculate the route using:
- the current points
- selected start point
- selected end point
- Round Trip setting
Open VTS evaluates the route order and displays the result in Route Analysis & Results.
The system keeps the start and end constraints you selected while determining the order of the remaining stops.
Apply Order
After optimization, Apply Order becomes available in the Points panel.
Select it when you want the optimized sequence to become the new point order in the list.
After applying the order, the list is reorganized to match the optimized journey.
Route Analysis & Results
After optimization, the results area provides a summary of the calculation.
It includes:
Original
The calculated distance using the route order before optimization.
Optimized
The calculated distance using the optimized stop order.
Saved
The percentage difference achieved by the optimization.
If the existing point order is already the best order found by the system, there may be no distance reduction.
Time
The time taken to perform the optimization calculation.
Algorithm
The results area identifies the optimization method used for the current route.
This information is mainly provided for reference; no algorithm selection is required from the User.
Detailed Report
The Detailed Report provides additional information about the optimization operation and result.
Result Actions
Once an optimization result is available, additional actions become available.
Download
Select Download to save the detailed optimization report as a text file.
Copy JSON
Select Copy JSON to copy the structured optimization result.
Clear
Select Clear to remove the current optimization result without deleting the route points.
The existing points remain available so the route can be adjusted and optimized again.
Copy Google Maps Link
Select Copy Google Maps Link to copy a Google Maps directions URL using the optimized route order.
Open in Google Maps
Select Open in Google Maps to open the optimized journey in Google Maps.
Create Route
Select Create Route when you want to save the optimized journey as a reusable Route in Open VTS.
This opens the Create Route dialog.
Enter a Route Name and select Create Route.
The dialog also indicates how many waypoints will be included.
The saved route uses the optimized waypoint order and becomes available with the other Routes in Open VTS.
Typical Route Optimization Workflow
To optimize a journey:
- Open Route Optimization.
- Select + Add.
- Add the required stops using landmarks, map locations, coordinates, or CSV data.
- Review the points in the left panel.
- Drag points if you want to establish an initial order.
- Set the required START point.
- Set the END point, or enable Round Trip.
- Review the route on the map.
- Select Optimize.
- Review the result in Route Analysis & Results.
- Use Apply Order if you want the optimized sequence applied to the point list.
- Copy or open the journey in Google Maps if required.
- Select Create Route if the optimized route should be saved in Open VTS.
Important Notes
At least two points are required before a route can be optimized.
Route Optimization works with locations rather than vehicles. Adding a point does not assign a vehicle to that route.
Changing a point, moving a marker, changing the start or end point, reordering the list, or changing Round Trip clears the previous optimization result. Run Optimize again after such changes.
The route shown on the map follows available routing data. If road-route data cannot be retrieved, the current implementation can fall back to direct connections between the supplied locations.
When an optimized route is saved through Create Route, it becomes a Route in Open VTS for future use.
The names and coordinates visible in screenshots are examples from the documentation environment and are not fixed Open VTS values.